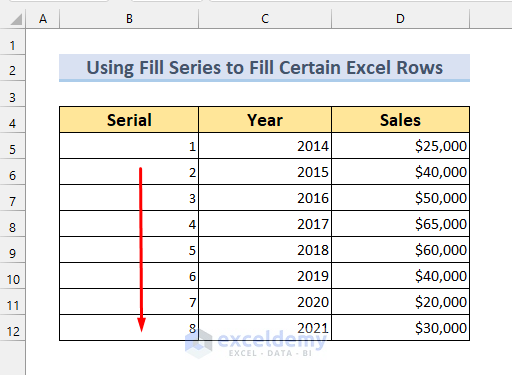
Method 1 – Making Pattern and Using Fill Handle for Filling a Certain Number of Excel Rows
Make a pattern of numbers. Fill Handle will allow us to repeat the pattern and Fill the Excel rows automatically.
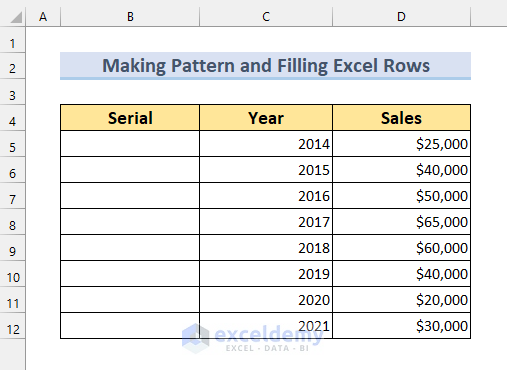
Steps:
- Put 1 in Cell B5, and 2 in B6. It will create a pattern (increasing by 1).
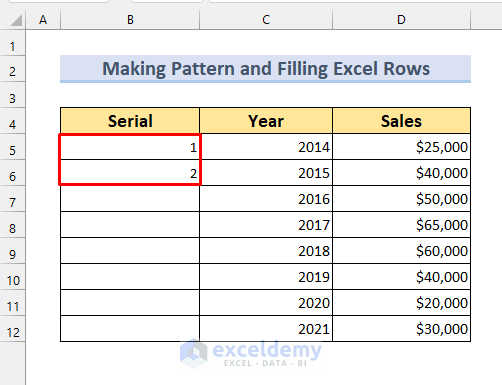
- Select those two rows.
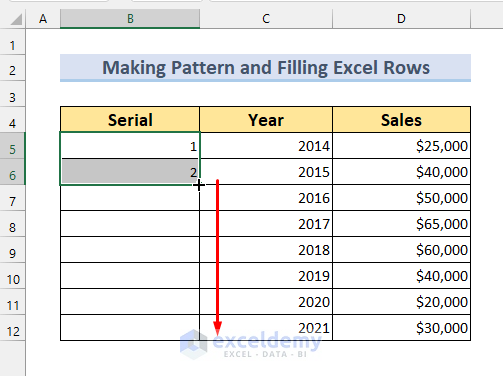
- Put the mouse pointer at the edge, until there is a “plus(+)” sign. The sign is called Fill Handle.
- Using the Fill Handle you can AutoFill number until cell B12.
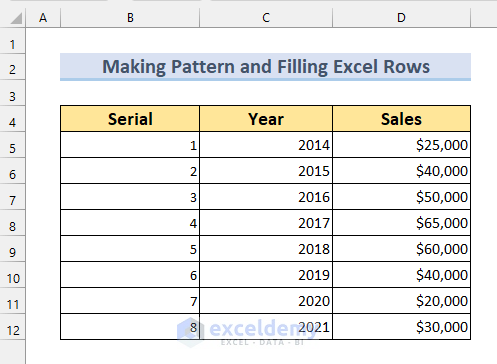
- The rows will be Auto-Filled.
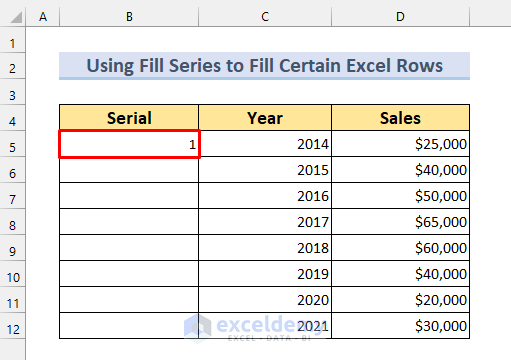
2. Applying Fill Series Command and Filling Certain Rows
Steps:
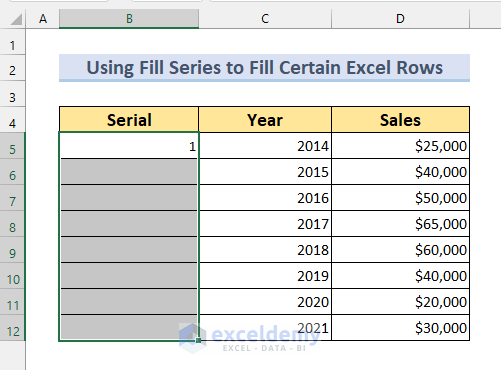
- Put a value in cell B5. We have put 1.
- Select the number of rows to be Auto-Filled.
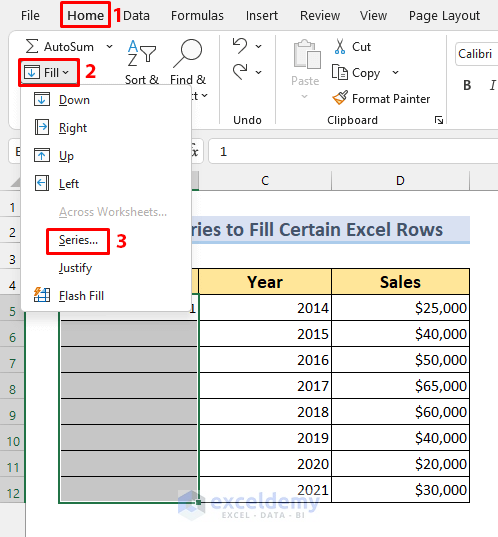
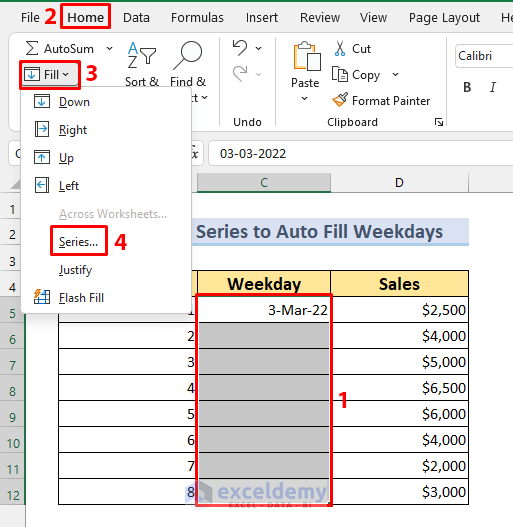
- Go to the Fill from Home.
- Select Series
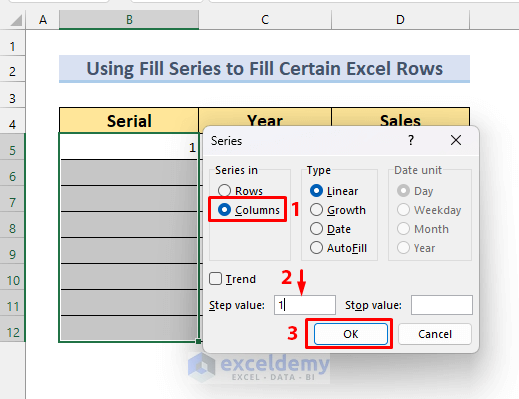
- Select Columns from Series in.
- Type should be set to “Linear” by default. If not, change it.
- Step Value: 1 (This will increase the values by 1).
- Press OK.
The Serial column has been Auto-Filled.
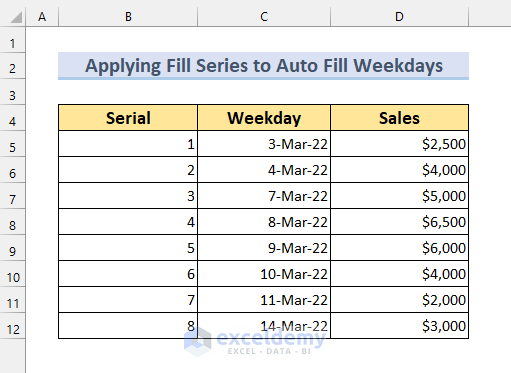
2.2. Applying Fill Series for Weekdays
Steps:
- Put the first value on cell C5.
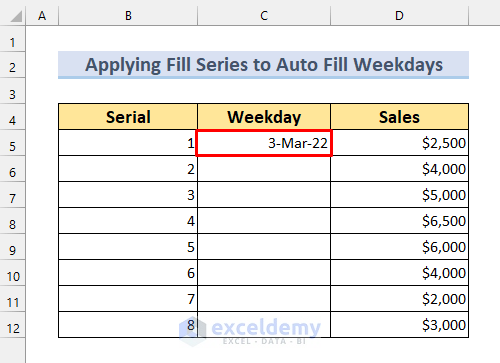
- Select the cell range C5:C12.
- Open the Home tab >> from Fill >> Select Series.
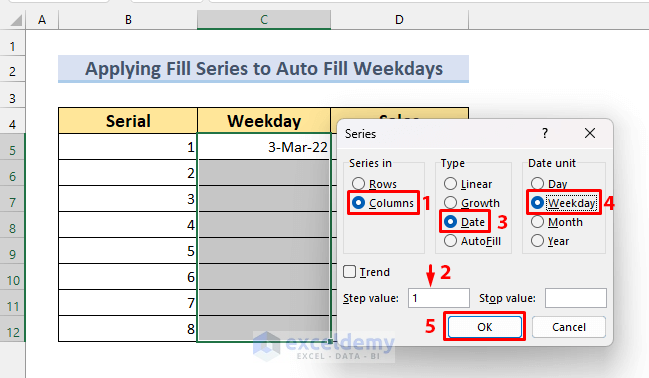
Select these options from the Series dialog box:
- Series in Columns.
- Type Date.
- Day unit Weekday.
- Step value 1.
- Finally, press OK.
We don’t have the dates 12, and 13 March 2022 as these dates are weekends. This shows the weekdays. The AutoFill method worked as intended.
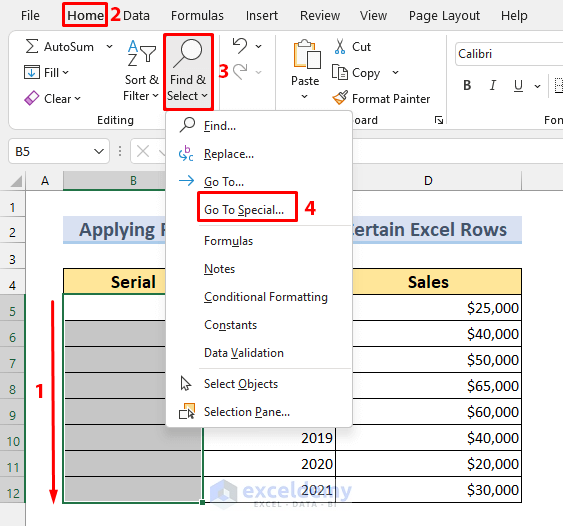
Method 3 – Utilizing the Row Function to Fill the Exact Number of Rows
Steps:
- Select the range B5:B12.
- Find & Select from Home.
- Go To Special.
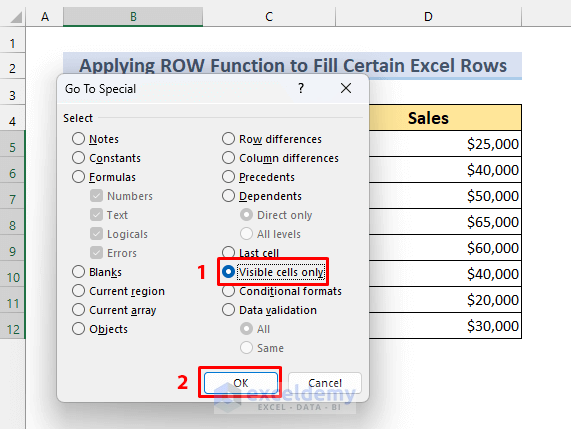
- Select Visible cells only.
- Press OK.
- Type the following formula in the Formula bar (it should be written on cell B5 by default, no need to click on anything):
=ROW(B5)-4ROW(B5) will return the value 5. We want our value to start from 1, we will deduct 4 from it.
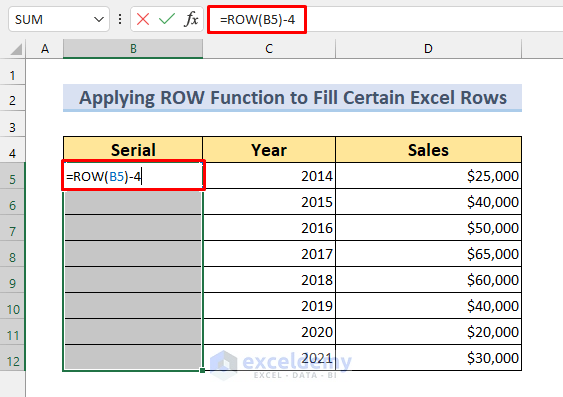
- Press CTRL + ENTER. The series of numbers will be inserted into the selected cells.
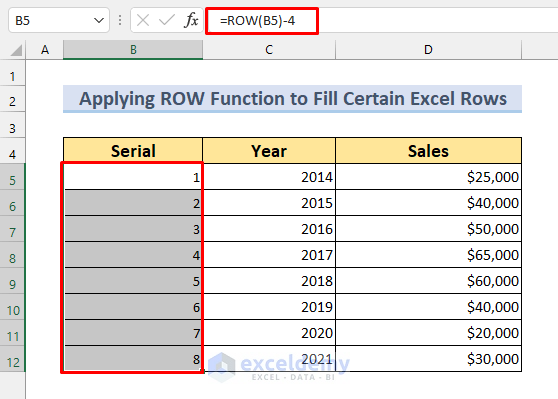
Click on cell B5 to show the formula.

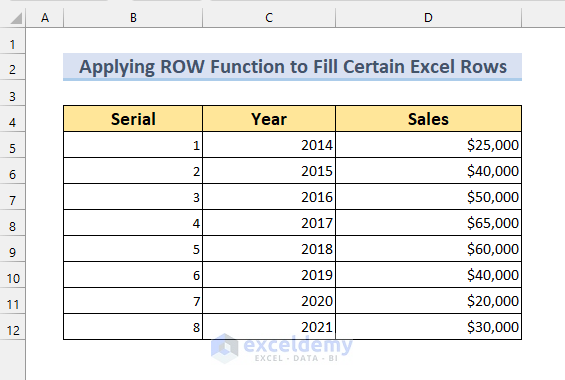
This is the final output of Filling a number of rows using the ROW function.
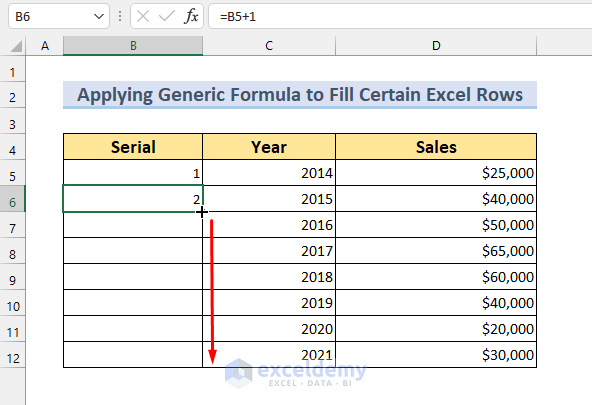
Method 4 – Creating a Formula to Fill Certain Rows in Excel Automatically
Steps:
- Put 1 in cell B5.
- Type the formula below in cell B6, or into the Formula bar:
=B5+1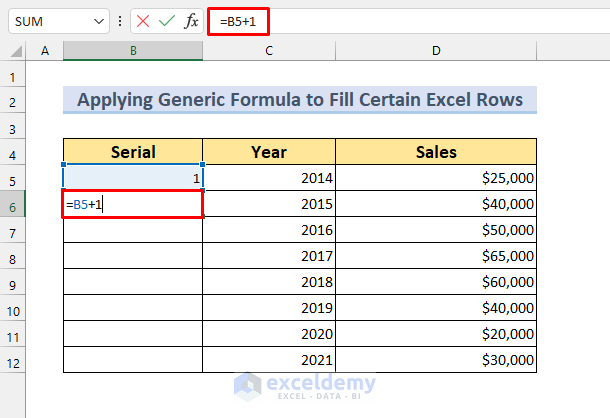
- Press Enter to see the value 2 in Cell B6.
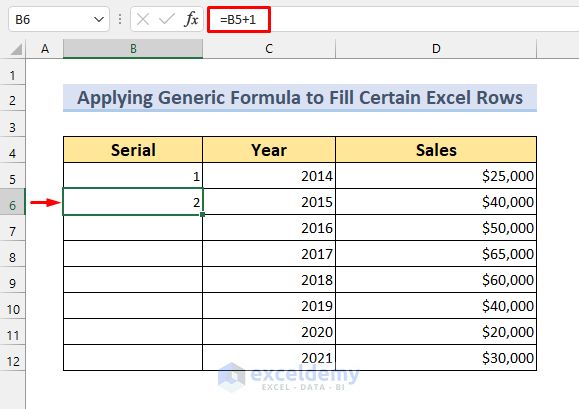
- Use the Fill Handle to AutoFill from cell B6 to copy the formula up to cell B12.
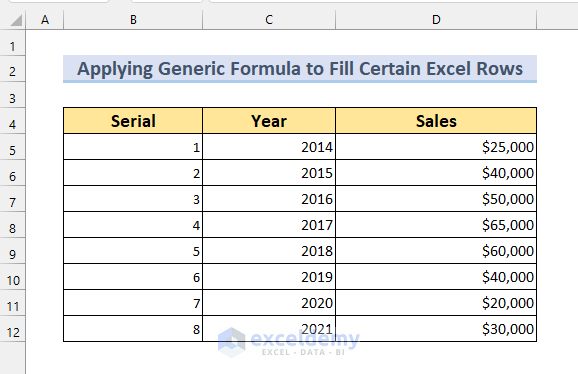
The AutoFill operation is successful.
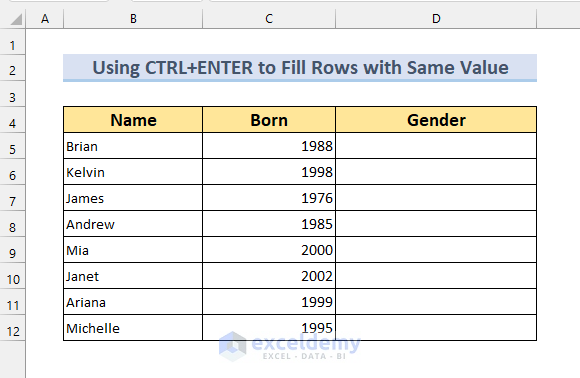
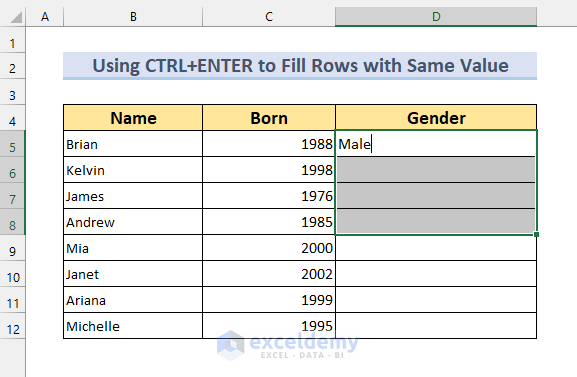
Method 5 – Using CTRL + ENTER to Fill Certain Number of Rows Automatically with Same Values
We need to type the same value in a certain number of rows in Excel, using the CTRL + ENTER Method. Select a range and then type the desired value. We need to press CTRL + ENTER to fill the selected rows. Put the gender of the people in the empty cells by using this technique.
5.1. Common Method of Using CTRL + ENTER
Steps:
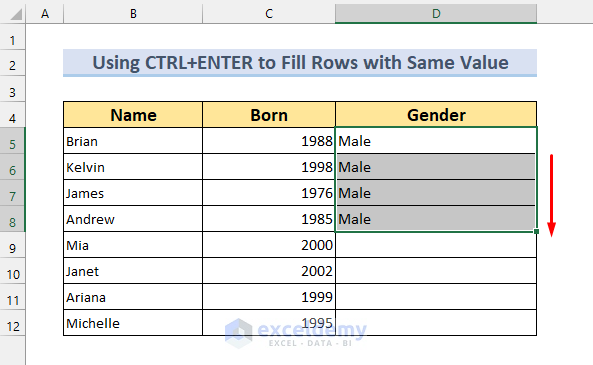
- Select rows D5:D8 to select only the male names.
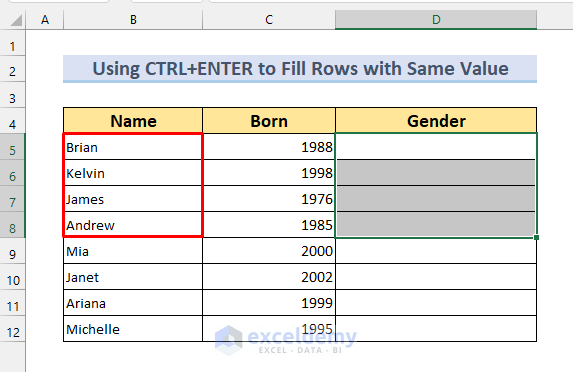
- Type “Male”.
- Press CTRL + ENTER.
The text “Male” is repeated 3 more times.
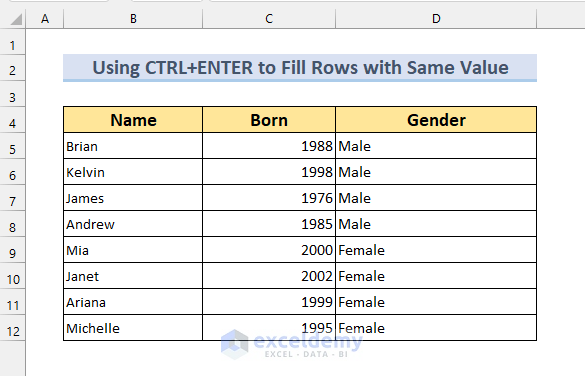
Do that for the 4 females too. If done correctly, this will be the result.
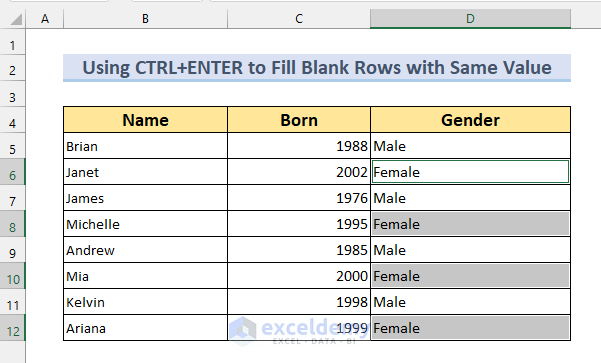
5.2. Filling in the Blanks of Certain Rows by Applying CTRL + ENTER
In this section, we have a dataset that has blank values. We can notice that the text “Female” should be there. We can fill those cells by selecting the blank cells and then the CTRL + ENTER method.
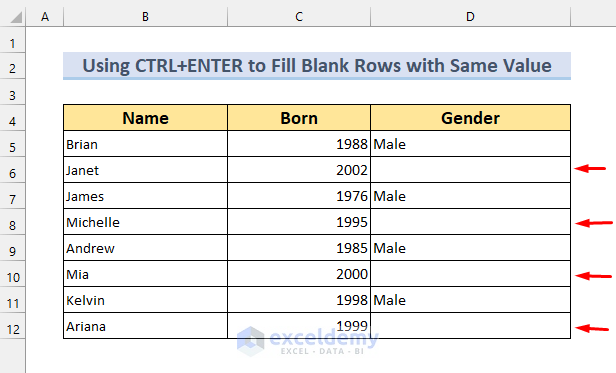
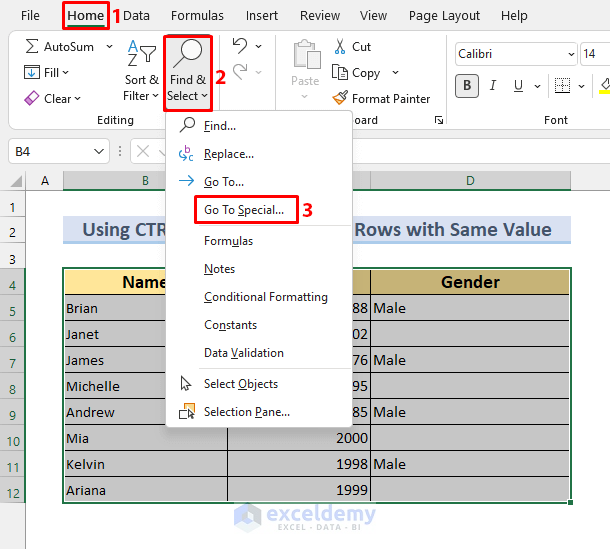
Steps:
- Select the full table by selecting the B4:D12 cell.
- Go to the Find & Select from Home.
- Select Go to Special.
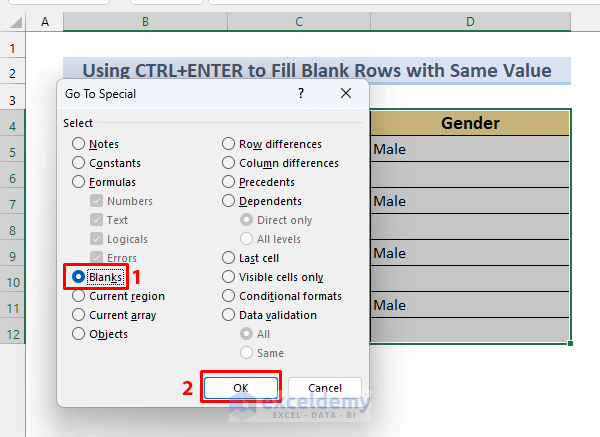
- Select Blanks on the Go To Special dialog box.
- Press OK.
The blank cells within the cell range will be selected.
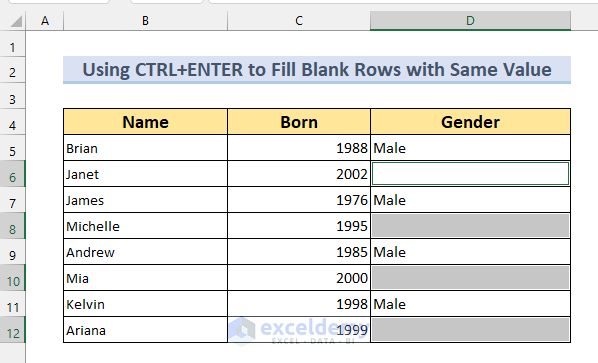
- Type the text “Female”.
- Press CTRL + ENTER.
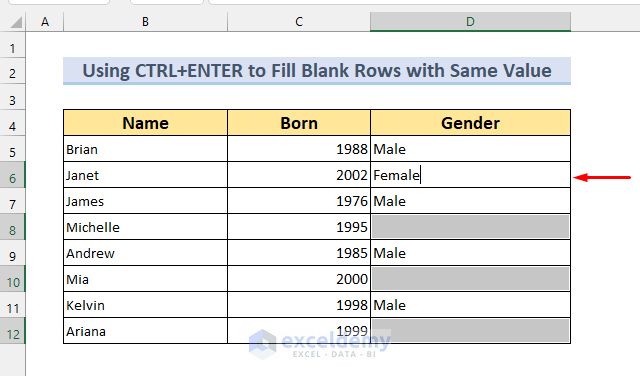
This will Fill up the blank rows.
Method 6 – Using the IF Function for Filling a Certain Number of Rows in Excel Automatically
Steps:
- Type the following formula in cell D5 or in the formula bar:
=IF(B5>2000,"New Employee"," ")If the Employee ID is more than 2000, the employee is a new employee. If the Employee ID is less than 2000, then leave the cell blank.
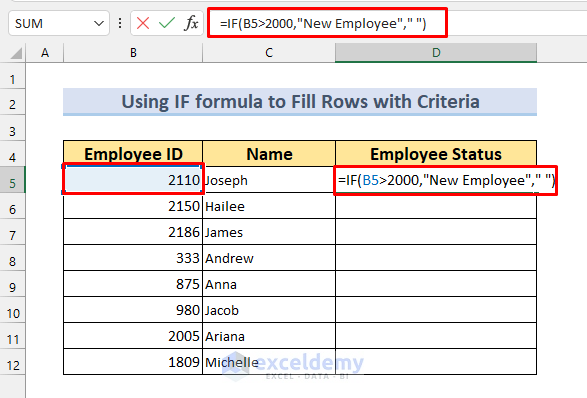
- Press ENTER to see the desired value in cell D5.
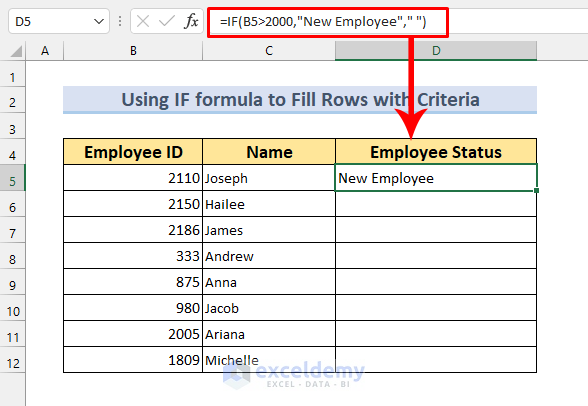
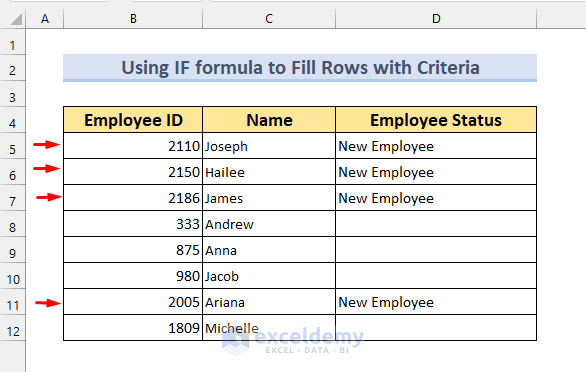
- Using the Fill handle we can copy the formula up to cell D12.
We can see that the AutoFill of a certain number of rows has worked perfectly.
Download Practice Workbook
Related Articles
- How to AutoFill Formula When Inserting Rows in Excel
- How to Auto Populate from Another Worksheet in Excel
- How to Autofill a Column in Excel
- Excel Formulas to Fill Down Sequence Numbers Skip Hidden Rows
<< Go Back to Excel Autofill | Learn Excel
Get FREE Advanced Excel Exercises with Solutions!

Useful article
Thank You.