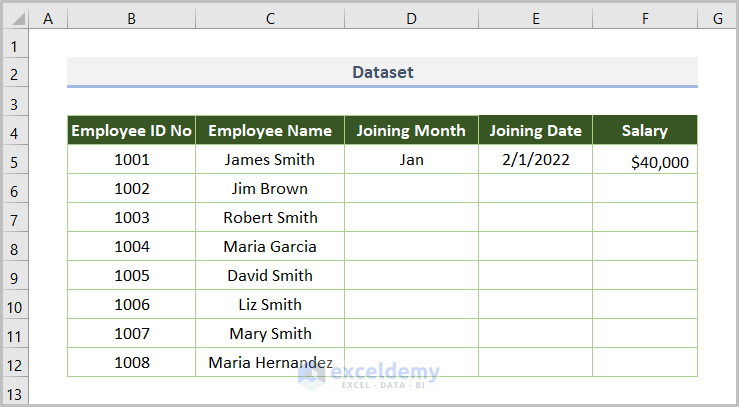
This is today’s dataset where the Employee Name is given with their ID No. However, other fields, such as Joining Month, Joining Date, and Salary, have only one cell value. We have to fill the down to the last row in the cell range.
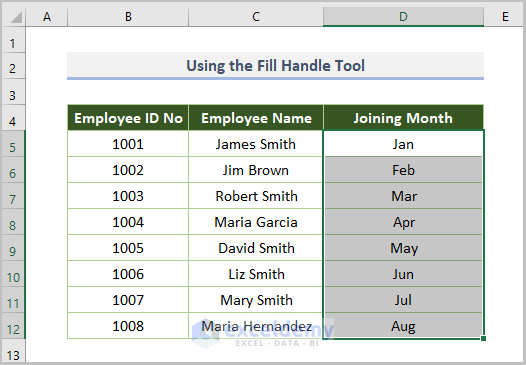
Method 1 – Using the Fill Handle Tool
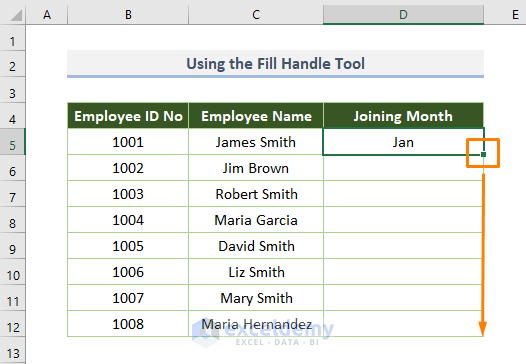
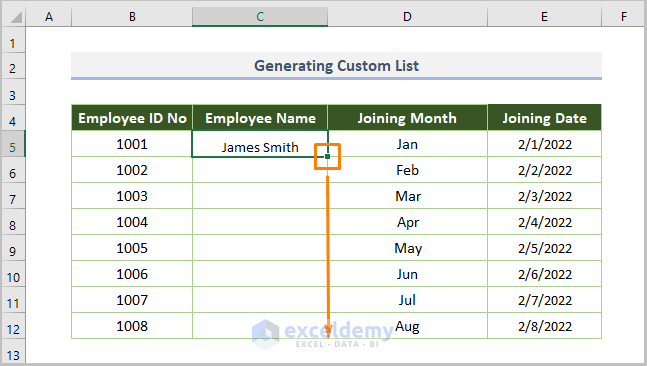
- Drag down the cursor by selecting the square to get the following output.
Read More: [Fixed!] Auto Fill Options Not Showing in Excel
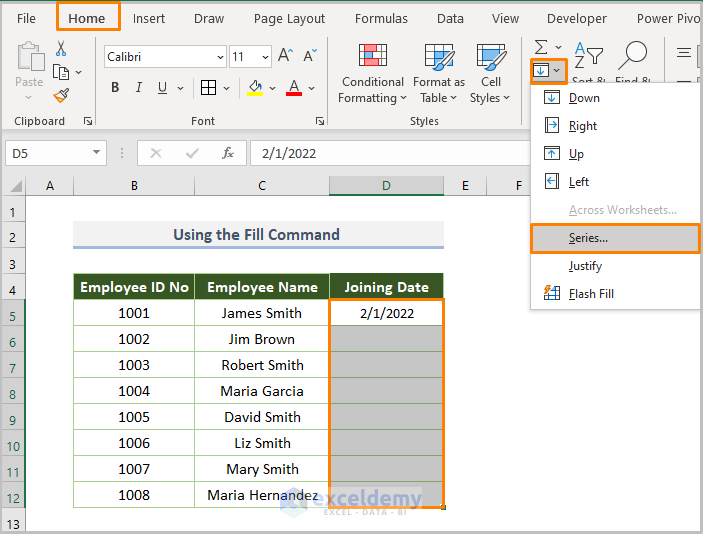
Method 2 – Using the Fill Command from the Excel Toolbar
Steps:
- Select the cell range with the given cell value.
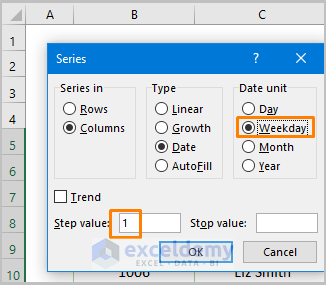
- Click the Series option from the Home tab > Fill command.
- The following dialog box will appear
- Check the circle before the Weekday unit.
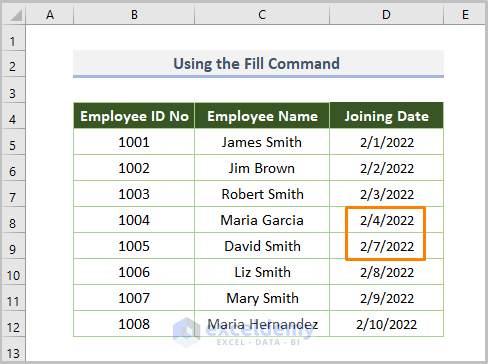
You’ll get the output where the two dates (orange colored) exclude the weekend within days.
Read More: How to Use Autofill Formula in Excel
Method 3 – Generating a Custom AutoFill List
3.1. A Custom AutoFill List from New Entries
Steps:
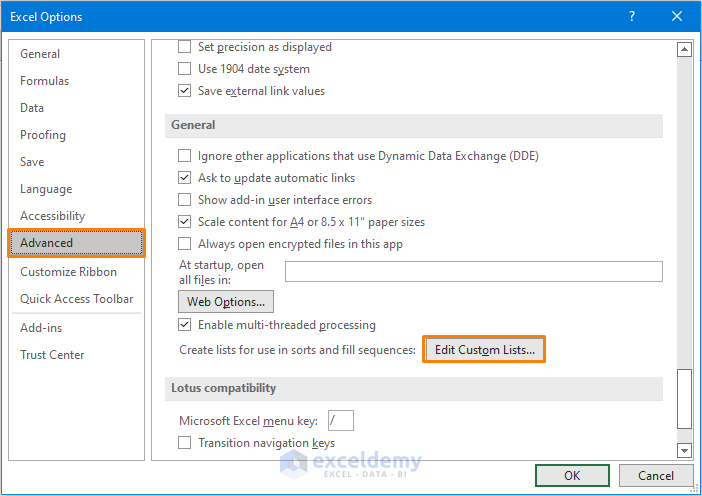
- Go to Excel Options by clicking File > Options.
- Move to the Advanced option > click on the Edit Custom Lists.
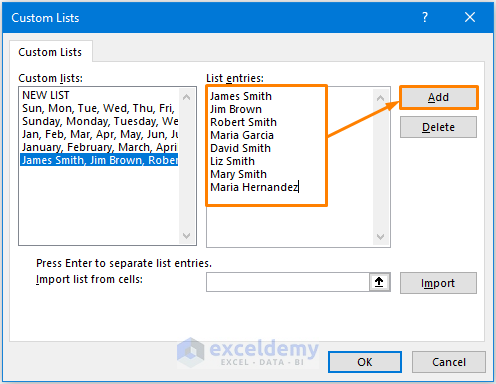
- You’ll see the Custom Lists dialog box.
- Type the new entries in the blank space under the List entries.
- Click on the Add option.
- Press OK.
Your newly created Custom List is ready to autofill.
- Type the first entry and use the Fill Handle Tool.
You will get the following output.
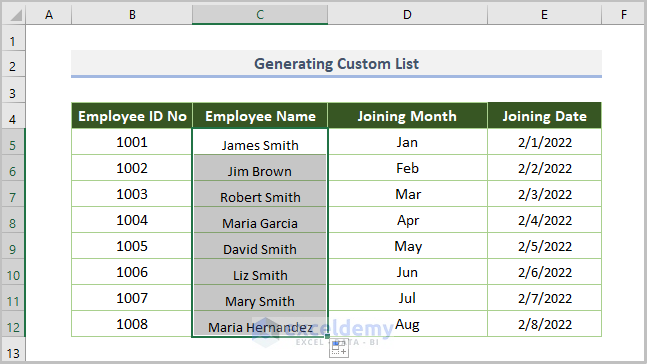
3.2. A Custom AutoFill List from Existing Data
Steps:
- Select the cell range (C5:C12).
- Open the Custom Lists dialog box, and click on Import.
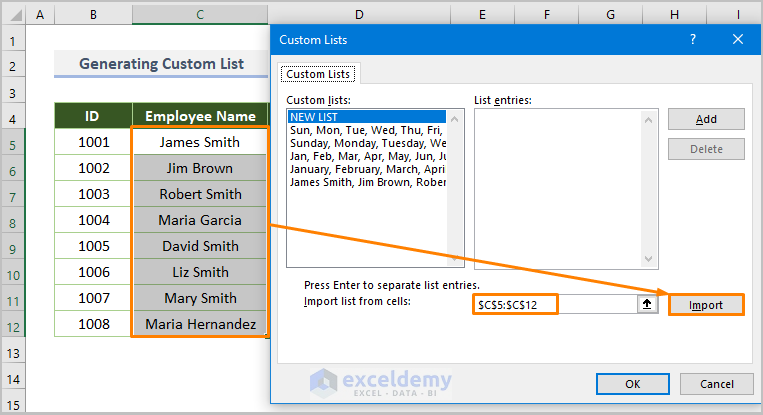
Your list of Employee Names is ready for auto-filling.
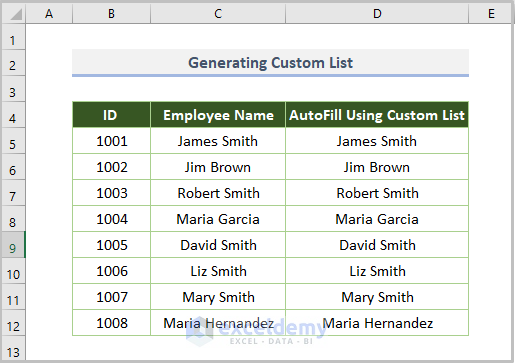
- Enter the first entry and use the Fill Handle Tool.
The output will be as follows.
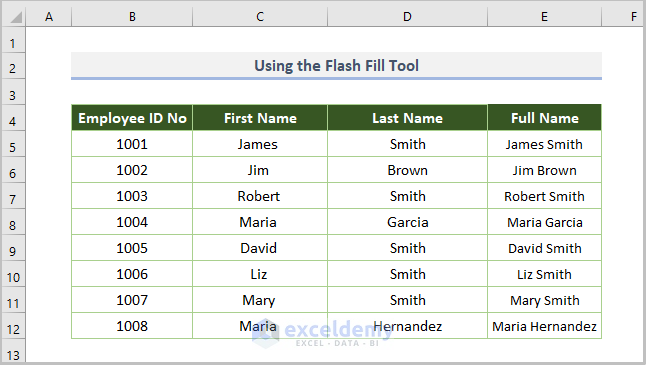
Method 4 – Applying the Flash Fill Tool
Steps:
- Input one cell manually (James Smith)
- Click on the Flash Fill from the Data Tools of the Data tab.
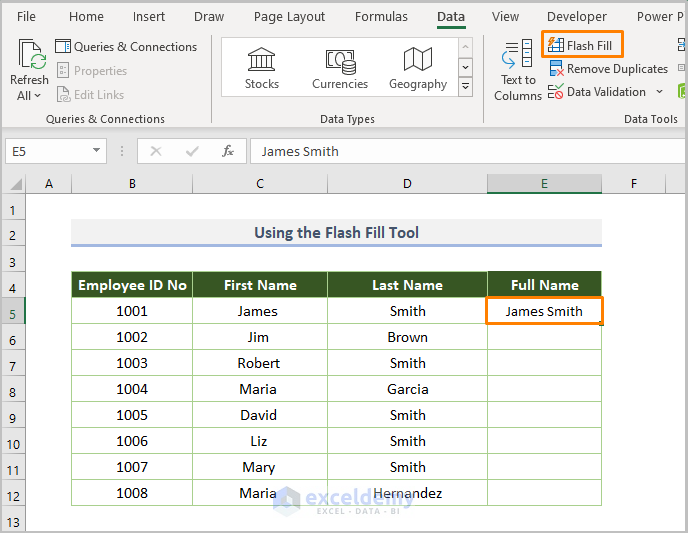
- After clicking on the Flash Fill option (the keyboard shortcut is CTRL + E) you’ll get the auto-filled list.
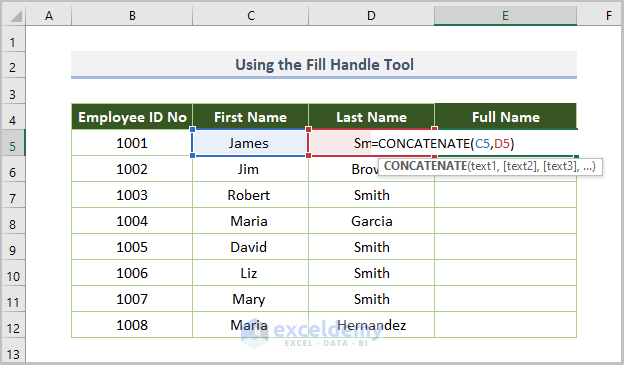
Method 5 – Using the CONCATENATE Function
If you don’t want to input any value manually, you may use the CONCATENATE function to quickly combine the two text strings.
The formula will be:
=CONCATENATE(C5,D5)
Here, C5 is the first name and D5 is the last name.
- Press Enter and use the Fill Handle Tool to see the following output.
Method 6 – Using the SEQUENCE Function
Say you are filling the salary field based on the given first cell value, $40,000. But you need to increase the salary by $500 for every row.
The adjusted formula will be:
=SEQUENCE(8,1,40000,500)
Here, 8 is the number of rows (D5:D12), 1 is the column number, 40000 is the fixed value, and $500 is the increment value.

Read More: How to AutoFill Sequential Letters in Excel
Method 7 – Utilizing VBA to AutoFill from List in Excel
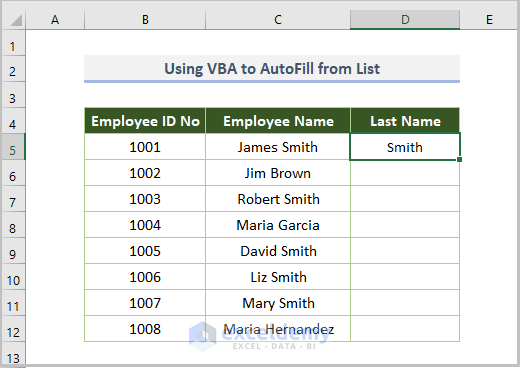
Steps:
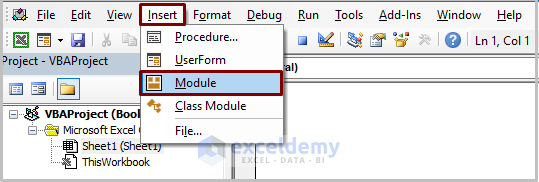
- Open a module by clicking Developer > Visual Basic.

- Go to Insert > Module.
- Enter the following code into the newly created module:
Sub AutoFill_VBA1()
  Dim List1 As Range
  Dim List2 As Range
  Set List1 = Range("D5:D5")
  Set List2 = Range("D5:D12")
  List1.AutoFill Destination:=List2, Type:=xlFlashFill
End Sub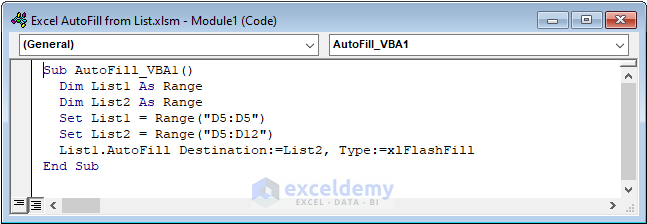
I declared two lists (List1 & List2) in the above code as Range type. Then, I set their corresponding range. Lastly, I used VBA AutoFill and xlFlashFill type to extract and then autofill the last name.
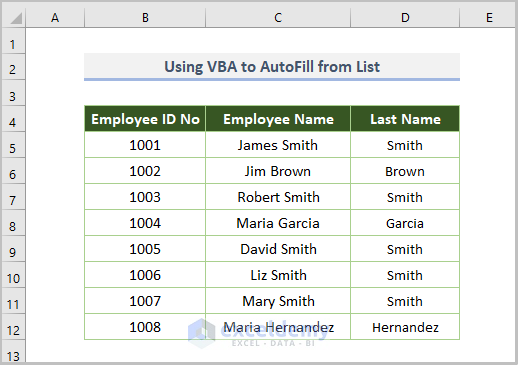
- Run the code (the keyboard shortcut is F5 or Fn + F5) and the output will be as follows.
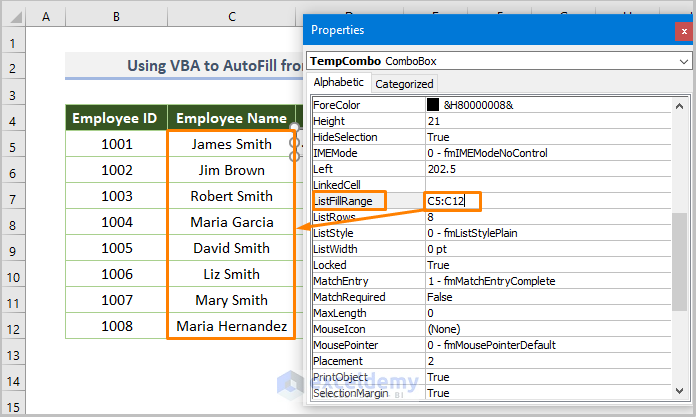
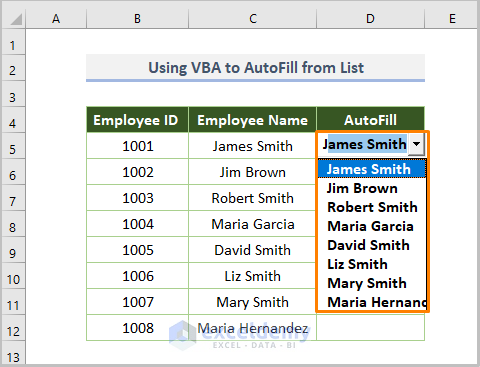
Method 8 – Creating an AutoFill Enabled Drop-Down List
Steps:
- Go to the Developer tab > Insert option > Choose the Combo Box from the ActiveX Controls.
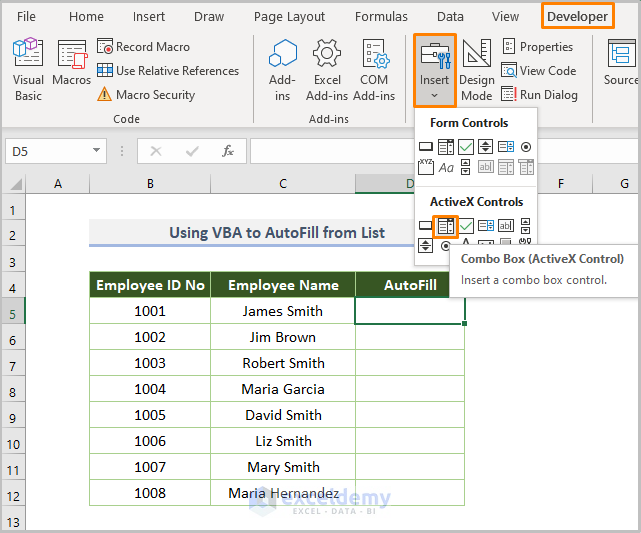
- Draw the Combo Box over the D5 cell and right-click on the box.
- Choose the Properties option.

- Fix the ListFillRange as C5:C12 as we want to use those lists.
If you type J, it will automatically fill in James Smith, the first entry from the list. This way, you can autofill without dragging.
Download the Practice Workbook
Related Articles
- AutoFill Cell Based on Another Cell in Excel
- How to Apply AutoFill Shortcut in Excel
- Fix: Excel Autofill Not Working
- [Fixed!] AutoFill Formula Is Not Working in Excel Table
- [Solved:] Excel Double Click AutoFill Not Working
<< Go Back to Excel Autofill | Learn Excel
Get FREE Advanced Excel Exercises with Solutions!
