This tutorial will help you to use Autofill shortcut in Excel of various types to conveniently autofill or populate the cells in Excel without any hassle. We will learn 7 different types of Excel autofill shortcut to let Excel automatically fill the rows for us. We will use Keyboard Shortcuts, Fill handle, Flash Fill, SHIFT, Alphanumeric Keys, Repeat Shortcut Keys, Own Autofill List, and VBA Macro Code.
How to Apply AutoFill Shortcut in Excel: 7 Suitable Methods
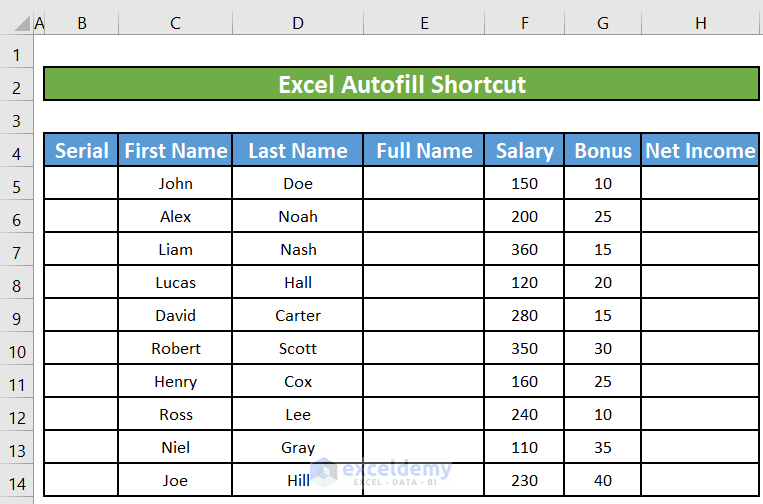
Let’s assume a scenario where we have information about employees of a company. We have the first and last names of the employees, their monthly salaries, and the bonus they got last month for the sales they had made. Along with these columns, we also have empty columns named Serial, Full Name, and Net Income. We will autofill the cells in these columns using different Excel autofill shortcut.
1. Fill Formulas to Adjacent Cells Using Keyboard Shortcut in Excel
You can use the Fill command to fill a formula into an adjacent range of cells. Simply do the following:
Step 1:
- Select the cell that has the formula in it. In this example, it is cell H5 under the Net Income In the Net Income column, we will sum up the salary and bonus of an employee with the SUM formula.
=SUM(F5,G5)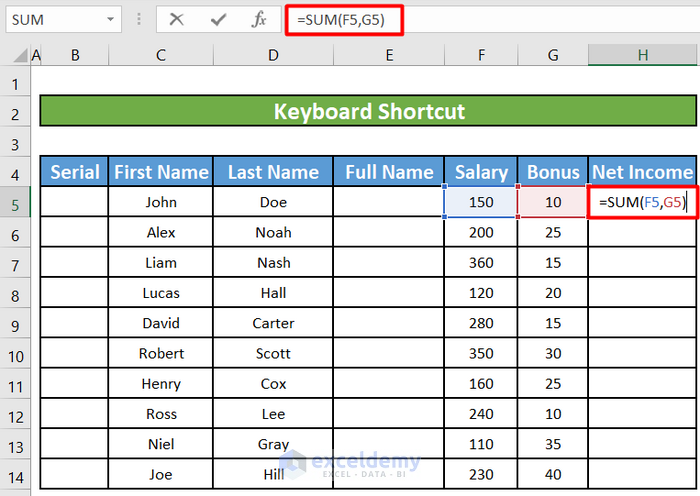
Step 2:
- With cell H5 being the active cell, press Shift + DOWN ARROW key (if you are filling a column) or Shift + RIGHT ARROW key if you are filling a row) up to where you want to autofill the content.
- Drag the Fill handle across the cells that you want to fill.
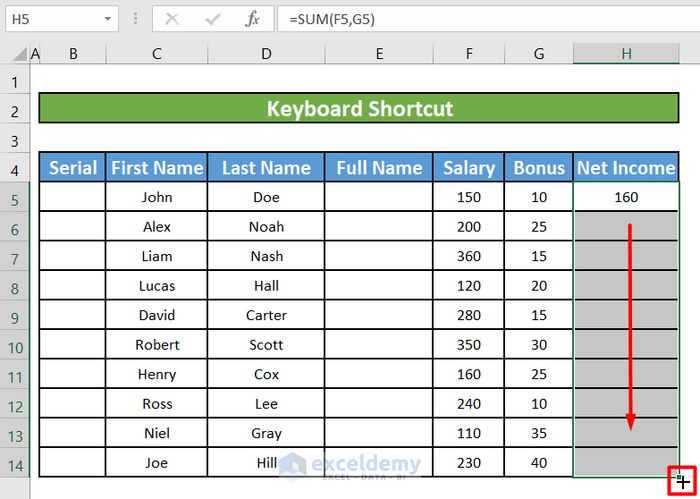
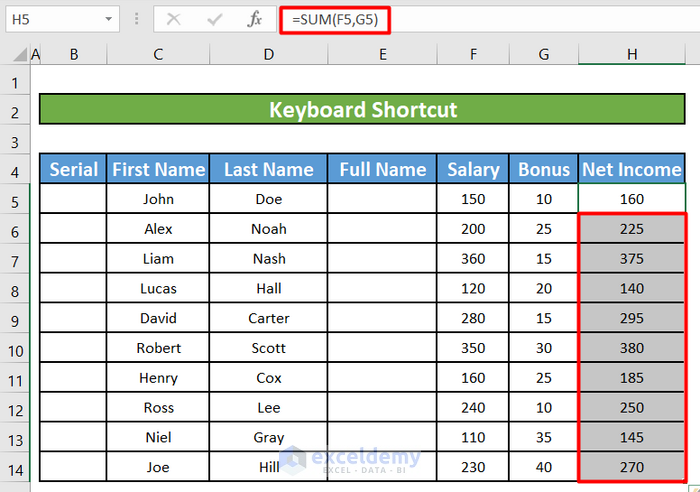
- You can also press Ctrl+D to fill the formula down in a column, or Ctrl+R to fill the formula to the right in a row. In this example, we are filing the formula down in a column. So we will press CTRL+D. Upon pressing CTRL+D, we will find that all the cell has been filled with the SUM formula and has Net Income for every corresponding employee.
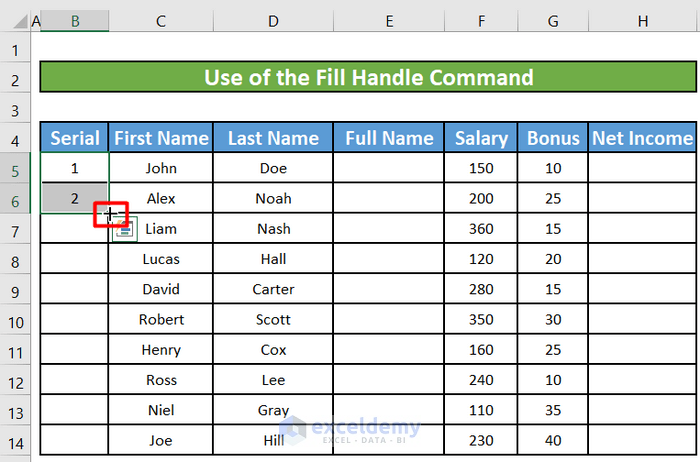
2. Fill Down a Series Using the Fill Handle
We have a Serial column where all the employees will be serialized in ascending order. We can autofill the column using the Fill Handle(+) tool in Excel.
Step 1:
- First, enter values in some of the cells of the Serial You can fill in only one cell although. But AutoFill works accurately when it has some data to work with.
- Select the cells you filled, and then click and hold the fill handle. The pointer changes to a plus symbol (+) when the mouse is in the correct place.
Step 2:
- Now drag the mouse down (if you’re filling a column) or to the right (if you’re filling a row). As you drag, a tooltip appears, displaying the text that is being generated for each cell.
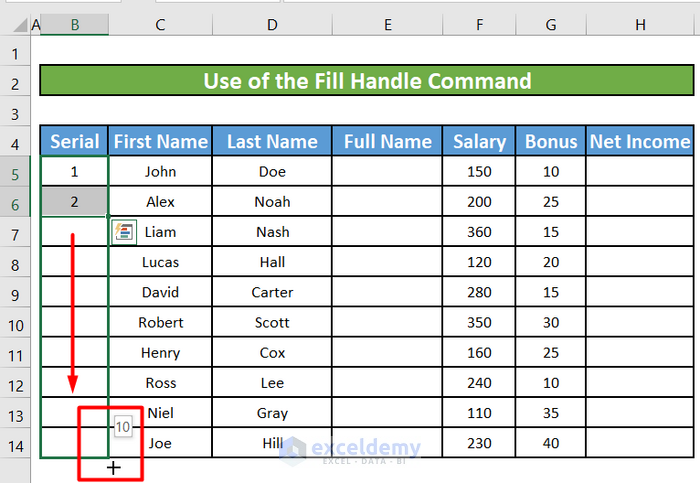
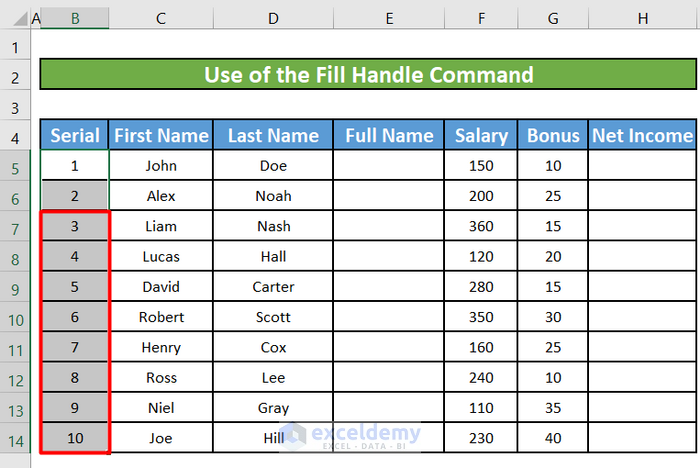
- On releasing the mouse button, Excel will autofill the series with a list of the serial numbers for the rest of the employees.
- You can also double-click the Fill Handle icon to autofill the cells. This will only work if you have values to the left or right of the column you need to fill as Excel looks at the adjacent column to define the last cell in the range to fill.
Read more: How to AutoFill Sequential Letters in Excel
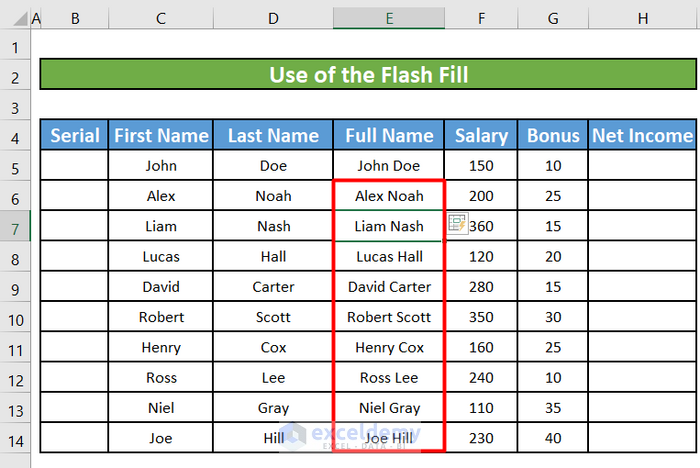
3. Use the Flash Fill Feature in Excel
Flash Fill automatically fills your data when it senses a pattern in cells. For example, you can use the Flash Fill command to separate first and last names from a single column or combine them from two different columns. It helps to repeat formula and fill the cells simultaneously.
Step 1:
- We have a First Name column and a Last Name column for the employees. We will combine the two names to get a full name in the Full Name.
- Write the First Name and then the Last Name of the first employee in the Full Name. Now when we are going to do the same for the second employee, Excel will show us suggestions of the Full Names for the second and rest of the employees.
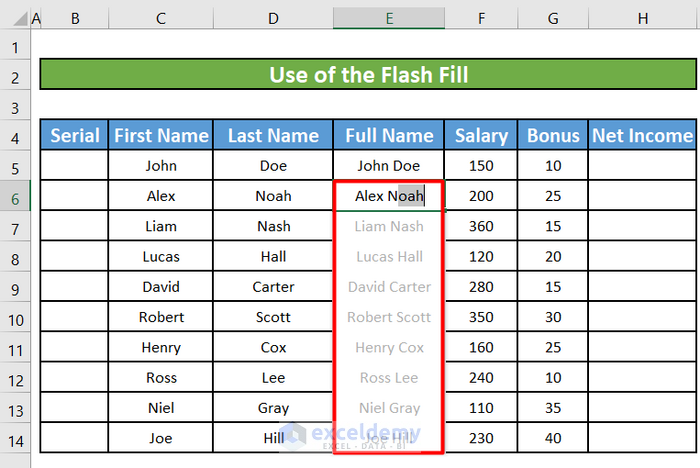
Step 2:
- Upon pressing the ENTER, we will get the full name of the rest of the employees. Alternatively, we can also press CTRL + E if Excel does not show us a suggestion.
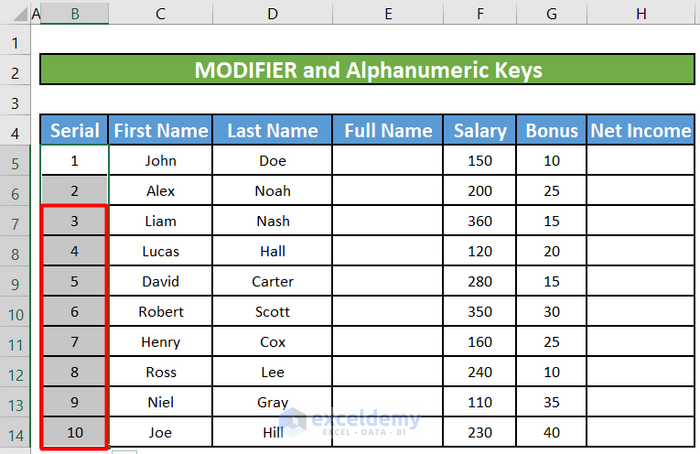
4. AutoFill Series Using Modifier and Alphanumeric Keys in Excel
There is another shortcut to autofill the series using only the keyboard. You have to do the following:
Step 1:
- Use SHIFT+DOWN ARROW to highlight where you want the series to go – must include the filled-in cells.
- Then press ALT + H + F + I + S. A pop-up window named Series will appear.
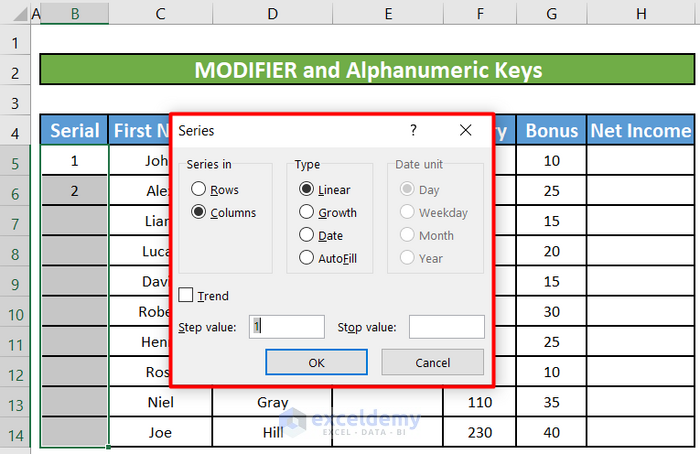
Step 2:
- Now, Press SHIFT + TAB + F. The series type will change to Autofill.
- Press OK or ENTER.
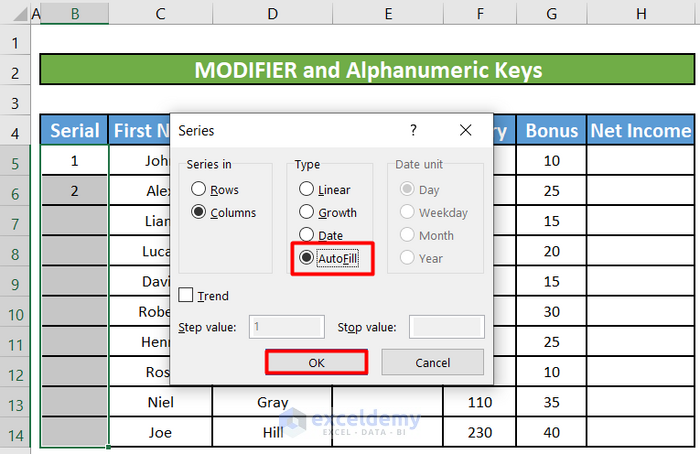
- The rest of the cells will be auto-filled.
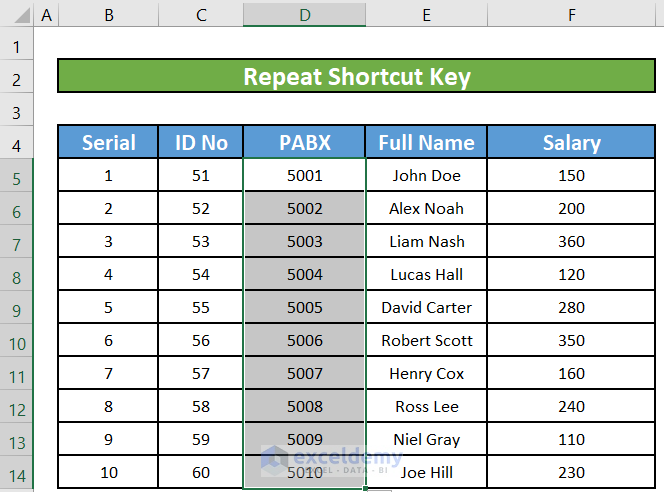
5. Repeat Shortcut Key to AutoFill in Excel
Although there isn’t a shortcut key or Ribbon command that does the same thing as double-clicking the AutoFill handle, Excel still recognizes it as a command. This means that you can use Excel’s Repeat feature to AutoFill as many times as you need after you have done the first AutoFill manually.
Steps:
- Let’s assume that we are working with employee ID No and PABX in their respective office room. Both the ID No and PABX No increase linearly just like the Serial No of the employees. So, if we autofill the Serial and ID No columns then we can use the repeat shortcut key to autofill the PABX
- So, we will first autofill the Serial and ID No columns using one of the above-mentioned methods.
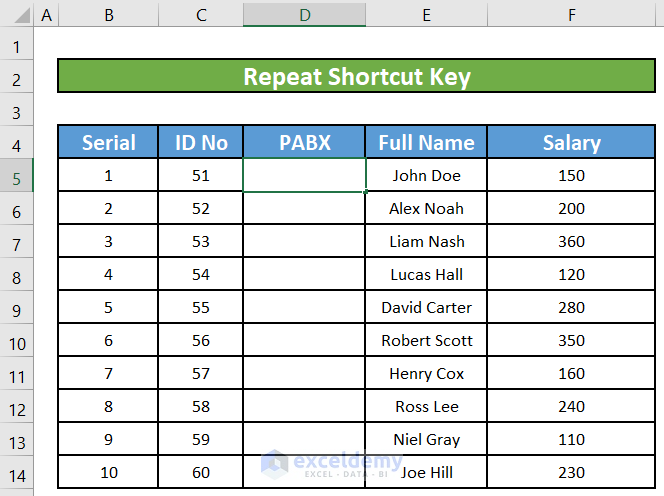
- Then we will fill the first two rows of the PABX column and select both of them using the fill handle.
- Now we will press CTRL+Y together to fill up the PABX.
6. Create Own AutoFill List
There is a collection of AutoFill lists that Excel recognizes and refers to every time you use the feature. However, you can add your own lists to the collection, which extends the series Excel recognizes.
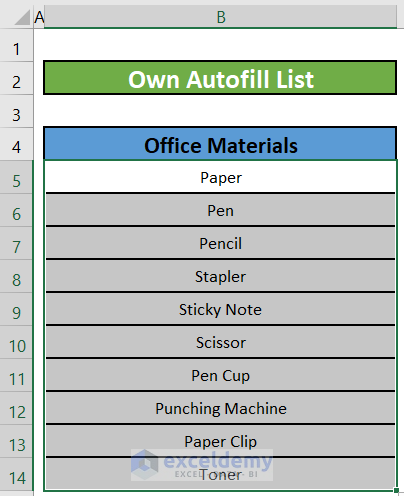
For example, the company we are working on may have to write down the name of some office materials every day. So, instead of writing the names of the materials every time, we can use our own custom list to autofill the names of the materials.
Step 1:
- First, we will go to the Options menu from the File.
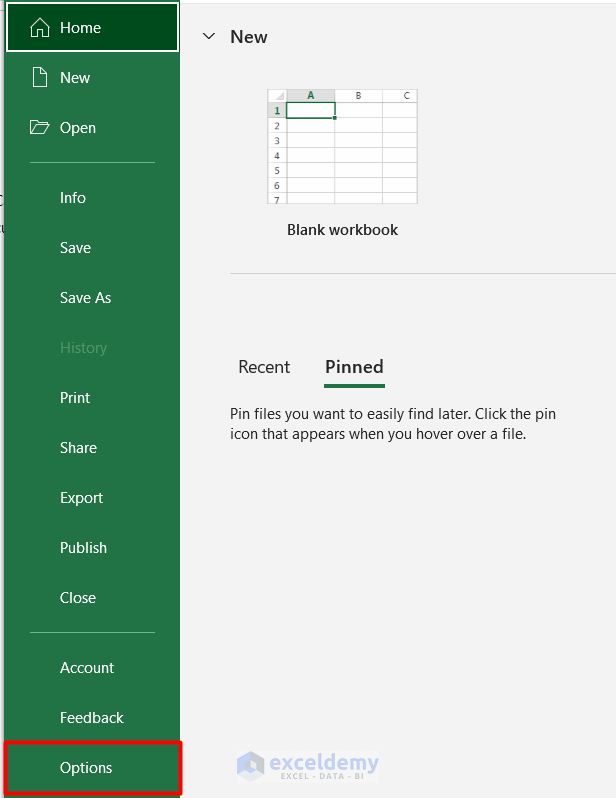
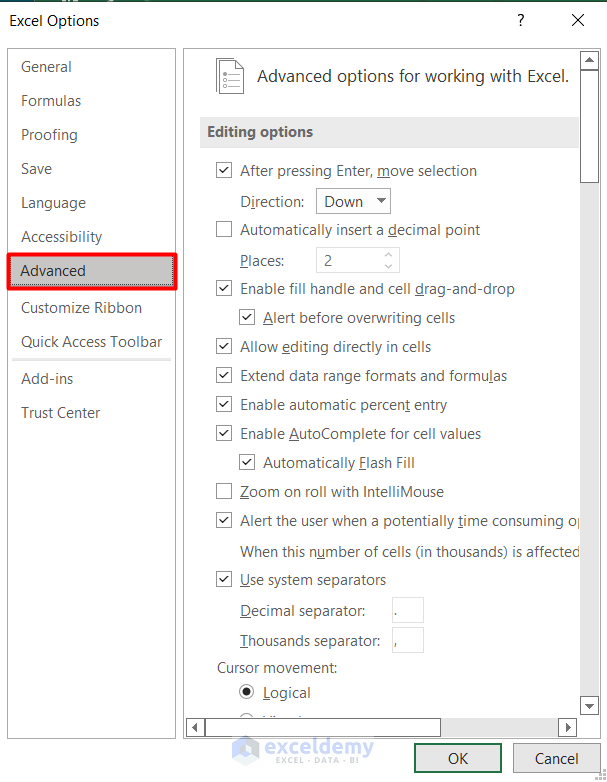
- Select the Advanced.
Step 2:
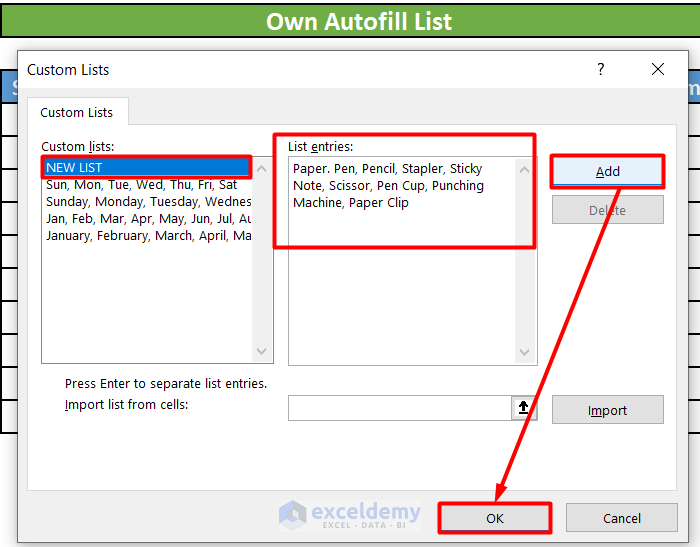
- Locate the General heading and at the bottom of that section, click Edit Custom Lists.

- In the “Custom lists” box select New List.
- Then in the “List entries” box type in your list separated with a comma as shown in the picture below.
- After typing your list, click Add to store your list.
- Click OK to close the Custom list window and OK again to close the Excel Option.
Step 3:
- Now type the first two items of the list in two cells. Select both of the cells and drag the fill handle to the cell where the last item of the list should be. As you drag, a tooltip appears, displaying the item of the list that is being generated for each cell.

- Release the fill handle and you will see the column has been automatically filled with items on the list.
7. AutoFill Using the VBA Macro
You can also use a VBA macro to autofill the cells. Just follow these steps:
Step 1:
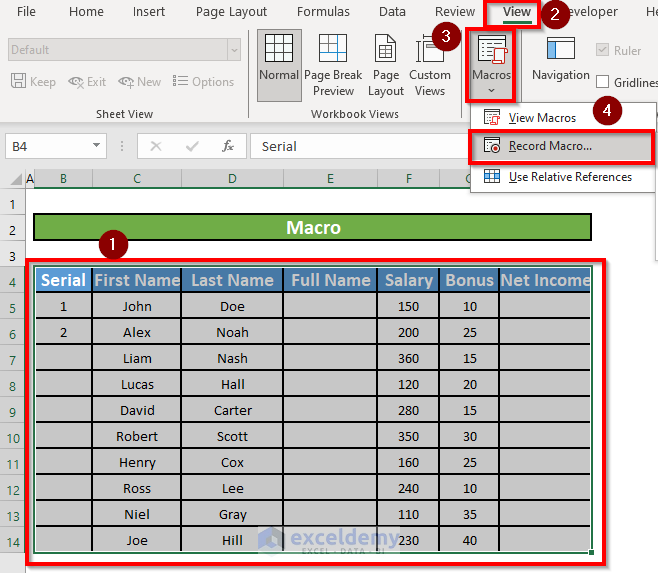
- First, select range B4:H14 → go to View tab → Macro → Record Macro
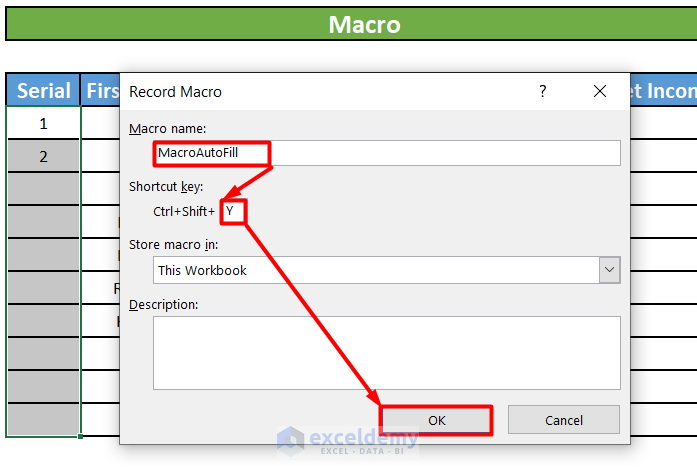
- Choose an optional name, for example, MacroAutoFill (no space in the name!).
- Then select an optional shortcut, for example, Ctrl+Y.
- Click OK to start recording the macro.
Step 2:
- Go to Home Tab → Editing → Fill → Series.
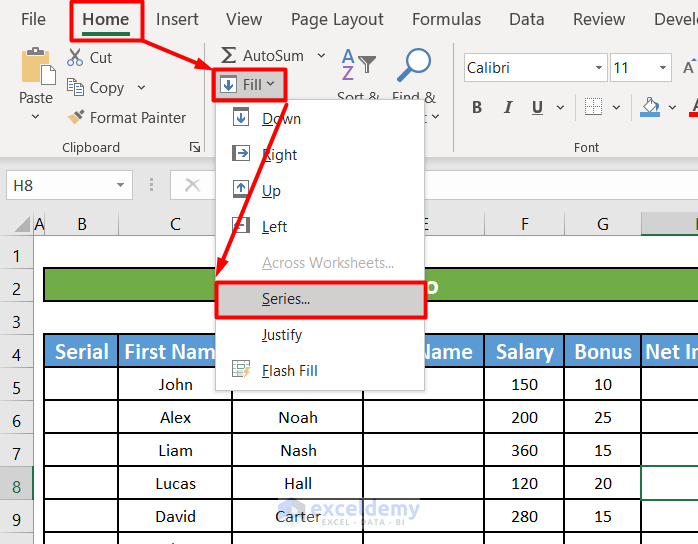
- For “Series in” choose “Columns“, check the “AutoFill” option, then click OK.

- Go to View tab → Macro → “Stop Recording“.
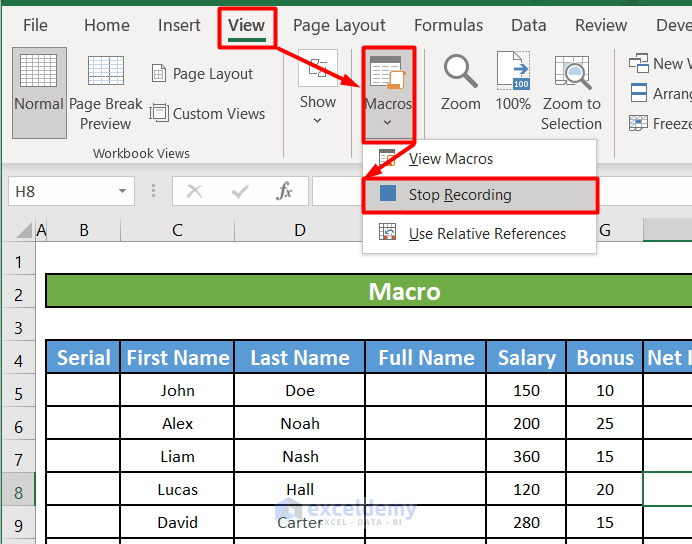
Step 3:
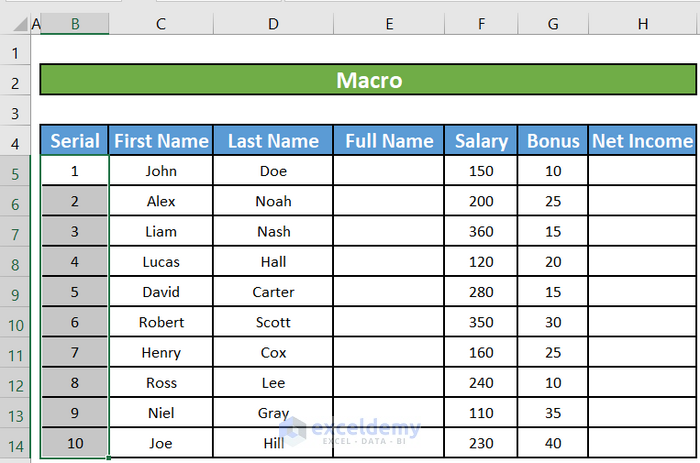
- Now type the first two numbers in the first two cells under the Serial column. Select both of the cells.
- Then press the macro shortcut keys CTRL+Y All the cells of the Serial column will be autofilled.
Read More: [Fixed!] AutoFill Formula Is Not Working in Excel Table
Things to Remember
- If you don’t see the fill handle, it might be hidden. To display it again:
⇒ First, click File > Options.
⇒ Then click Advanced.
⇒ Under Editing Options, check the Enable fill handle and cell drag-and-drop box.
- To change how you want to fill the selection, click the small Auto Fill Options icon that appears after you finish dragging, and choose the option that you want.
Download this practice book to exercise the task while reading this article.
Conclusion
In this article, we have learned to use Excel autofill shortcuts. I hope from now on you will find it very easy to use the Excel autofill shortcut. However, if you have any queries or recommendations about this article, please leave a comment below. Have a great day!!!
Related Articles
- AutoFill Cell Based on Another Cell in Excel
- Fix: Excel Autofill Not Working
- [Fixed!] Auto Fill Options Not Showing in Excel
- [Solved:] Excel Double Click AutoFill Not Working
<< Go Back to Excel Autofill | Learn Excel
Get FREE Advanced Excel Exercises with Solutions!

I’m here to learn about automatic student report card using excel