Method 1 – Using the Advanced Excel Options to Create a Custom AutoFill List
- Create a dataset.
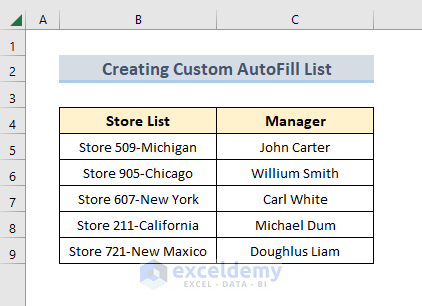
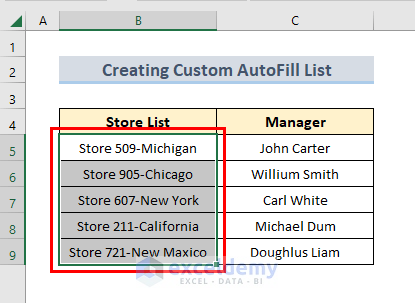
- Select the range to include in the custom autofill list. Here, B5:B9.
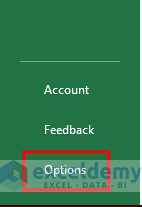
- Go to the File tab.

- Select Options.
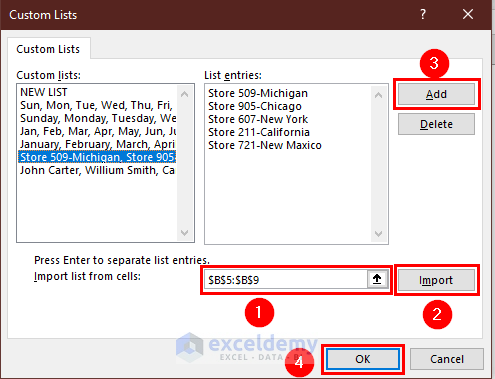
- In the Excel Options window, select Advanced > Edit Custom Lists.
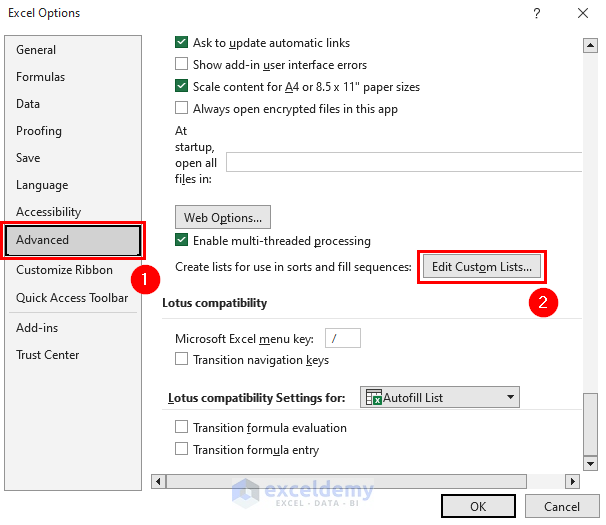
- In the Custom Lists window, select the range in Import List from Cells. (Here, it was already selected.)
- Select Import > Add.
- Click OK.
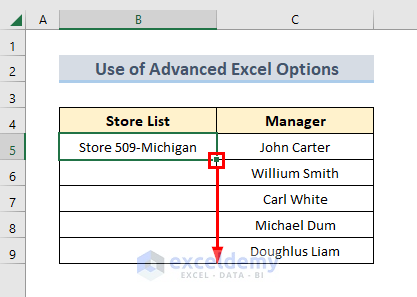
- Go back to the worksheet and enter the first name of the list in any cell.
- Use the Fill Handle to fill up the rest of the cells.
-
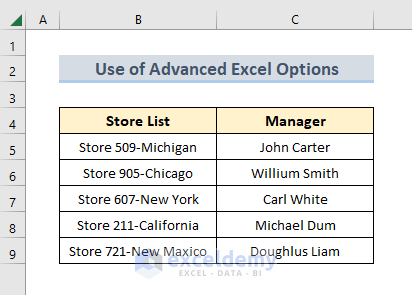
- This is the output
Read More: How to Use Autofill Formula in Excel
Method 2 – Generate a Custom AutoFill List Applying a VBA Code in Excel
- Create a dataset.

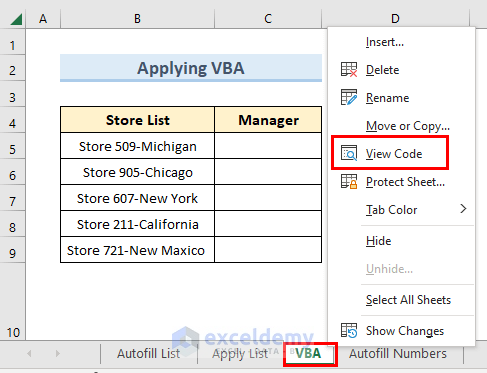
- Right-click the worksheet name and select View Code.
- In the code window, enter the following code:
Sub Cutom_AutoFill()
Application.AddCustomList ListArray:=Array("John Carter", "Willium Smith", "Carl White", "Michael Dum", "Doughlus Liam")
End Sub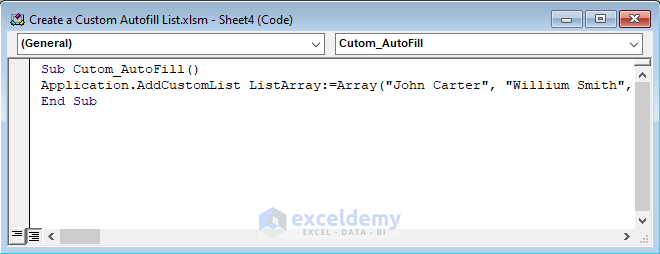
Note: Application.AddCustomList ListArray:=Array(“John Carter”, “Willium Smith”, “Carl White”, “Michael Dum”, “Doughlus Liam”) enters the list of items in the custom autofill list.
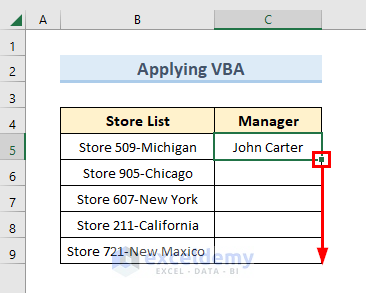
- Click Run.

- Go back to the worksheet and enter the first item of the list in any cell. Here, John Carter in C5.
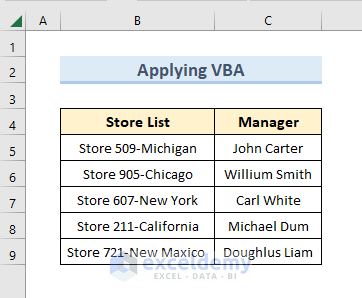
- Drag down the Fill Handle to see the result in the rest of the cells.
- Cells are filled with the items enlisted in the code.
Read More: How to Apply AutoFill Shortcut in Excel
How to AutoFill a Series of Numbers in Excel
- Create a dataset with 2/3 entries. In the example below: Normal Sequence (1,2,3,4…), Odd sequence (1,3,5,7…), Even Sequence (2,4,6,8…) and Specific Sequence (1,4,7,10…).
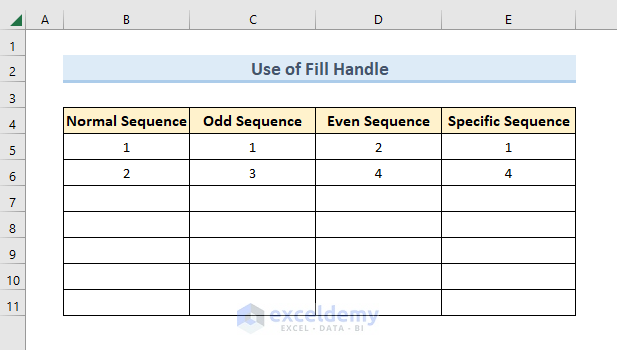
- Select the initial 2/3 entries and use the Fill Handle to create the whole series.
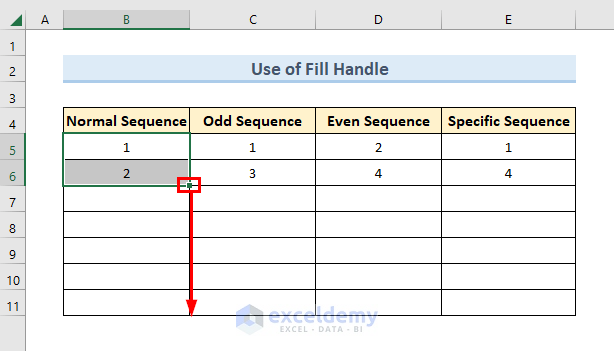
- Use the Fill handle to create the rest of the series in the other columns.
This is the output.

Read More: How to AutoFill Sequential Letters in Excel
Download Practice Workbook
Download the practice workbook.
Related Articles
- AutoFill Cell Based on Another Cell in Excel
- How to AutoFill from List in Excel
- Fix: Excel Autofill Not Working
- [Fixed!] Auto Fill Options Not Showing in Excel
- [Fixed!] AutoFill Formula Is Not Working in Excel Table
- [Solved:] Excel Double Click AutoFill Not Working
<< Go Back to Excel Autofill | Learn Excel
Get FREE Advanced Excel Exercises with Solutions!
