In this article, we will demonstrate some ideas about how to use Excel VBA to set a Range variable to selection. We can execute some common operations on these selected cells using VBA. In the following Excel dataset, we are showing some Western band names and their corresponding vocal singers.

Excel VBA to Set a Range Variable to Selection: 5 Examples
1. Setting Range Variable to Select a Range by Excel VBA
We can select a range by using the Range function in VBA. Suppose we want to select cells B5:C8. Let’s get to the procedure below.
Steps:
- To write code in VBA, first, open the Developer tab and then select Visual Basic.
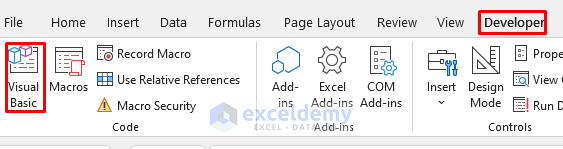
Then, it will open a new window of Microsoft Visual Basic for Applications.
- Now, open Insert >> select Module
.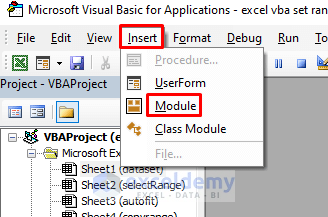
- Type the following code in the VBA Module.
Sub RangeSelect()
Dim Rng1 As Range
Worksheets("selectRange").Activate
Set Rng1 = Range("B5:C8")
Rng1.Select
End Sub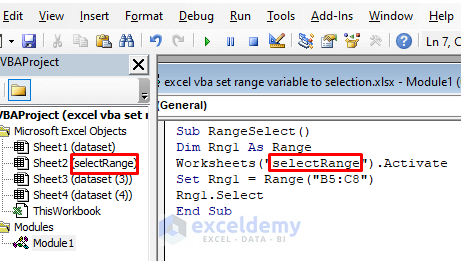
Here, we set the range B5:C8 as Rng1. We select it by the Range method of VBA. Keep in mind that we need to activate our Excel sheet so we activated the selectRange sheet.
- Now go back to the sheet and run Macro.
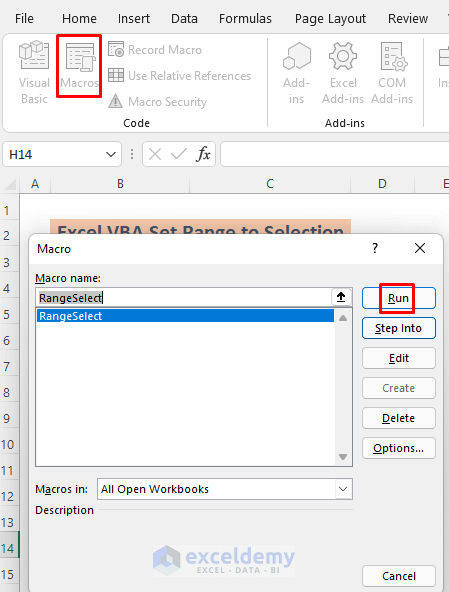
- After that, you will see the range B5:C8 selected automatically.

Thus you can set the desired Range variable to selection using VBA.
2. Using VBA to Format Cells by Setting Range Variable
Suppose our dataset looks like the following image.
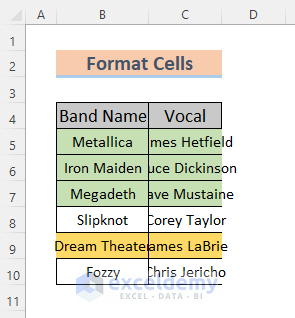
We want to make the heading bold and AutoFit the columns. We can do this via VBA. Let’s see how we can do this.
Steps:
- First, open Visual Basic and type the following code in the VBA Module (to see how to open Visual Basic and VBA Module, please go to Section 1).
Sub SetRange()
Dim xyz As Range
Set xyz = Range("B4:C4")
xyz.Font.Bold = True
xyz.Select
Worksheets("autofit").Columns("B:C").AutoFit
End Sub
Here we set the range B4:C4 as xyz. Then we used the Bold method to make the fonts in cells B4 and C4 bold. We also fitted columns B and C using the AutoFit method.
- Now, go back to the sheet and run the Macro which is named as SetRange.
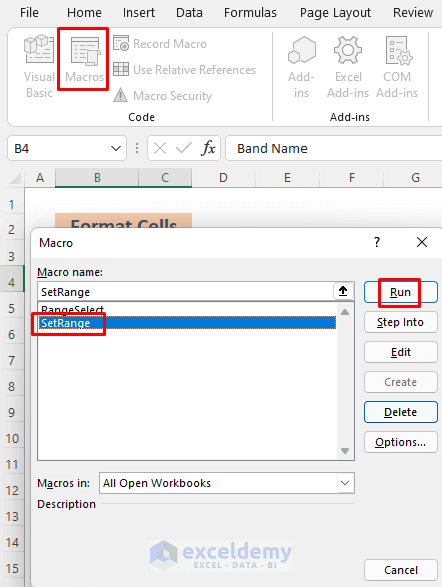
After that, you will see the names clearly in the columns and the headers become bold and selected.

Following this path, you can format cells and AutoFit columns setting Range variables in VBA.
Read More: VBA to Set Range in Excel
3. Copying a Range by Setting Variable Range Selection in VBA
Suppose we want to copy B6:C9 by setting the Range variable to select. Let’s discuss the procedure below.
Steps:
- First, open Visual Basic and type the following code in the VBA Module (to see how to open Visual Basic and VBA Module, please go to Section 1).
Sub CopyRange()
  Dim cpy As Range
  Set cpy = Range("B6:C9")
  cpy.Copy
End Sub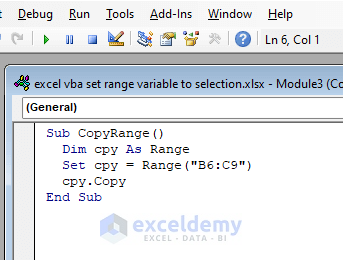
Here, we simply copied the range B6:C9 by using the Copy method of VBA. We set the range B6:C9 as cpy.
- Now go back to your sheet and run Macros. Select CopyRange as it is the name of your current Macro.

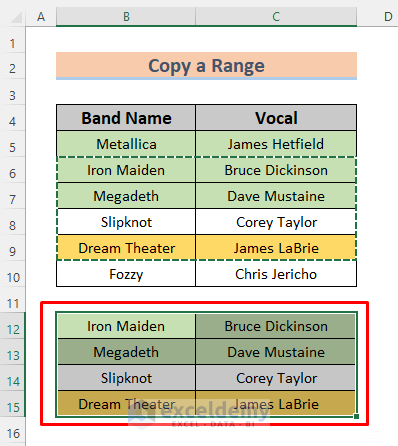
You will see the range B6:C9 is copied.
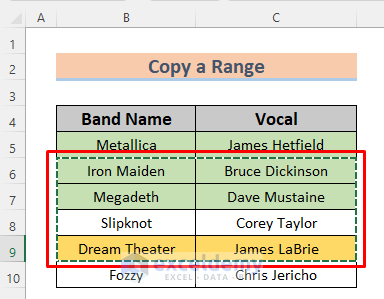
You can paste this range anywhere in your Excel sheet by pressing CTRL + V. I pasted the range through B12 to C15.
By going along with this method, you can copy a range by setting the range variable to selection in Excel VBA.
4. Format Cells with Color by Setting Range Variable to Selection
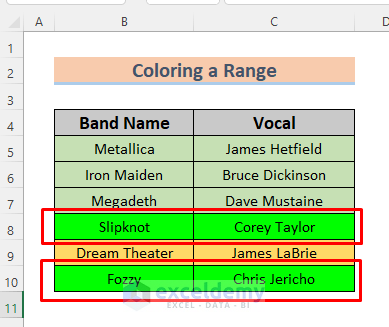
Suppose we want to color the 8th and 10th rows of the dataset with green. Let’s follow the description below.
Steps:
- First, open Visual Basic and type the following code in the VBA Module (to see how to open Visual Basic and VBA Module, please go to Section 1).
Sub ColorRange()
Dim color As Worksheet
Dim x1 As Range
Dim x2 As Range
Set color = ActiveSheet
Set x1 = Range("B8:C8")
Set x2 = Range("B10:C10")
x1.Cells.Interior.ColorIndex = 4
x2.Cells.Interior.ColorIndex = 4
End Sub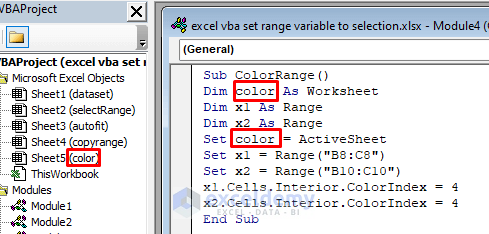
Here we define our range B8:C8 and B10:C10 as x1 and x2 respectively. We made our color Excel Sheet as ActiveSheet and we colored our desired ranges by ColorIndex property.
- Now go back to your sheet and run Macros. Select ColorRange as it is the name of the current Macro.

After that, you will see the desired ranges filled with green color.
Thus you can format the cells with color by setting the range variable to selection.
5. Deleting Rows by Setting Range Variable in VBA
Suppose we want to delete the 8th and 10th rows of the dataset with green. Let’s follow the description below.
Steps:
- First, open Visual Basic and type the following code in the VBA Module (to see how to open Visual Basic and VBA Module, please go to Section 1).
Sub ColorRange()
Dim color As Worksheet
Dim x1 As Range
Dim x2 As Range
Set color = ActiveSheet
Set x1 = Range("B8:C8")
Set x2 = Range("B10:C10")
x1.Cells.Interior.ColorIndex = 4
x2.Cells.Interior.ColorIndex = 4
End Sub
The ranges that we want to delete are B8:C8 and B10:C10. We named them x1 and x2 respectively. Then we just deleted them by Delete method.
- Now go back to your sheet and run Macros. Choose DeleteRange as it is the name of your current Macro.

After that, you will see the ranges B8:C8 and B10:C10 are gone.

By following this approach, you can delete rows by setting the range variables to selection.
Practice Section
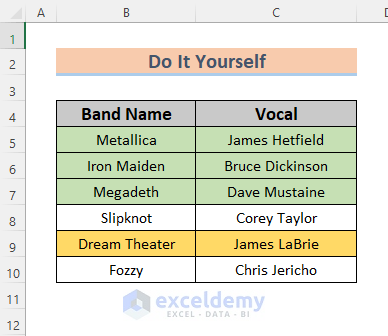
In the following image, you will find the dataset that we worked on in this article so that you can practice on your own.
Download Practice Workbook
Conclusion
In a nutshell, the article fully focuses on some applications to set Range variables to selection by Excel VBA. We described some pretty basic methods. If you have any other ideas or feedback, kindly leave them in the comment box. This will help me enrich my upcoming articles
Related Articles
- Excel VBA: Get Range of Cells with Values
- Excel VBA: Set Range by Row and Column Number
- How to Use Range with Variable Row and Column with Excel VBA
- VBA Range with Variable Row Number in Excel

