VBA Range Object
The Range object in VBA can contain a single cell, multiple cells, rows, or columns within the Excel worksheet.
The hierarchy of the Range object is as below.
Application > Workbook > Worksheet > Range
This is how you should declare the Range object in VBA.
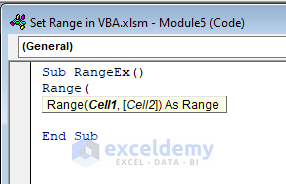
Read More: Excel VBA Range Function
How to Set a Range in VBA Excel: 7 Examples
Example 1 – Set the Range in a Single Cell in VBA
Steps:
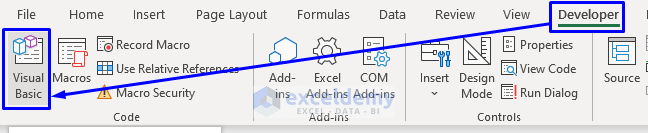
- Press Alt + F11 on your keyboard or go to Developer and to Visual Basic to open Visual Basic Editor.
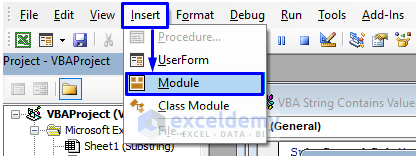
- In the pop-up code window, from the menu bar, click Insert and Module.
- Copy the following code and paste it into the code window.
Sub RangeOneCell()
Range("B2").Value = "Hello World"
End Sub
Here,
B2 = the cell where we want to set the value. You can set any cell reference number that you need.
- Press F5 on your keyboard or, from the menu bar, select Run then Run Sub/UserForm. You can also just click on the small Play icon in the sub-menu bar to run the macro.
- Cell B2 now contains the value “Hello World”.
Example 2 – Set the Range in Multiple Cells in VBA
Steps:
- Open a Visual Basic Editor from the Developer tab and Insert a Module in the code window.
- In the code window, copy the following code and paste it.
Sub RangeCells()
Range("A1:D5").Value = "Hello!"
End Sub- Run the macro and all the cells from A1 to D5 now hold “Hello!”
Example 3 – Set the Range in a Single Row in VBA
Steps:
- Open the Visual Basic Editor from the Developer tab and Insert a Module in the code window.
- In the code window, copy the following code and paste it.
Sub RangeRows()
Dim iRow As Range
Set iRow = Range("A1:D5")
iRow.Rows(3).Value = "Hello!"
End Sub- Run the macro and only the 3rd row from all the rows from A1 to D5 will hold “Hello!”
- Rows(3).Value in the code gave access to the 3rd row of the specific range A1:D5.
Example 4 – Set the Range in Multiple Rows in VBA
Steps:
- Open the Visual Basic Editor from the Developer tab and Insert a Module in the code window.
- In the code window, copy the following code and paste it.
Sub RangeRows()
Dim iRow As Range
Set iRow = Range("A1:D5")
iRow.Rows(1).Value = "Hello!"
iRow.Rows(3).Value = "Hello!"
iRow.Rows(5).Value = "Hello!"
End Sub- Run the macro, and the 1st, 3rd, and 5th rows from all the rows from A1 to D5 now hold “Hello!”
Example 5 – Set the Range in a Single Column in VBA
Steps:
- Open a Visual Basic Editor from the Developer tab and Insert a Module in the code window.
- In the code window, copy the following code and paste it.
Sub RangeColumns()
Dim iCol As Range
Set iCol = Range("A1:D5")
iCol.Columns(2).Value = "Hello!"
End Sub- Run the macro, and only the 2nd column from all the columns from A1 to D5 now hold “Hello!”
- iCol.Columns(2).Value in the code gave access to the 2nd column of the specific range A1:D5.
Example 6 – Set the Range in Multiple Columns in VBA
Steps:
- Open the Visual Basic Editor from the Developer tab and Insert a Module in the code window.
- In the code window, copy the following code and paste it.
Sub RangeColumns()
Dim iCol As Range
Set iCol = Range("A1:D5")
iCol.Columns(2).Value = "Hello!"
iCol.Columns(4).Value = "Hello!"
End Sub- Run the macro, and the 2nd and 4th columns from A1 to D5 now hold “Hello!”
Read More: Excel VBA: Set Range by Row and Column Number
Example 7 – Set the Range through a Command Button in VBA
Steps:
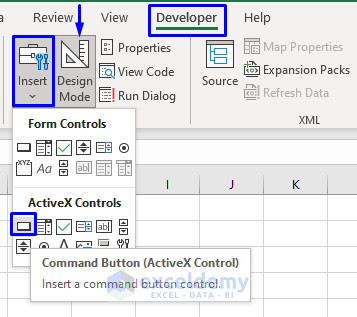
- Go to Developer, then Insert, and choose Command Button. Make sure you have the Design Mode turned on.
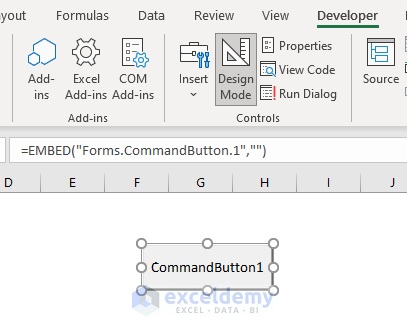
- Drag the Command Button into the sheet.
- Double-click on the button and it will take you to the code window, auto-generated with a VBA Sub-procedure code.
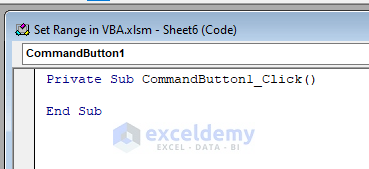
- Inside the Sub, copy your code and Save.
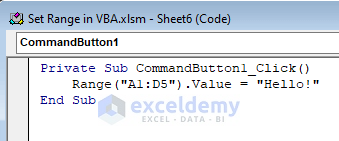
- Go back to the worksheet of interest and click the Command Button. The result based on your code will appear in the worksheet.
Read More: How to Use VBA to Set a Range Variable to Selection in Excel
Advantages of VBA Set Range
- It is very easy to implement.
- The arguments inside the Range object are not fixed. So we can modify the values of the argument according to our needs.
- More than 1 value can be passed as arguments.
Things to Remember
- CELLS properties in VBA can also be used to set the Range in VBA.
- Object variables should be set as the reference of the object by the SET
Download the Practice Workbook
You May Also Like to Explore
- Excel VBA: Get Range of Cells with Values
- How to Use Range with Variable Row and Column with Excel VBA
- VBA Range with Variable Row Number in Excel

