In this article, we will learn how to use Excel VBA horizontal alignment. Excel VBA is the visual basic analysis which is a programming language. You can simplify your manual work with this program. Sometimes while working on a dataset you need to change your horizontal alignment as per need. This is simple work if you are doing it once or twice but what if you need to change your cell content alignment in every cell? In that case, you can use VBA code to solve this problem in a better way.
The above overview image shows the output of the process. You will know better once you go through the whole article. So, let’s get started.
What Is Horizontal Alignment in Excel?
In Excel, horizontal alignment is the positioning of the cell content if it is text or number. The cell content can be aligned in different ways. It can be right-aligned, left-aligned, or center-aligned. You can change the alignment from the toolbar manually. But if you need to change your alignment so many times or in every cell content then you should use programming languages to get the required horizontal alignment.
For instance in Excel VBA “xlHAlignCenter” is used for center alignment, “xlHAlignleft” is used for left alignment, and “xlHAlignright” is for right alignment. In fact, you can use “xlHAlignDistributed” to distribute, “xlHAlignGeneral” to get the alignment according to the text, and so on.
Excel VBA Horizontal Alignment: Step-by-Step Procedures
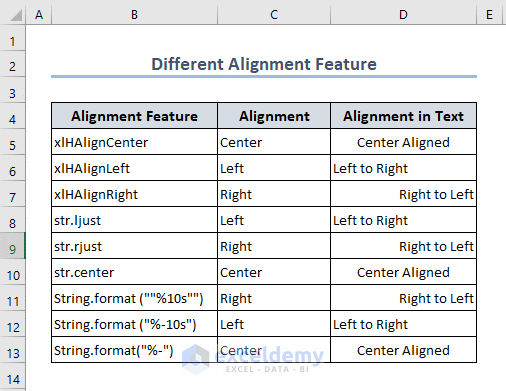
The dataset below contains different alignment features from different programming languages. For instance, “xlHAlignCenter” this feature represents center alignment in Excel VBA on the other hand “String.format(“%-”)” also represents center alignment but in Java Programming.
In this article, we will get the horizontal alignment of the text as required. So, follow the below steps to execute this process.

Step 1: Excel VBA Horizontal Alignment – Apply Code
Sometimes we need different alignments while working on a single worksheet. In that case, changing the alignment every time from the toolbar is time-consuming work. You can use Excel VBA code to simplify this hassle.
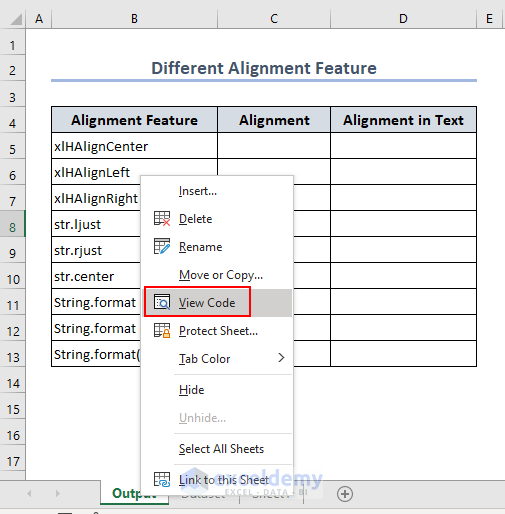
- Initially, place the Cursor on the Leaf Bar.
- Now, right-click the mouse to get the options menu from the Leaf bar.
- Therefore, select View Code from the options menu.
- After selecting View Code VBA Module window will pop up.
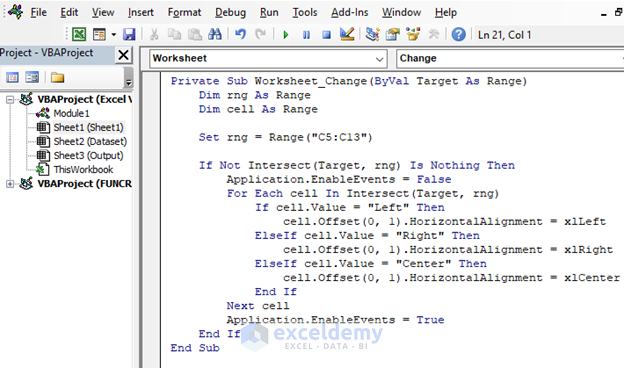
- Write down the code In the VBA Module window as below.
Code:
Private Sub Worksheet_Change(ByVal Target As Range)
    Dim rng As Range
    Dim cell As Range
    Set rng = Range("C5:C13")
    If Not Intersect(Target, rng) Is Nothing Then
        Application.EnableEvents = False
        For Each cell In Intersect(Target, rng)
            If cell.Value = "Left" Then
                cell.Offset(0, 1).HorizontalAlignment = xlLeft
            ElseIf cell.Value = "Right" Then
                cell.Offset(0, 1).HorizontalAlignment = xlRight
            ElseIf cell.Value = "Center" Then
                cell.Offset(0, 1).HorizontalAlignment = xlCenter
            End If
        Next cell
        Application.EnableEvents = True
    End If
End Sub
Code Breakdown:
Private Sub Worksheet_Change(ByVal Target As Range)
    Dim rng As Range
Dim cell As Range- This program starts with declaring a private subroutine which means it will not work beyond this worksheet module.
Set rng = Range("C5:C13")
    If Not Intersect(Target, rng) Is Nothing Then
Application.EnableEvents = False- Range is selected as C5:C13 and Intersect function is applied here to determine if the target and range overlap or intersect.
For Each cell In Intersect(Target, rng)
            If cell.Value = "Left" Then
                cell.Offset(0, 1).HorizontalAlignment = xlLeft
            ElseIf cell.Value = "Right" Then
                cell.Offset(0, 1).HorizontalAlignment = xlRight
            ElseIf cell.Value = "Center" Then
                cell.Offset(0, 1).HorizontalAlignment = xlCenter
End If- Here, For loop is applied to get the alignment and the OFFSET function is used to get the output from one cell right of the range. As the range is C5:C13 so the program will be executed in column D5:D13.
Next cell
        Application.EnableEvents = True
    End If
End Sub- Lastly, EnableEvents = True is used to enable this event after will be temporarily disabled.
Read More: Excel VBA to Set Vertical Alignment
Step 2: Create a Drop-Down Menu
Once you write down the code press Run (Icon) to execute this program. Now follow the below steps to create a dropdown menu.
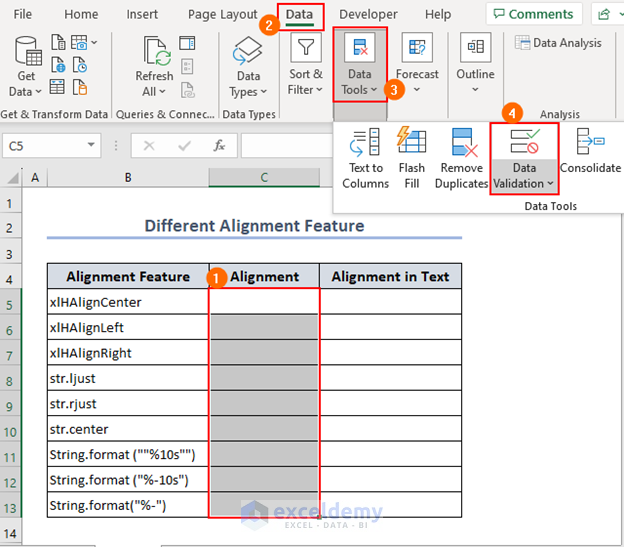
- In the beginning, Select cell range C5:C13 from the dataset.
- Therefore select Data >> Data Tools >> Data Validation from the toolbox.
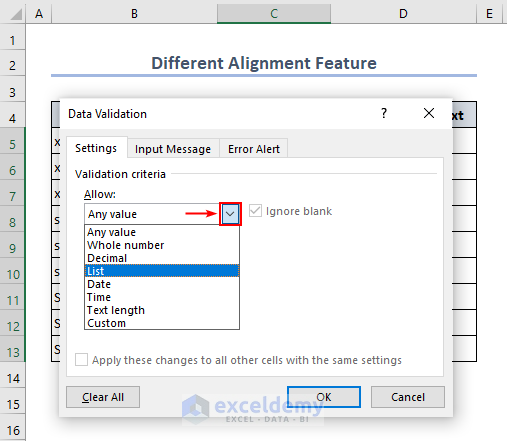
- Consequently, a Data Validation dialog box will pop up as below.
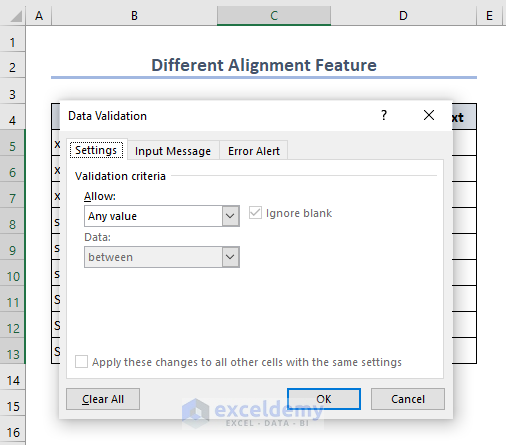
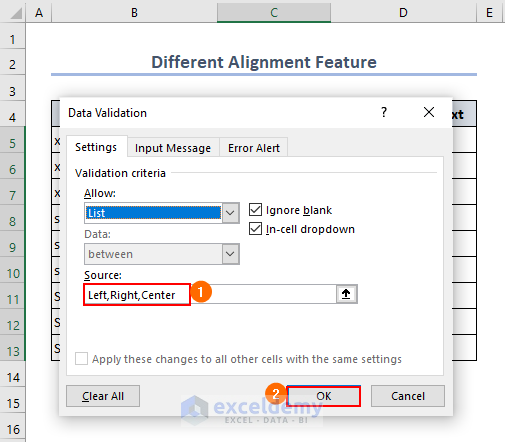
- Now select List from the drop-down menu of Validation Criteria.
- Write down manually Left, Right, and Center at the Source option in the Validation criteria.
- Finally, select OK to execute this process.
Step 3: Write Down Text to Get Required Horizontal Alignment
Once you get the drop-down menu, now you can select your required horizontal alignment when you write down any text.
- Firstly, the drop-down menu will be similar to below.

For accurate output, select the alignment first, then write down random text as below.
- Lastly, repeat this process till complete the total dataset.
- The output will be similar to below.
Things to Remember
- While executing the VBA program, make sure the macro is enabled in your Excel file. If the macro is not enabled then select File >> Option >> Trust Center >> Trust Center Settings >> Macro Settings. and enable the macro.
- You can change the range according to your dataset and execute this program.
Download Practice Workbook
Conclusion
In this article, we learned how to get Excel VBA horizontal alignment as required. We cover every detail of this process. As changing alignment in every line is quite tough work VBA programming is a better way to execute this issue. Hopefully, you can solve the problem shown in this article. Please let us know in the comment section if there is any query or suggestions.

