Method 1 – Run a VBA Code to Center Text Horizontally and Format Cell with Excel VBA
1.1 Center an Active Cell Horizontally
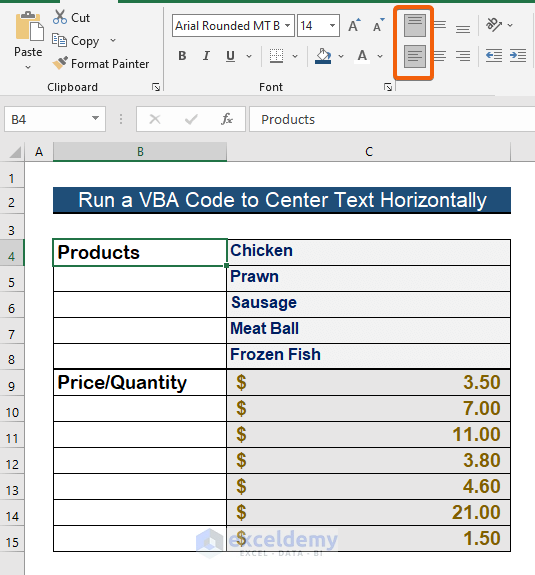
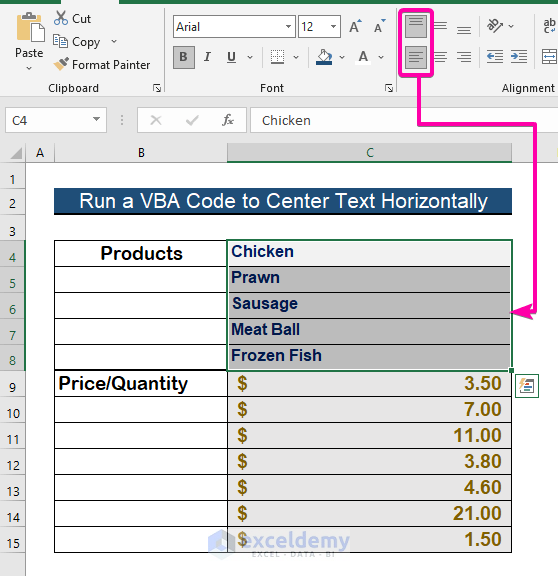
In the image below; there is an active cell B4 that is horizontally center-aligned. To make it center-aligned using the Excel VBA, follow the steps below.
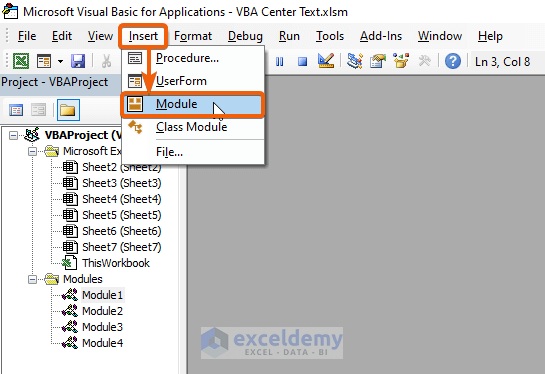
Step 1: Create a Module
- Press Alt + F11 to open the VBA Macro.
- Click on Insert.
- Select Module.
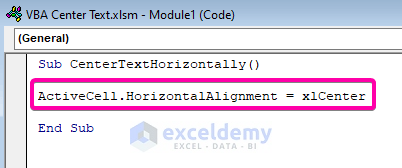
Step 2: Write a VBA Code
- Paste the following VBA code.
Sub CenterTextHorizontally()
ActiveCell.HorizontalAlignment = xlCenter
End Sub
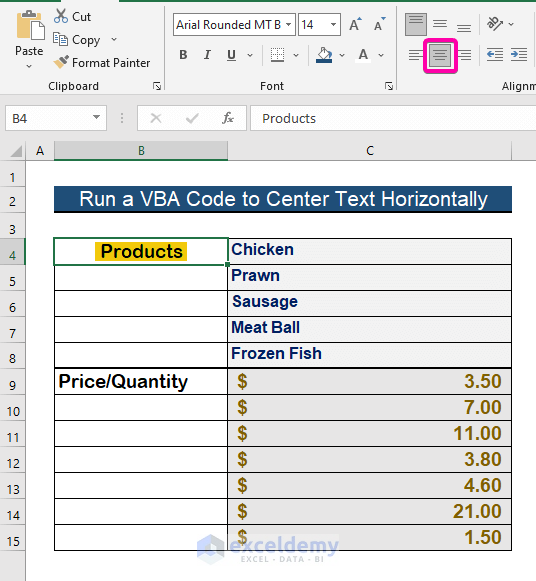
Step 3: Run the Program
- Save the program and press F5 to run.
- The cell B4 is center-aligned.
1.2 Center Selected Text Horizontally
Step 1: Selection of Cells
- Select the desired range.
Step 2: Type a VBA Code
- Enter the following VBA code in a new Module.
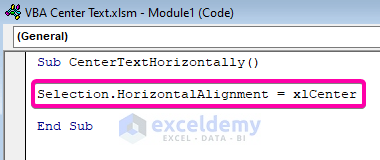
Sub CenterTextHorizontally()
Selection.HorizontalAlignment = xlCenter
End Sub
Step 3: Get the Result
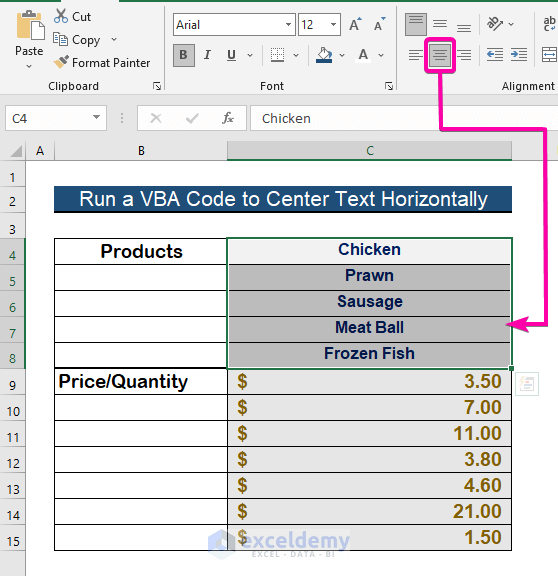
- Save the program and press F5 to run.
- The selected range will be center-aligned.
Read More: Excel VBA Horizontal Alignment
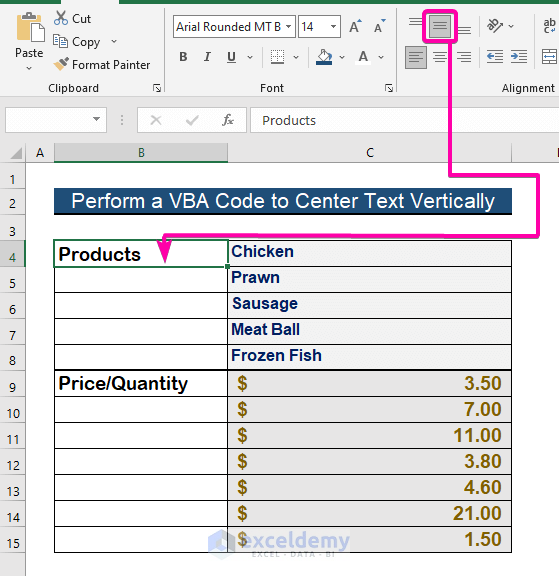
Method 2 – Perform a VBA Code to Center Text Vertically and Format Cell with Excel VBA
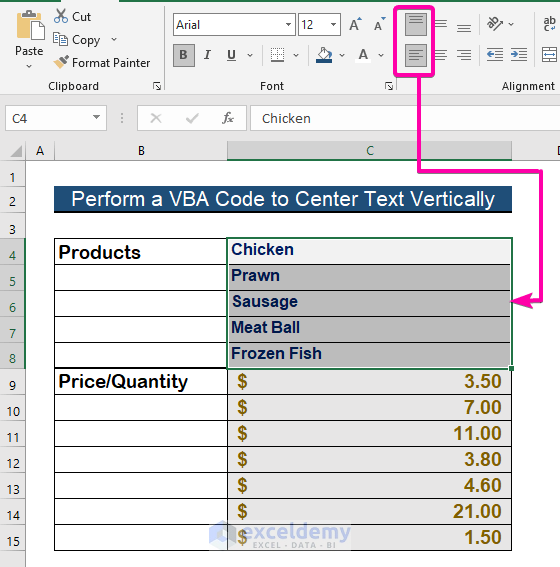
2.1 Center an Active Cell Vertically with Excel VBA
Step 1: Enter a VBA Code
- Insert a new Module as before.
- In a new Module, enter the following VBA,
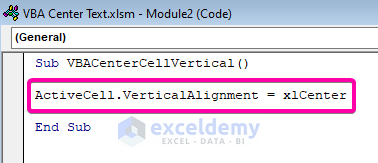
Sub VBACenterCellVertical()
ActiveCell.VerticalAlignment = xlCenter
End Sub
Step 2: Save and Run the Program
- Save the program and press F5 to run the program.
- The active cell B4 will appear vertically center-aligned.
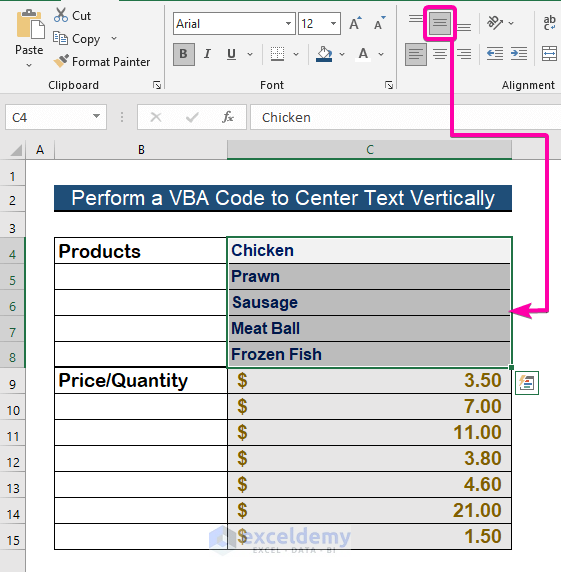
2.2 Center Selected Text Vertically with Excel VBA
Step 1: Selection of Cells
- Select all the required cells.
Step 2: Insert a VBA Code
- Create a Module and enter the following VBA.
Sub VBACenterCellVertical()
Selection.VerticalAlignment = xlCenter
End Sub
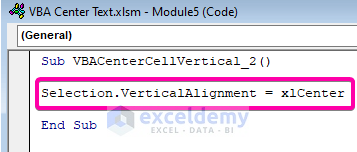
- The selected cells will be aligned vertically in the center.
Read More: Excel VBA to Set Vertical Alignment
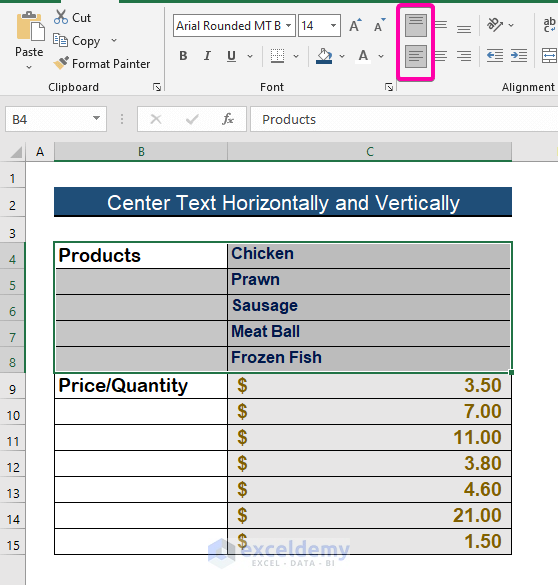
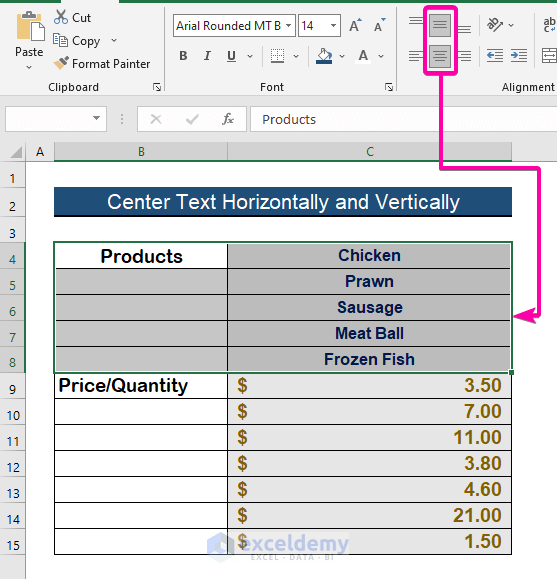
Method 3 – Apply a VBA Code to Center Text Both Horizontally and Vertically with Excel VBA
Step 1: Selection of the cells
- Select the required cells in the range.
Step 2: Write a VBA Code
- Enter the code in a new Module.
Sub CenterTextHorizontallyAndVertically()
Selection.HorizontalAlignment = xlCenter
Selection.VerticalAlignment = xlCenter
End Sub
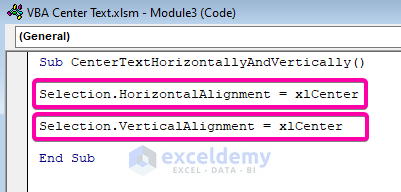
- The cells in the selection are aligned centrally.
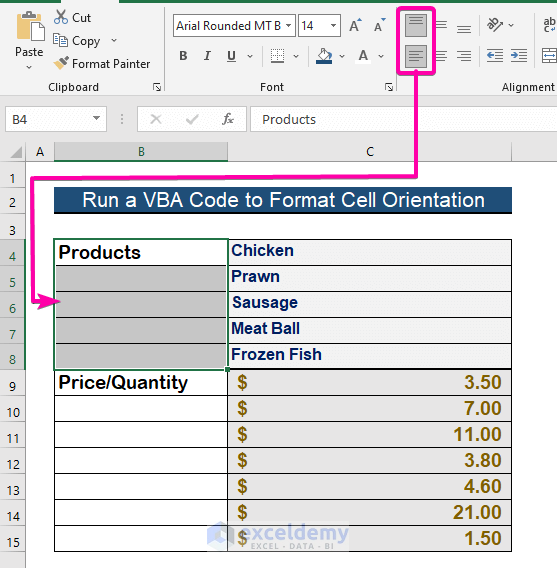
Method 4 – Run a VBA Code to Center Text and Format Cell Orientation with Excel VBA
Step 1: Selection of the cells
- Select the cells.
Step 2: Enter a VBA code
- In a new Module, enter the following VBA,
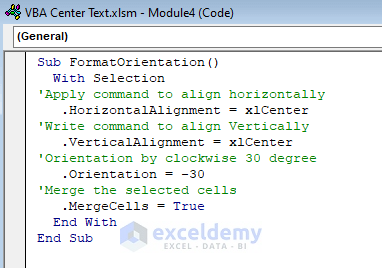
Sub FormatOrientation()
  With Selection
'Apply command to align horizontally
   .HorizontalAlignment = xlCenter
'Write command to align Vertically
   .VerticalAlignment = xlCenter
'Orientation by clockwise 30 degree
   .Orientation = -30
'Merge the selected cells
   .MergeCells = True
  End With
End Sub
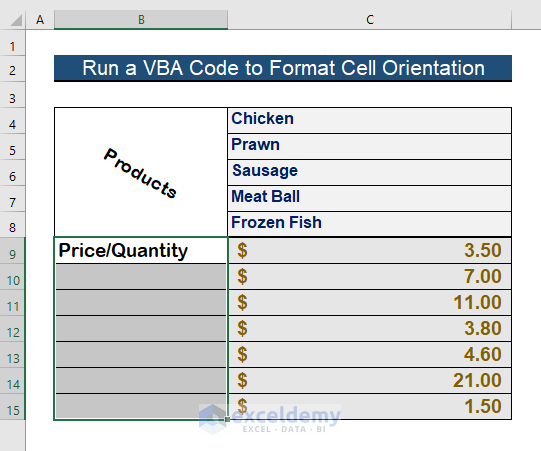
- Cell B4 is rotated 40 degrees clockwise.
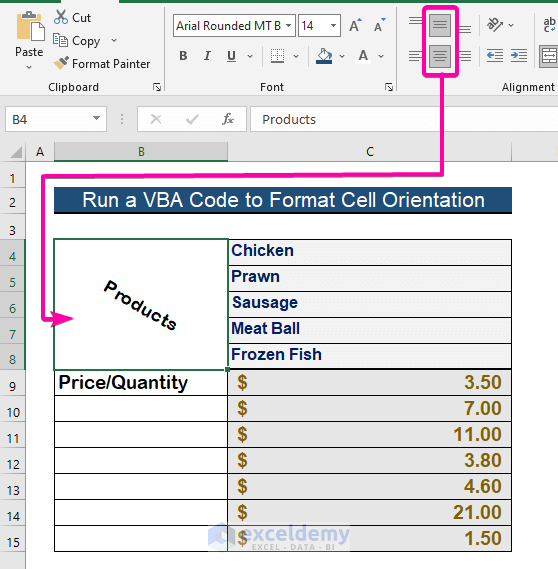
Step 3: Repeat the Selection
- Repeat the process for the remaining blank cells.
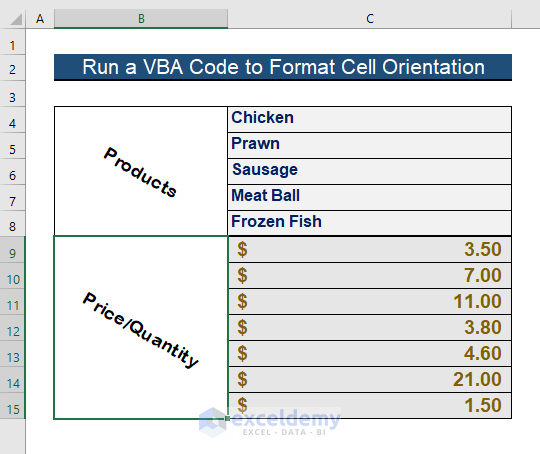
Step 4: Enter a VBA code
- To apply the code to a selected cell, enter the VBA code in a new Module.
Sub FormatOrientation()
  With Selection
'Apply command to align horizontally
   .HorizontalAlignment = xlCenter
'Write command to align Vertically
   .VerticalAlignment = xlCenter
'Orientation by clockwise 30 degree
   .Orientation = -30
'Merge the selected cells
   .MergeCells = True
  End With
End Sub
- Run the program to get the result.
Read More: Excel VBA to Rotate Text to 90 Degrees
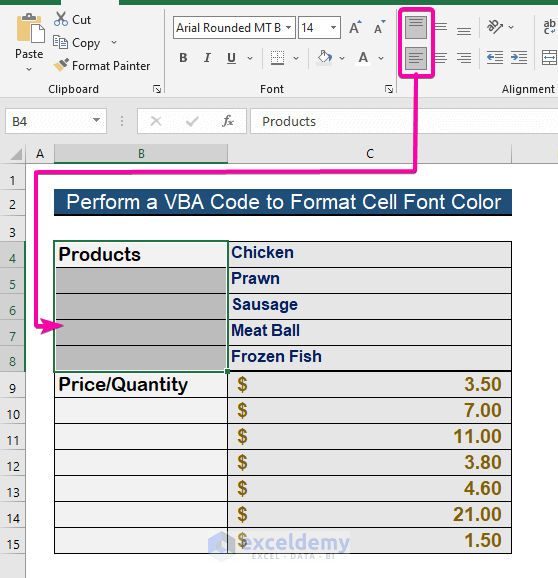
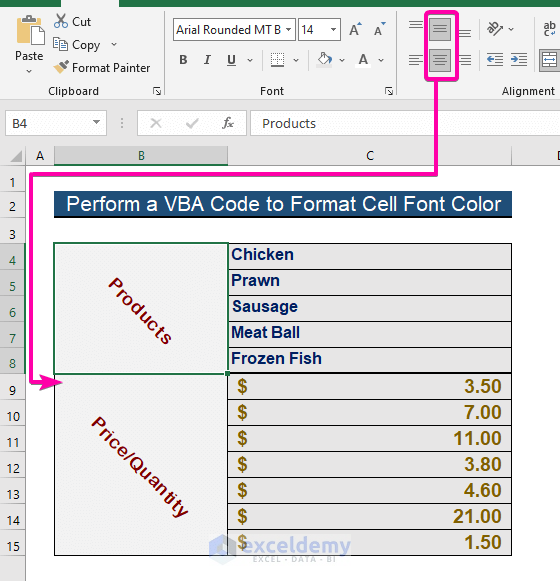
Method 5 – Perform a VBA Code to Center Text and Format Cell Font Color with Excel VBA
Step 1: Selection of the Cells
- Select the cells needed to merge and add color.
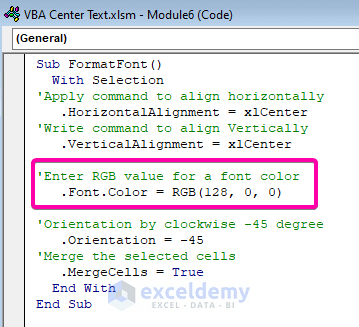
Step 2: Paste the VBA Codes
- Enter the following VBA code.
Sub FormatFont()
  With Selection
'Apply command to align horizontally
   .HorizontalAlignment = xlCenter
'Write command to align Vertically
   .VerticalAlignment = xlCenter
'Enter RGB value for a font color
   .Font.Color = RGB(128, 0, 0)
'Orientation by clockwise -45 degree
   .Orientation = -45
'Merge the selected cells
   .MergeCells = True
  End With
End Sub
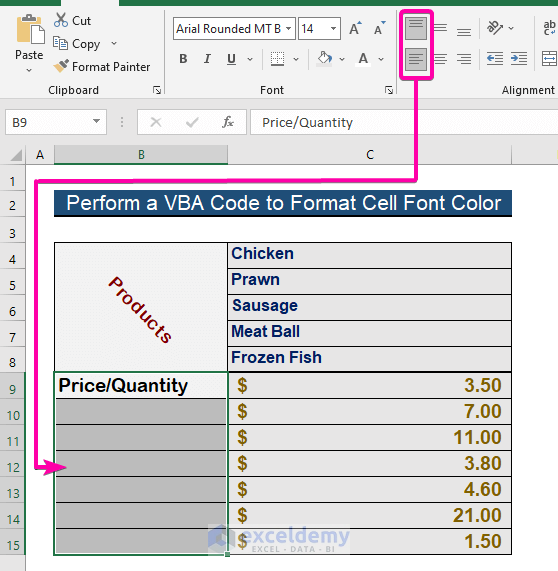
Step 3: Run the Program
- Save the program and press F5 to run it.
- The cells will be merged and colored with the RGB color code (128,0,0).
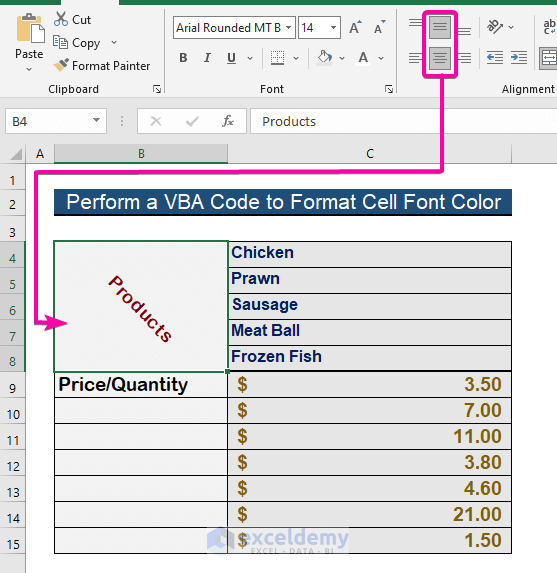
- Apply the code to the other selections.
Download Practice Workbook
Get FREE Advanced Excel Exercises with Solutions!
