We can refer to a certain range of cells in the Excel worksheet by using the Define Name feature. But, we constantly need to add new data or update our worksheets. In that case, defining the range names, again and again, is an inconvenient process. Forming a dynamic named range can solve this problem. In this article, we’ll show you the step-by-step process to create a Dynamic Named Range with VBA in Excel.
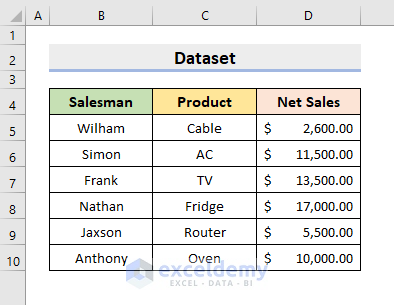
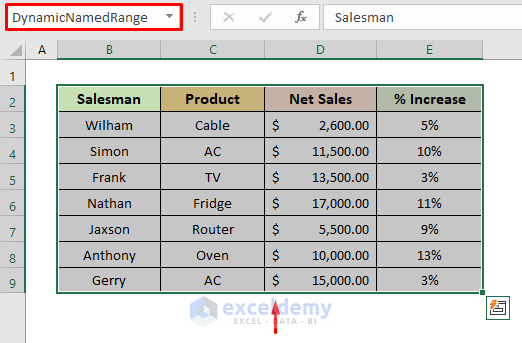
To illustrate, we’re going to use a sample dataset as an example. For instance, the following dataset represents the Salesman, Product, and Net Sales of a company.
Dynamic Named Range in Excel
Often, we assign a name to the selected range of cells with the Define Name feature in Excel. It helps us to call a range easily with the assigned name instead of calling the cell references. However, the static named range doesn’t update by itself even if we add new data to the worksheet. We’ve to add the new row or the new column manually using the Define Name feature over again. This is quite tiresome. To avoid this issue, we can easily create a Dynamic Named Range. The Dynamic Named Range updates by itself to include the newly added row or column.
Excel VBA to Create Dynamic Named Range: Step-by-Step Guideline
We’ll show you the complete process of creating the Dynamic Named Range with a simple VBA code in Excel. Therefore, follow the steps given below to perform the task.
STEP 1: Open the VBA Window to Create Excel Dynamic Named Range
In order to apply the code, we should open the Visual Basic window first. See the following process.
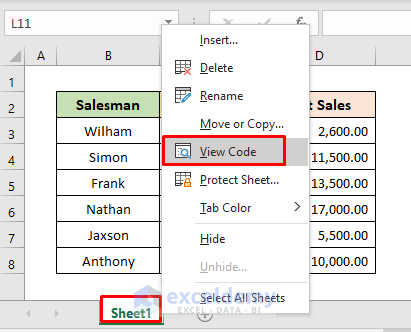
- Firstly, select Sheet1.
- Then, right-click on the mouse. There, select View Code.
- As a result, the Visual Basic window will pop out. And you’ll see a dialog box to apply the code.
STEP 2: Paste the VBA Code
- Now, copy the below code and paste it into the dialog box.
Sub NamedRangeDynamic()
    Dim WS As Worksheet
    Dim FirstR As Long
    Dim LastR As Long
    Dim FirstC As Long
    Dim LastC As Long
    Dim NamedRangeDynamic As Range
    Dim RngName As String
    Set WS = ThisWorkbook.Worksheets("Sheet1")
    FirstR = 2
    FirstC = 2
    RngName = "DynamicNamedRange"
    With WS.Cells
        LastR = .Find(What:="*", LookIn:=xlFormulas, LookAt:=xlPart, SearchOrder:=xlByRows, SearchDirection:=xlPrevious).Row
        LastC = .Find(What:="*", LookIn:=xlFormulas, LookAt:=xlPart, SearchOrder:=xlByColumns, SearchDirection:=xlPrevious).Column
        Set NamedRangeDynamic = .Range(.Cells(FirstR, FirstC), .Cells(LastR, LastC))
End With
    ThisWorkbook.Names.Add Name:=RngName, RefersTo:=NamedRangeDynamic
End Sub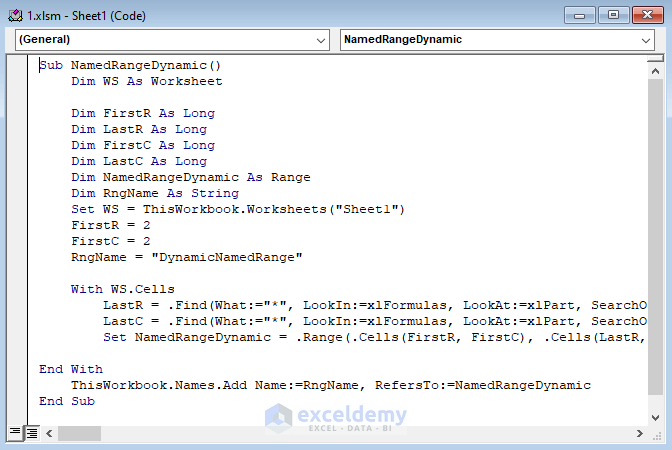
- After that, press F5 to run the code.
- Subsequently, close the window.
STEP 3: Select DynamicNamedRange in the Excel Name Box
- You’ll see the desired range of cells in your worksheet with the named range DynamicNamedRange after you select it from the Name Box.

STEP 4: Check If the Created Named Range Is Dynamic
We have to check if the named range is dynamic or not. So, carry out the further operation below.
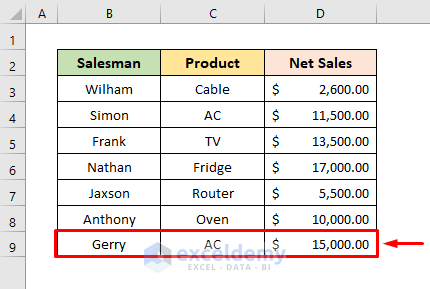
- Add new data in the 9th row like it’s shown in the following picture.
- Then, under the Developer tab, select Macros.
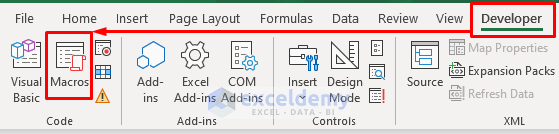
- Consequently, the Macro dialog box will pop out.
- There, select NamedRangeDynamic in the Macro name.
- After that, press Run.

- Subsequently, select DynamicNamedRange in the Name Box.
- As a result, it’ll return the new range including the newly added row like it’s shown below.

- Again add a new column.

- Follow the above steps to run the Macro.
- Finally, select DynamicNamedRange in the Name Box and you’ll get your expected range.
Read More: How to Check If Named Range Exists with Excel VBA
Download Practice Workbook
Download the following workbook to practice by yourself.
Conclusion
Henceforth, you will be able to create a Dynamic Named Range with VBA in Excel with the above-described method. Keep using it and let us know if you have any more ways to do the task. Don’t forget to drop comments, suggestions, or queries if you have any in the comment section below.
Related Articles
- How to Set Value to a Named Range with Excel VBA
- Excel VBA to Create Named Range from Selection
- Excel VBA to Loop Through Named Range
- Excel VBA to Delete Named Range


Thank you very much for this code!… it works like a charm… Thanks for sharing
Dear Sushil,
You are most welcome.
Regards
ExcelDemy
how to count total number of named range in current workbook?
Hello VIKAS
Thanks for reaching out and sharing your queries. You wanted to count the total number of named ranges in a workbook.
I am delighted to inform you that I have developed an Excel VBA sub-procedure to display the total number of named ranges in an Excel MsgBox.
OUTPUT OVERVIEW:
Excel VBA Sub-procedure:
Hopefully, the code will help you. Good luck.
Regards
Lutfor Rahman Shimanto
Excel & VBA Developer
ExcelDemy