In this article, I’ll show you how you can set value (s) to a named range with VBA in Excel. You’ll learn to set a single value to a named range, as well as a series of values.
Set Value to a Named Range with Excel VBA (Quick View)
Sub Set_Single_Value_to_a_Named_Range()

Worksheet_Name = "Sheet1"
Named_Range = "MyRange"
Value = 100

Worksheets(Worksheet_Name).Range(Named_Range) = Value

End Sub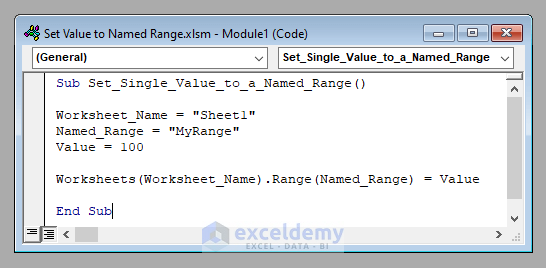
Excel VBA to Set Value to a Named Range: Step-by-Step Analysis
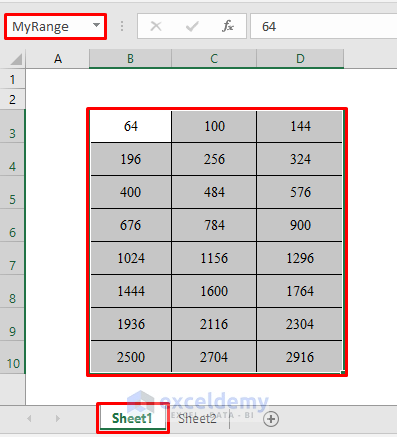
Here we’ve got a Named Range called MyRange that contains cell B3:D10 of a worksheet called Sheet1 of a workbook.
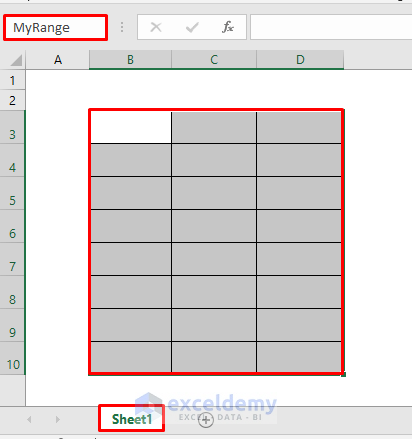
Our objective today is to insert a value (s) to this named range with Excel VBA.
1. Set a Single Value to a Named Range with Excel VBA
First of all, we’ll learn to set a single value to all the cells of this Named Range. Let the value be 100.
I am showing you the step-by-step procedure to execute this.
⧪ Step 1: Inserting the Inputs (Worksheet Name, Named Range, and Value)
First of all, we’ve to enter the inputs to the code. The inputs are worksheet name (Sheet1), Named Range (MyRange), and value (100).
The lines of code to set these will be:
Worksheet_Name = "Sheet1"
Named_Range = "MyRange"
Value = 100
⧪ Step 2: Setting the Value to the Named Range
Next, we have to set the value to the Named Range.
Worksheets(Worksheet_Name).Range(Named_Range) = ValueSo, the complete VBA code will be:
⧭ VBA Code:
Sub Set_Single_Value_to_a_Named_Range()

Worksheet_Name = "Sheet1"
Named_Range = "MyRange"
Value = 100

Worksheets(Worksheet_Name).Range(Named_Range) = Value

End Sub
⧭ Output:
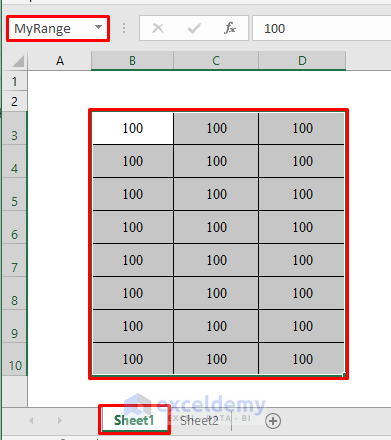
Run the code (Don’t forget to change the Worksheet_Name, Named_Range, and the Value according to your need before running the code).
It’ll set 100 to all the cells of the Named Range (MyRange) of Sheet1.
2. Set a Series of Values to a Named Range with Excel VBA (First Row, then Column)
We’ve learned to set a single value to a Named Range. This time we’ll learn to set a series of values to a named range with VBA.
We’ll go row-wise within the range first, then column-wise.
Let’s set a series of squares of even numbers starting from the square of 8 in the Named Range (MyRange) of Sheet1.
That means the series of values will be: 64 (Square of 8), 100 (Square of 10), 144 (Square of 12), and so on.
⧪ Step 1: Inserting the Inputs (Worksheet Name, Named Range, Starting Value, Increment, and the Index)
First of all, we have to insert the inputs into the code. They are worksheet name (Sheet1), named range (MyRange), starting value (8), increment (2), and index (2).
Worksheet_Name = "Sheet1"
Named_Range = "MyRange"
Starting_Value = 8
Increment = 2
Index = 2
⧪ Step 2: Iterating through a For-Loop to Set Values to Each Cell of the Named Range
Next, we’ll iterate through a For-loop to set values to each cell of the named range..
For i = 1 To Worksheets(Worksheet_Name).Range(Named_Range).Rows.Count
    For j = 1 To Worksheets(Worksheet_Name).Range(Named_Range).Columns.Count
        Worksheets(Worksheet_Name).Range(Named_Range).Cells(i, j) = Starting_Value ^ Index
        Starting_Value = Starting_Value + Increment
    Next j
Next i
Therefore, the complete VBA code will be:
⧭ VBA Code:
Sub Set_Multiple_Values_to_a_Named_Range_1()

Worksheet_Name = "Sheet1"
Named_Range = "MyRange"
Starting_Value = 8
Increment = 2
Index = 2

For i = 1 To Worksheets(Worksheet_Name).Range(Named_Range).Rows.Count
    For j = 1 To Worksheets(Worksheet_Name).Range(Named_Range).Columns.Count
        Worksheets(Worksheet_Name).Range(Named_Range).Cells(i, j) = Starting_Value ^ Index
        Starting_Value = Starting_Value + Increment
    Next j
Next i
End Sub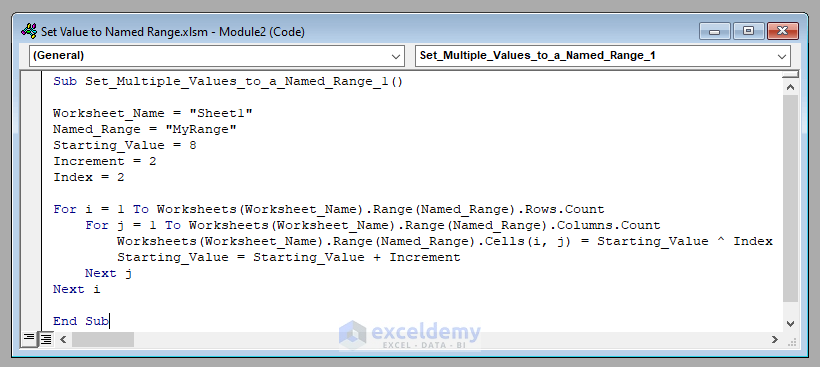
⧭ Output:
Run the code (Again don’t forget to change the Worksheet_Name, Named_Range, Starting_Value, Increment, and Index according to your need before running the code).
It’ll set a series of squares of even numbers starting from the square of 8 (64) in the named range, first row-wise and then column-wise.
3. Set a Series of Values to a Named Range with Excel VBA (First Column, then Row)
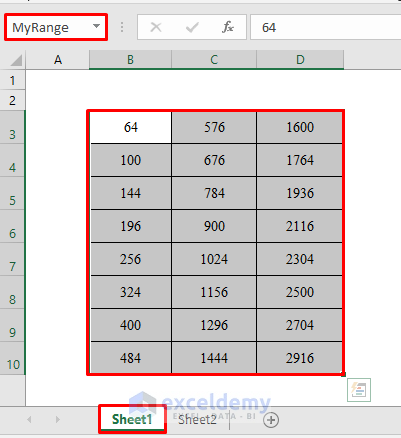
We’ll again insert a series of squares of even numbers starting from the square of 8 to the named range.
But this time we’ll go column-wise first, then row-wise.
The code is the same as the previous one. Only during the iterations, first iterate through the columns, then through the rows.
The VBA code will be:
⧭ VBA Code:
Sub Set_Multiple_Values_to_a_Named_Range_2()

Worksheet_Name = "Sheet1"
Named_Range = "MyRange"
Starting_Value = 8
Increment = 2
Index = 2

For i = 1 To Worksheets(Worksheet_Name).Range(Named_Range).Columns.Count
    For j = 1 To Worksheets(Worksheet_Name).Range(Named_Range).Rows.Count
        Worksheets(Worksheet_Name).Range(Named_Range).Cells(j, i) = Starting_Value ^ Index
        Starting_Value = Starting_Value + Increment
    Next j
Next i

End Sub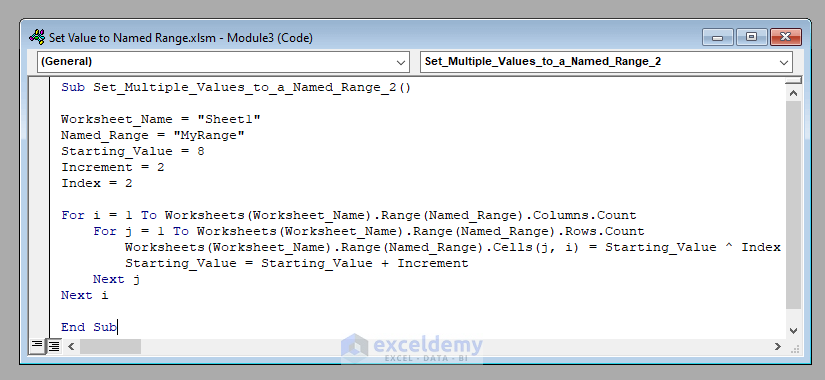
⧭ Output:
Run the code (Obviously by changing the inputs according to your needs). It’ll set the series of required values to the given named range.
Read More: Excel VBA to Create Named Range from Selection
Things to Remember
In this article, I’ve focused on setting values to a named range only.
Also while working with VBA in Excel, you needn’t save any file to run a VBA code. You can see the output of any code without saving the file. But in case you want to save the file for future use, you must save the file as Excel Macro-Enabled Workbook (*.xlsm).
Download Practice Workbook
Download this practice workbook to exercise while you are reading this article.
Conclusion
So, these are the ways to set value (s) to a named range with VBA in Excel. Do you have any questions? Feel free to ask us in the comment section.
Related Articles
- Create Dynamic Named Range with VBA in Excel
- Excel VBA to Loop Through Named Range
- Excel VBA to Delete Named Range
- How to Check If Named Range Exists with Excel VBA

