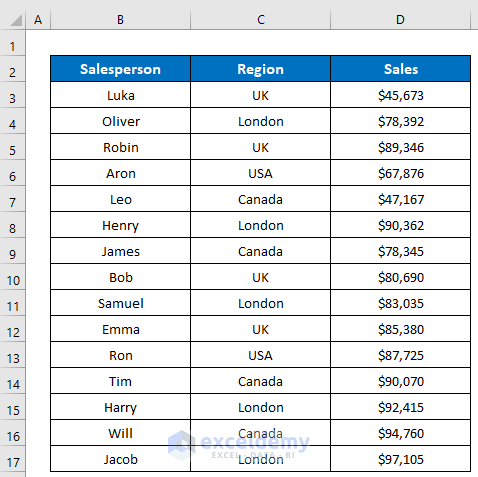
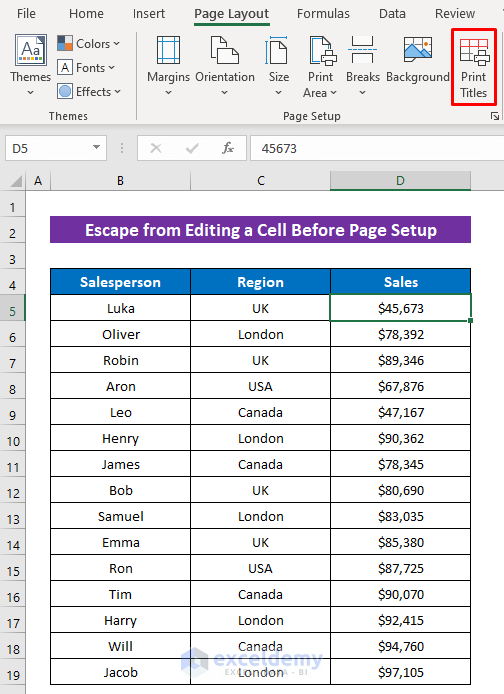
Below is a dataset that represents the sales of various salespersons in different regions.
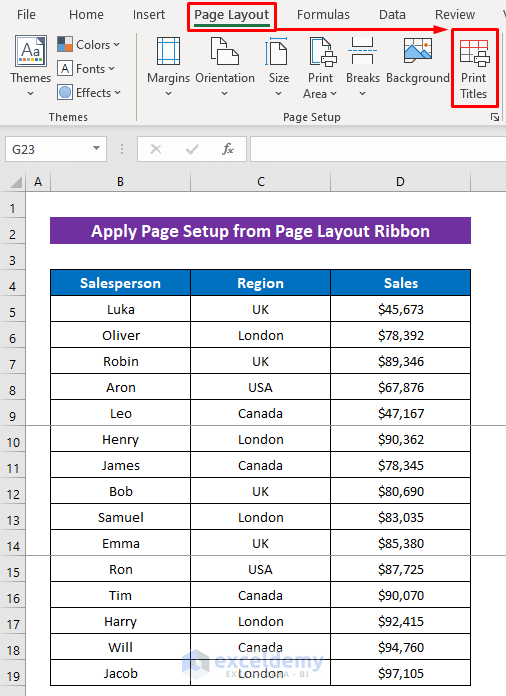
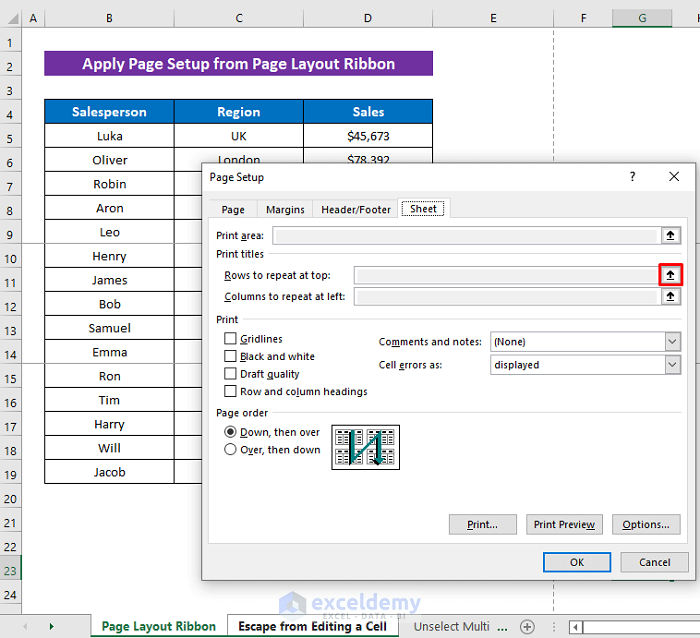
Fix 1: Applying Page Setup from the Page Layout Ribbon
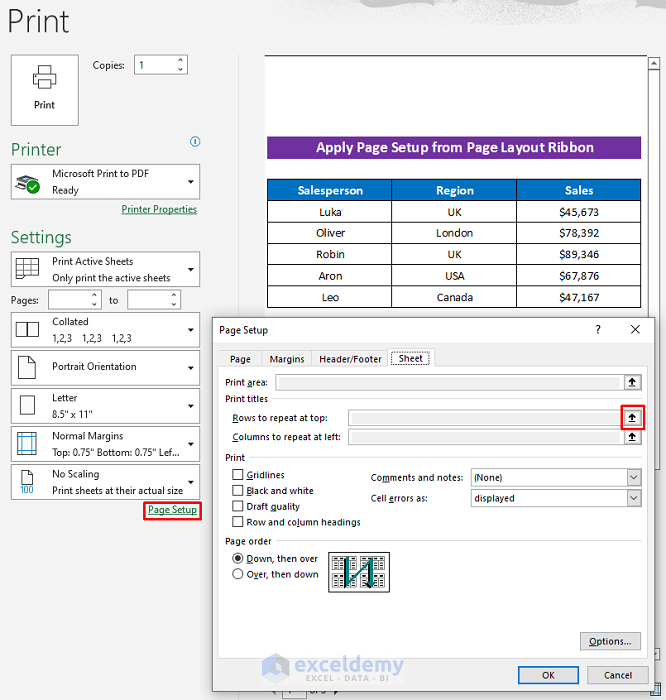
Looking at the image below, the Page Setup dialog box is open from the print preview window and the Rows to Repeat at Top feature is grayed out. There’s no way to use this command form here.
Solution:
- Open the Page Setup dialog box from the Page Layout ribbon and then use the Rows to Repeat at Top feature.
- Click Page Layout > Print Titles.
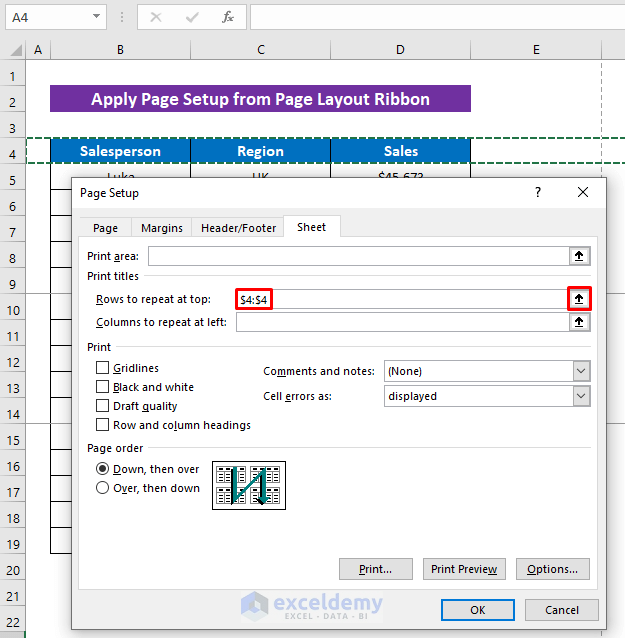
The feature should now work.
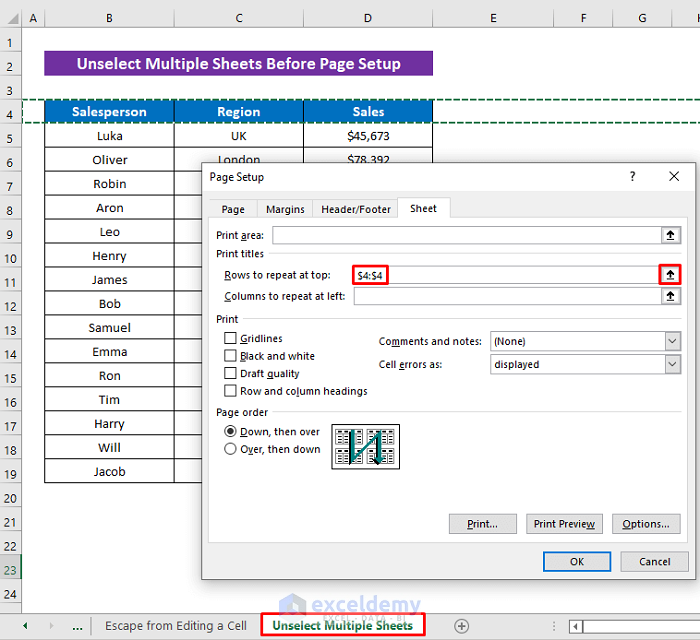
Fix 2: Unselect Multiple Sheets Before Page Setup
Below, the Rows to Repeat at Top feature is ticked, but it won’t work although I opened it from the Page Layout ribbon.
- Two sheets were selected before using the feature.
Solution:
- Select only one sheet and then apply the Rows to Repeat at Top feature.
It should now work.
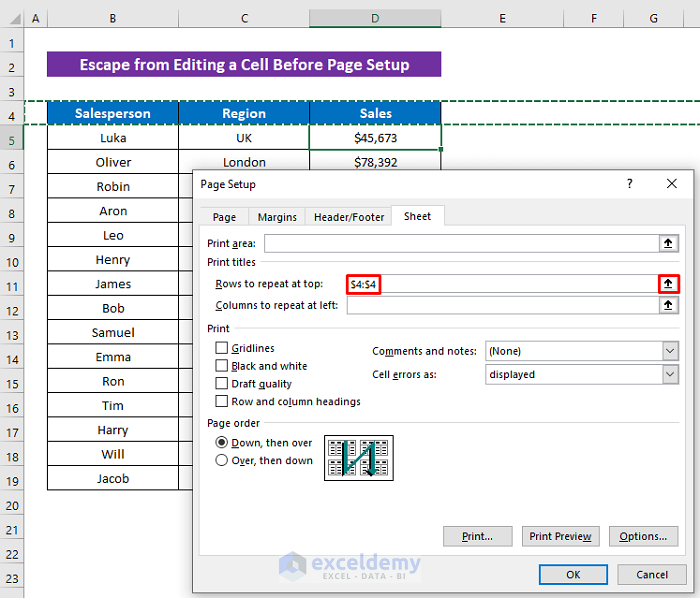
Fix 3: Exit Editing a Cell Before Page Setup
Below, Page Layout is clicked on, but no option is available.
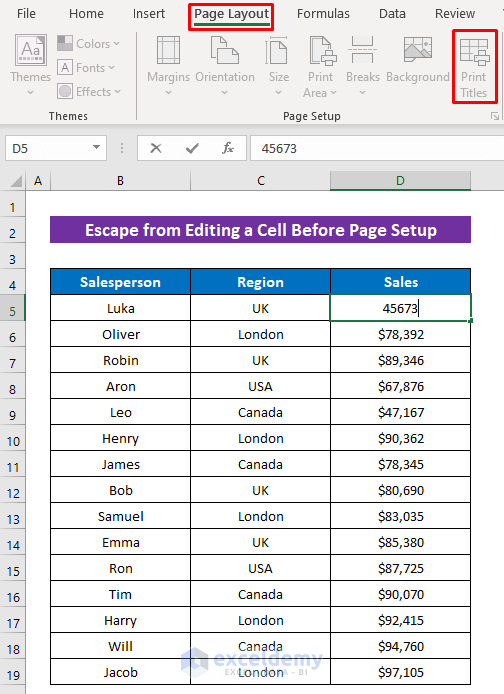
Cell D5 was being edited and it was kept in editing mode.

Solution:
- Press the ESC key to exit from the editing mode of a cell.
Every option of the Page Layout ribbon is available.
You can now apply the Rows to Repeat at Top feature.
Read More: How to Repeat Rows in Excel Based on Cell Value
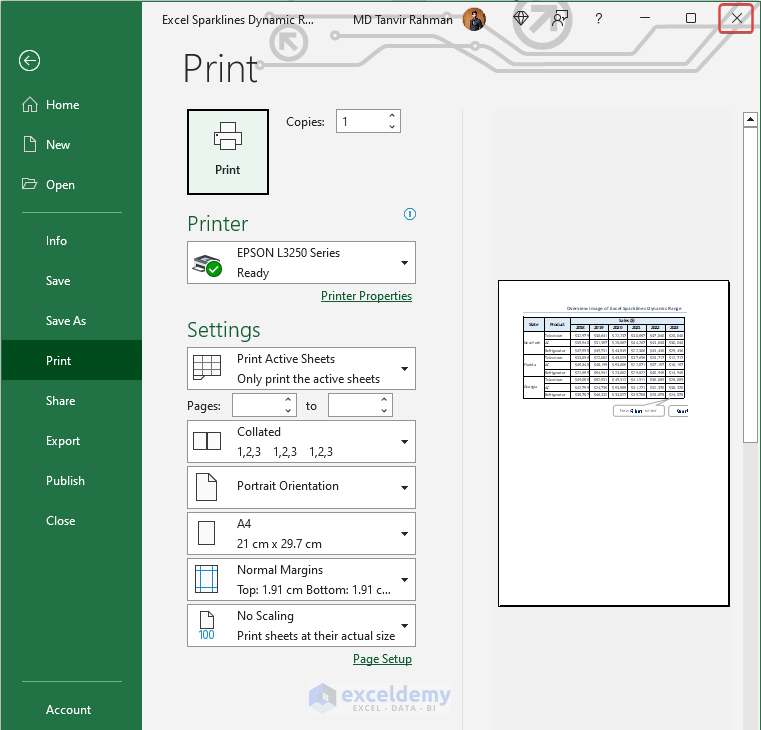
Fix 4: Close Other Workbooks with an Open ‘Print Preview’
If a Print Preview window is open for another workbook, the Row to repeat at top field is prevented from functioning, leading to the greyed-out problem for the current workbook.

Solution:
Check if there is another workbook running in the background.
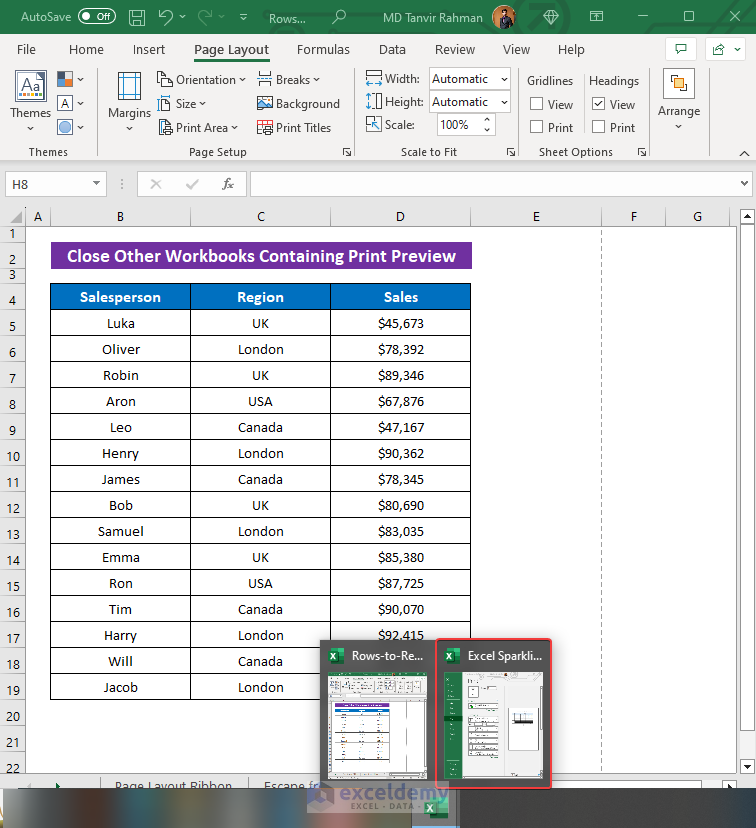
- If this is the case, as in the image above, close the additional window.
- The Rows to repeat at top field should now perform for the current workbook.

Read More: How to Repeat Multiple Rows in Excel
Download the Practice Workbook
You can download the free Excel workbook to practice.
Related Articles
- How to Repeat Cell Values in Excel
- How to Repeat Cell Value X Times in Excel
- How to Repeat Formula for Each Row in Excel
- How to Repeat Formula in Every nth Row in Excel
<< Go Back to Repeat in Excel | Excel Cell Format | Learn Excel
Get FREE Advanced Excel Exercises with Solutions!

I am still greyed out and none of these apply. Any other suggestions?
Hello KATHY,
Thanks for your feedback. Would you please check whether your worksheet is protected or not? If not then your problem is quite specific. So if you would share your file with us then hope, we could find out the reason and provide a solution.
None on these are helping. It’s still greyed out.
Hello ROXY,
Thanks for your feedback. The above three issues are all the most common and possible issues that we have recognized till now. Would you please check whether your worksheet is protected or not? If not then maybe your problem is quite particular and that’s quite difficult to find without the file. So if you would share your file with us then hope, we could find out the reason and give a proper solution.
*Sharing email address: [email protected]
none of the above options resolved the grayed out options “Rows to repeat at top:” “Columns to repeat at Left:” “Print area:” the other functions in page setup work.
Hello Ken K,
Thanks for your feedback. The Print Title options including Rows to Repeat are always disabled in the Print Preview’s page setup. Display the spreadsheet in Normal view, go to the Page Layout tab and click on Print Titles. You may check whether your worksheet is protected or not. If you are facing the same problem then your problem may be quite exceptional. So, we can not solve the problem without your Excel file. You can share your Excel file via [email protected].
Hopefully, we will be able to solve your problem. Keep supporting us.
Regards,
Fahim Shahriyar Dipto
Excel & VBA Content Developer.
nope, doesn’t work and I have a very experienced excel user. I have never experienced this issue before today (2/6/23)
Hello JOE,
Thank you for your feedback. Did you try the solutions suggested in the article and did they work before 6 February 2023?
If the solutions worked before, then you may need to repair your Microsoft Office application.
Hopefully, this resolves the problem.
Regards,
ExcelDemy
Also, make sure you don’t have print preview with or without page setup (from the preview page) open in another document, or it still will be grayed from the ribbon’s page layout > print titles in the active document.
Hello PHIL REINIE,
Thanks for your feedback. The issue you introduced is really a valid issue that we never faced before. Thanks a lot for sharing it with us. We have added this solution in our article, we hope it will help other users.
Thanks and regards,
Md. Sourov Hossain Mithun
ExcelDemy
Wonderful! You made it look so very simple, which Microsoft forums could not do! Great!
Hello Venkatesh,
You are most welcome.
Regards
ExcelDemy
Searched everywhere to solve this issue and your article was the only one found which had the solution – didn’t realize another open excel file in print preview mode would deter this option…thank you!
Hello Melissa,
We are glad that our article solved your problem. You are most welcome. Thanks for your appreciation.
Regards
ExcelDemy
I’m also facing the similar issue. Kindly provide the solution
Hello Shrinivas,
If you’re facing the same issue where the Rows to Repeat at Top option is greyed out, it’s usually because you’re not in Page Layout view or you’re editing the file in a restricted mode.
Here are some quick fixes:
1. Go to the View tab → Switch to Normal or Page Break Preview view.
2. Then go to Page Layout tab → Print Titles → you should now be able to set rows to repeat.
3. Make sure the worksheet is not protected and the file is not in “Page Layout” editing mode from Print Preview.
If using Excel Online, download the file and open it in the desktop version, as this option isn’t available in the online version.
Regards
ExcelDemy