Anchoring the text box in Excel means fixing the position of the text box relative to a specific location. This ensures that the text box remains in a particular position even when you scroll through the worksheet or make changes to the size or position of nearby cells.
In this free Excel tutorial, you will learn how to anchor text box in Excel. We’ll use relevant practical datasets to give you a better understanding.
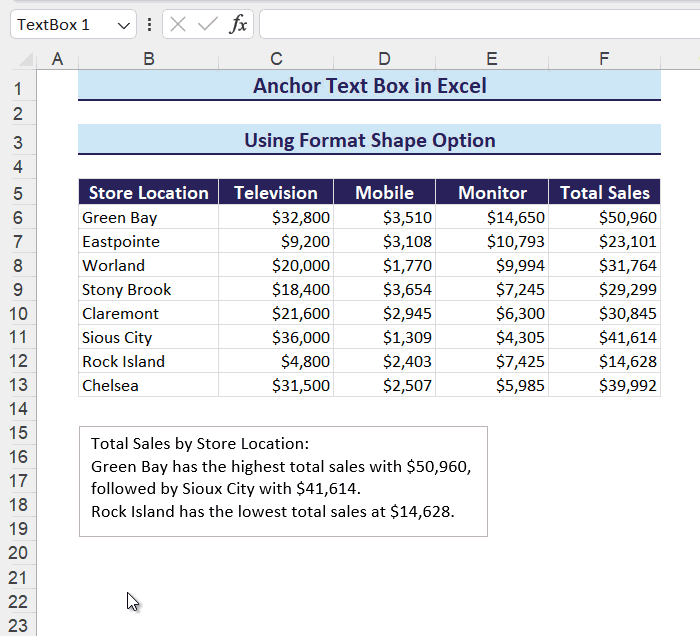
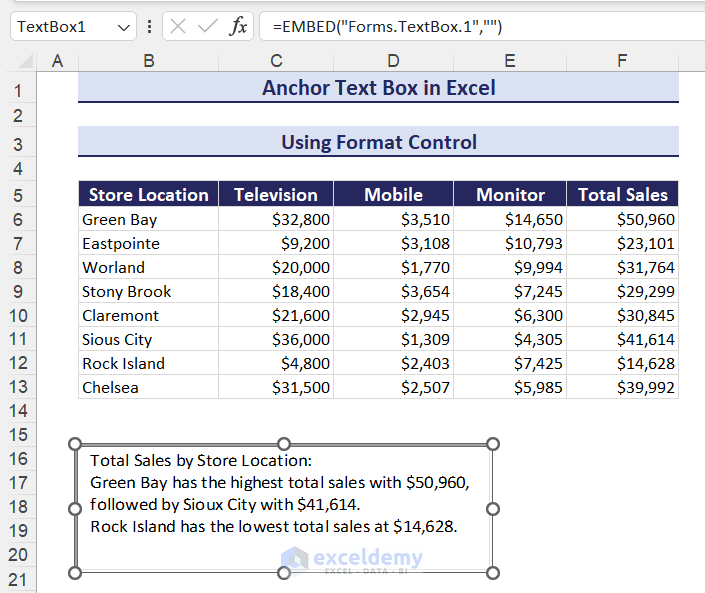
In the following gif, we have a dataset containing sales of different accessories in different locations. Below that, there is a text box holding a summary of the dataset. It is displaying the highest and lowest sales. Here, we are anchoring the text box using the Format Shape option.

In this article, we’ll show you how to anchor text box using the Format Shape option and the Format Control command.
⏷Using Format Shape Option
⏷Using Format Control
1. Using Format Shape Option
In this method, you’ll learn how to anchor the text box in Excel using the Format Shape command.
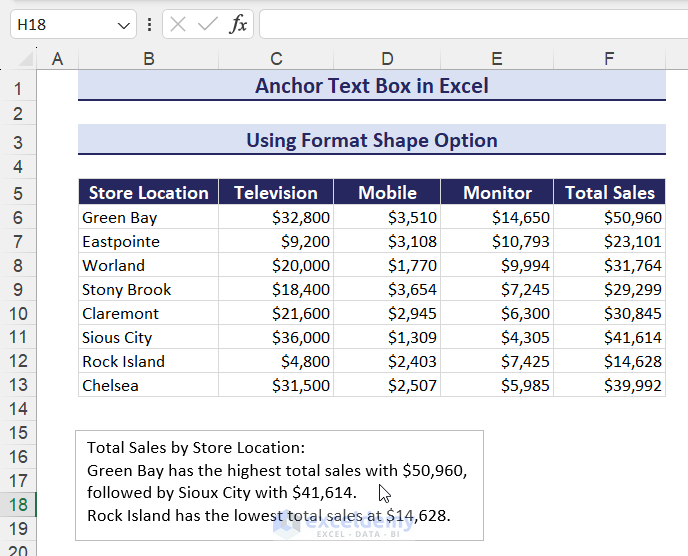
Here, we have a dataset containing sales of different accessories in different locations. Below that, there is a text box holding a summary of the dataset. Now, we will anchor the text box using the Format Shape command.

Steps:
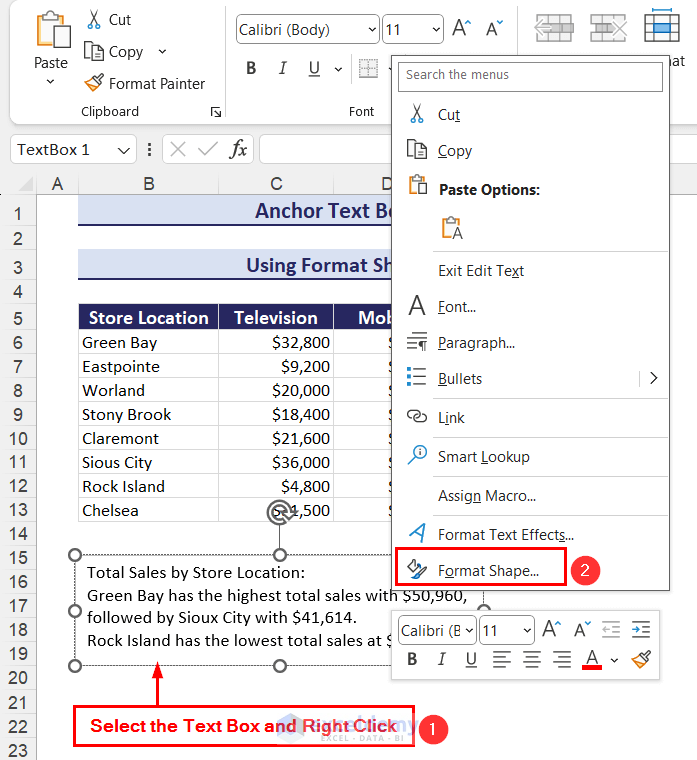
- First, click on the text box.
- Now, right-click on your mouse to launch the Context menu and choose the Format Shape option.
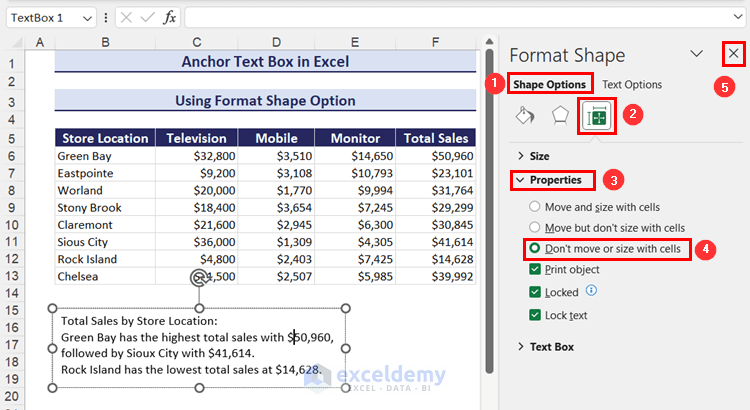
- As a result, a side window called Format Shape will appear.
- After that, from the Shape Options section, click on the Size & Properties drop-down.
- Then, click on the drop-down arrow of the Properties option and check the Don’t move or size with cells option.
- Close the side window.
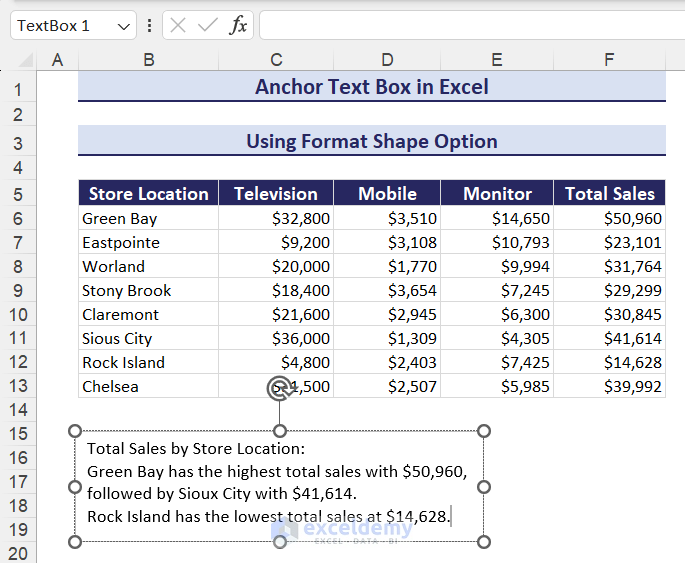
- The text box will be anchored.
- Now, if you change the row or column size, the text box remains in its initial position. But when you select the text box and hover your mouse while keeping the text box selected, the text box will move. We’ll solve this problem in the next step.
- Go to Home tab => Click on the Format drop-down under the Cells group of commands => Select the Protect Sheet option.
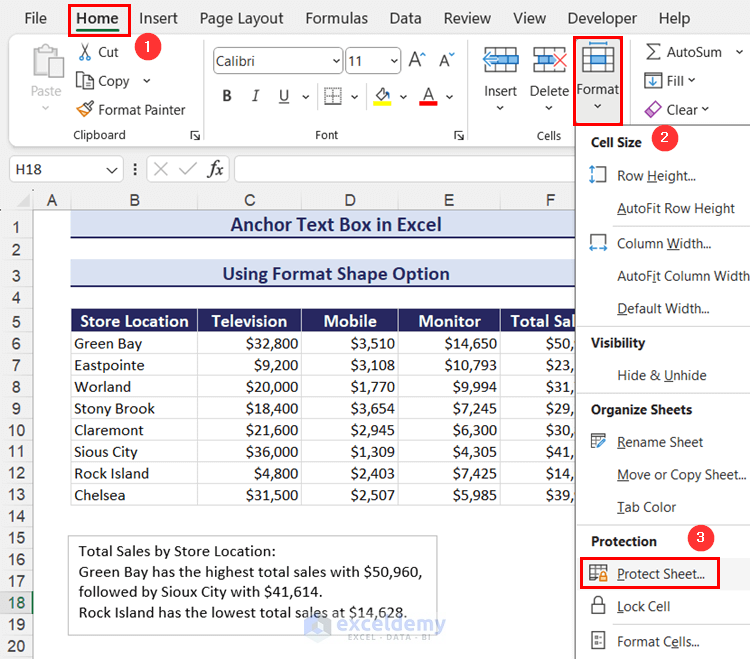
- The Protect Sheet dialog box will appear.
- Tick all the options except Edit objects and press OK.
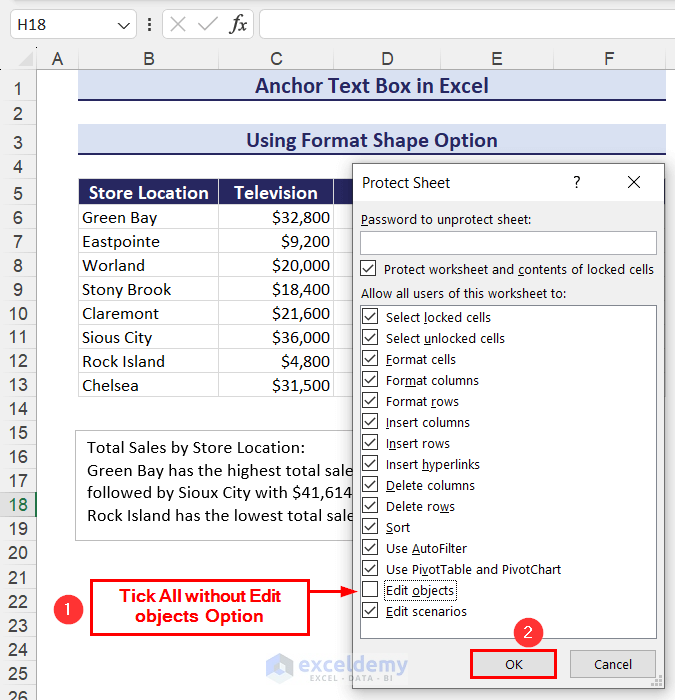
- The sheet is now protected. You cannot select or move the text box.
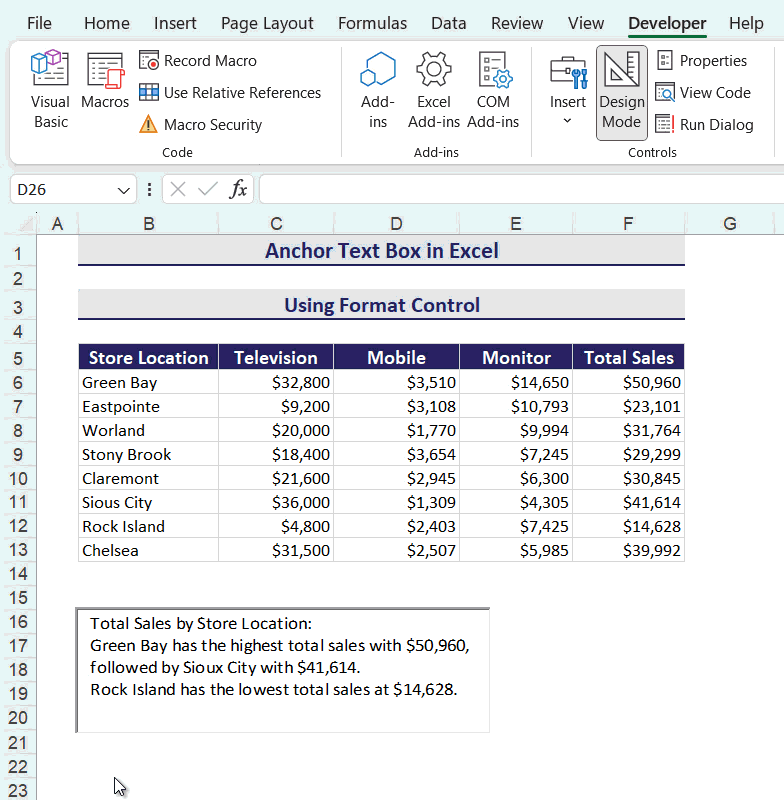
2. Using Format Control
In this example, you’ll learn how to anchor the text box that is inserted from the ActiveX Controls group using the Format Control command.
You can insert text boxes from the ActiveX Controls group under the Developer tab in Excel. These text boxes will help you to create interactive forms in Excel. You can input data or make selections within these text boxes. You can write VBA code to manipulate the content of these text boxes.
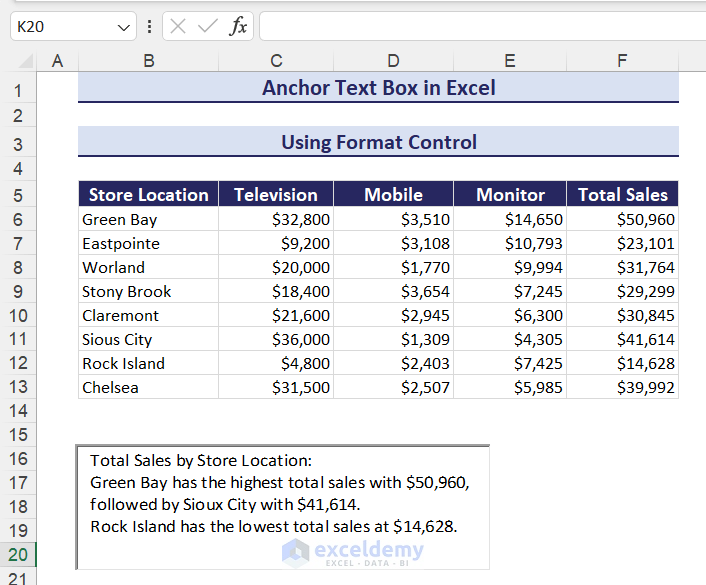
The dataset will be the same, and we will anchor the text box to demonstrate the procedure.
Steps:
- Go to the Developer tab and click on the Design Mode command.
- Right-click on the text box after selecting it and choose the Format Control option from the Context menu.

- As a result, a small dialog box called Format Control will appear.
- Then, in the Properties tab, select the Don’t move or size with cells option.
- Finally, click OK.

- The text box will be anchored.
- Now, if you change the row or column size, the text box remains in its initial position. But when you select the text box and hover your mouse while keeping the text box selected, the text box will move. We’ll solve this problem in the next step.
- Go to the Developer tab => Click on the Design Mode option to unselect it.
- Now, you cannot move the text box at all.

Download Practice Workbook
In this article, we have shown you how to anchor text box using the Format Shape command. Also, when you insert a text box from the Developer tab, you can anchor it using the Format Control command. If you know any other methods or face any problems that we have not discussed in this post, please share them with us in the comment box.
Related Articles
- How to Put Space in Text Box in Excel
- How to Convert Text Box to Cell in Excel
- How to Insert Scrolling Text Box in Excel
- How to Create Floating Text Box in Excel
- How to Add Text Box in Excel Graph
- How to Remove Text Box Border in Excel
<< Go Back to TextBox | Learn Excel
Get FREE Advanced Excel Exercises with Solutions!
