If you are looking for how to remove text box border in Excel, then you are in the right place. A text box is an empty field where a user can fill in a piece of text. It generates a clean space to hold the text without occupying a cell or disrupting data and equations. While using Excel, we often need to make a text box and add or remove borders to or from it. In this article, we’ll try to discuss how to remove the text box border in Excel.
How to Remove Text Box Border in Excel: 2 Useful Methods
Excel offers a couple of ways to remove the text box border. To remove an existing text box border, we have to insert a text box first. It is very easy to make it. After creating the text box, we can follow the ways to remove it. Those are very handy to use. We just need to follow some simple steps.
1. Using Shape Format Feature
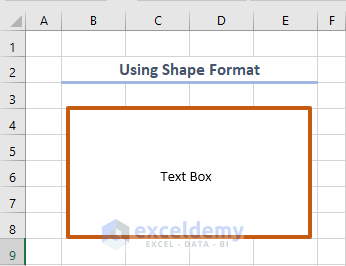
Using the Shape Format feature is the easiest way to remove the text box border. Suppose we have a text box with a border in the following picture. We need to remove this border.
- Firstly, click on the text box.
- Secondly, go to Shape Format > select the icon of Shape Outline > choose No Outline.
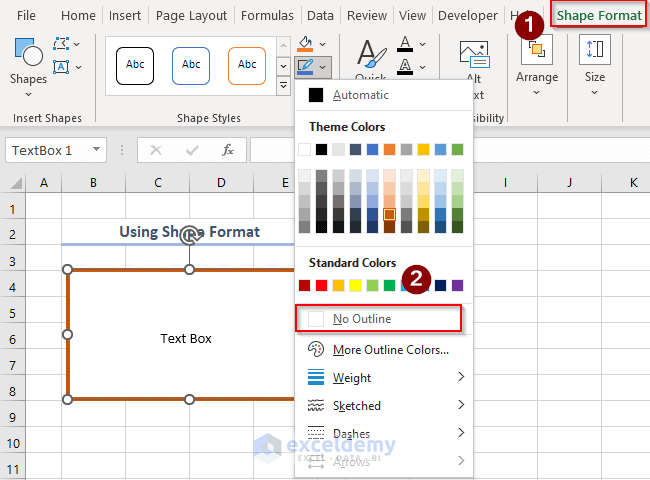
- Eventually, we’ll see that the border of the text box has been removed.

Read More: How to Convert Text Box to Cell in Excel
2. Utilizing VBA
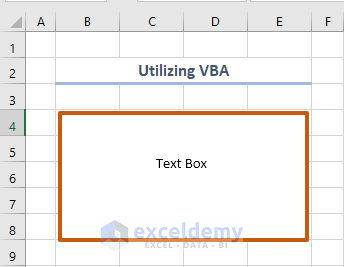
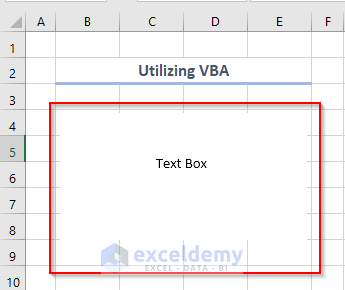
We can use VBA code to remove the text box border very easily. Suppose, we have a text box border in the following picture like this. We need to remove this border.
Steps:
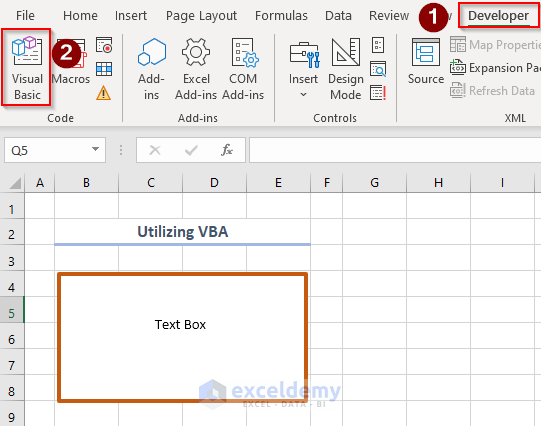
- Firstly, go to the Developer tab > select Visual Basic.
- Secondly, click Insert > select Module.

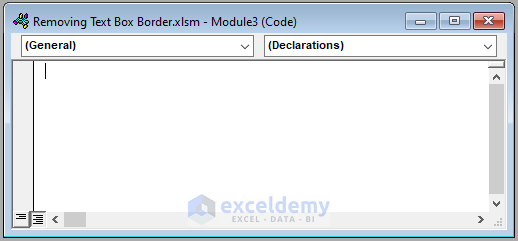
- Eventually, a new module will appear like this.
- Thirdly, write the following code in the module.
Sub DeleteTextBoxBorder()

Dim box As Shape

On Error GoTo BoxBorder

For Each box In ActiveSheet.Shapes
If box.Name Like "TextBox*" Then
box.Line.Visible = msoFalse
End If

BoxBorder:
    Next

End Sub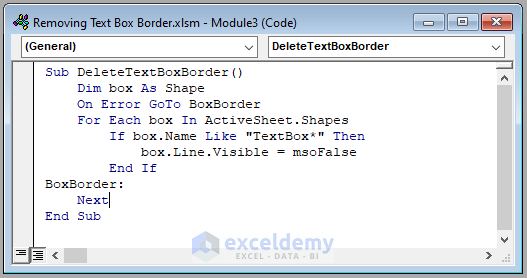
Here, we have declared a sub procedure DeleteTextBoxBorder where we have filtered the type of the shape with something like TextBox (usually when you create a text box the shape’s name is like TextBox 1, TextBox 2,). And made its line visibility mosFalse that leads not display the border.
- Fourthly, click Run > select Run Sub/UserForm.

- Finally, we’ll see that the text box border is removed like this.
Read More: How to Insert Scrolling Text Box in Excel
How to Remove Cell Border in Excel
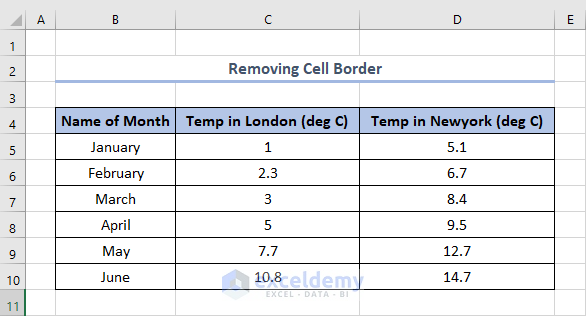
We can remove the cell box border very easily. There are a couple of ways to do that, but we’ll discuss only one way, and that is using the Font box. Suppose, we have the following dataset where cells B4:D10 are covered with borders.
We’ll show the way to remove the borders.
Steps:
- Firstly, select the cells where there are borders. In this case, it is cells B4:D10.
- Secondly, go to Home > click the drop-down menu of Borders > select No Border.
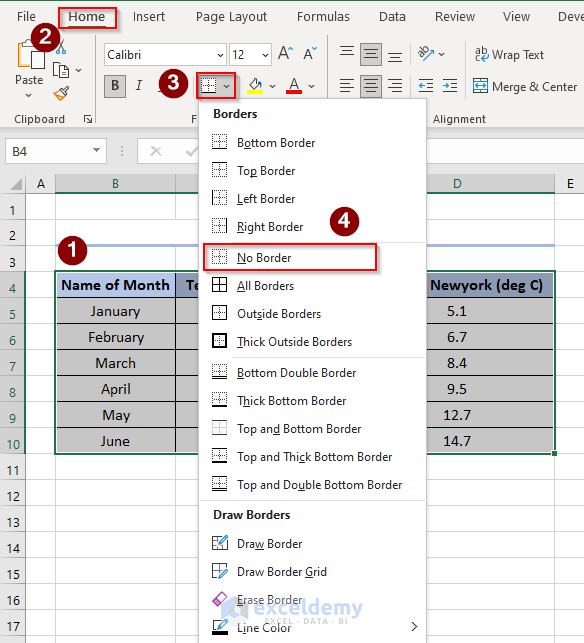
- Consequently, we’ll see that the borders are removed from the selected cells like this.

Download Practice Workbook
Conclusion
That’s all about today’s session. These are the ways to remove text box borders in Excel. We strongly believe this article would be highly beneficial for you.
Related Articles
- How to Add Text Box in Excel Graph
- How to Put Space in Text Box in Excel
- How to Anchor Text Box in Excel
- How to Create Floating Text Box in Excel
- How to Add a Dynamic Text Box in Excel
<< Go Back to TextBox | Learn Excel
Get FREE Advanced Excel Exercises with Solutions!
