Protection is a must for valuable data from unauthorized editing. We can protect Excel Sheet from editing. Here, We are going to discuss how to protect Excel Sheet from editing.
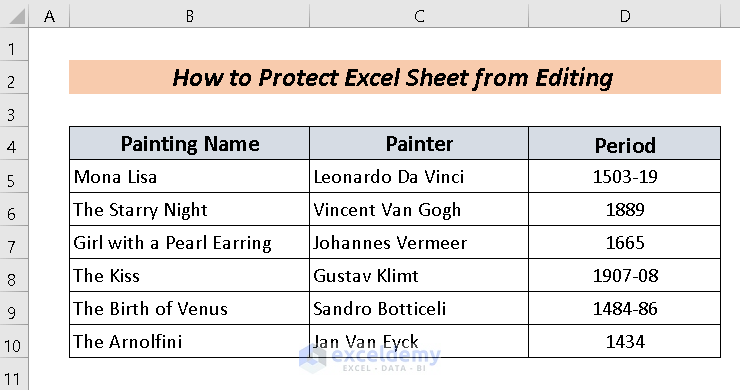
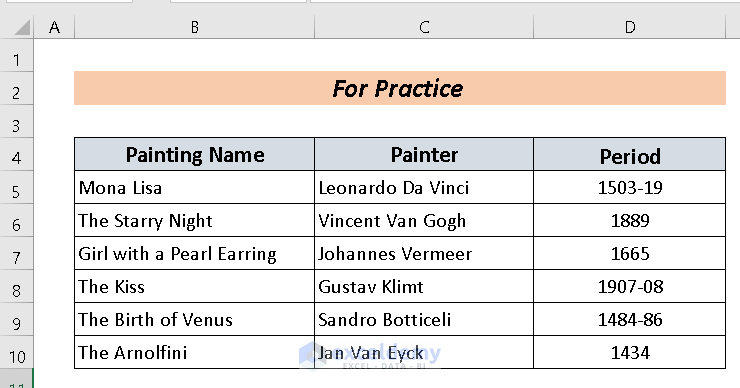
For more clarification, I am going to use a dataset containing Painting Name, Painter, and Period column name.
How to Protect Excel Sheet from Editing: 7 Smart Ways
1. Use of Protect Sheet Feature to Protect Excel Sheet from Editing
One of the simplest ways to protect an Excel sheet is the use of Protect Sheet command under the Review Tab.
Steps:
- First, click on the Review tab.
- Then, select Protect Sheet.

A Protect Sheet box will appear.
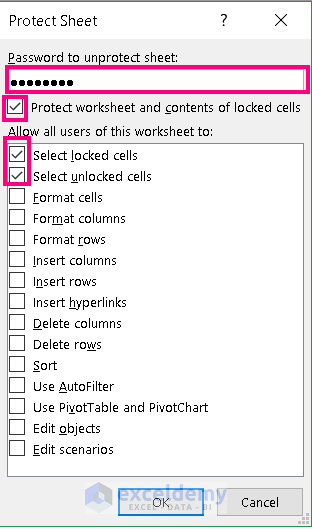
- Input a suitable password in the Password to unprotect sheet Here, I used the password 12345678.
- Check on the boxes of Protect worksheet and contents of locked cells, Select locked cells, and Select unlocked cells.
- Then, hit OK.
Another box named Confirm Password will appear.
- Again, input the same password in the Reenter password to proceed.
- Click on OK.

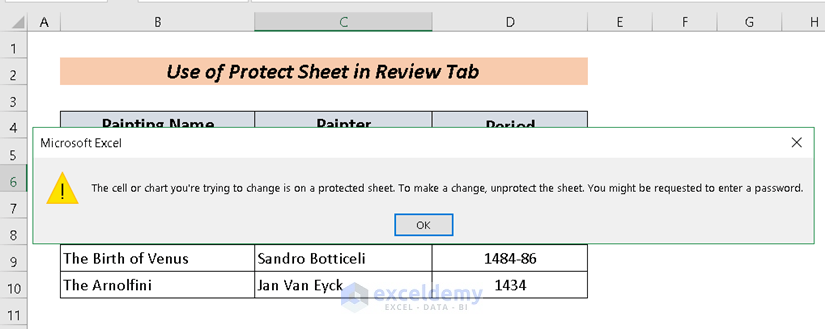
Thus, the sheet will have protection. If you want to change any cell value then it will show you a warning message.
2. Application of Protect Workbook Command to Protect Sheet from Editing
In the Review Tab, there is another option named Protect Workbook that will protect the sheet as well as the whole workbook.
Steps:
- Select the Review tab.
- Then, choose Protect Workbook.

A box named Protect Structure and Windows will appear.
- Write down the password and click OK. I input the password 12345678.

- Rewrite the password in the Re-enter password to proceed in the Confirm Password dialog box.
- Press OK to finish the protection process.

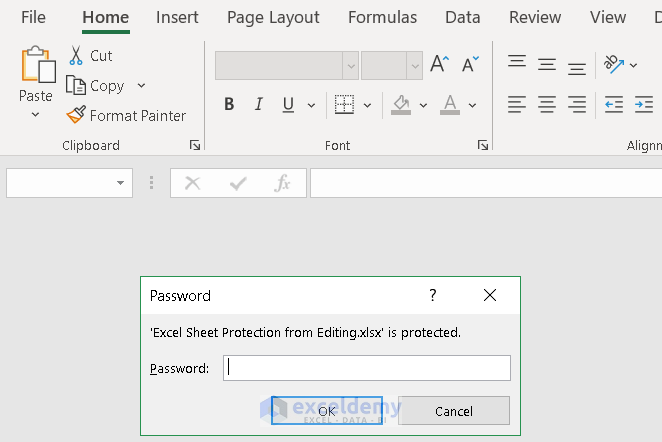
So, you won’t be able to do any further editing without a password.
Read More: How to Protect Excel Sheet from Deleting
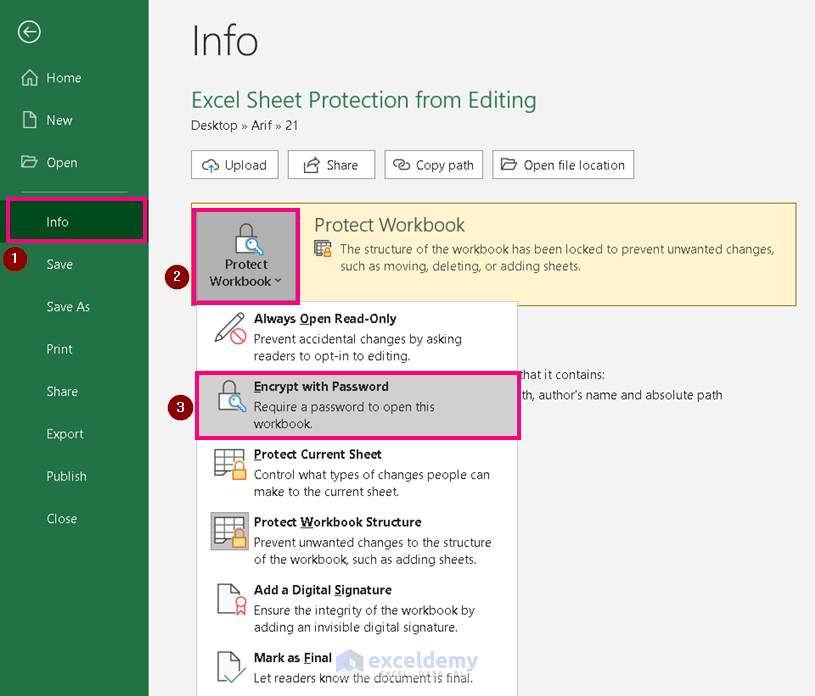
3. Use of Encryption with a Password Option to Protect Sheet from Editing
We can also use Encrypt with Password feature from the File Tab to protect the sheet from editing.
Steps:
- Select the File tab.

- Next, go to Info.
- Click on Protect Workbook.
- Then, select Encrypt with Password.
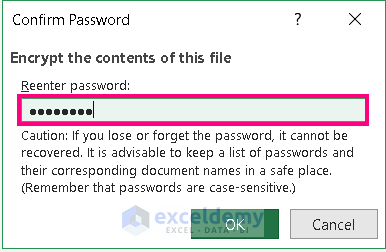
Encrypt Document box will appear.
- Input the password in the Password I used the password 12345678 here.
- Press OK.

A box named Confirm Password box will come forward.
- Again, input the same password in the Reenter Password box.
- Hit OK to finish the process.
Thus, the sheet will remain protected. If you want to change any cell value then it will show you a warning message.

4. Adoption of Read-Only Mode to Protect Sheet from Editing
Read-Only mode is another amazing feature to protect sheet from editing.
Steps:
- Choose the File tab.

- Then, pick the Info.
- Click on Protect Workbook.
- Next, select Always Open Read-Only.
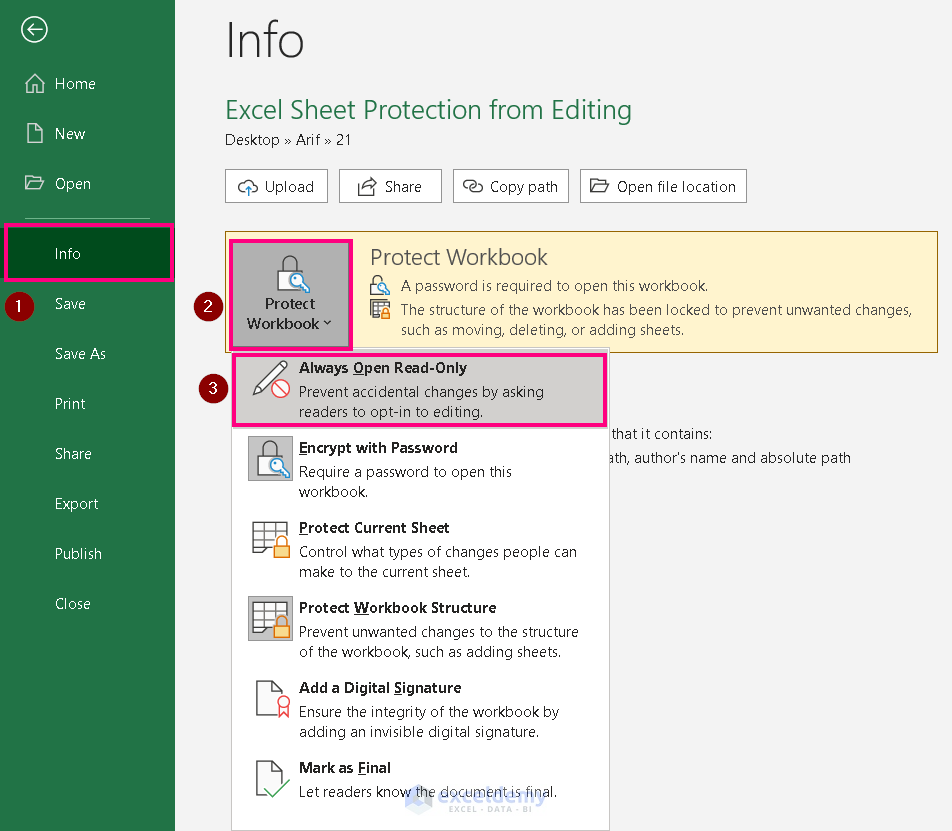
Thus, the sheet will have protection from editing.
If anyone opens the workbook, he will see the following box. It is very simple protection as anyone can edit the sheet just by clicking on No.

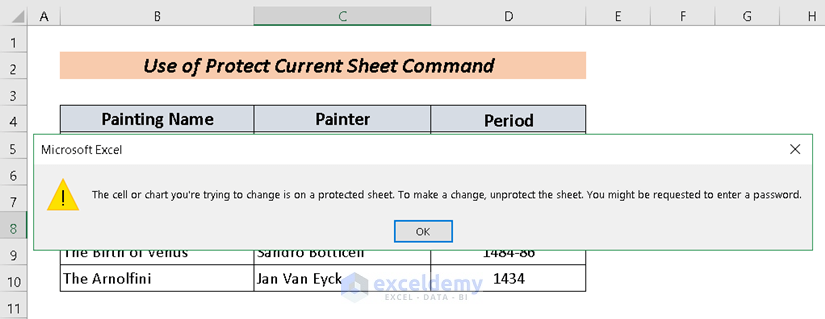
5. Use of Protect Current Sheet Command to Protect Sheet from Editing
There is a command named Protect Current Sheet which we can use to protect the sheet from editing.
Steps:
- Click on the File tab.

- Then, select the Info.
- Click on Protect Workbook.
- Next, select Protect Current Sheet.

Then, A Protect Sheet box will appear.
- Write down a password in the Password to unprotect sheet Here, I used the password 12345678.
- Next, check on the boxes named Protect worksheet and contents of locked cells, Select locked cells, and Select unlocked cells.
- Click OK.

A Confirm Password box will appear.
- Write the same password again in the Reenter password to proceed.
- Finally, Click on OK to fulfill the protection process.

So, no further editing is possible.
Read More: Protect Excel Sheet but Allow Data Entry
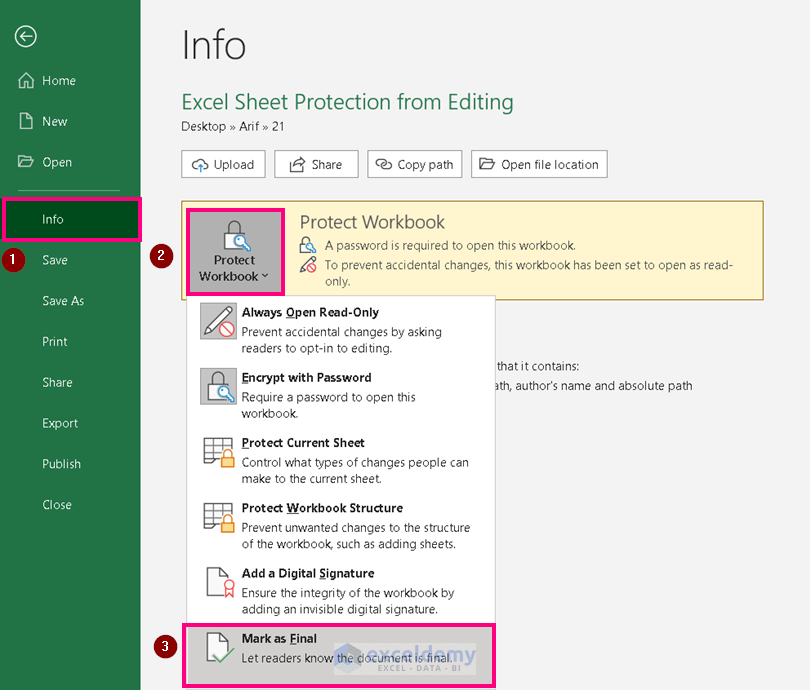
6. Applying Mark as Final Feature to Protect Sheet from Editing
Mark as Final command will protect the sheet as well as the whole workbook.
Steps:
- Firstly, go to the File tab.

- Select the Info option.
- Then, click on Protect Workbook.
- Pick Mark as Final.
A warning box will come forward.
- Press OK to end the procedure.

So, the sheet will be protected from any further editing.

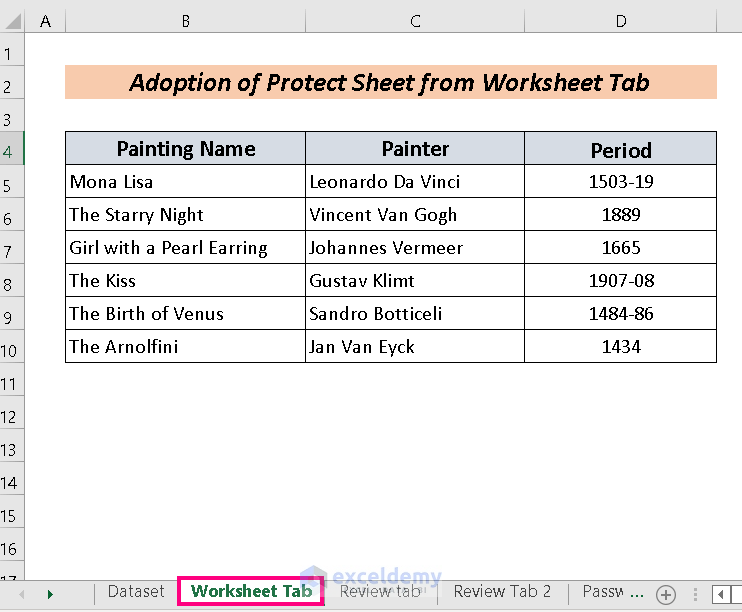
7. Using Right-Click to Protect Sheet from Editing
We can also protect the sheet from the Worksheet Tab.
Steps:
- Right-click on the Tab you want to protect.
- Choose Protect Sheet from the options.
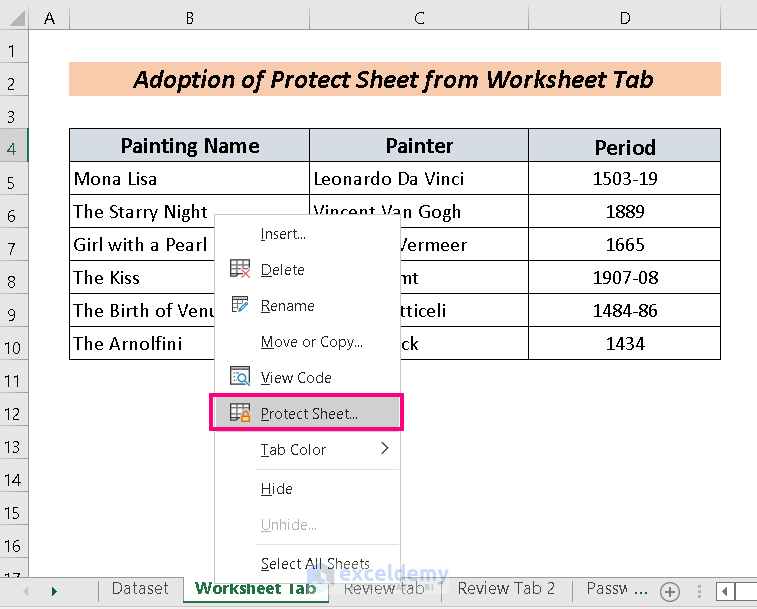
Then, A Protect Sheet box will come on the screen.
- Input a password in the Password to unprotect sheet My used password is 12345678.
- Next, check on the boxes of Protect worksheet and contents of locked cells, Select locked cells, and Select unlocked cells.
- Click OK.

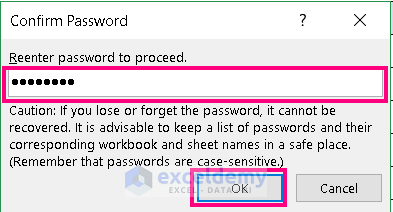
This time, another box named Confirm Password will appear.
- Again, input the same password in the Reenter password to proceed.
- Press OK and the process is complete.
Finally, we have our protected sheet. If you want to change any cell value then it will show you a warning message.

Practice Section
You can practice here for more expertise.
Download Practice Workbook
Conclusion
I have tried to explain seven smart approaches on how to protect Excel sheet from editing as simply as possible. I hope it will be helpful for Excel users. For any more questions, comment below.
Related Articles
<< Go Back to Protect Excel Sheet | Excel Protect | Learn Excel
Get FREE Advanced Excel Exercises with Solutions!
