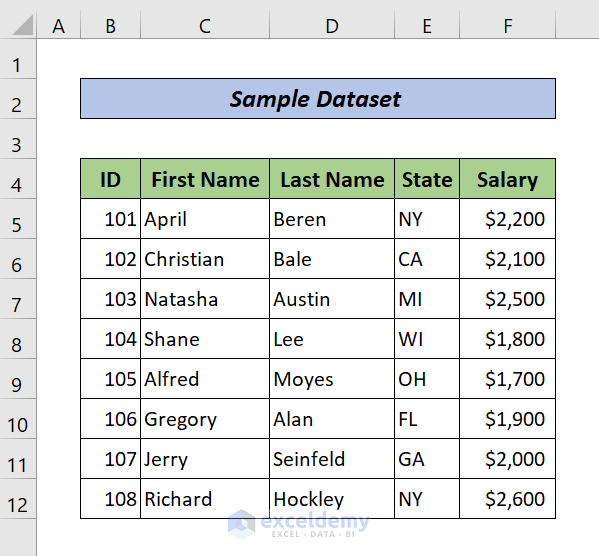
In this article, we present 2 handy approaches to protect an Excel sheet while still allowing data entry. We’ll use the following dataset of some people’s first names, last names, states, and salaries, and protect the sheet but allow data entry in certain cells.
Method 1 – Using the Protection Tab from the Format Cells Option
To protect the Excel sheet but allow data entry, we’ll have to unlock the cells first, then select the cells to be locked, and then protect the worksheet again.
Steps:
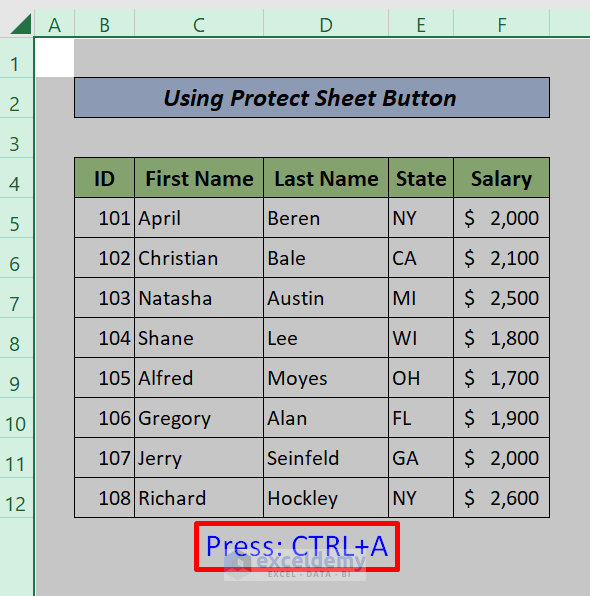
- Press CTRL+A to select the entire worksheet.
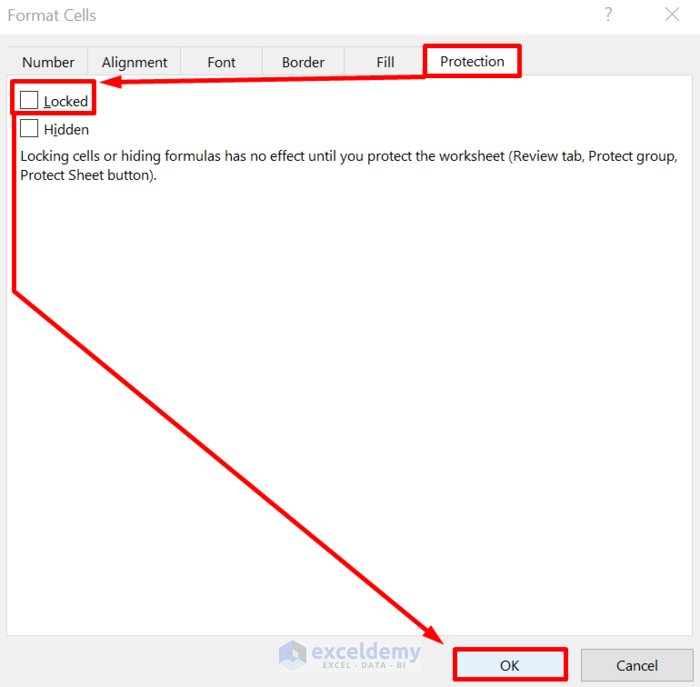
- Press CTRL+1 to open the Format Cells window.
- In the Protect section, unmark Locked checkbox and click OK.
- Select the cells you want to protect with a password.
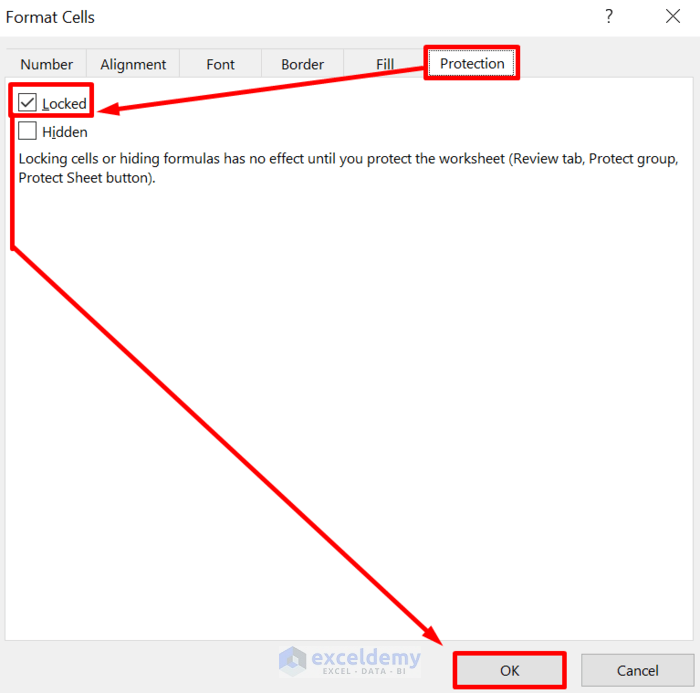
- Again press CTRL+1 to open the Format Cells window.
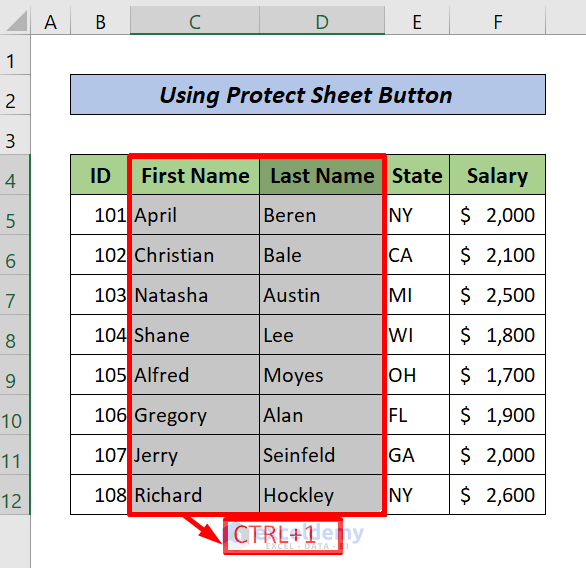
- This time, check the Locked option and then click on OK.
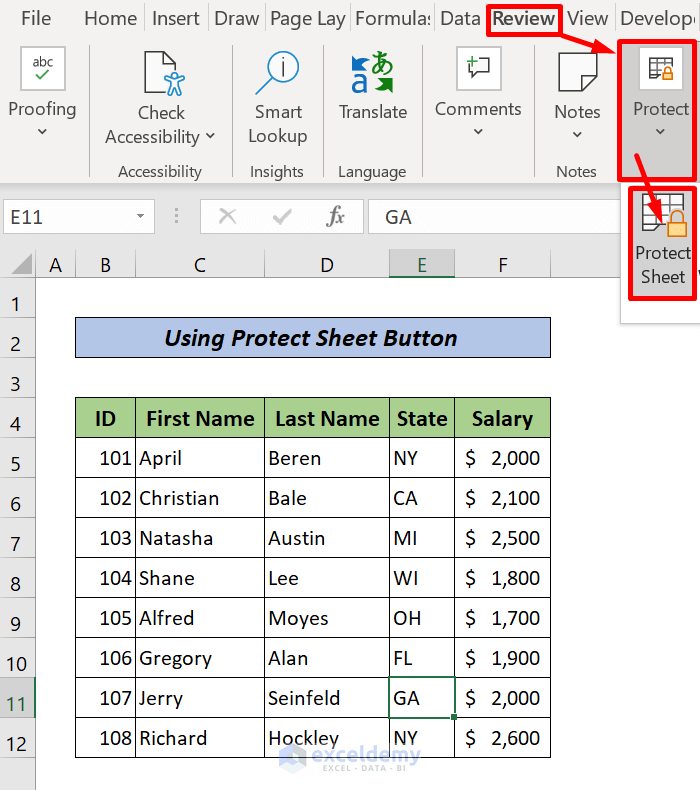
- Go to the Review tab and under the Protect group, click on Protect Sheet.
The Protect window will pop up.
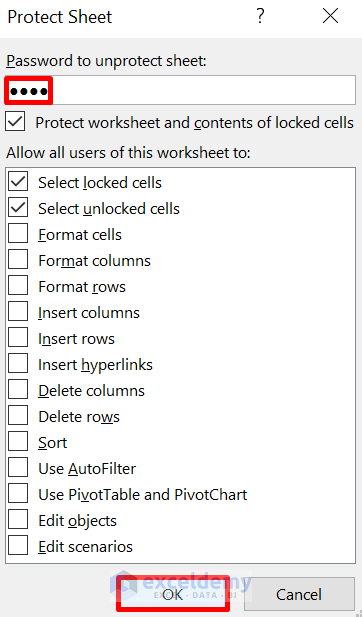
- In the Password box, enter a convenient password and click OK.
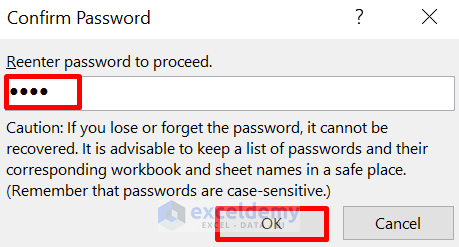
A Confirm Password dialog box will appear.
- Re-enter your password and click OK.
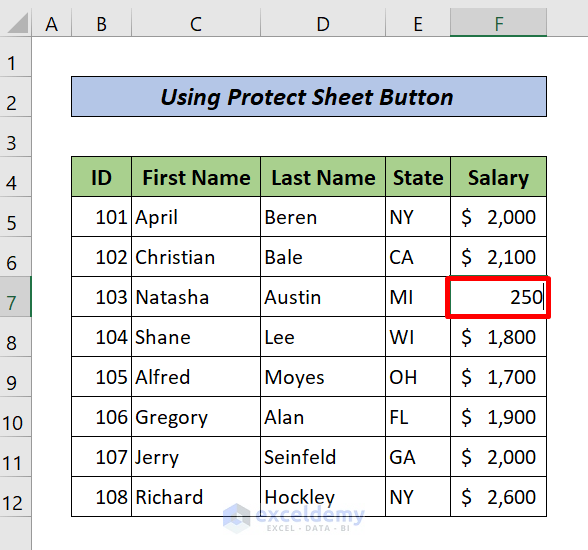
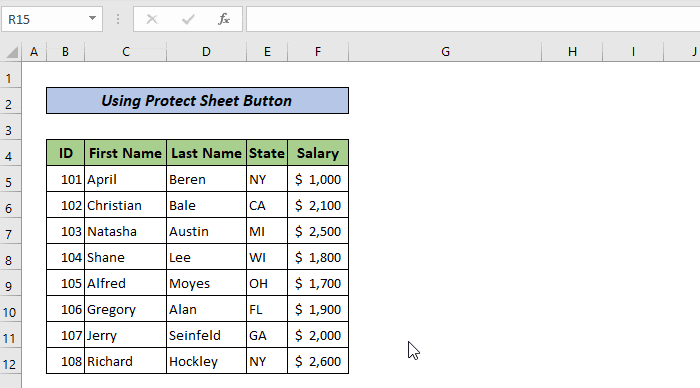
Now, we can enter data into all the cells except C4:C12 and D4:D12. For example, we can easily edit cell F7.
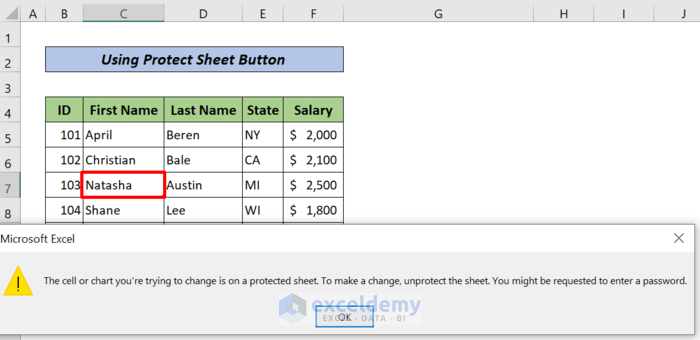
The cells C4:C12 and D4:D12 are password protected. To enter data in these cells, the password will need to be entered first.
Here is an animation to clarify this method.
Read More: How to Protect Excel Sheet from Deleting
Method 2 – Using VBA Code
We can also protect an Excel sheet but allow entering data in the cells by running a VBA code.
Steps:
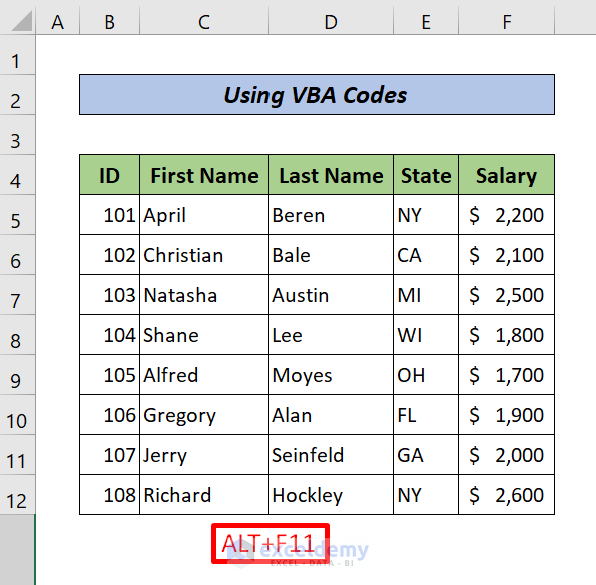
- Select the whole worksheet and press the hotkey ALT+F11 to open the “Microsoft Visual Basic for Applications” window.
- Or, click on the Developer tab > Visual Basic > Insert > Module.
A module window will appear.

- Copy the following code and paste it into the module box.
Sub ProtectSheetButAllowDataEntry()
ActiveSheet.Protect Userinterfaceonly:=True, AllowFiltering:=True
Range("B4:F12").Locked = False
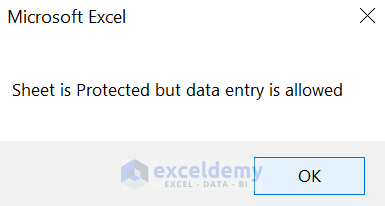
MsgBox "Sheet is Protected but data entry is allowed"
End Sub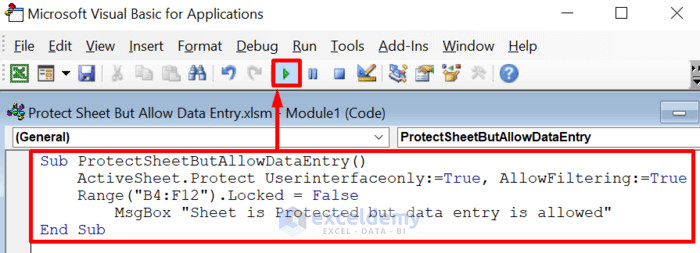
- Finally, click on the Run button as shown above.
Now the worksheet is protected, but we can enter data in the range B4:F12.
Download Practice Workbook
Related Articles
- How to Insert Digital Signature in Excel
- How to Protect Excel Sheet from Editing
- How to Protect Excel Sheet from Copy-Paste
<< Go Back to Protect Excel Sheet | Excel Protect | Learn Excel
Get FREE Advanced Excel Exercises with Solutions!
