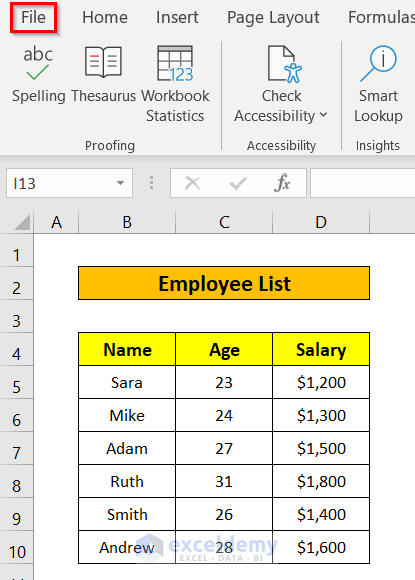
The following Employee List table in the Excel sheet named Dataset contains information that we want to protect.

Method 1 – Using the Review Tab to Protect an Excel Sheet from Viewing with Password
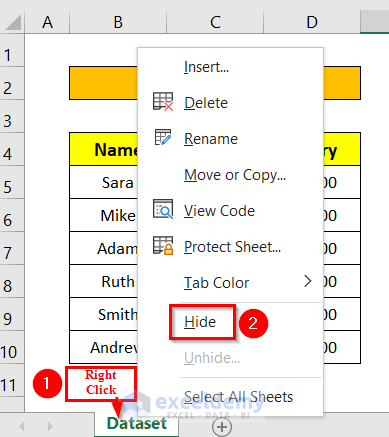
- Right-click on the sheet name and click on Hide.
A confirmation window will appear.
- Click OK.

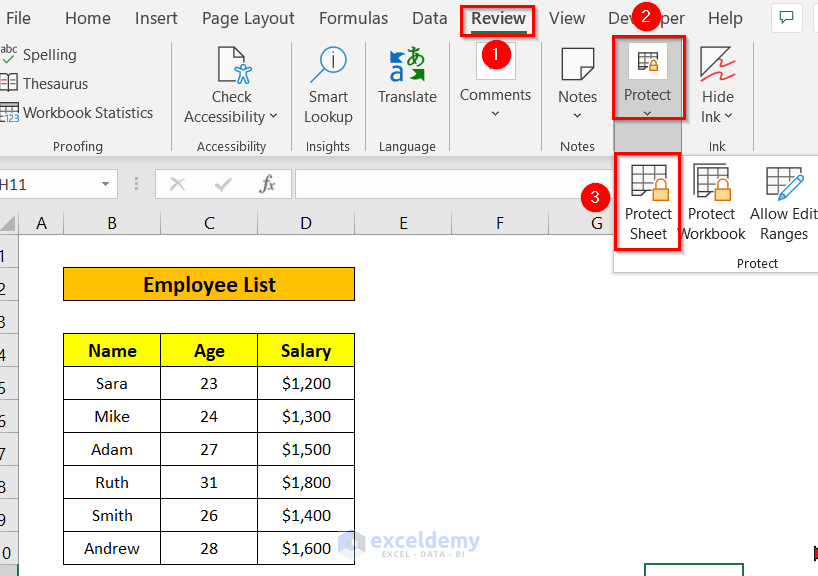
- Go to the Review tab, select Protect, and click on Protect Sheet.
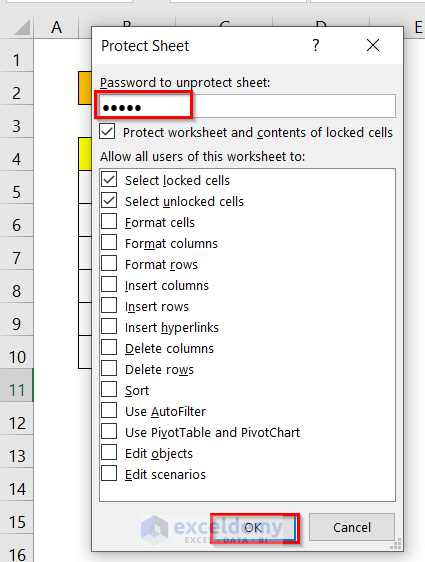
A Protect Sheet window will appear.
- Input a password in the Password to unprotect sheet box.
- Click OK.
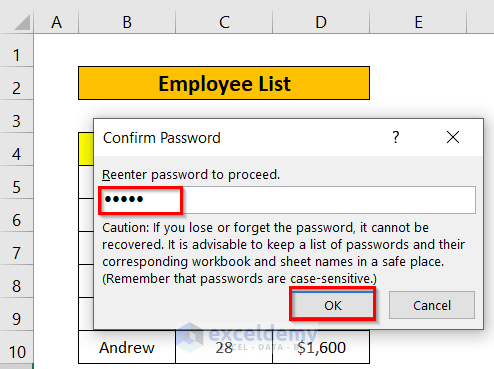
A Confirm Password window will appear.
- Re-enter the password in the Reenter password to proceed box.
- When you click on any cell in the Dataset sheet to edit, a warning appears. Therefore, the sheet has been protected with a password.

Read More: How to Protect Excel Sheet with Password
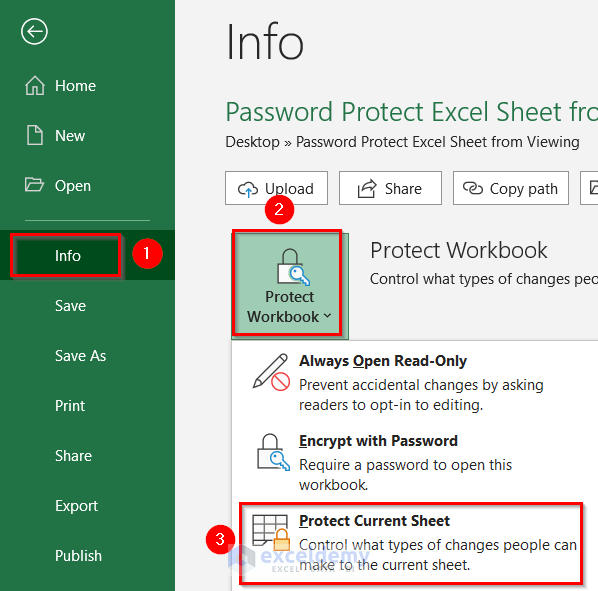
Method 2 – Protecting a Sheet from Viewing with Password Through the Info Option from the File Tab
- Go to the File tab in the ribbon.

- Select Info, click on Protect Workbook, and select Protect Current Sheet.
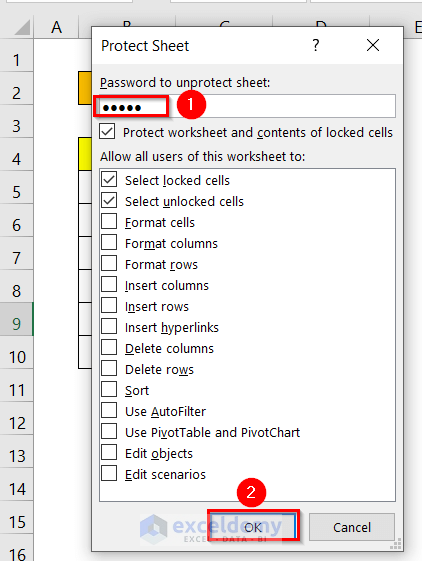
A Protect Sheet window will appear.
- Enter a password in the Password to unprotect sheet box.
- Click OK.
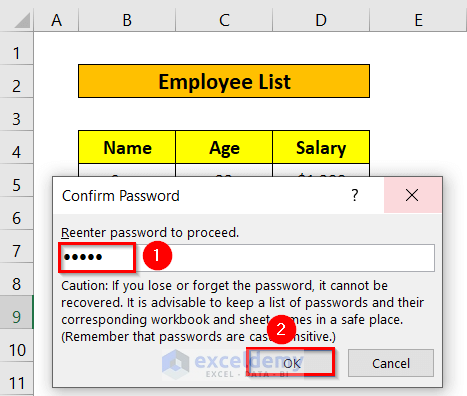
A Confirm Password window will appear.
- Re-enter the password in the Reenter password to proceed box.
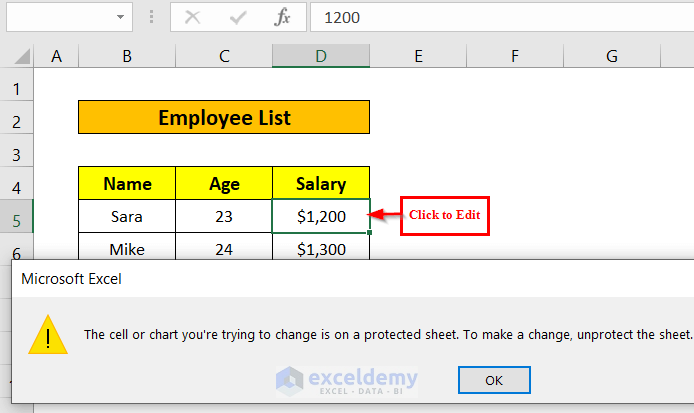
- If you click on any cell in the Dataset sheet to edit, a warning appears. Therefore, the sheet has been protected with a password.
Read More: How to Protect an Excel Sheet Except for Certain Cells
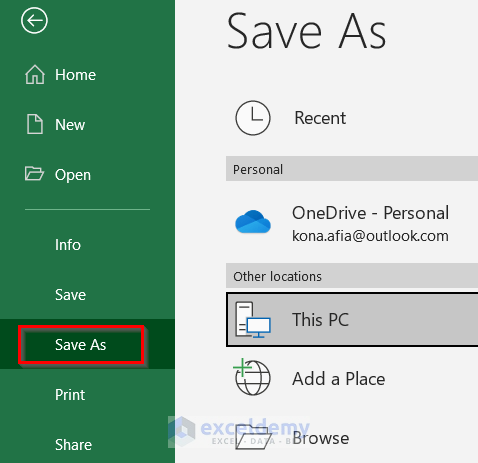
Method 3 – Protecting an Excel Workbook from Viewing with a Password While Saving
- Go to the File tab.
- Click on Save As.
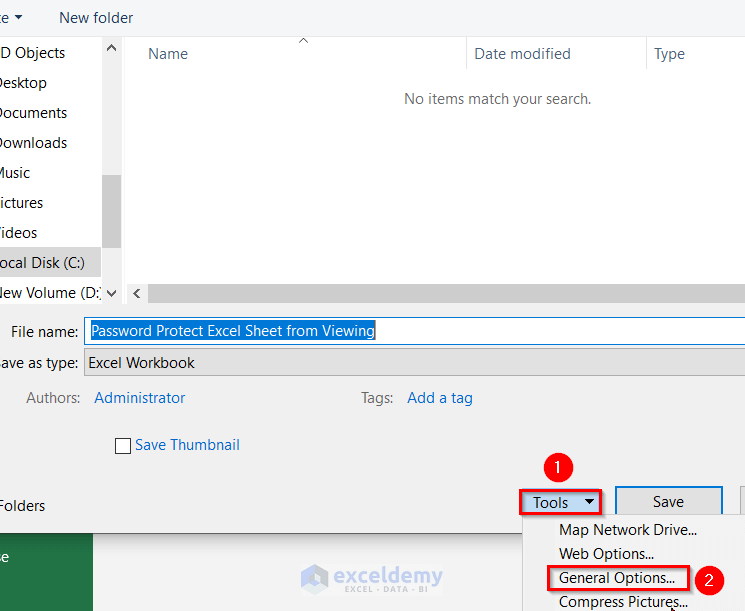
- Select the location where to save the file and give the file a name.
- Click on Tools which is at the left of Save and select General Options.
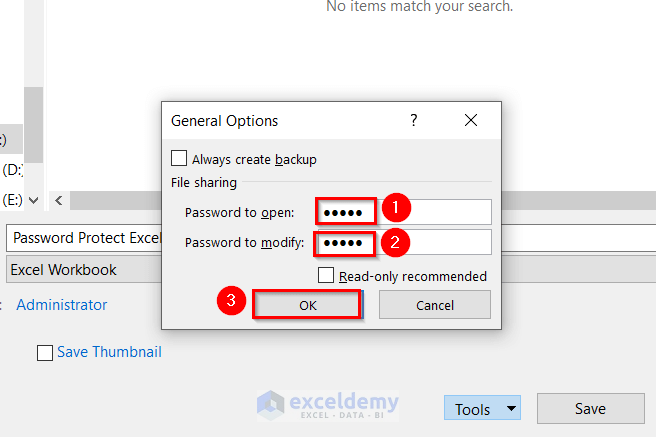
A General Options window will appear.
- Enter a password in the Password to Open box.
- Enter a password in the Password to Modify box.
- Click OK.
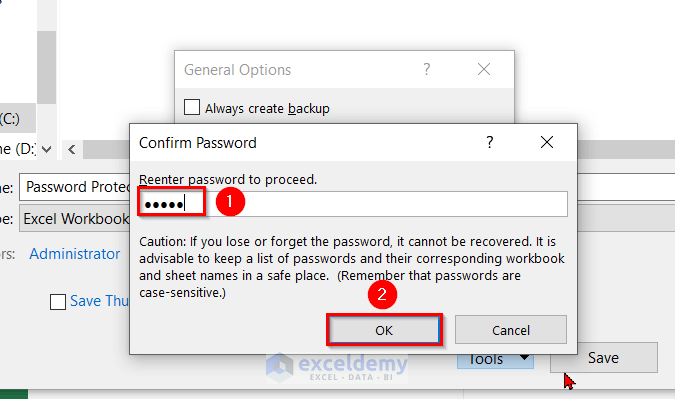
A Confirm Password window will appear.
- Re-enter the first password in the Reenter password to proceed box.
- Click OK.
Another Confirm Password window will appear.
- Re-enter the second password in the Reenter password to modify box and click OK.

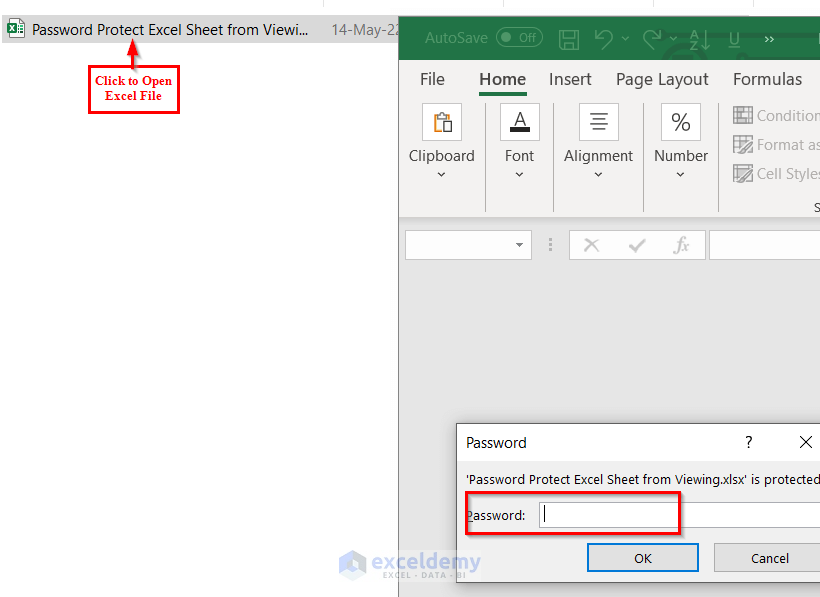
- When trying to open the Excel file, Excel does not open it immediately but asks for the first password.
Download the Workbook
Related Articles
- How to Password-Protect Hidden Sheets in Excel
- Excel VBA to Protect Sheet but Allow to Select Locked Cells
<< Go Back to Protect Excel Sheet | Excel Protect | Learn Excel
Get FREE Advanced Excel Exercises with Solutions!
