In this article, I’ll show you how can protect an Excel sheet with a password and also allow the filter there using VBA.
Excel VBA: Protect Sheet with Password and Allow Filter (Quick View)
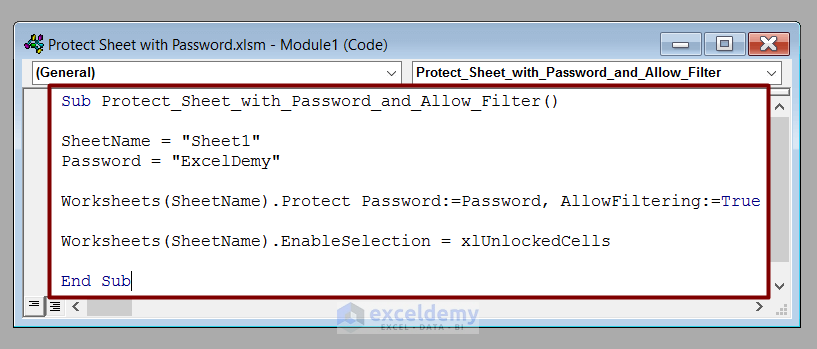
Sub Protect_Sheet_with_Password_and_Allow_Filter()

SheetName = "Sheet1"
Password = "ExcelDemy"

Worksheets(SheetName).Protect Password:=Password, AllowFiltering:=True

Worksheets(SheetName).EnableSelection = xlUnlockedCells

End Sub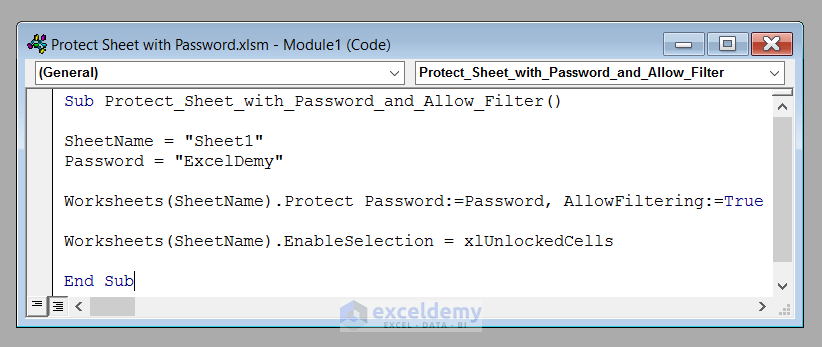
An Overview of the VBA Code to Protect Sheet with Password and Allow Filter in Excel (Step-by-Step Analysis)
So, without further delay, let’s go to our main discussion today. We’ll break down the VBA code step-by-step to learn how to protect an Excel sheet with a password and allow the filter there.
⧪ Step 1: Inserting the Necessary Inputs
At the very outset of the code, we have to insert the necessary inputs required in this code. They are:
- The Worksheet Name
- The Password
SheetName = "Sheet1"
Password = "ExcelDemy"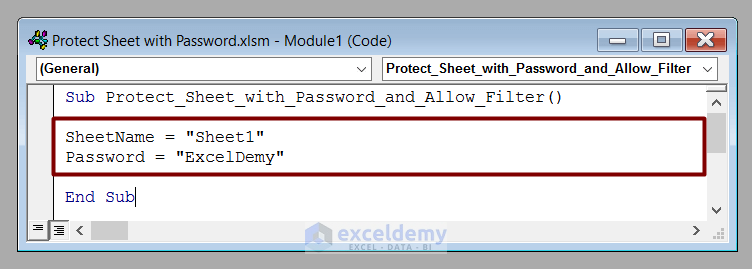
⧪ Step 2: Setting the Password and Allowing the Filter
This is the most important step. We’ll set the password of the worksheet and allow the filter here.
Worksheets(SheetName).Protect Password:=Password, AllowFiltering:=True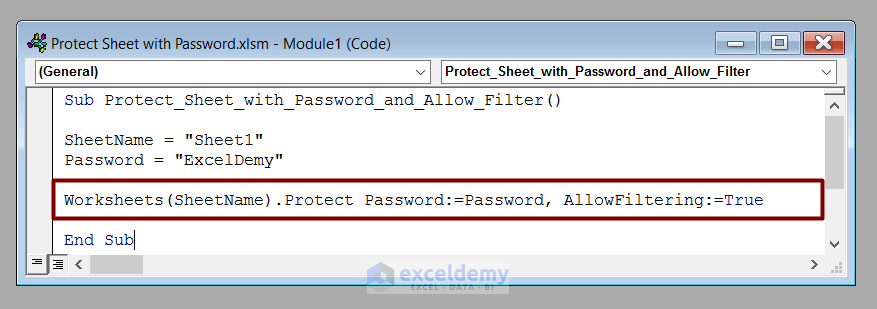
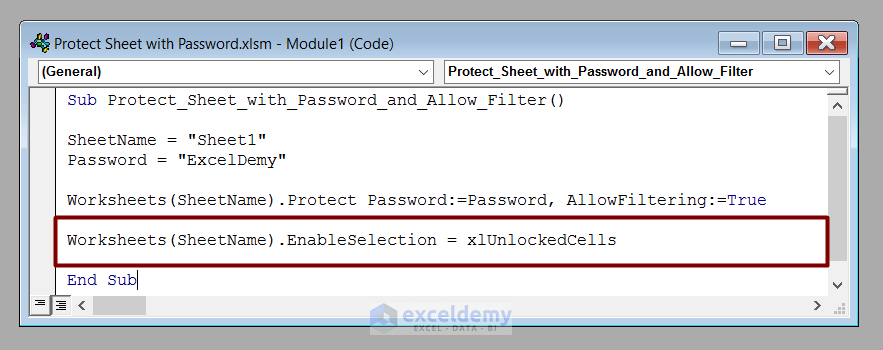
⧪ Step 3: Setting EnableSelection to True
Next, we have to set the EnableSelection property of the worksheet to xlUnlockedCells.
Worksheets(SheetName).EnableSelection = xlUnlockedCells
So the complete VBA code will be:
⧭ VBA Code:
Sub Protect_Sheet_with_Password_and_Allow_Filter()

SheetName = "Sheet1"
Password = "ExcelDemy"

Worksheets(SheetName).Protect Password:=Password, AllowFiltering:=True

Worksheets(SheetName).EnableSelection = xlUnlockedCells

End Sub
Developing the Macro to Protect the Sheet with a Password and Allow Filter
We’ve seen the step-by-step analysis of the code to protect an Excel sheet with a password and allow the filter.
Now, we’ll see how we can develop a Macro using the code.
⧪ Step 1: Opening the VBA Window
Press ALT + F11 on your keyboard to open the Visual Basic window.
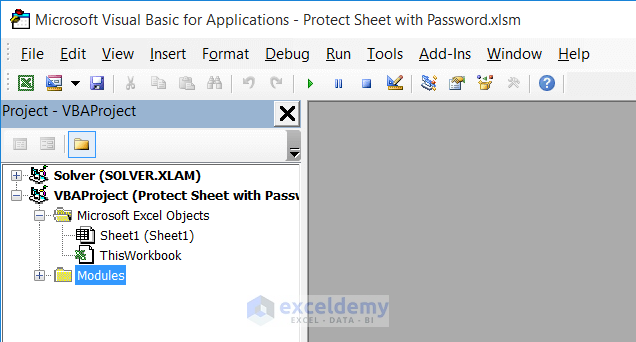
⧪ Step 2: Inserting a New Module
Go to Insert > Module in the toolbar. Click on Module. A new module called Module1 (or anything else depending on your past history) will open.

⧪ Step 3: Putting the VBA Code
This is the most important step. Insert the given VBA code in the module.
⧪ Step 4: Running the Code
Click on the Run Sub / UserForm tool from the toolbar above.
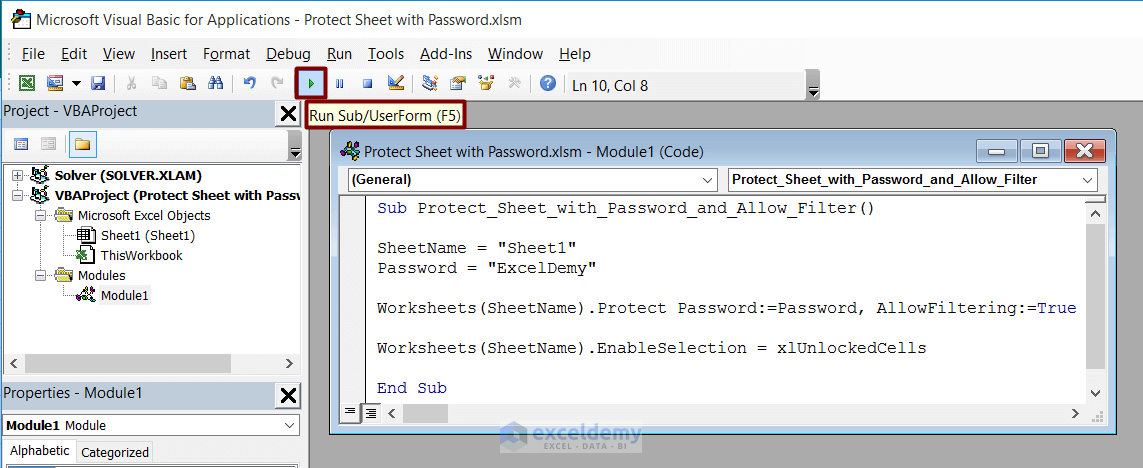
The code will run. Once the code is run, the sheet will become protected with the given password. Now if you come back to the worksheet, you’ll find you can’t edit it. You’ll need the password to edit it.

Read More: Excel VBA to Protect Sheet but Allow to Select Locked Cells
Things to Remember
The moment you run the code, the worksheet will be protected with a password. You can’t edit it anymore unless you know the password. Therefore, it’s recommended not to run the code before you understand every bit of the code and have a clear idea of how to recover a protected sheet in Excel.
Download Practice Workbook
Download this practice workbook to exercise while you are reading this article.
Conclusion
Therefore, this is the process of developing a macro to protect a sheet with a password and allow the filter in Excel. Do you have any questions? Feel free to ask us, we will get back to you ASAP.
Related Articles
- How to Protect Excel Sheet with Password
- How to Protect Excel Sheet from Viewing Using Password
- How to Password-Protect Hidden Sheets in Excel
- How to Protect an Excel Sheet Except for Certain Cells
<< Go Back to Protect Excel Sheet | Excel Protect | Learn Excel
Get FREE Advanced Excel Exercises with Solutions!
