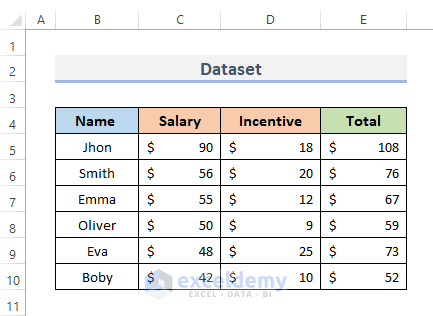
To protect the sheet and allow select locked cells to edit, we are going to use the dataset below. The dataset contains some employee names in column B, their monthly salary in column C, the incentive they get for a specific month in column D, and their total salary for that particular month in column E.
Example 1 – Excel VBA to Protect Sheet but Allow to Select Locked Cells
STEPS:
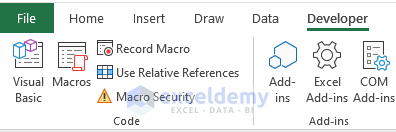
- Go to the Developer tab from the ribbon.
- From the Code category, click on Visual Basic to open the Visual Basic Editor. Alternatively, press Alt + F11 to open the Visual Basic Editor.
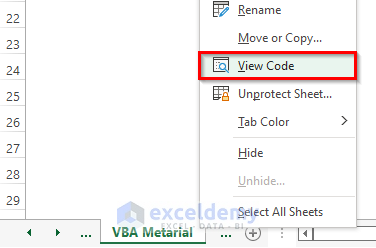
- You can also right-click on your worksheet name and go to View Code. This will also take you to Visual Basic Editor.
- Click on Module from the Insert drop-down menu bar.
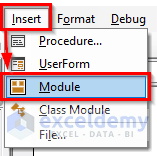
- This will create a Module in your workbook.
- Copy and paste the VBA code shown below.
VBA Code:
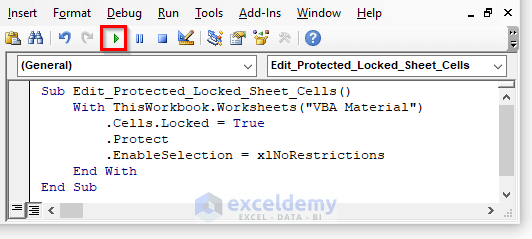
Sub Edit_Protected_Locked_Sheet_Cells()
With ThisWorkbook.Worksheets("VBA Material")
.Cells.Locked = True
.Protect
.EnableSelection = xlNoRestrictions
End With
End Sub- Run the code by clicking on the RubSub button or pressing the keyboard shortcut F5.
- This will protect the sheet and allow you to select locked cells.
- Whenever you click to edit any of the cells in that particular sheet, an error message will appear as shown in the screenshot.

VBA Code Explanation
Sub Edit_Protected_Locked_Sheet_Cells()Sub is a part of the code that is used to handle the work in the code but will not return any value. It is also known as a subprocedure. So we name our procedure Edit_Protected_Locked_Sheet_Cells().
With ThisWorkbook.Worksheets("VBA Material")
End With
The With expression makes it easy to manage a sequence of statements on a certain object without having to recertify the entity’s description.
.Cells.Locked = True
.Protect
We make the cells locked and protect the whole sheet.
.EnableSelection = xlNoRestrictionsThe block of the code will enable the selection and give no restrictions.
End SubThis will end the procedure.
Read More: How to Protect Excel Sheet with Password
Example 2 – Protect Sheet and Allow to Select Locked Cells Using VBA Macro in Excel
STEPS:
- Go to the Developer tab from the ribbon.
- Click on Visual Basic to open the Visual Basic Editor. Another way to open the Visual Basic Editor is to press Alt + F11.
- Alternatively, right-click on the sheet name, then select View Code.
- Go to Insert and select Module from the drop-down menu.
- This will open up the visual basic window.
- Copy and paste the VBA code below.
VBA Code:
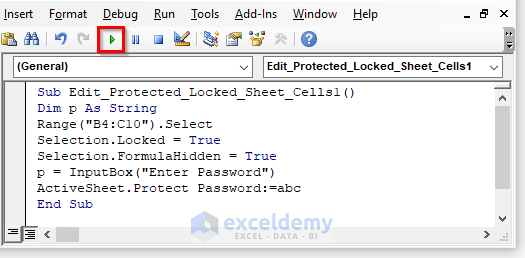
Sub Edit_Protected_Locked_Sheet_Cells1()
Dim p As String
Range("C4:E10").Select
Selection.Locked = True
Selection.FormulaHidden = True
p = InputBox("Enter Password")
ActiveSheet.Protect Password:=abc
End Sub- Press the F5 key or click on the Run Sub button to run the code.
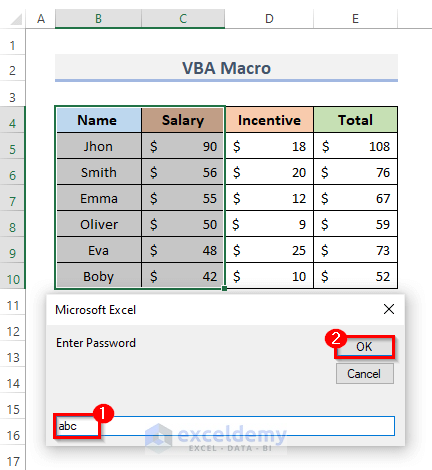
- A pop-up window will appear and ask for the password. Enter the password there and click OK.
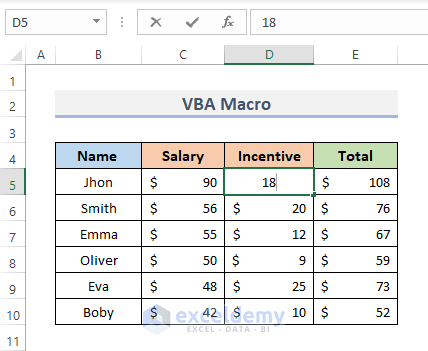
- Whenever you want to select the cell range B4:C10, you won’t be allowed to edit them. An error message will appear.
- You will be allowed to select the locked sheet cells from range D4:E10.
VBA Code Explanation
Dim p As StringThe DIM statement in VBA refers to “declare,” and it must be used to declare a variable. So, we declare our password which is a string as p.
Range("C4:E10").Select
Selection.Locked = True
We select the range and lock it.
Selection.FormulaHidden = TrueWe hide the formulas of the spreadsheet.
p = InputBox("Enter Password")This will create an input box where the box asks for the password.
ActiveSheet.Protect Password:=abcProtect the active sheet by the password.
Download the Practice Workbook
Related Articles
- How to Protect Excel Sheet from Viewing Using Password
- How to Password-Protect Hidden Sheets in Excel
- How to Protect an Excel Sheet Except for Certain Cells
<< Go Back to Protect Excel Sheet | Excel Protect | Learn Excel
Get FREE Advanced Excel Exercises with Solutions!
