Navigating an Excel table is just like navigating within a worksheet. You can use a mouse or you can use the keyboard to navigate within a table. In this post, we shall discuss how you can navigate an Excel table with 7 simple techniques.
What Is an Excel Table?
In general, a Table is a tool in Microsoft Excel which is a storage of our data in a certain manner. It represents data within a rectangular table defined and named in a particular way. We can create an Excel table from the Home > Styles > Format as Table command or Insert > Tables > Table command.
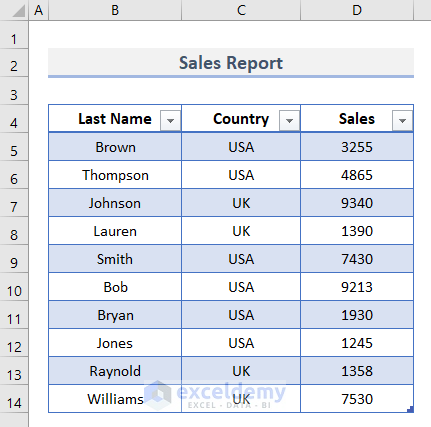
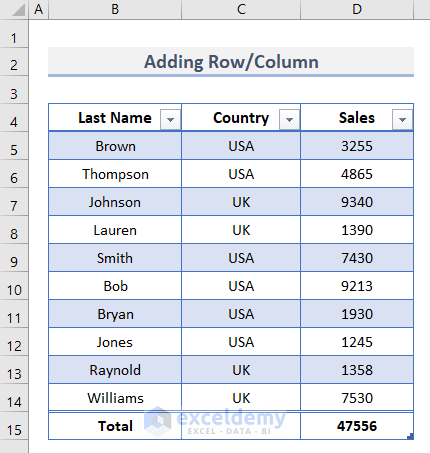
In this article, we have created a table comprising the information of Sales Reports of 10 different people from the USA and UK.
Navigating Excel Table: 7 Simple Techniques
With the sample dataset that we mentioned above, we will learn to navigate the Excel table with 7 simple techniques. Let’s get started.
1. Use Keyboard Shortcut to Navigate Excel Table
Keyboard shortcuts are the ultimate time saver for Excel users. We can use it to navigate the table in different situations. Let’s check them out.
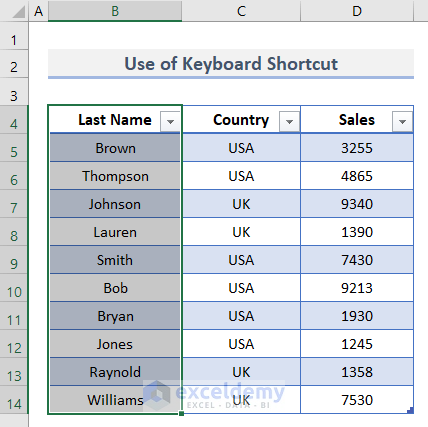
1.1 Select Entire Column
There are 3 ways to select an entire column in the dataset. Here they are:
- Firstly, select the first cell of the column and then press Ctrl + Shift + Down button to select the whole column until the last value.
- Secondly, click the first cell and press Shift selecting the last cell of the column for selecting the whole.
- Thirdly, press Ctrl + Space twice to select the entire column including the header title.
Following any of the methods you will see this output:
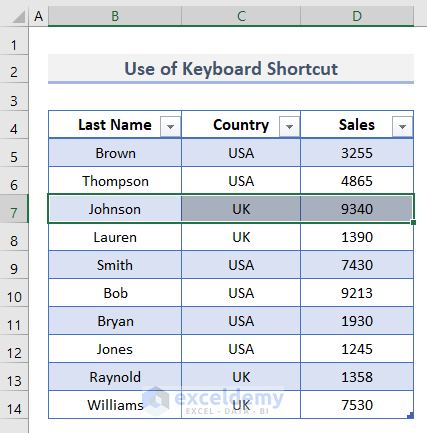
1.2 Select Entire Row
Just like a column, we can select an entire row as well with keyboard shortcuts.
- First, select the first cell of the row that you want to navigate.
- Then, just press the Shift + Space key and you will get your desired selection.
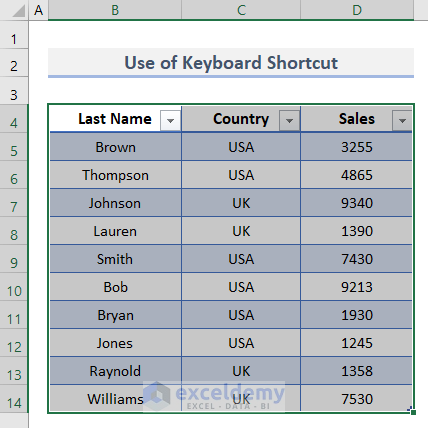
1.3 Select Entire Table
It is also possible to select the entire table with keyboards. Here is the solution.
- First, select the first cell B4 of the table.
- Then, press Ctrl + A twice to select the table including the header.
Read More: Types of Tables in Excel: A Complete Overview
2. Navigate Excel Table with Mouse Cursor
We can also navigate the Excel table with the help of a mouse cursor. It is not only confined to selecting an entire row, column, and table, but also we can select part of the table with the mouse. Let’s see how it works.
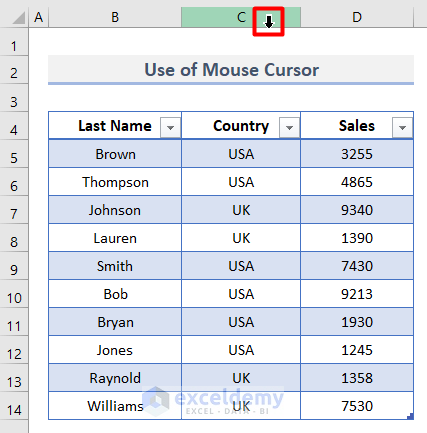
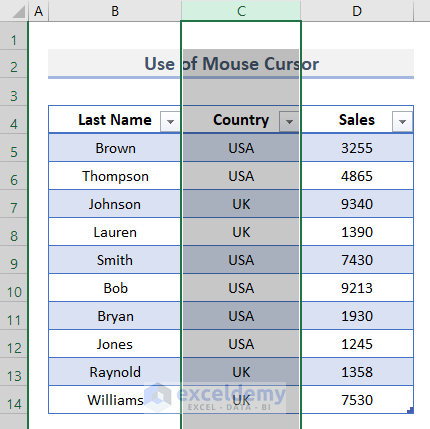
2.1 Select Entire Column
The mouse cursor can help to locate and select columns easily.
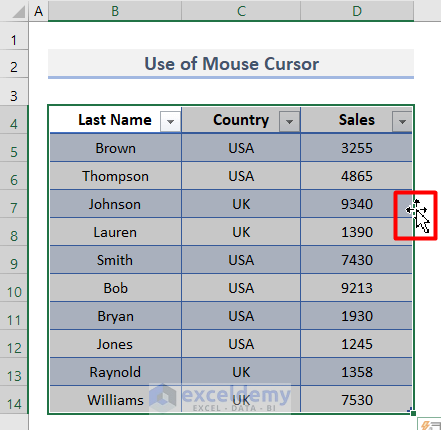
- First, put your cursor over that specific column from the bar.
- Then, it will show an arrow like this:
- Following, left-click on it and it will select the whole column.
Read More: Does TABLE Function Exist in Excel?
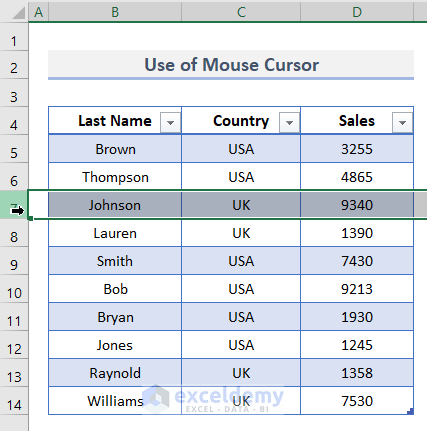
2.2 Select Entire Row
We can also select an entire row with just a click.
- Simply hover over the row pointing with the small arrow.
- Then, left-click and the whole row is selected.
Read More: Excel Table vs. Range: What Is the Difference?
2.3 Select Entire Table
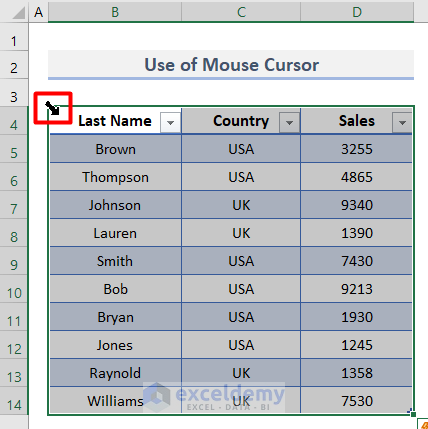
It is also possible to select an entire Excel table as a part of navigation. Here are 2 ways to do it.
- Firstly, hover your mouse over the top left corner and you will see a small diagonal arrow.
- Now, left-click in this state twice to select the table with headers.
- Otherwise, you can simply select the first cell and then drag it to the last one to select the entire table. You will see this icon afterward.
Read More: How to Convert Range to Table in Excel
2.4 Select with a Single Cell
In addition to the above methods, we can select a row, column, or entire table by selecting only one cell.
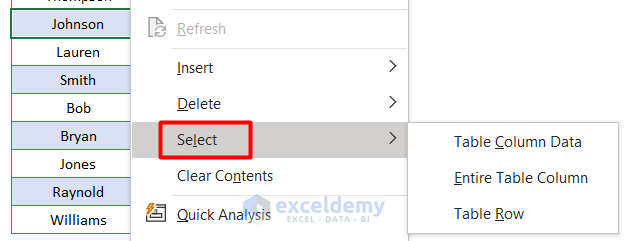
- Simply right-click on any of the cells in the dataset.
- Then, go to Select.
- From here, choose any of the options of selection.
Read More: How to Make Excel Tables Look Good
3. Select Name Box for Navigating Table in Excel
When you have a huge number of tables throughout your worksheet, it gets difficult to navigate them one by one. In this case, Name Box is a useful solution for navigation.
- First, select any cell inside the Excel table.
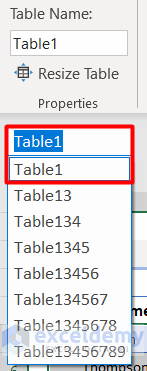
- Then, you will see a new tab named Table Design in the Excel ribbon.
- In this ribbon, you will see the Table Name of that specific worksheet.

- Now, just below this, you will see the Name Box with the list of tables.
- Select any one of them according to your preference.
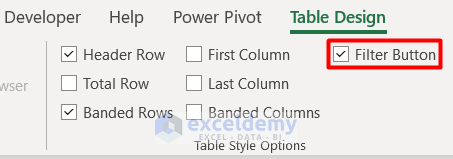
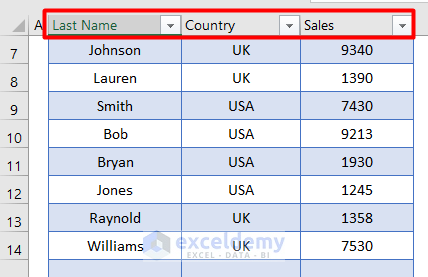
4. Excel Table Navigation with Table Filter
Table Filter helps you to navigate it according to categories. You can find this option by clicking the filter arrow in the headers.
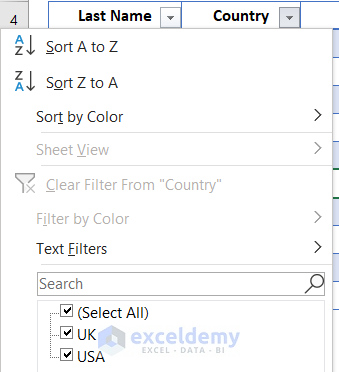
To turn off this feature you can apply two of the methods below:
- Press Ctrl + Shift + L on your keyboard and the filter will be inactive in the Excel table.
- Otherwise, go to the Table Design tab and unmark the Filter Button to turn it off.
5. Keep Column Header Visible While Scrolling
Here is a fun fact about navigation through the Excel table. Whenever you have a long table, you will find the header constantly visible by scrolling downward. Here is how it looks:
Read More: How to Convert Table to List in Excel
6. Table Navigating to Add Row/Column in Excel
An important part of Excel table navigation is adding a total row or a new column to the dataset. It is required when you want a total result (sum, average, etc.) in the row. Here we will discuss the process of adding a row and column separately.
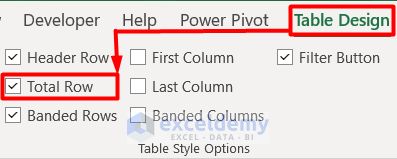
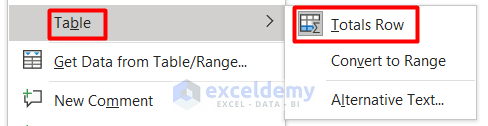
6.1 Adding Total Row
Here are 3 different solutions to add a total row to the table.
- Firstly, you can turn on the Total Row feature from the Table Design tab.
- Secondly, you can right-click on any cell of the Excel table and select Total Row from the Table section.
- Thirdly, press Ctrl + Shift + T and you will get the final output.
Read More: Table Name in Excel: All You Need to Know
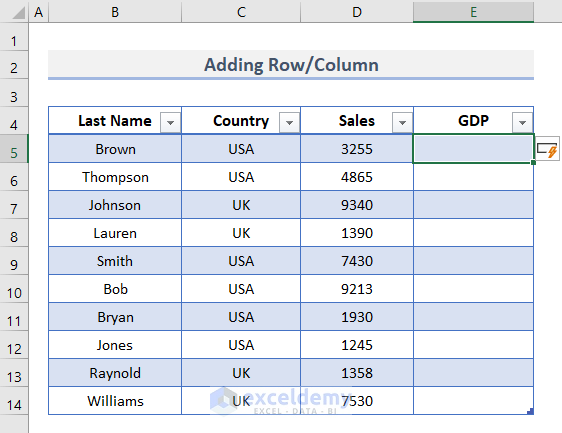
6.2 Adding New Column
Following are two solutions for adding a new column as a part of Excel table navigation.
- Firstly, insert the new column header name GDP in cell E5.
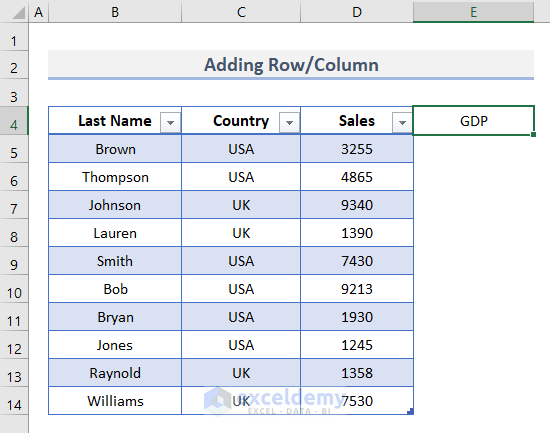
- Following, press Enter and you will see the new column is added.
- Otherwise, right-click on any cell and select Table Columns to the Left from the Insert section.

7. Delete Row/Column During Excel Table Navigation
For easy navigation, you may need to remove certain rows or columns from the Excel table. Here are two solutions for it.
- Right-click on any cell and select Table Columns or Table Rows from the Delete section.
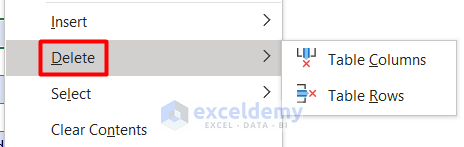
- Otherwise, select the whole row or column following any of the methods above and press Delete on your keyboard.
Download Practice Workbook
Download this sample file to practice by yourself.
Conclusion
This summarizes the ways of navigating an Excel table with 7 simple techniques. Do leave your comments to let us know if this post was helpful.
Further Readings
- How to Insert Floating Table in Excel
- How to Make a Comparison Table in Excel
- How to Create a Table Array in Excel
- How to Provide Table Reference in Another Sheet in Excel
<< Go Back to Excel Table | Learn Excel
Get FREE Advanced Excel Exercises with Solutions!
