If you are looking for some easy and effective tricks to make a personal expense sheet in Excel then you are in the right place. Every person must track expenses so he/she can identify what to do to keep the expenses under control. In this article, I will show you every step with clear illustrations to make a personal Expense sheet. You can download the free monthly expense template and modify it for your personal use.
How to Make Personal Expense Sheet in Excel: Step-by-Step Procedure
Making a personal expense sheet is necessary for everyone. But it may feel clumsy or daunting work to create an expense tracker in Excel. So, in this article, I will show you the necessary steps to create a personal expense sheet.
There are some important things you should include in the expense sheet. These are:
- List of expenses with Forecast and Actual values.
- You can categorize the expenses so you will get a summary of data that will show where you have spent and how much amount.
- You should include the types of transaction Medium that you use. So you can see how much amount you have in each Medium.
📌 Step 1: Create Expense Sheet Layout
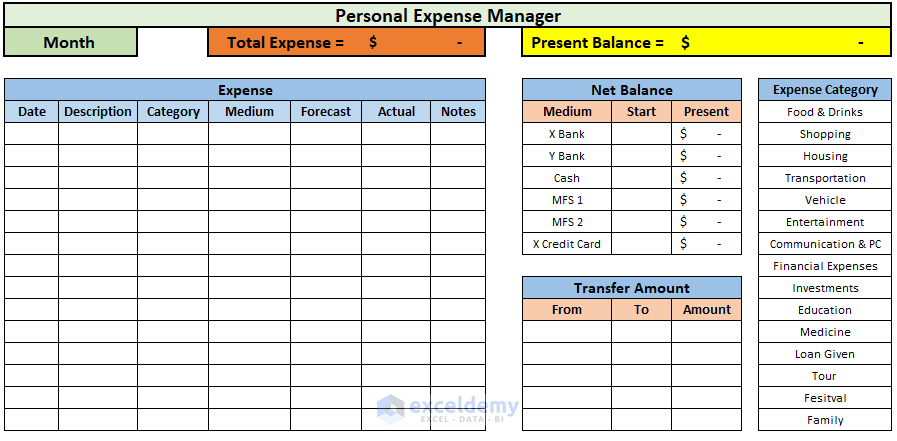
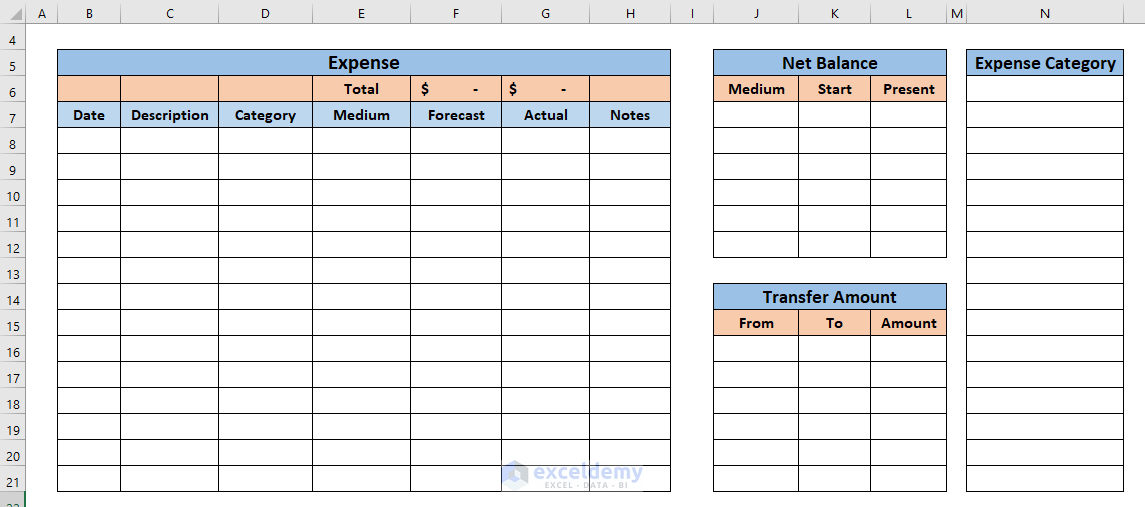
First, create a blank template in a new worksheet. There you will create 4 Tables.
- Expense Table: In this table, you will add columns for Date, Description of the Expense, Category of the Expense, Medium of transactions and Forecast amount, and the Actual amount. You can add a column to add Notes for expenses.
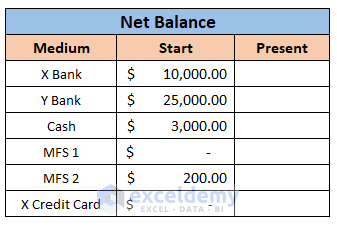
- Net Balance: Here, you will insert the list of transaction Mediums, Start balance of each medium, and the Present balance.
- Transfer Amount: Here, you will add the transferred Amount From one medium To another.
- Expense Category: Here, you will list the Expense Category items. It will help you to make a summary of the month’s expenses.
📌 Step 2: Insert Transaction Medium and Expense Category Lists
- Now, add the list of transaction mediums in the Medium Column that you use. I have inserted some items here for example. You will add your Bank Account Names, Credit Cards, or mobile Financial Services here.
- Then, add the list of probable expense categories in the Expense Category column. Also, I have added a list of categories for example. You can edit these to add or remove categories as per your use.

📌 Step 3: Create Drop-Down List in Medium and Category Columns
Now, you will create drop-down list options in the Medium and Category columns in the Expense table. So, while entering the expense you can easily select options from the drop-down list. And you can make a summary of the expense per category and mediums.
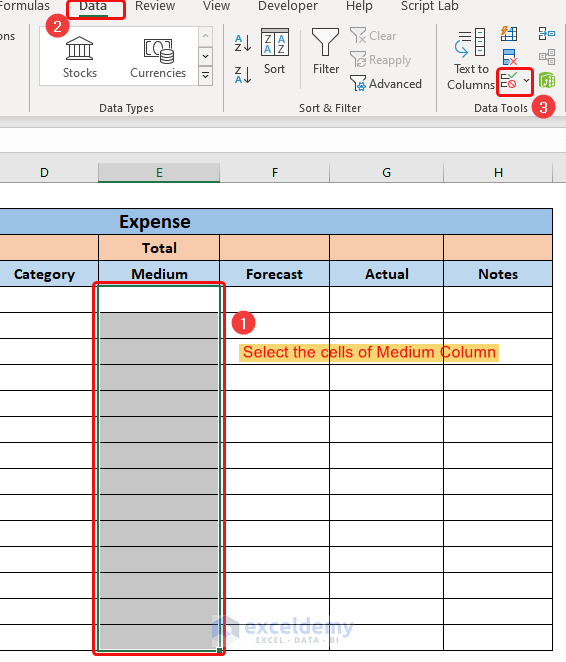
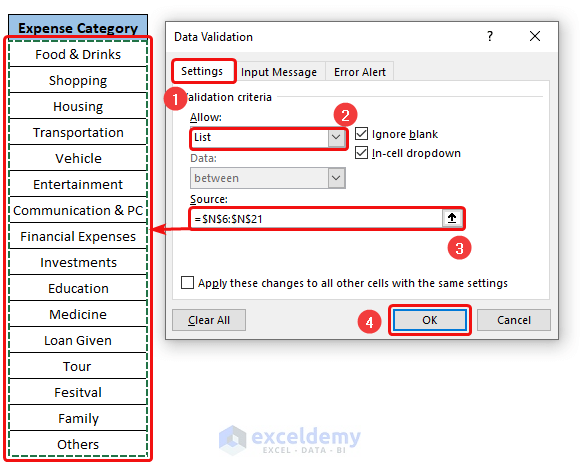
- For this, to implement a drop-down list in the Medium column cells, select all the cells of the medium column.
- Then, go to the Data tab and select the Data Validation tool.
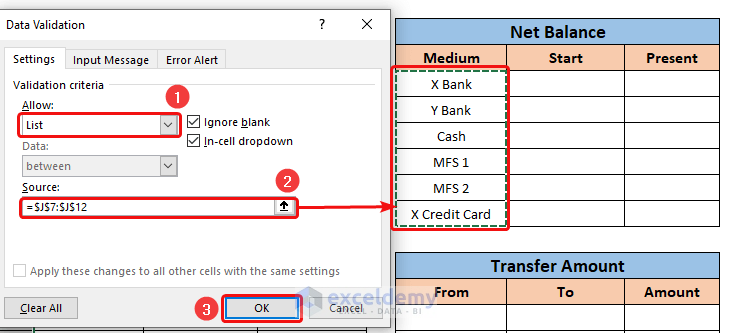
- Then, in the Data Validation window, select List in the Allow option.
- Then, select the Medium column cells in the Source option.
- Similarly, apply the same steps to apply drop-down options in the Category cells.
- Before entering data, you should convert the cells of the Date columns into the Short Date format.
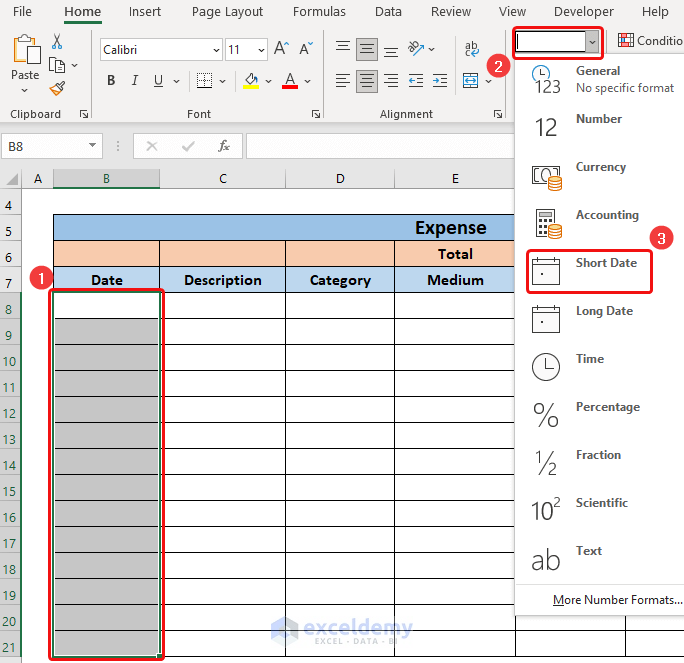
📌 Step 4: Insert Expense Data
Now, you are ready to take entry of the expenses. Here I am showing an example of how you can easily enter a date in the expense table.
- Then enter the starting balance of each transaction medium that you use. You have to edit this data as per your income and the remaining balance from the previous month.
📌 Step 5: Calculate Net Balance of Transaction Mediums
- Now, you can calculate the Present balance using a formula that will automate the Expense Sheet. Insert this formula into cell L7.
=K7-SUMIF($E$8:$E$100,J7,$G$8:$G$98)+SUMIF($K$16:$K$21,J7,$L$16:$L$21) - SUMIF($J$16:$J$21,J7,$L$16:$L$21)🔎 Formula Breakdown:
- SUMIF($E$8:$E$100,J7,$G$8:$G$98) : Here, the SUMIF function will calculate the sum of the cells in the Actual column if the Medium cell contains the value of J7 which is “X Bank”. So, it will give the Total expense done from the X bank medium. So. this amount will be subtracted from the Start balance.
- SUMIF($K$16:$K$21,J7,$L$16:$L$21) : It will give the sum of the transferred amount in this Medium. So, it will be added to the Start balance.
- SUMIF($J$16:$J$21,J7,$L$16:$L$21) : It will give the sum of the transferred amount from this Medium. So, it will be subtracted from the Start balance.

- Now drag the Fill Handle icon to paste the used formula to the other cells of the column or use Excel keyboard shortcuts Ctrl+C and Ctrl+P to copy and paste.
📌 Step 6: Make a Dashboard of Personal Expenses
Now, make a dashboard that will show the present balance and total expenses for this month.
- Calculate the sum of values in the Actual column in the Expense table using the SUM function. For this, paste this formula into the cell G3:
=SUM(G7:G20)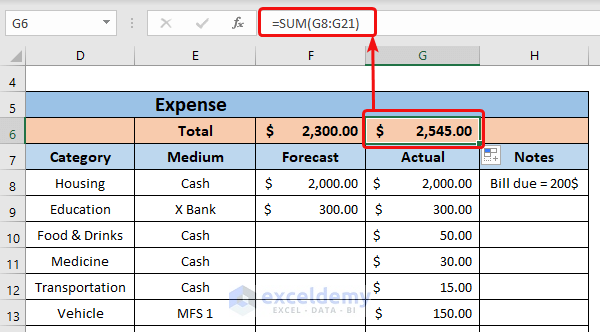
- Then calculate the Present balance from the Net Balance Table. Paste this formula into the cell mentioning the Present Balance =
=SUM(L7:L12)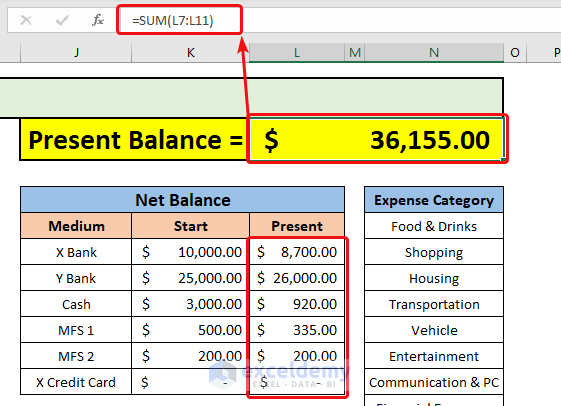
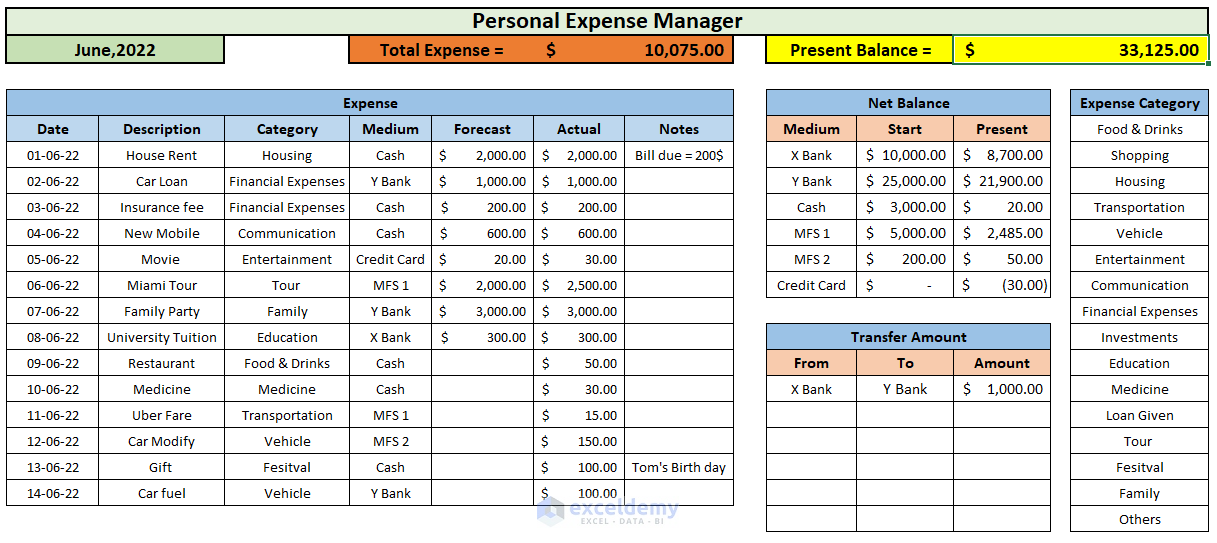
- Now, your monthly expenses sheet is ready to use. Start entering data of daily expenses and you will see the Total Expense and the Present Balance showing results automatically.
Things to Remember
- Edit the transaction Medium as of your usage. Enter the income and remaining balance from the previous month in the Start column of Net Balance.
- Edit the expense category list as of your daily living expenses.
Download Sample Workbook
You can download the following free template from here:
Conclusion
In this article, I have shown you how to make a personal expense sheet in Excel. Download the free template and modify it for your use. I hope you found this article helpful. Please, drop comments, suggestions, or queries if you have any in the comment section below.
Related Articles
<< Go Back To How to Make Expense Sheet in Excel | Excel For Finance | Learn Excel
Get FREE Advanced Excel Exercises with Solutions!
