Looking for ways to know how to make a wedding budget in Excel? Then, this is the right place for you. Organizing a wedding event needs budgeting on different scales. We can make a budget sheet for various purposes including wedding budgets in Excel. Here, you will find 2 different step-by-step explained ways to make a wedding budget in Excel.
We can make a wedding budget in Excel by using some easy ways and formatting.
1. Using Excel Templates to Make a Wedding Budget
In the first method, we will use the in-built Excel templates to make a wedding budget in Excel. Follow the steps below to do it on your own.
Steps:
- First, open an Excel workbook.
- Then, go to the File tab.
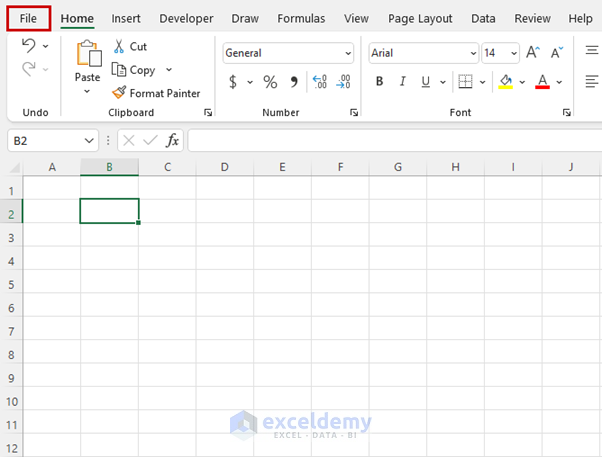
- After that, go to the New tab.
- Then, in the Office section in the search bar type “Wedding Budgets”.

- Now, you will find various templates. Choose anyone according to our preference. Here, we selected the Wedding budget expenses comparison1 template.
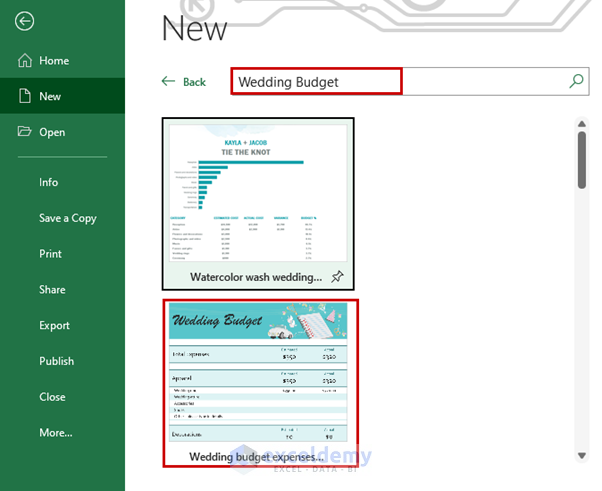
- After that, press on the Create button.

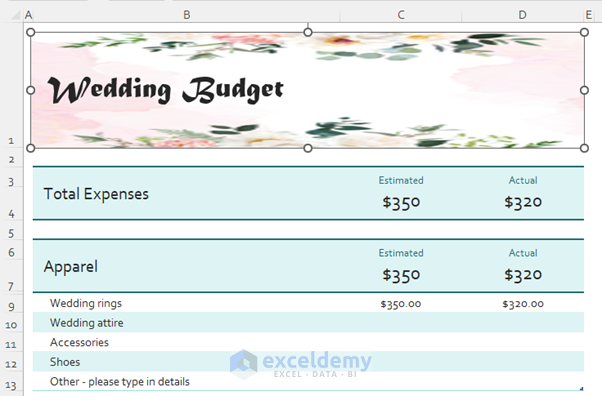
- Now, you can see a new Excel file has opened. Here, we named the workbook as Wedding Budget.

- Here, we can change the title of the table.
- Now, select the text and Right-click to bring the Context Menu.

- After that, we changed the Theme Fonts as Matura MT Script Capitals.
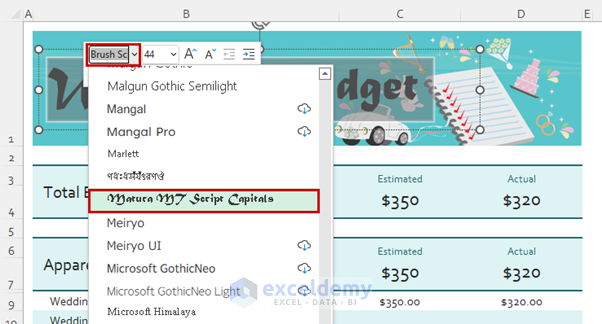
- Then, we changed the Font Size to 28.

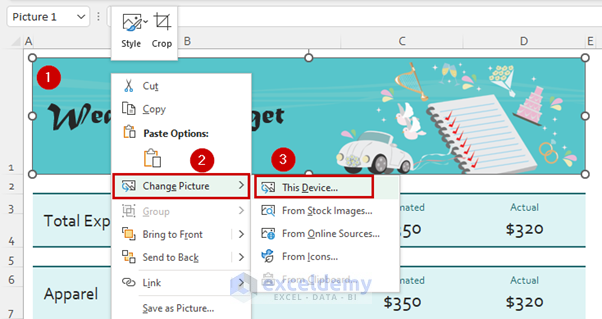
- Here, we can change the Background Image too.
- Now, select the image and Right-click to bring the Context Menu.
- Then, click on Change Picture >> select This Device.
- After that, the Insert Picture box will open.
- Then, select the image you want to add in the Excel sheet. Here, we select the image named istockphoto-1294181713-612×612.jpg.
- Next, click on Insert.

- Now, you can see the changed image.
- Here, in cell C7 we can see the following formula to calculate the total Estimated value for the Apparel.
=SUM(Table_Apparel[Estimated])
- Moreover, in cell D7 we can see the following formula to calculate the total Actual value for the Apparel.
=SUM(Table_Apparel[[#All],[Actual]])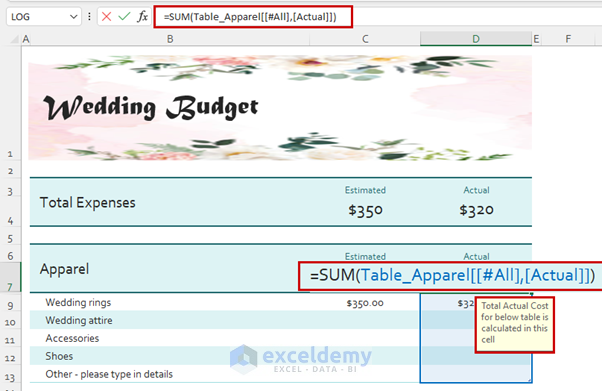
- Then, you can insert any value in the Estimated and Actual columns. Here, we inserted 350 in Cell C9.

- Here, you can see all the values we have inserted as Estimated and Actual columns.
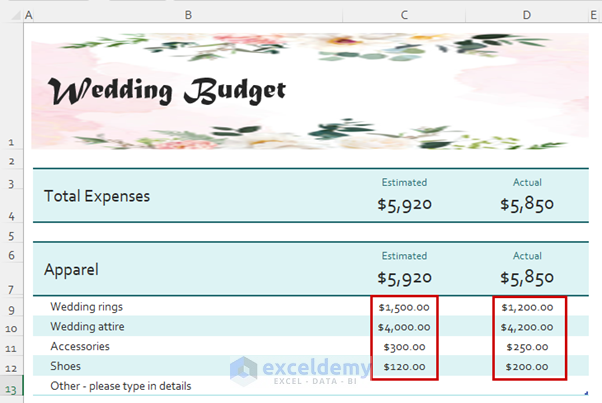
- Then, you can also join other data in Column D.
- Here, we will add new data as Vail/Headpiece.

- Then, add the corresponding Estimated and Actual costs.

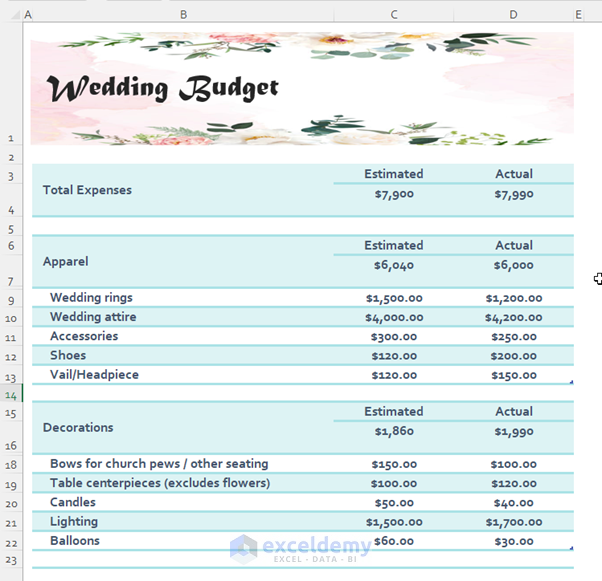
- Now, after inserting all the data you will see a dataset like an image given below.

- Then, select Cell range B3:D108.
- Afterward, go to the Home tab >> click on Cell Style.
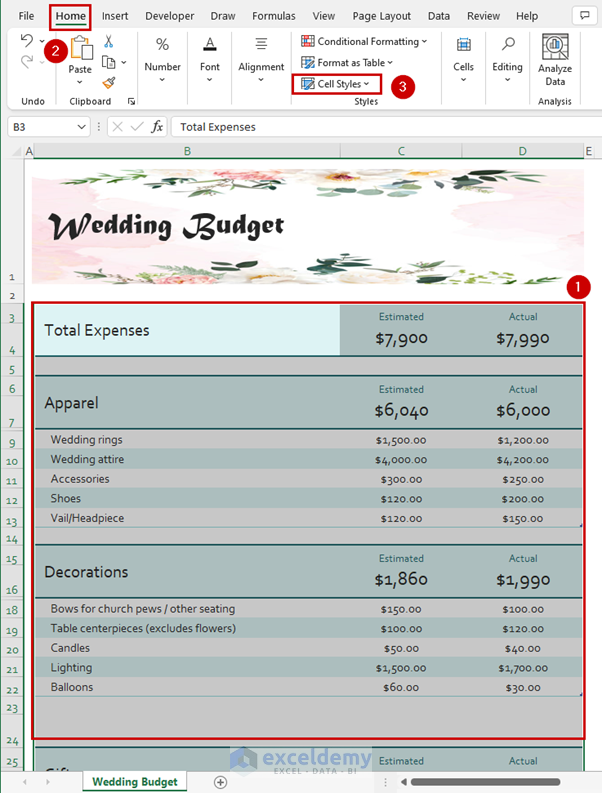
- Next, select Heading 2.

- Finally, you will get a Wedding Budget sheet like the image given below.
Read more: How to Make a Family Budget in Excel
2. Manually Creating a Wedding Budget in Excel
We can also make a wedding budget Manually in Excel by going through some steps. Here, you will find some of those steps to make your own wedding budget in Excel.
Steps:
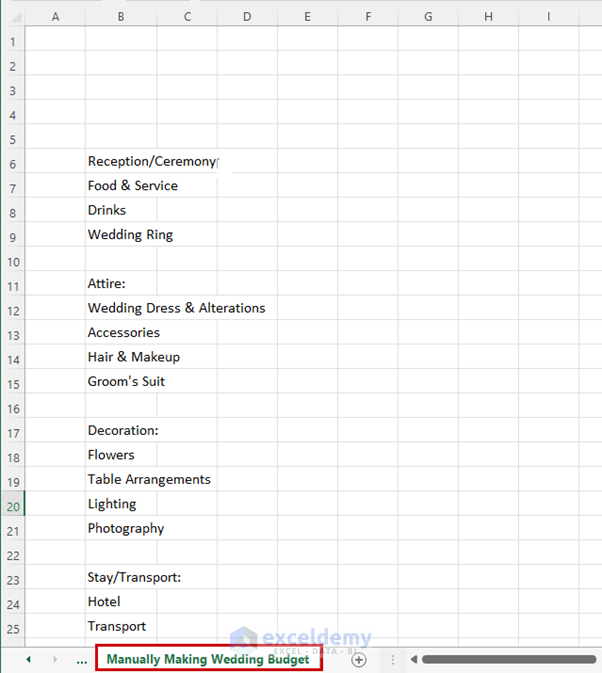
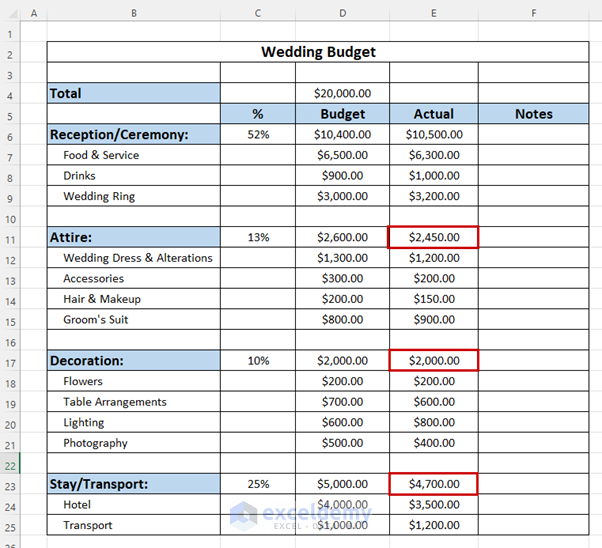
- First, insert the name of the things you want to add to your budget according to some categories. Here we added some stuff as sub-categories under the Reception/Ceremony, Attire, Decoration, and Stay/Transport categories.
- Then, name the Excel worksheet as Manually Making Wedding Budget.
- After that, adjust the Column width according to our preference.

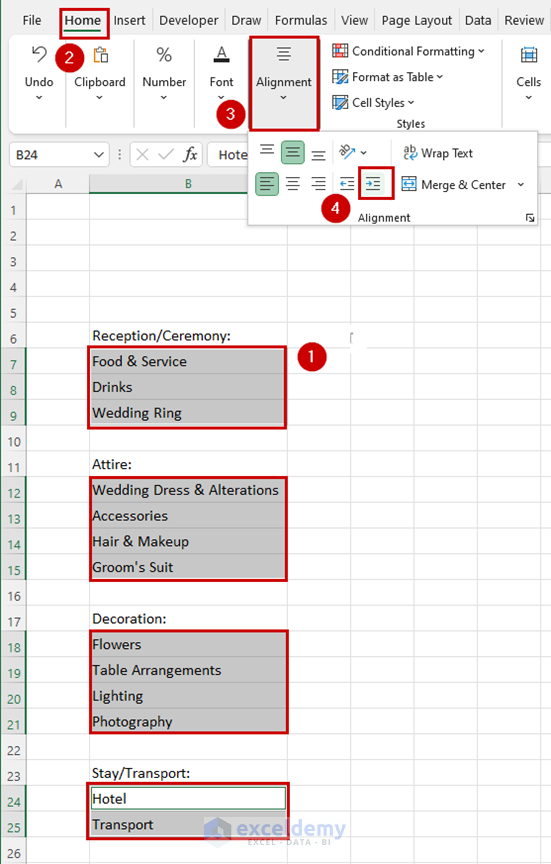
- Next, select all the sub-categories.
- Then, go to the Home tab >> click on Alignment >> click on the Increase Indent twice.
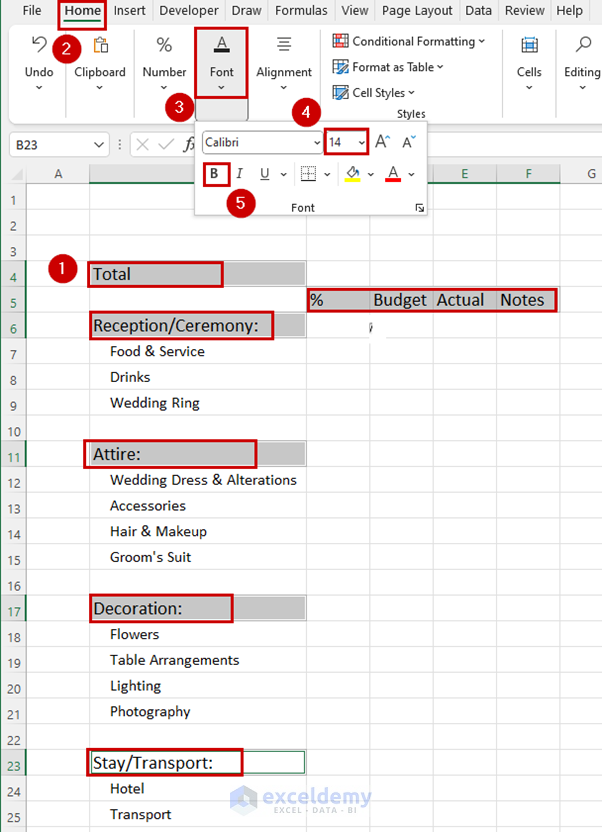
- After that, add column titles %, Budget, Actual, Notes, and a row title Total.

- Then, select all the categories, row title and column titles.
- Next, go to the Home tab >> click on Font >> change the Font Size as 14 >> click on Bold.
- Then, select Cell B2.
- After that, type Wedding Budget as Table title.

- Then, go to the Home tab >> change the Font Size as 16 >> click on Bold.

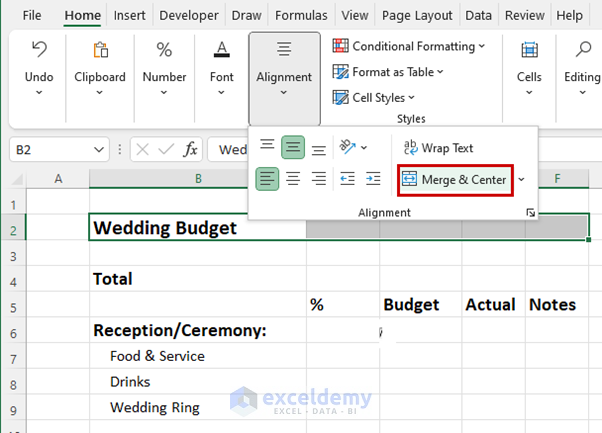
- Next, select Cell range B2:F2.
- Then, go to the Home tab >> click on Alignment.

- After that,click on Merge & Center.
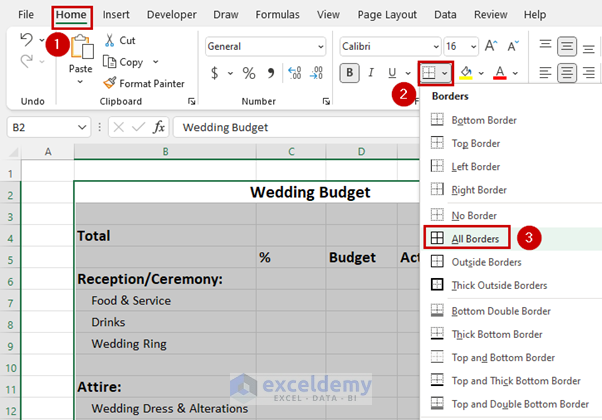
- Next, select the Cell range B2:F15.

- After that, go to the Home tab >> click on the Borders toolbox >> select All Borders.
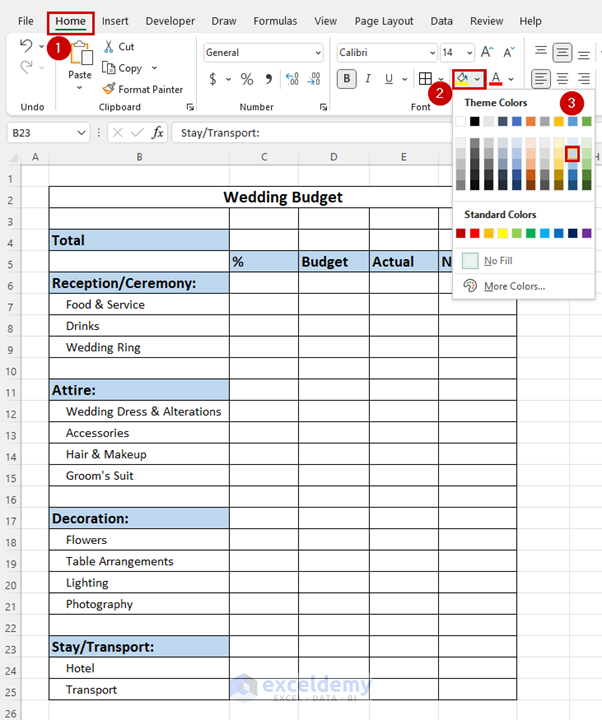
- Then, select all the categories, row title and column titles.

- After that, go to the Home tab >> click on the Theme Colors toolbox >> select Blue, Accent 5, Lighter 60%.
- Then, select Cell range C4:F25.
- Afterward, go to the Home tab >> click on Alignment >> click on Center.

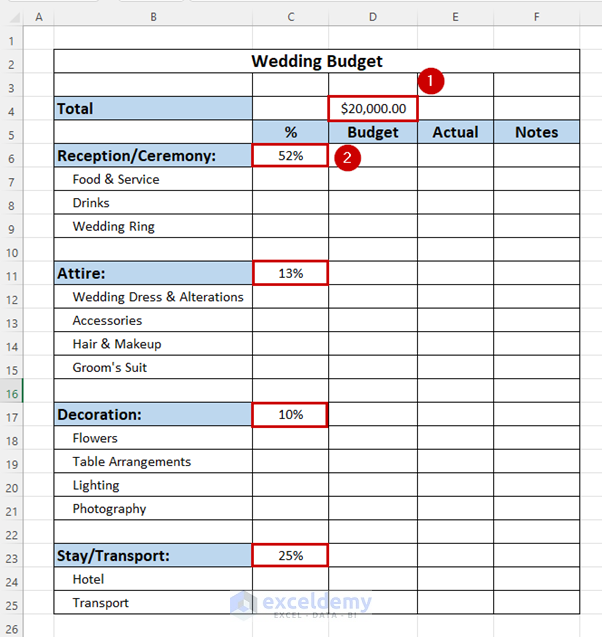
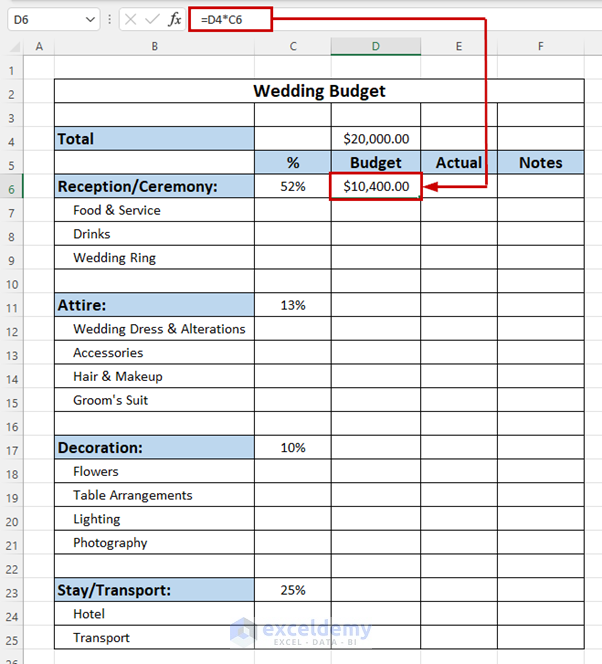
- Then, insert the Total Budget in Cell D4. Here, we will insert $20,000 as the Total Budget.
- Next, insert the Percentage Values (%) of the categories. Here, we inserted 52% for Reception/Ceremony, 13% for Attire, 10% for Decoration and 25% for Stay/Transport.
- Again, select Cell range D6:E25.
- After that, go to the Home tab >> click on Number Format.

- Then, select Currency.
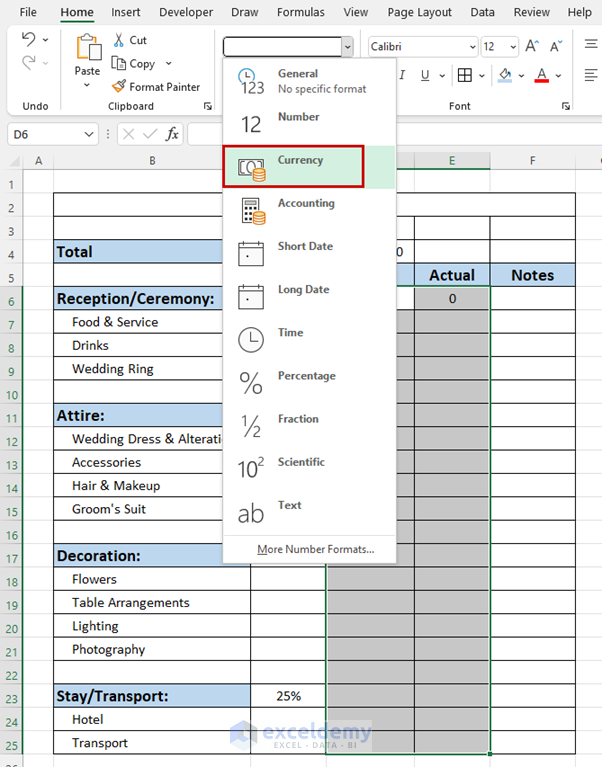
- Next, select the cell D6.
- Then, insert the following formula.
=D4*C6
- After that, press ENTER to get the value of Budget for Reception/Ceremony.
- Similarly, calculate the value of the Budget for Attire, Decoration, and Stay/Transport.

- Then, insert the individual value of the Budget for all the sub-categories.
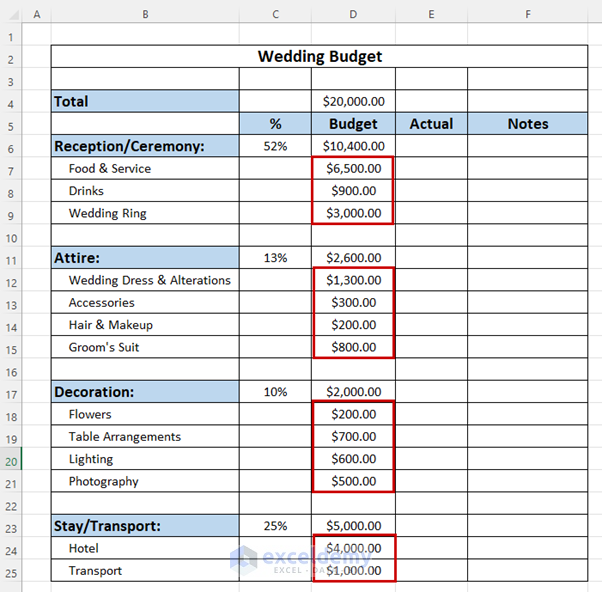
- After that, insert the Actual amount of cost for all the sub-categories.

- Next, select the Cell D6.
- Then, insert the following formula.
=SUM(E7:E9)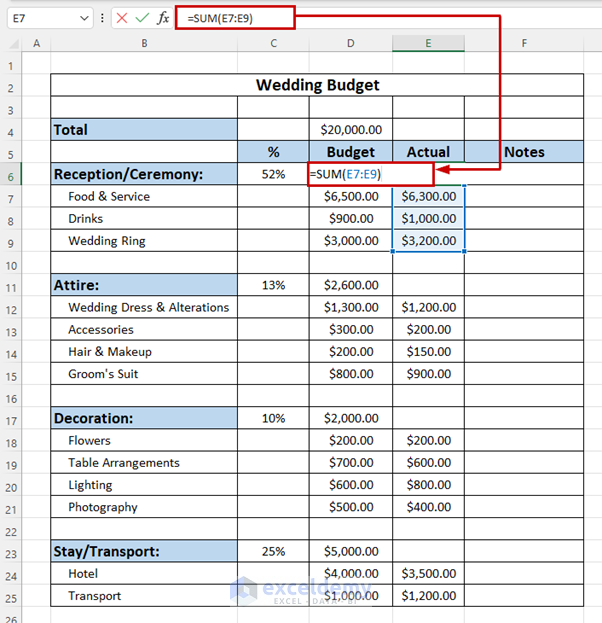
Here, we used the SUM function to calculate the Actual value spent for the Reception/Ceremony.
- After that, press ENTER to get the Actual value spent for the Reception/Ceremony.

- Similarly, calculate the value of Actual amount spent for Attire, Decoration and Stay/Transport.
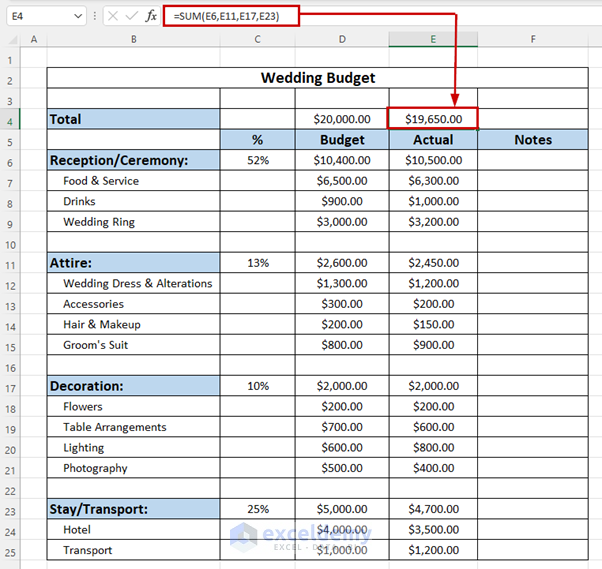
- Then, select Cell E4.
- Next, insert the following formula.
=SUM(E6,E11,E17,E23)
- Then, press ENTER to get the Total Actual Cost.
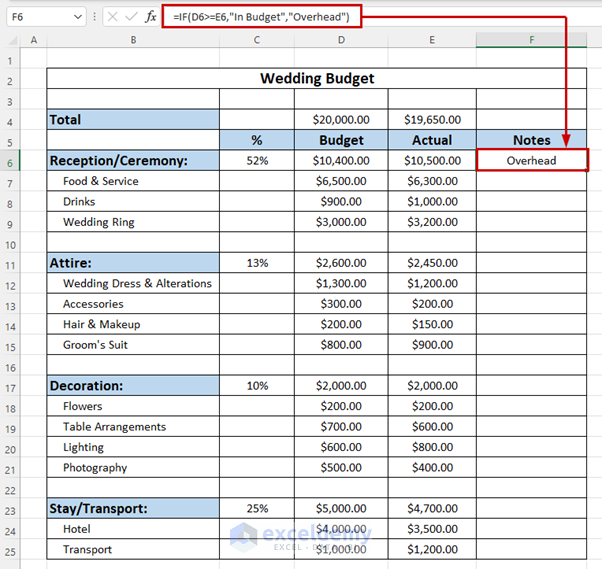
- After that, select Cell F6 to use the IF function.
- Then, insert the following formula.
=IF(D6>=E6,"In Budget", "Overhead")
Here, the IF function will check the spending Overhead based on the Budget. If spending access the budget limit then it will return Overhead otherwise will return In Budget in the Notes column.
- Next, press ENTER to know if the Actual cost is In Budget or Overboard for Reception/Ceremony.
- Similarly, evaluate whether the Actual cost is In Budget or Overboard for Attire, Decoration, and Stay/Transport.

- After that, select Cell ranges D4:E4, C6:F6, C11:F11, C17:F17, and C23:F23.
- Then, go to the Home tab >> from Fonts >> click on Fill Color.
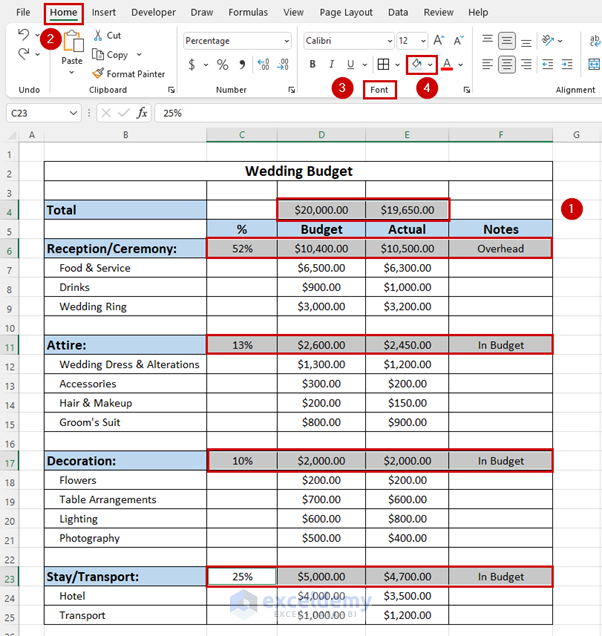
- Next, select Green, Accent 6, Lighter 80%.

- Next, select Cell B2.
- Then, go to the Home tab >> from Fonts >> click on Fill Color.
- After that, select Orange, Accent 2, Lighter 40%.

- Then, go to the View tab >> off the Gridlines.
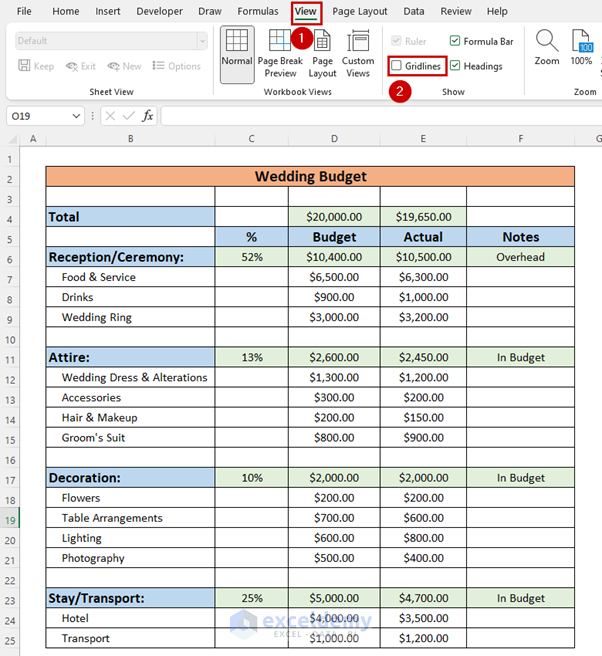
- Finally, you will get your desired Wedding Budget.

Read More: How to Make a Household Budget in Excel
Download Practice Workbook
Conclusion
So, in this article, you will find 2 ways to make a wedding budget in Excel. Use any of these ways to accomplish the result in this regard. Hope you find this article helpful and informative. Feel free to comment if something seems difficult to understand. Let us know any other approaches which we might have missed here.
Related Articles
- How to Create a Personal Budget in Excel
- How to Make a Personal Monthly Budget in Excel
- How to Make a Budget in Excel for College Students
- How to Create a Department Budget in Excel
<< Go Back To How to Create a Budget in Excel | Excel For Finance | Learn Excel
Get FREE Advanced Excel Exercises with Solutions!
