Dates are one of the most common data types we use in Excel. Using and interpreting dates can be confusing, as Excel has several formats to display the same date. For this, we need to have a proper understanding of the date formats and how they work.
Date formats are the way dates are displayed in Excel.
In this Excel tutorial, we will discuss 4 ways to change the Excel date format. The ways include: changing the default format using the keyboard shortcut, the number format box from the ribbon, the format cells dialog box, and using the DATEVALUE function. We also discuss changing the default date format from the control panel and changing to different locales to change the date format.
Date Format Codes
A date format code represents how a date is displayed. Changing the code means changing the way to display a date.
There are dedicated codes in Excel for how we want to display days, months, and years. These are shown below:
Code for Days:
| Code | Meaning | Example |
|---|---|---|
| d | days with single-digit number | 3 |
| dd | days with double-digit number | 03 |
| ddd | days as short week name | Wed |
| dddd | days as full week name | Wednesday |
Code for Months:
| Code | Meaning | Example |
|---|---|---|
| m | months with single-digit number | 3 |
| mm | months with double-digit number | 03 |
| mmm | months as short name (first 3 letters) | Feb |
| mmmm | months as full name | February |
| mmmmm | months as the first letter of the name | F |
Note: Using mmmmm can get confusing as we have different months with the same first letter. For example: all three of January, June, and July will display the date as J. August and April both display A.
Code for Years:
| Code | Meaning | Example |
|---|---|---|
| yy | year as last two-digits | 24 |
| yyyy | year as full digits | 2024 |
4 Ways to Change Date Format in Excel
After inserting a date in Excel, we may need to change the format for various reasons. We can change the date format in three different ways: using the keyboard shortcut, the number format box, the format cells dialog box, and using the DATEVALUE function to format dates stored as texts.
1. Using Keyboard Shortcut
To apply the default format, use the keyboard shortcut:
- Select the cell or range of cells.
- Press Ctrl + Shift + 3(#) on your keyboard.
The keyboard shortcut applies the short date formatting to the date.
2. Using Number Format Box
The number format box can be accessed from the ribbon of the Home tab. This allows us to format the date as short or long.
To format the date using the number format box:
- Select the cell or range of cells.
- Go to Home > Number group > Number Format box.
- Select Short Date or Long Date.
The date will be displayed accordingly.
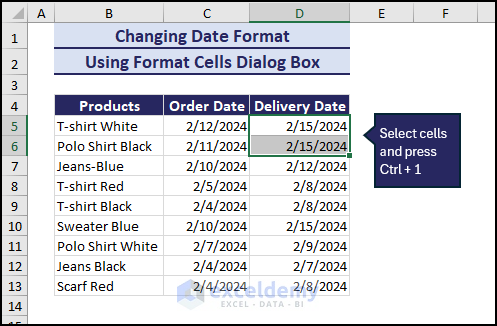
3. Using Format Cells Dialog Box
If you want more options to display the date, you can use the Format Cells dialog box. This can be used to make a custom date format too.
To format the date using the format cells dialog box:
- Select the cell or range of cells.
- Press Ctrl + 1 on your keyboard.
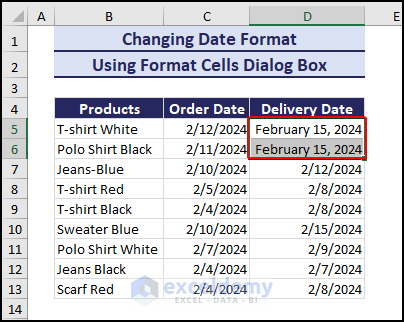
 This brings out the Format Cells dialog box. In the Format Cells dialog box:
 - Go to the Number tab and select Date in the category field.
- Select the preferred format from the Type field.
- Click on OK.

The date will be displayed according to your selected format.
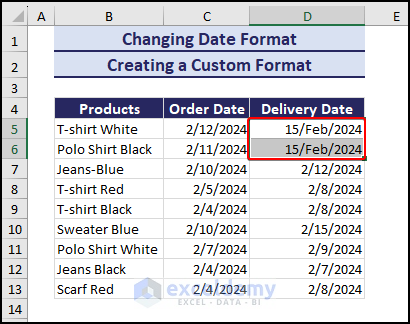
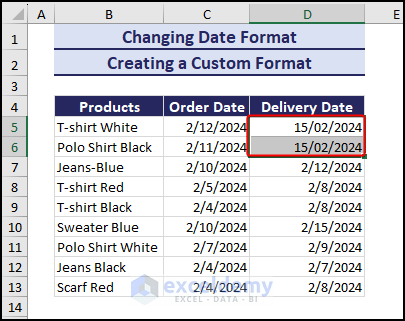
Creating a Custom Date Format
If you do not like the options provided in the Type field in the Format Cells dialog box, you can add a custom format for the dates.
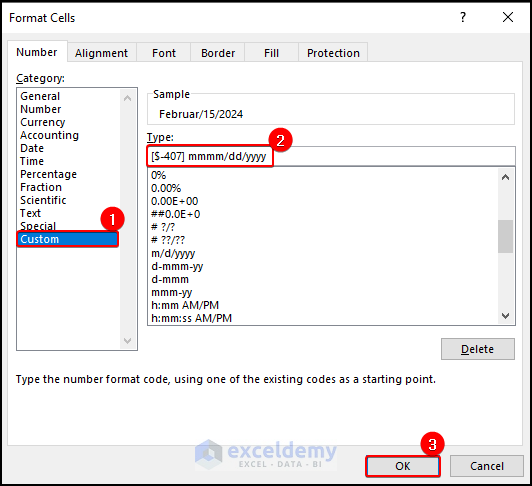
To add a custom format:
- Select Custom in the Category field.
- Insert the custom format in the Type box.
- Click on OK to close the Format Cells dialog box.
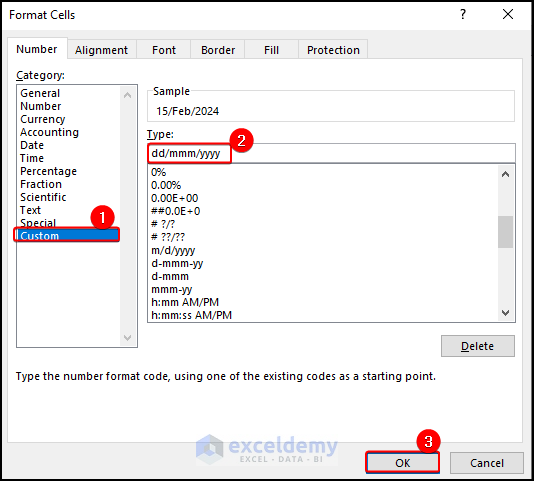
The custom format will be applied to the selected cells.
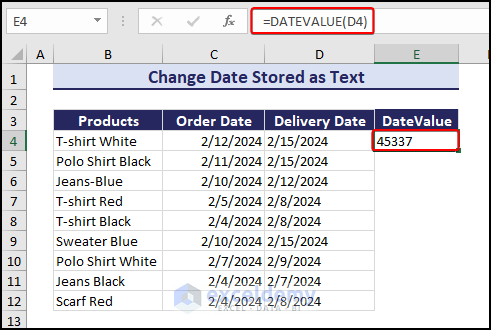
4. Using DATEVALUE Function to Change Date Stored as Text
Sometimes, when we import data from elsewhere, the dates might be displayed as texts in Excel. This creates a problem when we want to change the formatting. To solve this, we can use the DATEVALUE function.
We have to remember that in Excel, dates are stored as serial numbers. January 1st, 1900 is given a serial number of 1, January 2nd, 1900 is denoted by 2, and so on. Every date is assigned a unique serial number.
The DATEVALUE function returns the serial number of a particular date stored as text. This serial number can then be converted to dates and we can apply formatting to it.
To change the formatting of dates stored as text using the DATEVALUE function:
- Go to cell E4.
- Insert the following formula:
=DATEVALUE(D4)
Now we can apply any formatting we like to the value.
 Press Ctrl + Shift + 3(#) on your keyboard to apply the default date formatting to the cell.
How to Change Default Date Format
The default date format is the one that we see after inserting a date in Excel. The default date format is determined by the native settings of our computer. There are two default date formats: Short Date and Long Date. We can easily notice them in the Format Cells dialog box as they are marked with an asterisk(*).

The default date format can be changed from the Control Panel of Windows.
Follow these steps to change the default date format:
- Go to the Control Panel.
- Select Change date, time, or number formats under the Clock and Region section.
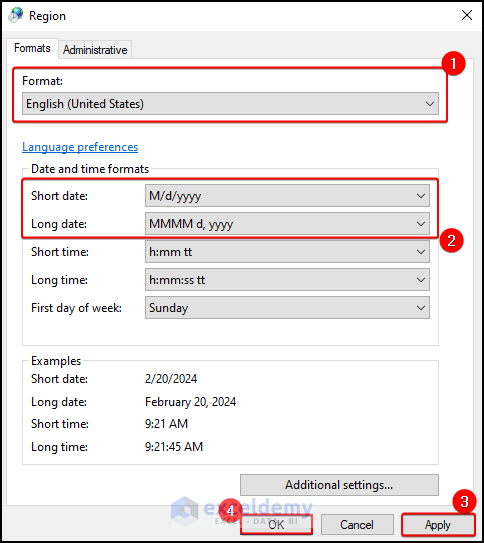
 A new window named Region appears. The default location based on which the date is displayed can be changed in the Format section.
 - Select the format from the Short date and Long date drop-downs.
- Click on Apply and then OK.
Applying Custom Format for Default Date Format
Now what if you want to apply a custom formatting to the default date format? We can choose from a limited number of options in the drop-down menus. But, we can easily insert a custom date format that we like and easily understand.
Follow the steps below:
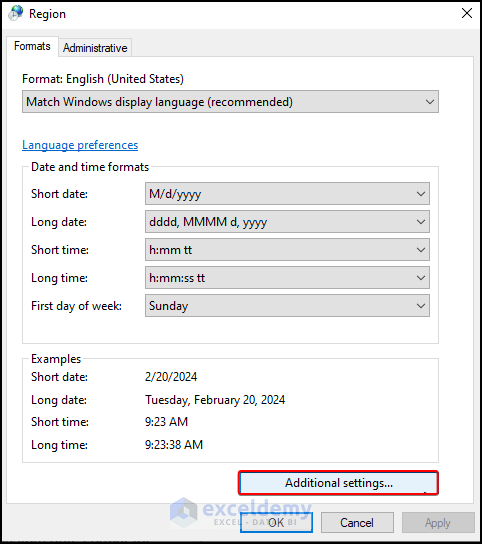
- Click on Additional settings in the Region window.
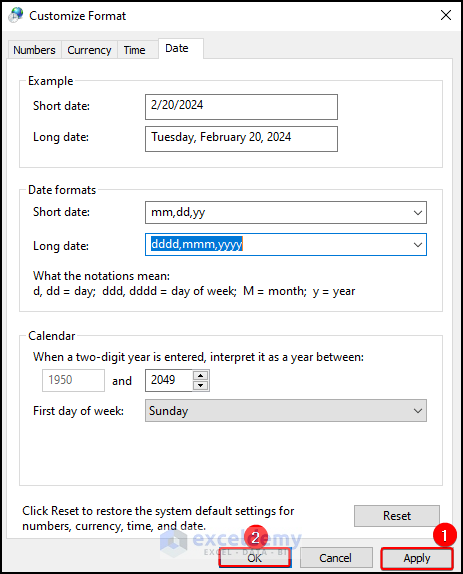
 Go to the Date tab.
- Insert custom formats in the Short date or Long date boxes.
 Click on Apply and then OK to apply the formatting.
How to Change Date Format to Other Locale
Every country handle dates a little differently. Each country has its unique style when it comes to the way of displaying dates. Thats why, selecting a certain region can display the date according to that region.
We can select a location to view a date according to that location from the Number tab of the Format Cells dialog box.
Follow the steps shown below:
- Select a language from the Locale(Location) drop-down menu.
This will modify the date formats in the Type field accordingly. - Choose the preferred format.
- Click on OK to apply the format.
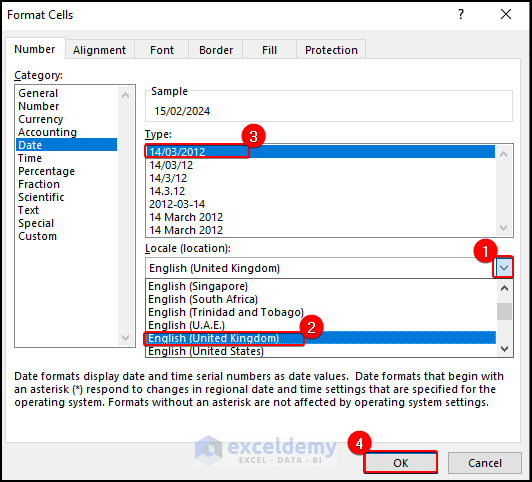
The selected format will be applied to the selected cells.
Custom Date Format for Other Locales
Now, what if you don’t want to change the location but still want to display a date according to a different language? In that case, you have to use the corresponding language code associated with a language. The code will allow you to display the date in that particular language. The code has to be used inside square brackets ([]) followed by a dollar sign ($) and a dash (–) in the Custom tab of the Format Cells dialog box.
The German language is denoted by code 407. If you want to display a date in German, you have to use the code: [$-407]
Some of the most popular languages and their codes are:
| Language | Code |
|---|---|
| English (US) | [$-409] |
| English (UK) | [$-809] |
| German (Germany) | [$-407] |
| French (France) | [$-40c] |
| Spanish (Traditional) | [$-40a] |
| Chinese (PRC) | [$-804] |
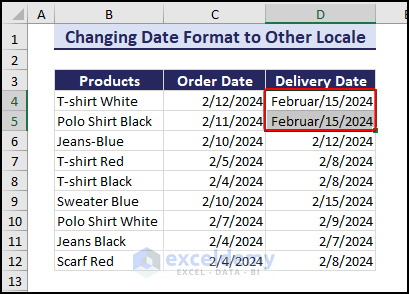
The steps to do this are described below:
- Insert the language code in the Type box along with the format.
- Click on OK to apply the formatting.
The format for the German language is applied to the selected dates.
Things to Remember
- If, after changing the format, the date is displayed as #####, the cell is probably not wide enough to show the full date. Modify the cell width to solve this issue.
- The TEXT function can be used to convert a date into text.
Download Practice Workbook
Conclusion
In this article, we have described the way to change the date format from the control panel and change the date format in Excel.
We have also shown the process of changing the location to change the date format according to that location.
We recommend you select a date format according to the requirements of your dataset and the one you understand easily.
We hope that this article clears up all your confusion regarding the different date formats.
Excel Change Date Format: Knowledge Hub
<< Go Back to Date Format | Number Format | Learn Excel
Get FREE Advanced Excel Exercises with Solutions!

Thanks for describing all these methods, but none of them seem to work for the case in which the dates are listed in year-month-day order. It seems like all the methods above rely upon having the reverse order.
In this case, I would like to extract the year, the month, and the day separately, and I have datafiles with thousands of such entries. Of course, I can use the “Left()”, “Mid()”, and “Right()” commands to extract text, but I was hoping there was a way that could apply to both date formats. (In these long data tables, the date format might change unexpectedly.)
Hello Jon Nelson,
Thanks for the detailed feedback, this is a very valid point. You’re right that many of the examples in the article assume a specific date order (like day–month–year), which can cause issues when your data is in year–month–day (YYYY-MM-DD) format or when formats are inconsistent.
A more robust approach that works regardless of the displayed order is to first make sure Excel is working with a true date value, and then extract the components using built-in date functions:
Year: =YEAR(A1)
Month: =MONTH(A1)
Day: =DAY(A1)
These functions are format-independent and will continue to work even if the date format changes unexpectedly in large datasets.
If some of your dates are stored as text (which often happens with imported files), you can first convert them using:
Go to the Data tab >> select Text to Columns, or
=DATEVALUE(A1) (when Excel can recognize the text date)
Once converted, YEAR(), MONTH(), and DAY() will handle both Y-M-D and D-M-Y formats reliably without relying on LEFT, MID, or RIGHT. Thanks again for pointing this out, it’s a great real-world scenario, especially when working with large and inconsistent data files.
Regards,
ExcelDemy