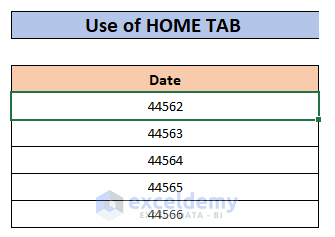
Method 1 – Converting the Date to a Serial Number in Excel with the DATEVALUE Function
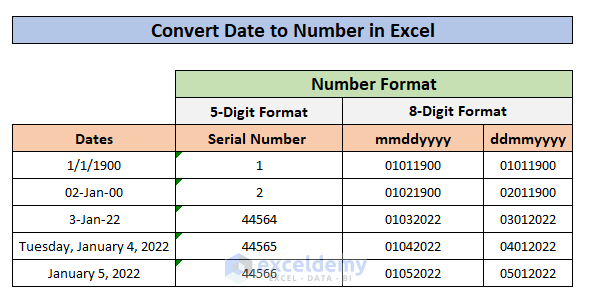
We will convert a date to a number in Excel. Here is an overview of the final result.
NOTE: Excel stores dates as serial numbers in its system. The serial number starts from 1 on the date 1/1/1900 and increases by 1 for each date thereafter.
The DATEVALUE function in Excel converts a text-formatted date to a serial number that is recognizable as a date to Excel.
Syntax of the DATEVALUE function:
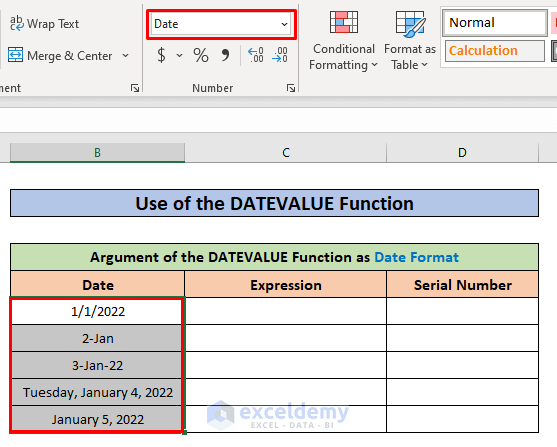
Example 1: DATEVALUE Function Argument in the Date Format
If the argument for the DATEVALUE function is in the date format, we need to put the date inside double quotes to make the function work.
Screenshot 1: The selected column is in the date format.
Screenshot 2: We put the date inside a double quote to make it text for the DATEVALUE function and then hit ENTER.
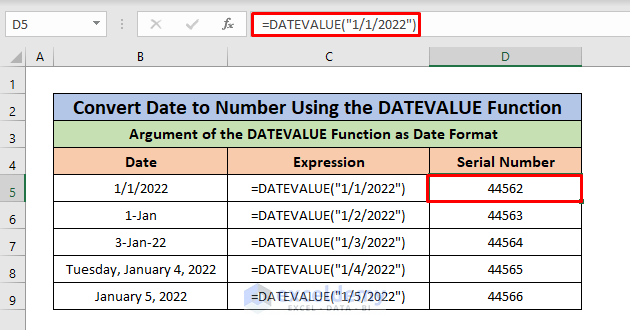
The DATEVALUE function converts the date into a serial number.
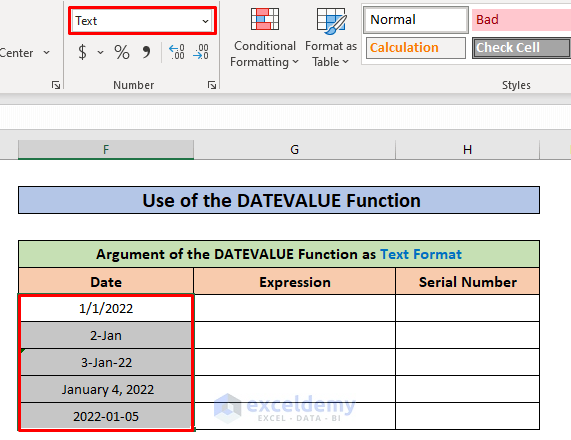
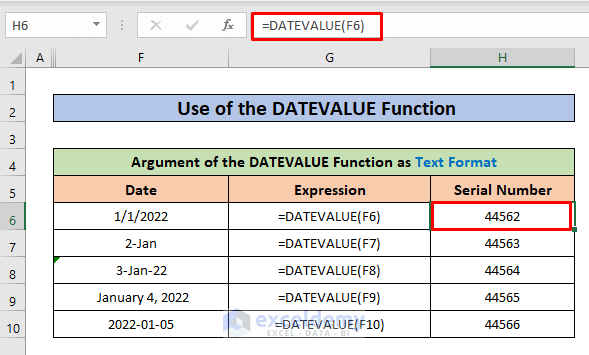
Example 2: DATEVALUE Function Argument in the Text Format
If the argument for the DATEVALUE function is in Text format, we need to put the date inside the function to turn it into a serial number.
Screenshot 1: The selected cells contains a list of dates in Text format.
Screenshot 2: In cell H6, we put F6 as the argument which contains the date 1/1/2022 (in Date format), and hit Enter to convert it to a serial number.
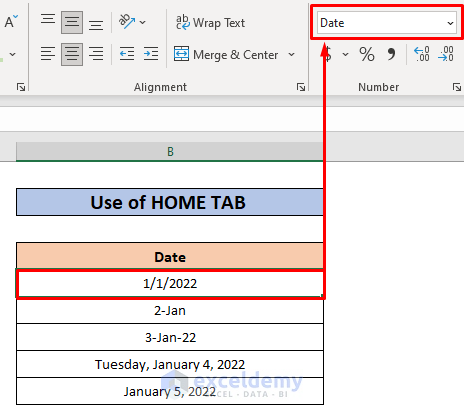
Method 2 – Converting Date to a Serial Number Changing the Formatting
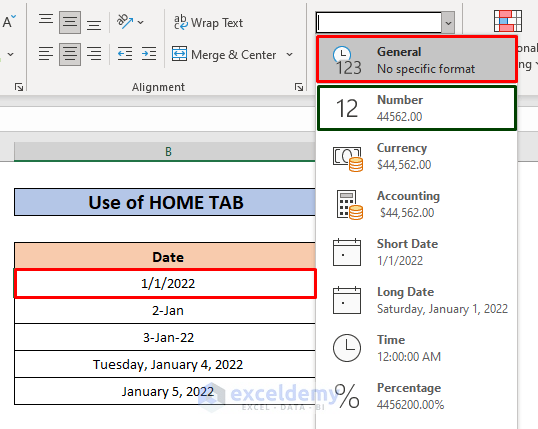
- This screenshot shows a list of dates in the Date format. From the Home tab, navigate to the Number section, there is a box that shows the format of the selected cells and options to change into another format.
- From the format options, choose the General or the Number option.
- This will turn the date into a 5-digit number.
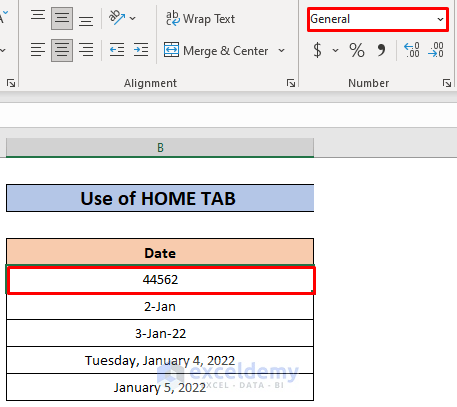
Following the same steps, all the other dates can be converted into a serial number.
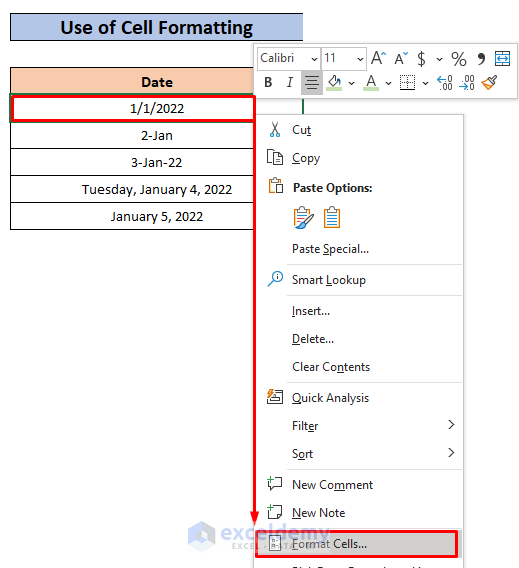
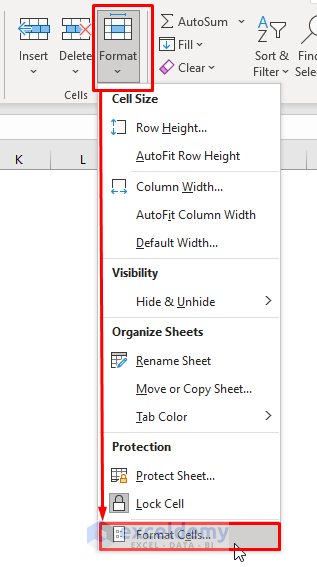
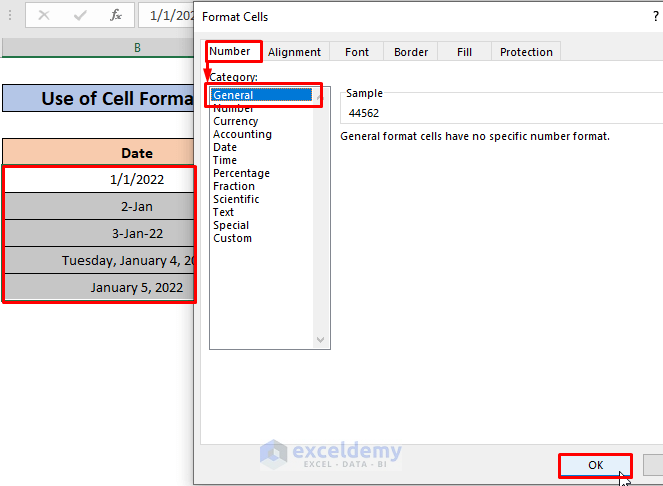
Method 3 – Using Format Cells Dialog Box for Converting Date to Number
Open the Cell Formatting Option (3 ways):
1. Select a cell, right-click and choose Format Cells from the Context Menu.
OR
2. Go to the Cells section from the Home tab. From the Format tab, select the Format Cells option.
OR
3. Press Alt + H + O + E on your keyboard to show the Format Cells window.
In the Number tab, select General from the Category list. Click the OK button.
Method 4 – Using Custom Formatting to Transform the Date to an 8-digit Number (mmddyyyy or ddmmyyyy Format)
Open the Format Cells window using any of the ways (click here to see the ways) described in the previous method.
- Go to the Number tab.
- Select the Custom option from the Category.
- Put mmddyyyy in the Type input box.
- Click the OK button.
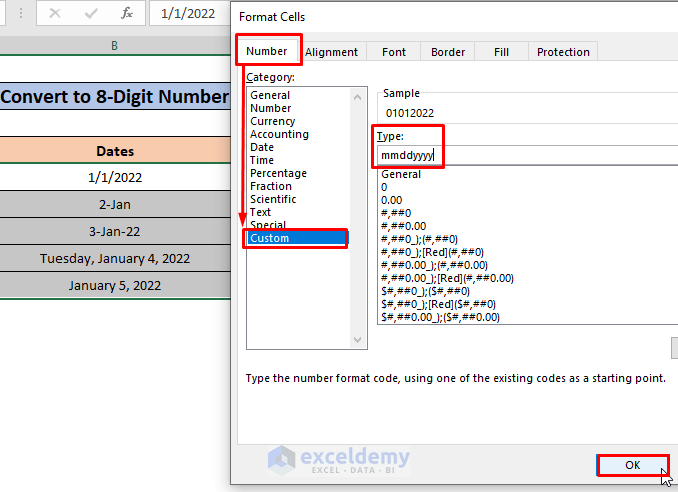
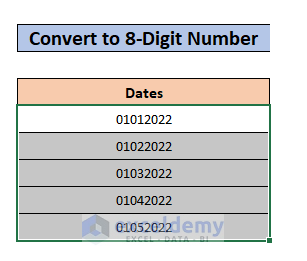
- This converts all the dates into 8-digit numbers in the mmddyyyy format.
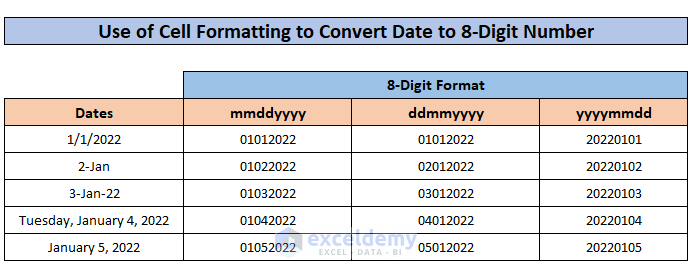
Following the same procedure, we can convert dates to different formats like ddmmyyyy, yyyymmdd, etc.
Here is an overview:
Things to Remember
- You might sometimes see #### displayed in a cell after converting a date to a number. This happens when the cell isn’t wide enough to show the entire number. Increase the column width to fix the issue.
- While using the default date system of Microsoft Excel for Windows, the argument value must be in a range from January 1, 1900, to December 31, 9999. It fails to handle a date beyond this range.
Download Practice Workbook
Related Articles
- How to Convert Date to Day of Week in Excel
- How to Convert Date to Day of Year in Excel
- How to Convert Date to Month in Excel
- Convert Date to Day of Year in Excel
- How to Convert Date to Month and Year in Excel
- How to Convert Date to Quarter and Year in Excel
- How to Convert Date to Day in Excel
<< Go Back to Date Format | Number Format | Learn Excel
Get FREE Advanced Excel Exercises with Solutions!
