Dataset Overview
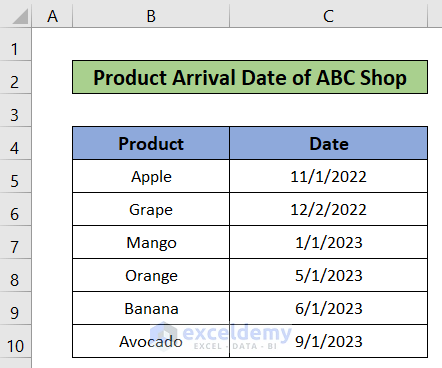
We’ll use a dataset called the Product arrival Date of ABC Shop to demonstrate these methods. This dataset consists of two columns B and C called Product and Date. the dataset ranges from cells B4 to C10.
Method 1 – Using ROUNDUP Function
Steps
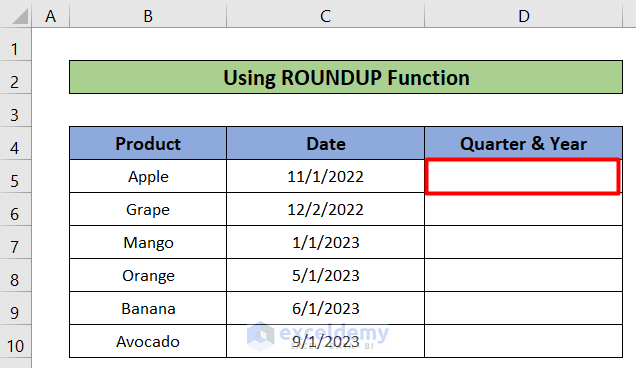
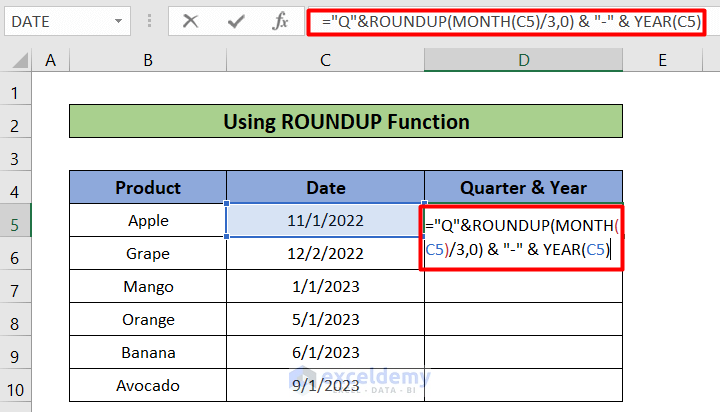
- Select cell D5, the cell where you want to display the quarter and year.
- In the selected cell, enter the following formula:
="Q"&ROUNDUP(MONTH(C5)/3,0) & "-" & YEAR(C5)This formula combines the quarter (Q) and year based on the date in cell C5.
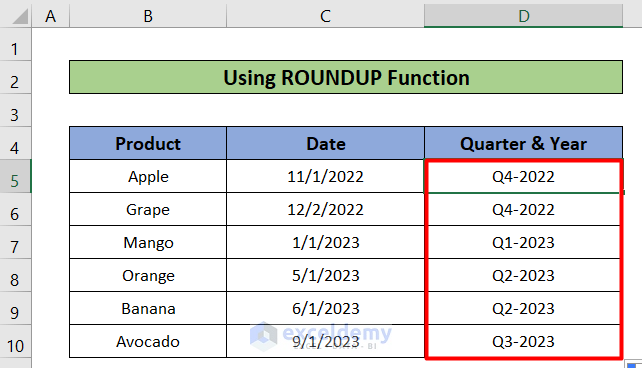
- Use the Fill Handle to copy the formula from cell D5 to D10.

- You’ll see the results as shown in the picture.
How Does the Formula Work?
- MONTH(C5)/3,0) & “-” & YEAR(C5): The MONTH function calculates the month value from C5, divides it by 3, and appends the year from C5.
- “Q”&ROUNDUP(MONTH(C5)/3,0) & “-” & YEAR(C5): “Q” is then concatenated with the rounded-up result of the MONTH function divided by 3, followed by a hyphen and the year from C5.
Read More: Convert Date to Day of Week in Excel
Method 2 – Applying INT Function
Steps
- Select Cell D5 where you want the quarter and year information.

- In Cell D5, enter the following formula:
="Q" &INT((MONTH(C5)+2)/3) & "-" & YEAR(C5)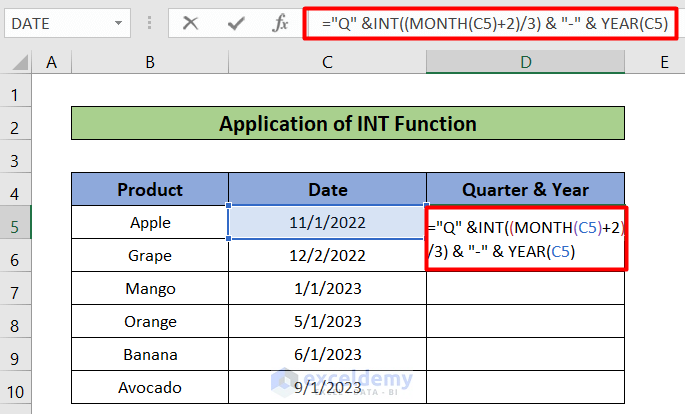
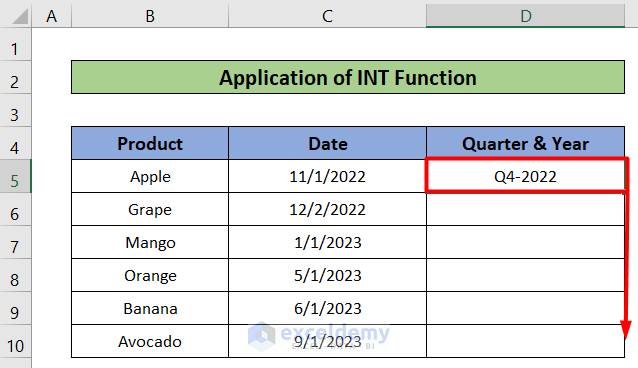
- Press Enter to get the desired result.
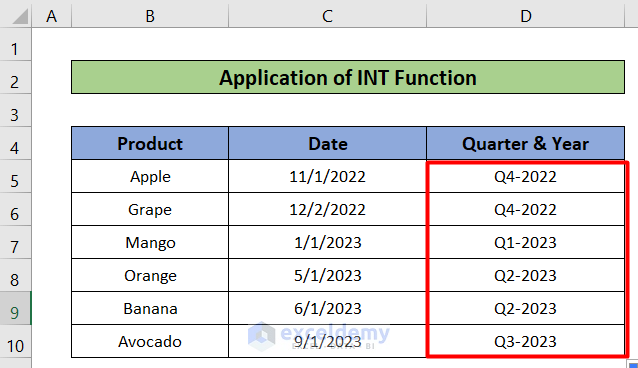
- Copy the formula from cell D5 to D10 to obtain the quarter and year values.
- The desired quarter and years can be seen below:
How Does the Formula Work?
- MONTH(C5)+2)/3 & “-” & YEAR(C5): The MONTH function retrieves a month value from C5, then divides the result by 3. Additionally, the YEAR function extracts the year value from C5.
- “Q” & INT((MONTH(C5)+2)/3) & “-” & YEAR(C5): The INT function rounds the returned value of the MONTH function.
Read More: How to Convert Date to Year in Excel
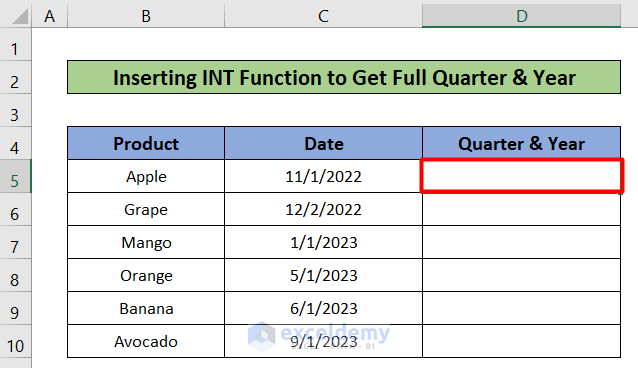
Method 3 – Full Quarter and Year Using INT Function
Steps
- Select Cell D5, where you want the full quarter and year.
- Enter this formula:
="Quarter " & INT((MONTH(C5)+2)/3) & "-" & YEAR(C5)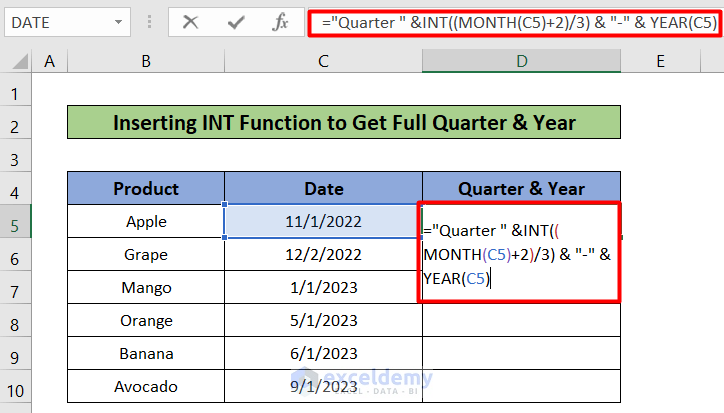
- Press Enter to see the result in cell D5.
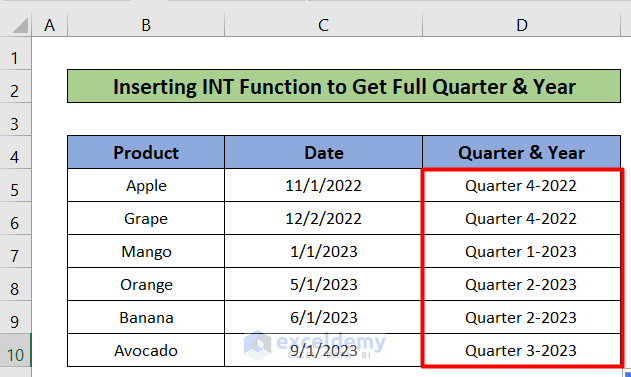
- Copy the formula from cell D5 to D10 to get the complete quarter and year details.
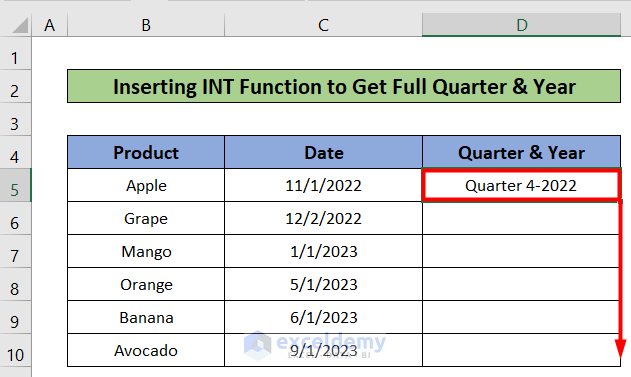
- The result can be seen below:
How Does the Formula Work?
- MONTH(C5)+2)/3 & “-” & YEAR(C5): The MONTH function obtaining the month value from C5, then dividing it by 3, and appending the year value from C5.
- “Quarter ” & INT((MONTH(C5)+2)/3) & “-” & YEAR(C5): The INT function rounds the returned value of the MONTH function.
How to Convert Date to Month in Excel
Steps
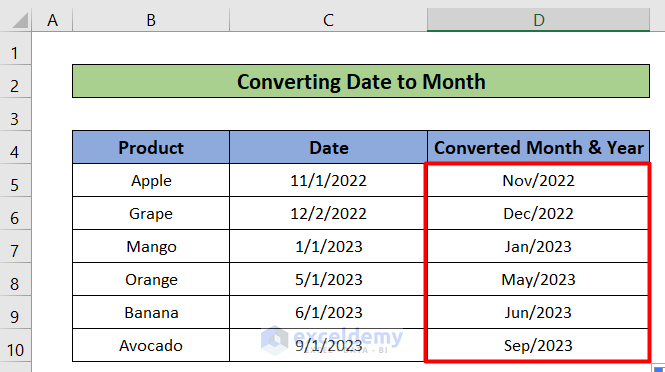
- Select cell D5, where you want to display the month and year.
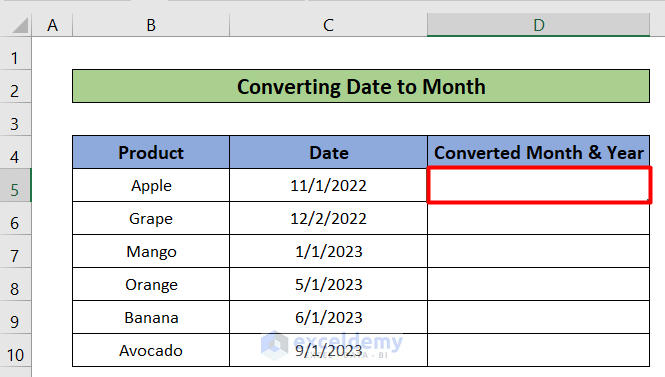
- In Cell D5, enter the following formula:
=TEXT(C5,"mmm/yyyy")This formula extracts the month (in abbreviated format) and the year from the date in cell C5.
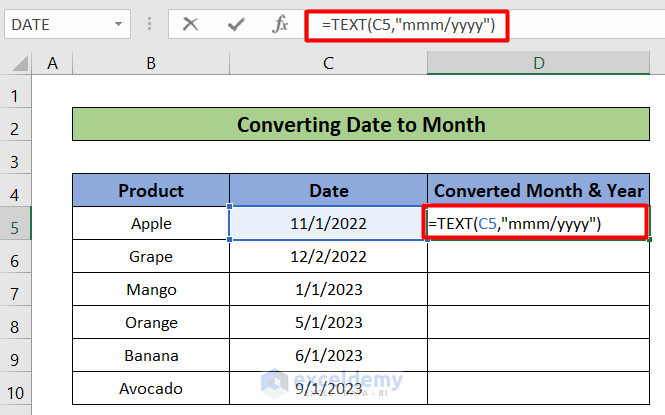
- Press Enter to get the desired result.
- Use the Fill Handle to copy the formula from cell D5 to D10.
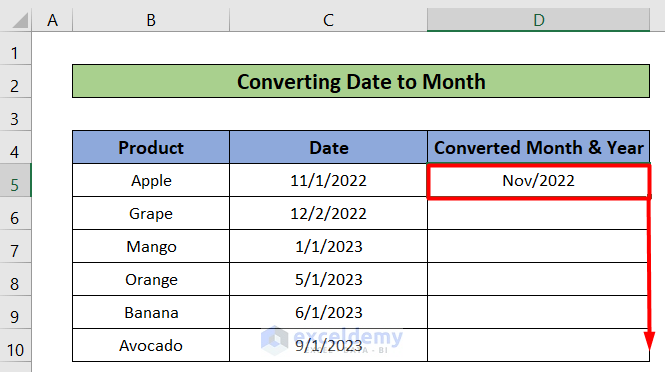
- You’ll see the results as shown in the picture.
Read More: How to Convert Date to Month and Year in Excel
Things to Remember
- Both the ROUNDUP and INT functions return integer values in the formulas.
Download Practice Workbook
You can download the practice workbook from here:
Related Articles
- How to Convert Date to Day of Year in Excel
- How to Convert Date to Number in Excel
- How to Convert Date to Month in Excel
- How to Convert Date to Day in Excel
<< Go Back to Date Format | Number Format | Learn Excel
Get FREE Advanced Excel Exercises with Solutions!

by using this formula =IF(MONTH(I2)>3,”Q”&ROUNDUP(MONTH(I2)/3,0)-1&” FY-“&RIGHT(YEAR(I2),2),”Q4 FY-“&RIGHT(YEAR(I2),2)) result will be= Q4 FY-19
by using this formula =IF(MONTH(I2)>3,”Q”&ROUNDUP(MONTH(I2)/3,0)-1&” FY-“&RIGHT(YEAR(I2),2),”Q4 FY-“&YEAR(I2)) result will be= Q4 FY-2019
Hello Ankur Vaish,
Thanks for your suggestions.