If you are searching for ways to insert a symbol in the Excel Footer, then this article will be helpful for you. So, let’s get into the main article.
How to Insert Symbol in Excel Footer: 3 Effective Ways
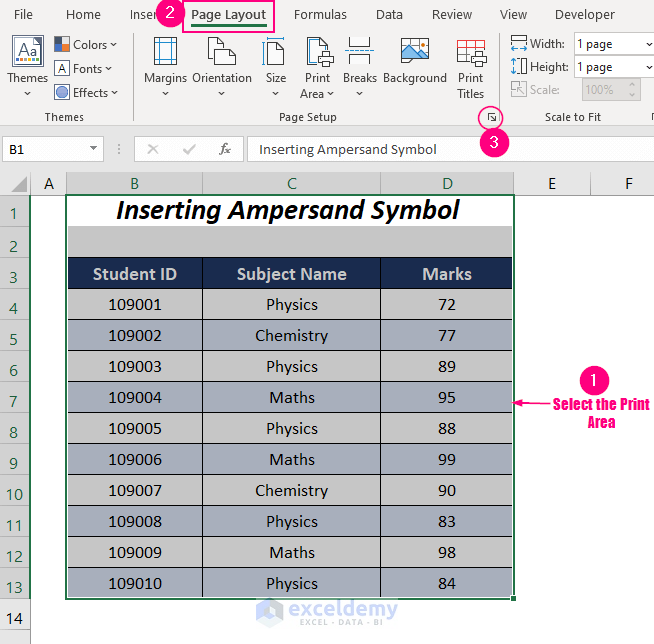
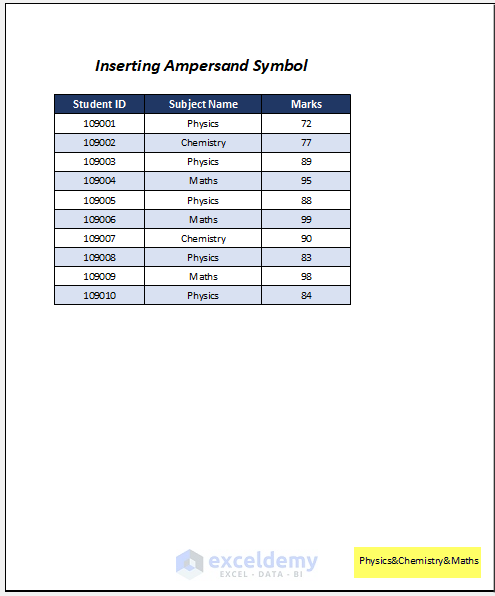
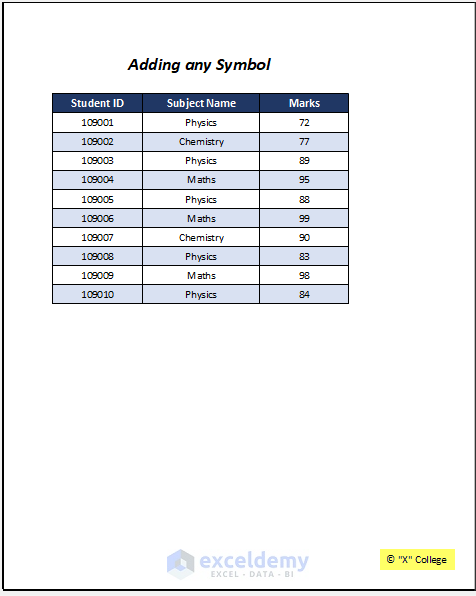
Here, we have the records of the marks for different subjects of some students of a college. Using this datasheet we will add our desired symbol in the Footer section and then print the whole sheet. By following the 3 ways in the upcoming sections you can also add your desired symbols in the Footer section.

We have used the Microsoft Office 365 version here.
1. Using Page Layout Tab to Insert Symbol in Excel Footer
Here, we are going to use the Page Layout tab of Excel to insert different symbols in the Footer section of a sheet. Adding Ampersand (&) in the Footer section is dissimilar to adding another type of symbol. The two cases will be illustrated below.
Case 1: Insert Ampersand (&) Symbol in Excel Footer
In this section, we will only discuss the process of insertion of the specific symbol Ampersand (&) in the Footer section of the following sheet. This symbol will separate the subjects: Physics, Chemistry, and Math.

Steps:
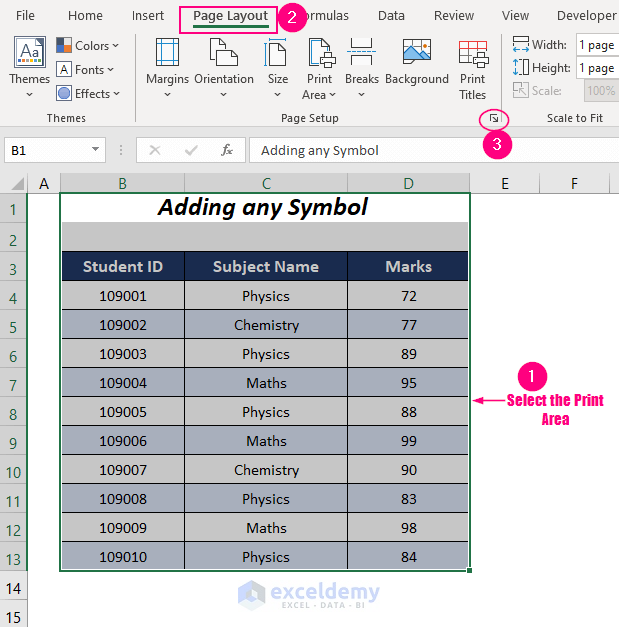
➤ Select the dataset to appear in the Print Preview and then go to the Page Layout tab >> Click on the Expand icon of the Page Setup area.
After that, the Page Setup dialog box will open up.
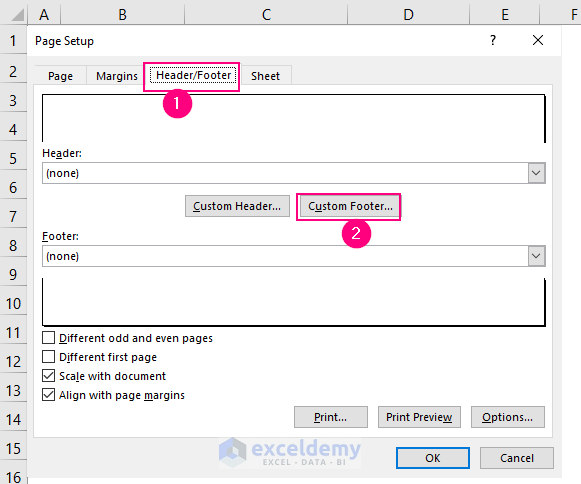
➤ Click on the Header/Footer section and then select the Custom Footer option.
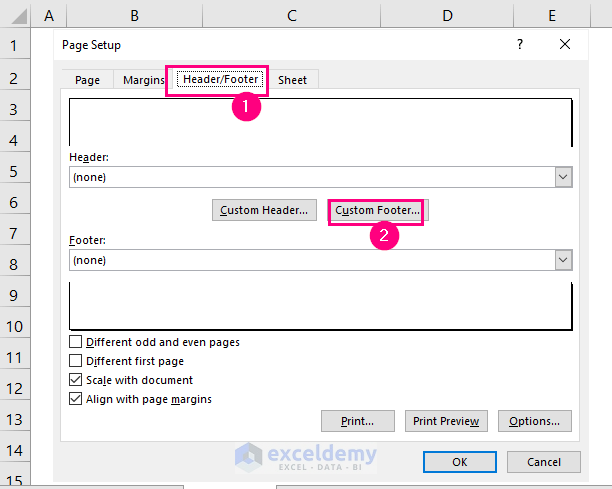
Then, the Footer window will pop up.
Among the three sections, you can write anywhere you want to appear in the Footer section.
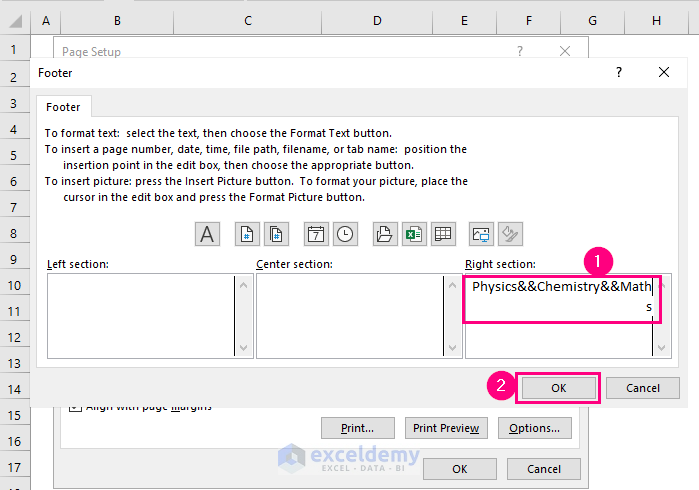
➤ We are going to type the subject names with & on the Right section and notice that we have separated Physics, Chemistry, and Math by 2 ampersands (&) as a separator between every 2 subjects. Because a single & will indicate the joining of two text strings but typing 2 & symbols here will result in a single & sign in the main Footer section.
➤ Press OK.
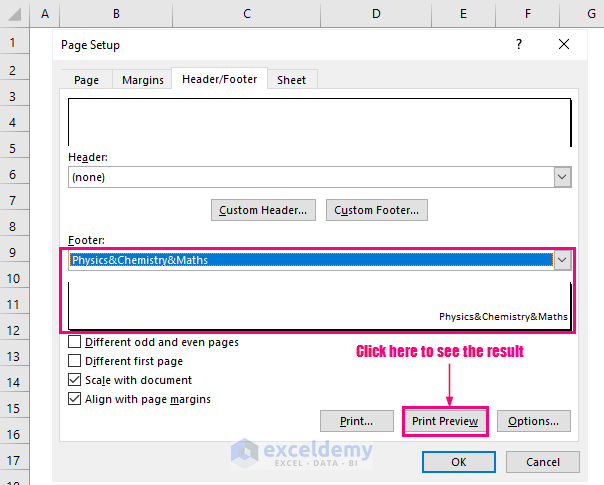
Afterward, you will be taken to the Page Setup dialog box again.
In the Footer section, you can see the resultant view of the Footer part with each subject separated by a single Ampersand.
➤ Click on the Print Preview option to see the result.
Finally, you will be able to add the Ampersand symbol successfully in the Footer section.
Case 2: Typing Character Code of a Symbol to Insert
In this portion, we will discuss the way of inserting any type of symbol except for the Ampersand symbol.

Steps:
➤ Select the dataset to appear in the Print Preview and then go to the Page Layout tab >> Click on the Expand icon of the Page Setup area.
After that, the Page Setup dialog box will open up.
➤ Click on the Header/Footer section and then select the Custom Footer option.
Then, the Footer window will pop up.
Among the three sections, you can write anywhere you want to appear in the Footer section.
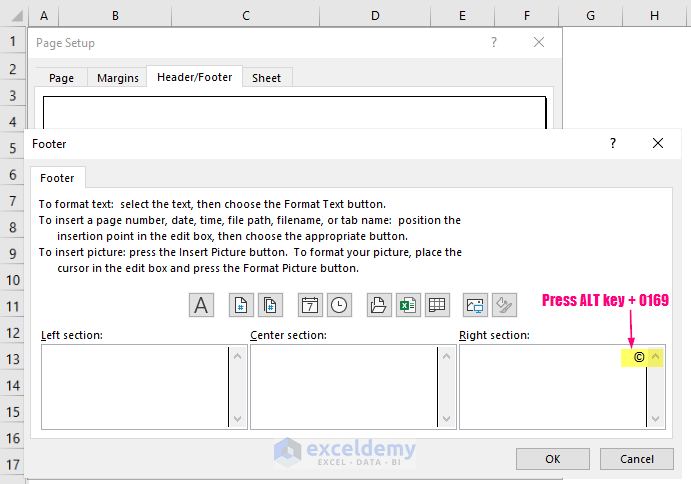
➤ We are going to enter our content in the Right section and so we have added the copyright symbol by pressing the ALT + 0169 (the numbers will be pressed one by one while holding the ALT key and the numbers should be entered from the Numeric Keypad).
Here, 169 is the character code of the copyright symbol and an extra 0 should be added prior to this code here to work properly.
➤ Enter the college name after the symbol and then press OK.
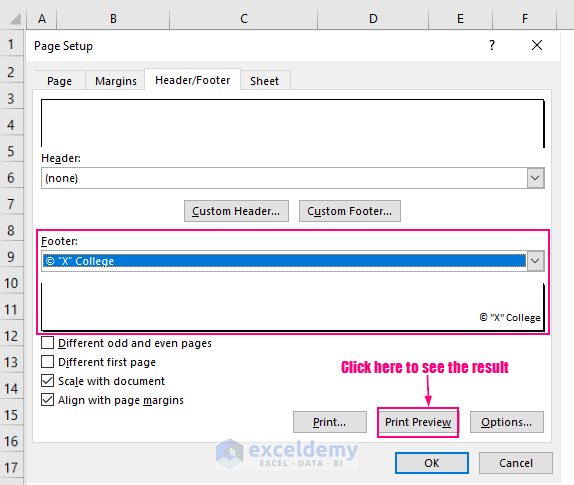
Afterward, you will be taken to the Page Setup dialog box again.
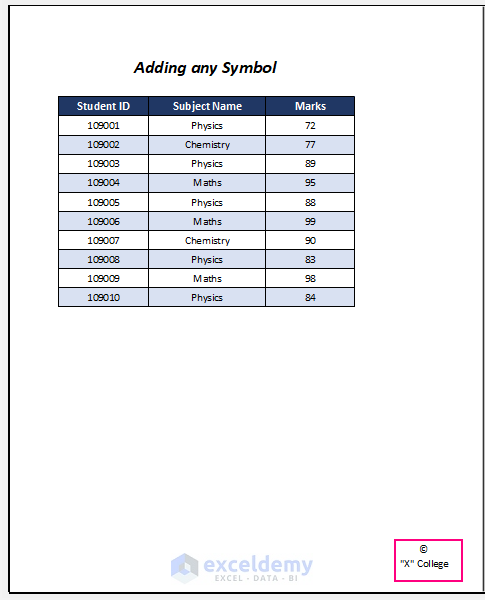
In the Footer section, you can see the resultant view of the Footer part with the college name after the copyright sign.
➤ Click on the Print Preview option to see the result.
- You will get the Footer section with your desired symbol.
Read More: How to Insert Symbol in Excel Header
2. Use of Copy & Paste Feature to Insert Desired Symbol
Here, we will explain how to add any symbol except for the Ampersand symbol in the Footer section of the following dataset. We will insert here the Copyright symbol but you can choose any other symbol you want.

Steps:
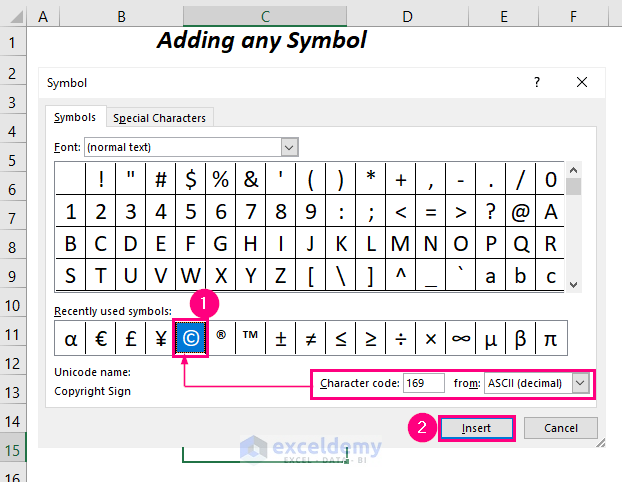
➤ Select the cell where you want to insert the symbol and then go to the Insert tab >> Symbols group >> Symbol option.
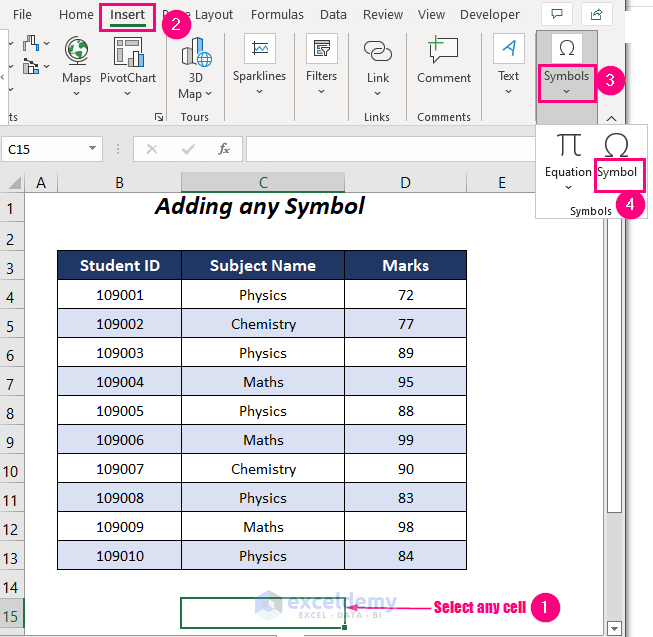
Then, the Symbol window will appear.
➤ Select the Copyright (©) symbol which is from ASCII (decimal) and has a character code of 169.
➤ Click on the Insert option.
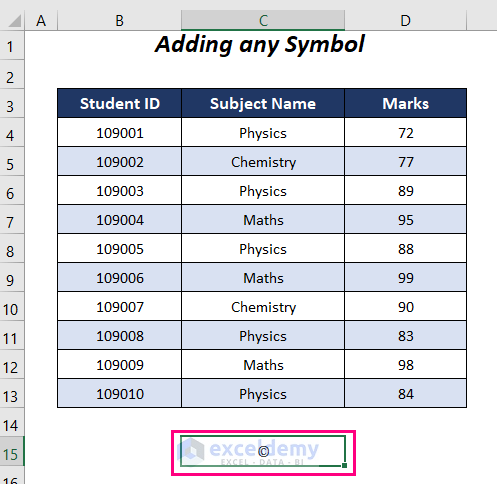
After that, we placed our desired symbol in cell C15.
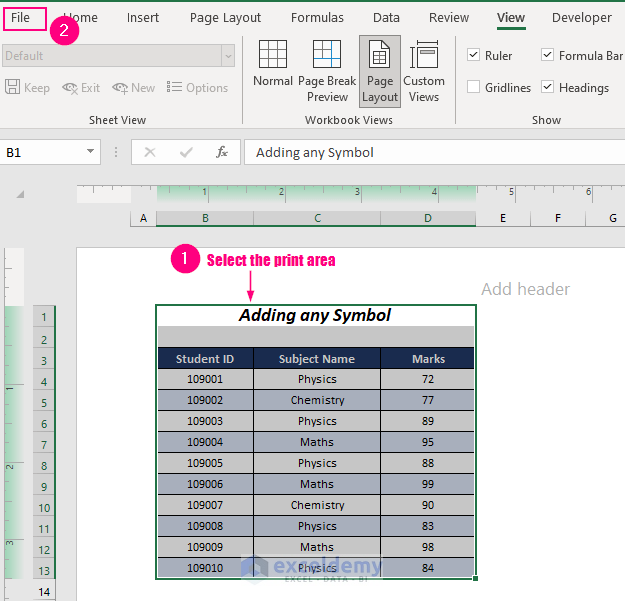
➤ Now, go to the View tab >> Workbook Views group >> Page Layout option.
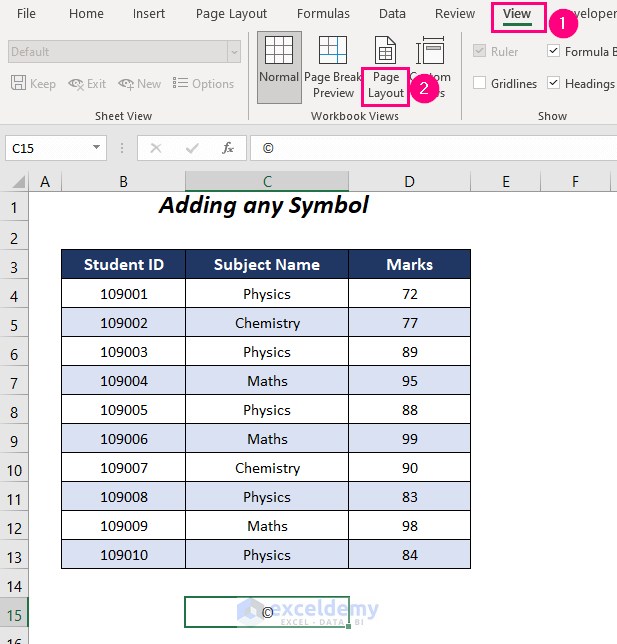
The following figure shows the Page Layout view of this sheet.
➤ Copy the symbol by pressing CTRL + C and to see the Footer section scroll down the page.
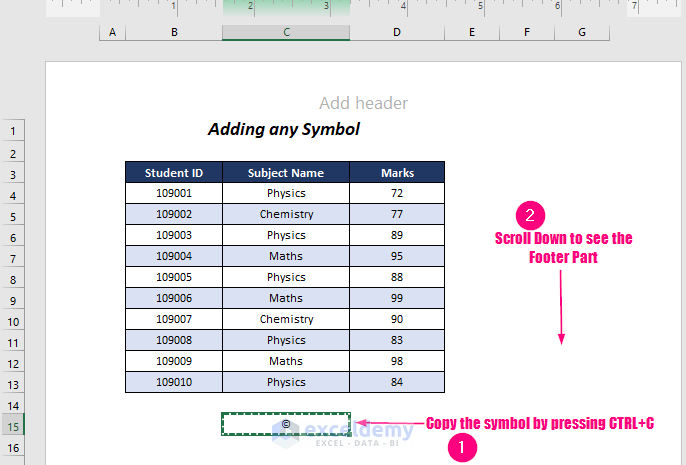
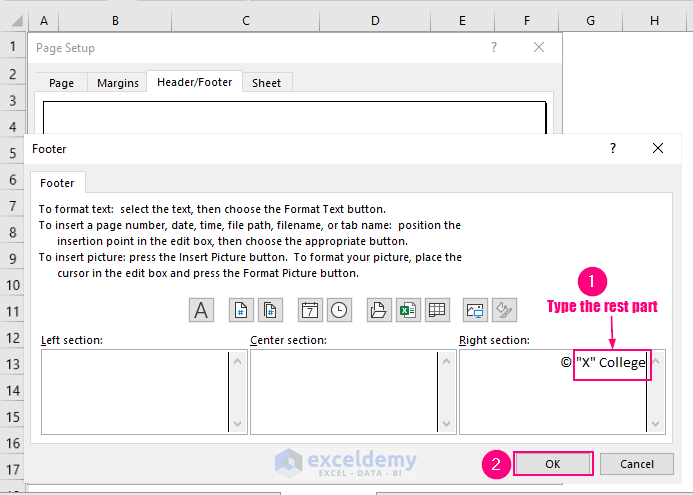
Lastly, we can see the Footer section of this page, and here we have 3 sections to write the content of the Footer.
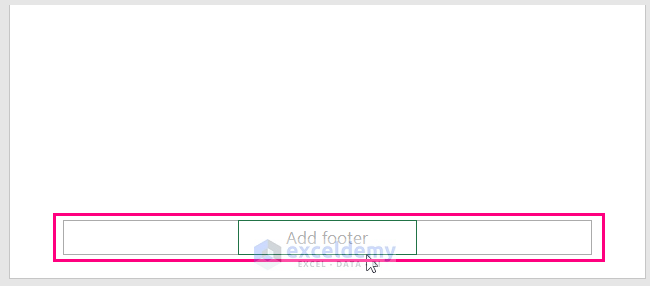
➤ Then, paste the copied symbol by pressing CTRL + V in the right section.

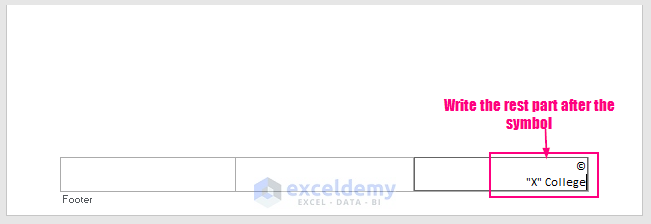
➤ Type the rest part of the content after the symbol which is the college name.
In this way, we have completed the task of adding a symbol in the Footer section and now we will preview the result.
➤ Select the dataset and then go to the File tab.
➤ Select the Print option. Instead of doing this, you can also press CTRL + P.

In this way, we have entered our desired symbol in the Footer section of the following sheet.
Read More: How to Insert Sign in Excel Formula
3. Using VBA to Insert Symbol in Excel Footer
Here, we are going to use a VBA code to add any symbol except for the Ampersand symbol in the Footer section of the following dataset.

Steps:
➤ Go to the Developer tab >> Code group >> Visual Basic option.

Then, the Visual Basic Editor will open up.
➤ Go to the Insert tab >> Module option.
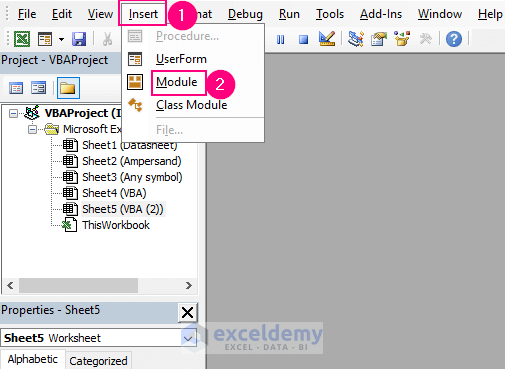
- After that, a Module will be created.
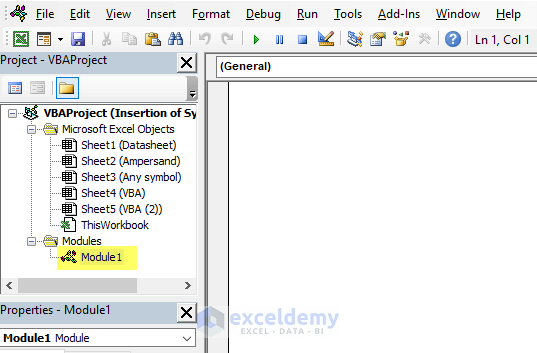
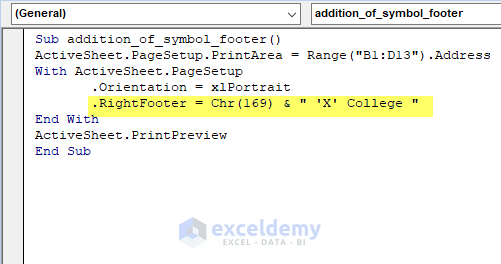
➤ Write the following code on the module.
Sub addition_of_symbol_footer()
ActiveSheet.PageSetup.PrintArea = Range("B1:D13").Address
With ActiveSheet.PageSetup
       .Orientation = xlPortrait
       .RightFooter = Chr(169) & " 'X' College "
End With
ActiveSheet.PrintPreview
End Sub
Code Breakdown
- Here, we have named the subprocedure as addition_of_symbol_footer and then set the address of the print area as range B1:D13 of the active sheet.
- After that, the WITH statement is applied to avoid the repetition of the object PageSetup every time declaring other properties.
- Within this statement, we have set the margin of the page, the orientation of the dataset, etc., and finally, to add a symbol in the Footer section we have used the property .RightFooter = Chr(169) & ” ‘X’ College “. Where Chr(169) represents the Copyright (©) symbol and then the college name will appear after it.
- Finally, PrintPreview will help us view the Footer area in the Preview section.
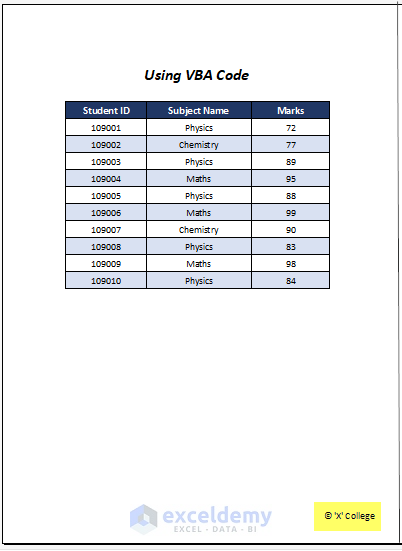
➤ Press F5.
Finally, you will have the added symbol in the context of the Footer section.
Practice Section
For doing practice by yourself we have provided a practice section like below in a sheet named Practice. Please do it by yourself.

Download Workbook
Conclusion
In this article, we tried to cover the ways to insert a symbol in the Excel footer. If you have any suggestions or questions, feel free to share them in the comment section. For more Excel-related articles you can explore our website site.
Related Articles
- How to Put Equal Sign in Excel without Formula
- How to Insert Dollar Sign in Excel Formula
- How to Put Sign in Excel Without Formula
- How to Write X Bar in Excel
- How to Insert Rupee Symbol in Excel
- How to Insert Tick Mark in Excel
<< Go Back to Insert Symbol in Excel | Excel Symbols | Learn Excel
Get FREE Advanced Excel Exercises with Solutions!
