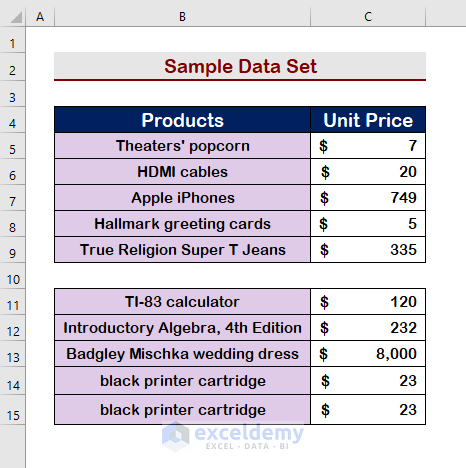
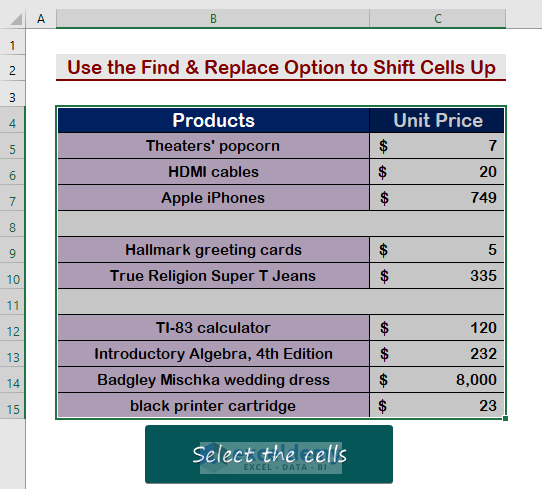
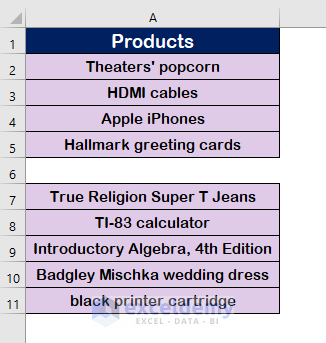
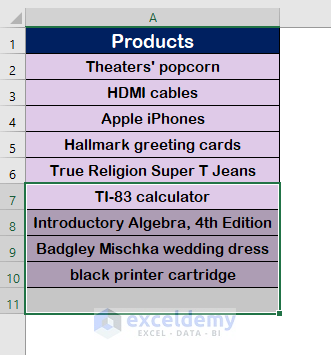
An example dataset is shown below.
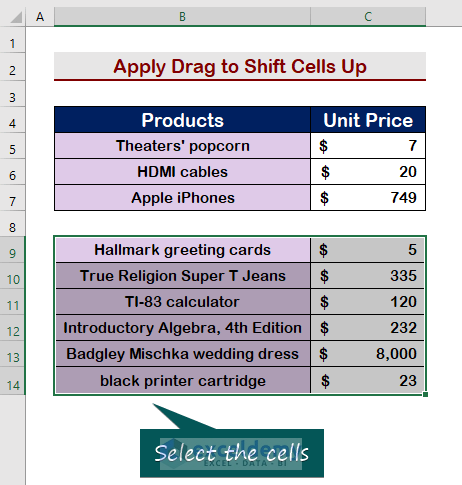
Method 1 – Use Drag to Shift Cells Up in Excel
Step 1:
- Select the cells you want to shift.
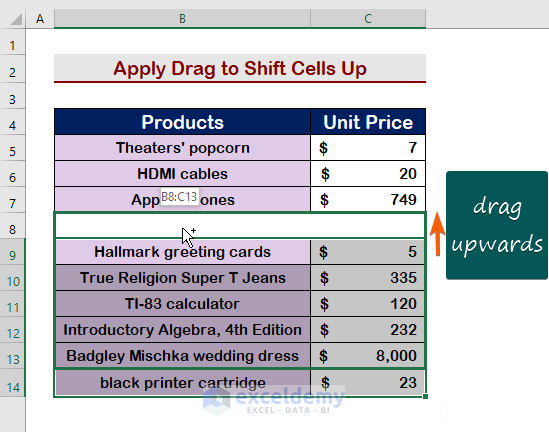
Step 2:
- Hold the mouse Left–click and shift upwards.
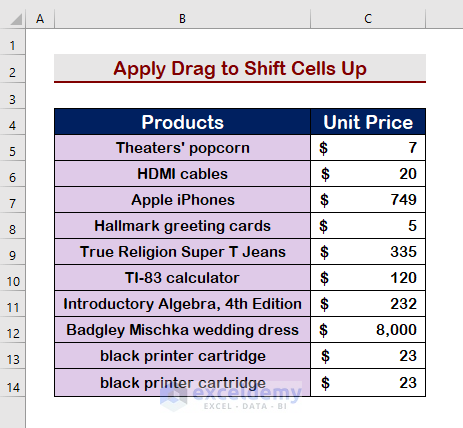
The cells will be shifted up.
Read More: How to Shift Cells Down in Excel
Method 2 – Right-Click to Shift Cells Up in Excel
Step 1:
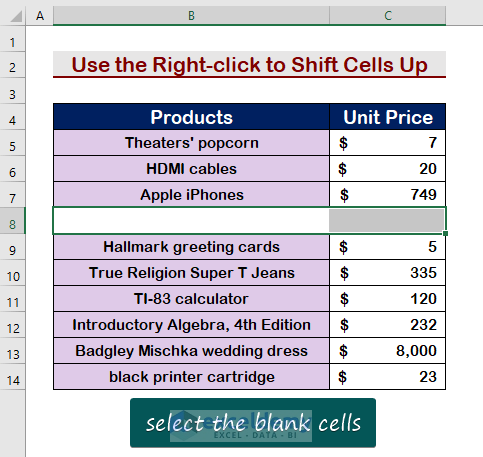
- Select the blank cells.
Step 2:
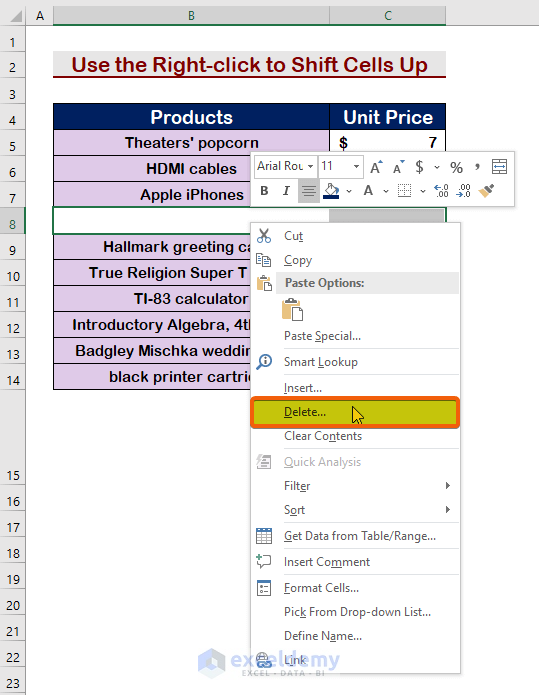
- Right-click to see options.
- Choose Delete.
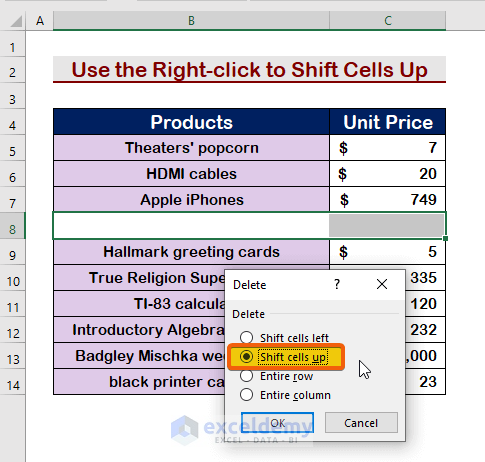
Step 3:
- Select Shift Cell Up.
- Press Enter.
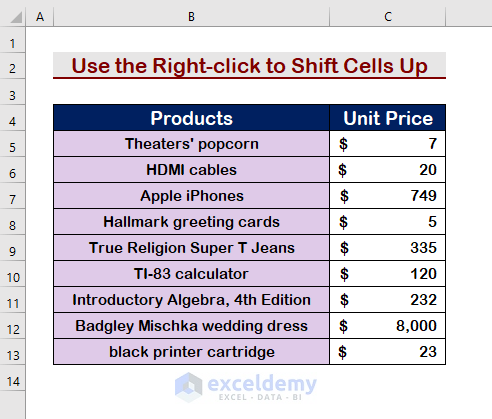
Cells will be moved up.
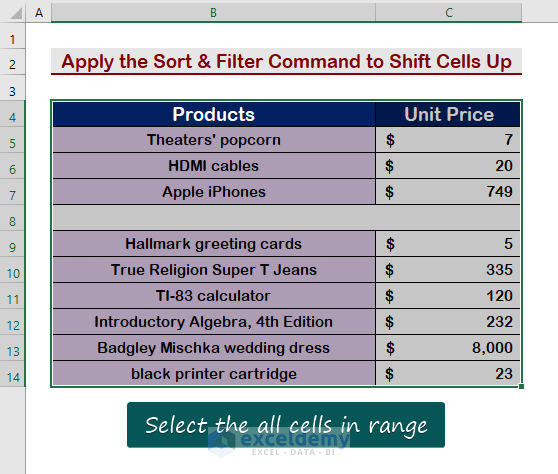
Method 3 – Use the Sort & Filter Command to Shift Cells Up in Excel
Step 1:
- Select all cells in the range.
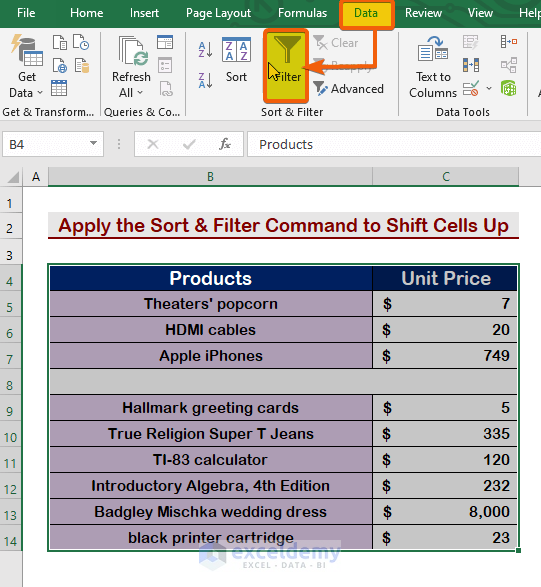
Step 2:
- In the Data tab choose Filter.
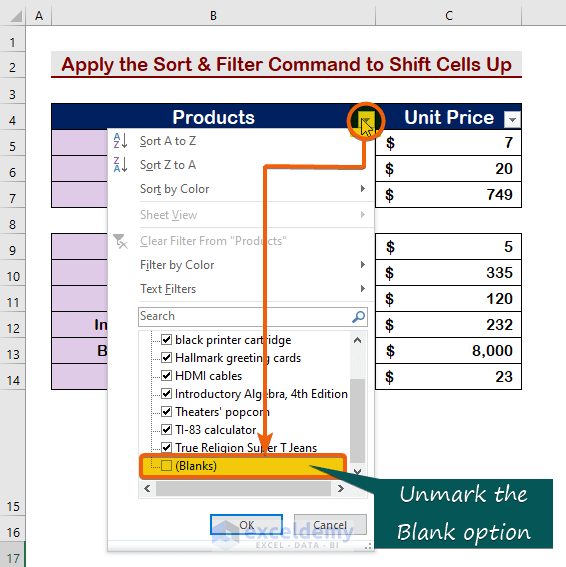
Step 3:
- Click the Icon.
- Unmark Blanks.
- Press Enter.
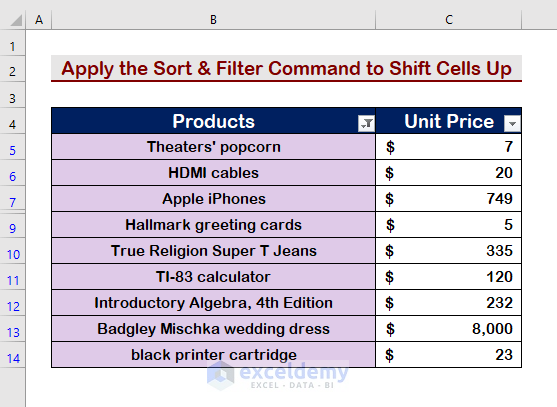
All blanks in the range will disappear and the cell will be moved up.
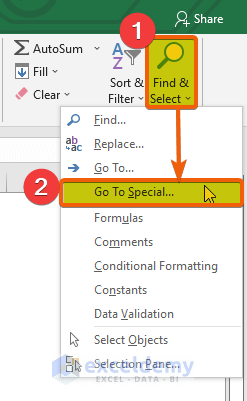
Method 4 – Use the Find & Replace Option to Shift Cells Up in Excel
Step 1:
- Select all cells.
Step 2:
- Go to the Home tab and choose Find & Replace.
- Choose Go To Special.
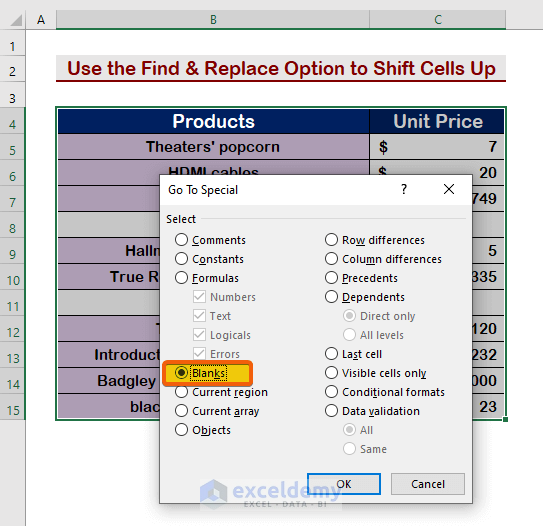
Step 3:
- Select Blanks.
- Press Enter.
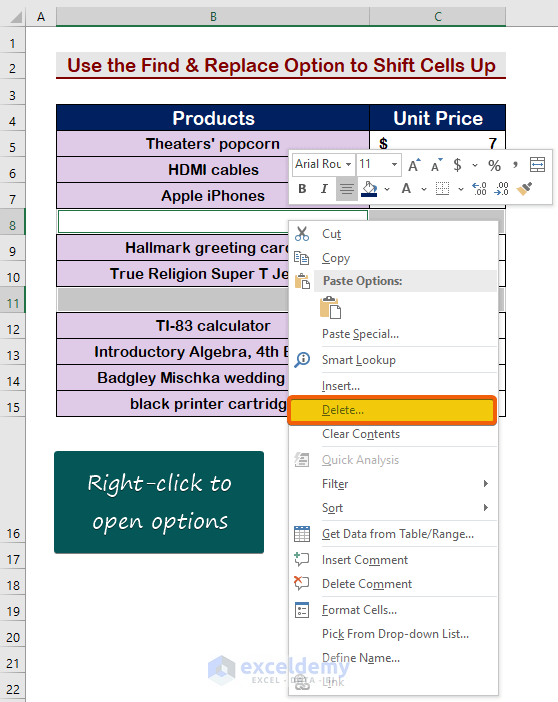
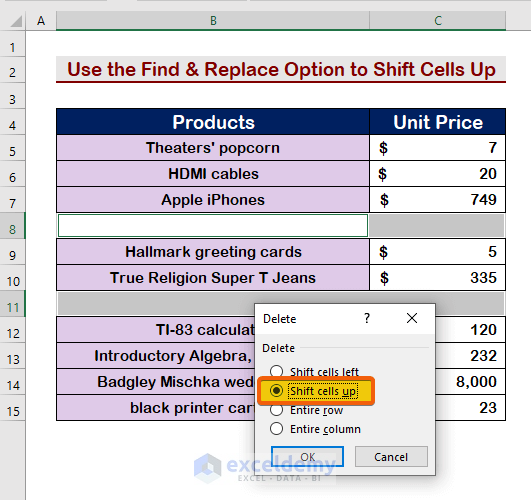
Step 4:
- Right-click a blank cell.
- Choose delete.
Step 5:
- Choose Shift cells up.
- Press Enter to see the results.
Cells will be shifted.

Method 5 – Run a VBA Code to Shift Cells Up
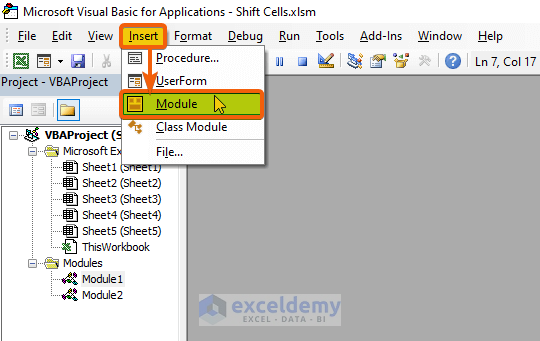
Step 1:
- Press Alt + 11 to open the Macro.
- Click Insert.
- Choose Module.
Step 2:
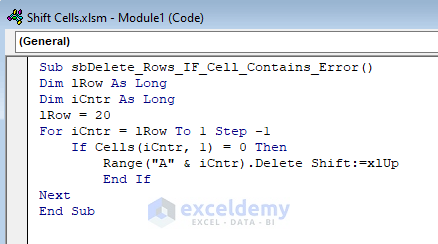
- Enter the following VBA code.
Sub Shift_cells_up
Dim lRow As Long
Dim iCntr As Long
lRow = 20
For iCntr = lRow To 1 Step -1
If Cells(iCntr, 1) = 0 Then
Range("A" & iCntr).Delete Shift:=xlUp
End If
Next
End Sub
Code Breakdown
lRow = 20 refers to the total row in the range.
For iCntr = lRow To 1 Step -1 checks IRow.
If Cells(iCntr, 1) = 0 is the If condition for blank cells.
Range(“A” & iCntr). is your range column
Delete Shift:=xlUp deletes rows and shifts cells up
This is the result.
Read More: How to Move Down One Cell Using Excel VBA
Download Practice Workbook
Download this practice workbook to exercise.
Related Articles
- How to Shift Cells Down in Excel without Changing Formula
- How to Shift Cells Right in Excel
- Fix: Excel Cannot Shift Nonblank Cells
- Move One Cell to Right Using VBA in Excel
- How to Perform Double Click Cell Jump in Excel
<< Go Back to Excel Cells | Learn Excel
Get FREE Advanced Excel Exercises with Solutions!
