Oftentimes, our Excel datasheet contains unnecessary characters that we may want to remove. In this article, I’ll show you 5 easy and simple ways to remove specific characters in Excel.
The following image shows an overview of the article, which represents the removal of specific characters in Excel.
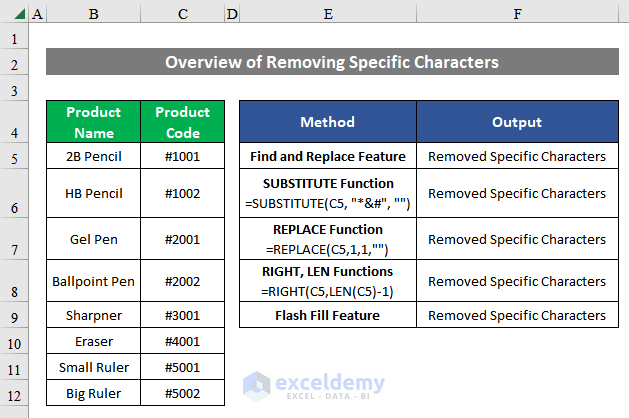
How to Remove Specific Characters in Excel: 5 Quick Ways
In the following, I have described 5 simple ways to remove specific characters in Excel. Follow the instructions below.
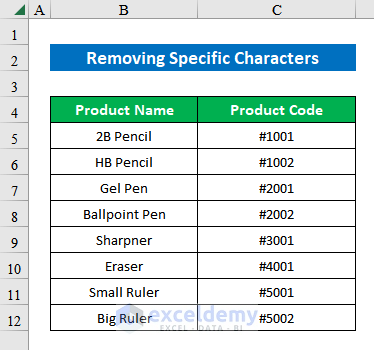
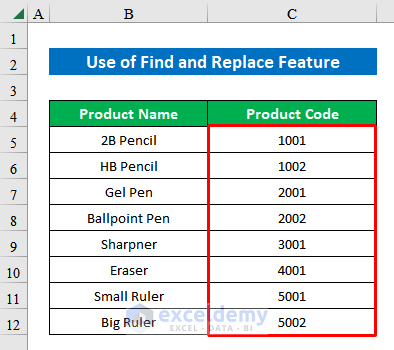
Let’s say, we have different product codes for different products in column B which are started with the character “#”. Now we will remove this specific character using some easy tricks. Stay tuned!
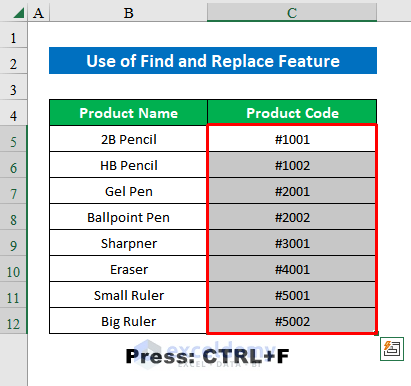
1. Using Find and Replace Feature to Remove Specific Characters
You can remove specific characters from multiple cells at a time by using the Find and Replace command. Follow the instructions below.
Steps:
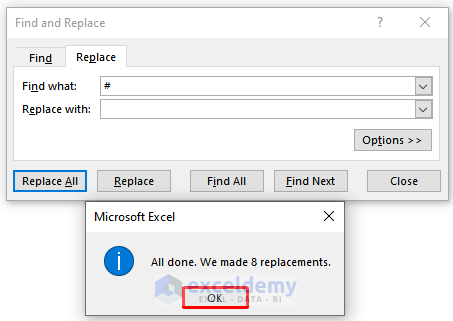
- First, select a range of cells from the data table and press CTRL+F to open the “Find and Replace” window.
- Next, from the appeared window, put “#” in the “Find what” box and click “Replace All”.
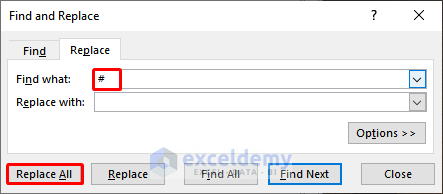
- A confirmation window will pop up confirming all the replacements.
- Simply, click OK.
- Finally, we have removed specific characters from the selected cells. Simple isn’t it?
2. Removing Specific Characters with SUBSTITUTE Function
Using the SUBSTITUTE function is another way to remove specific characters from a cell.
Steps:
- Just choose a cell (D5) and apply the below formula down-
=SUBSTITUTE(C5, "*&#", "")Where,
- The SUBSTITUTE function is replacing “*&#” characters from string “*ϩ”.
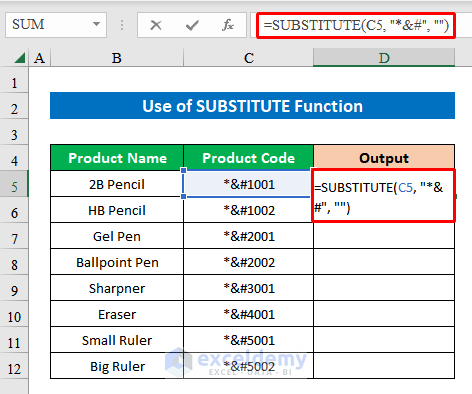
- Simply hit the ENTER key and drag the Fill Handle down to fill.
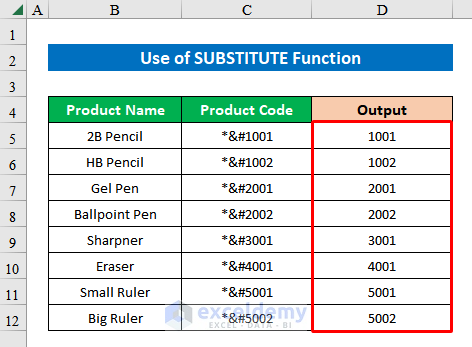
- In conclusion, you will get the final output in your hands by removing specific characters.
3. Applying REPLACE Function
You can use the REPLACE function to remove any character from any cell. Go through the steps below-
Steps:
- Similarly, choose a cell (D5) and write the below formula down-
=REPLACE(C5,1,1,"")Where,
- The REPLACE function replaces characters (#) from the given string “#1001”.
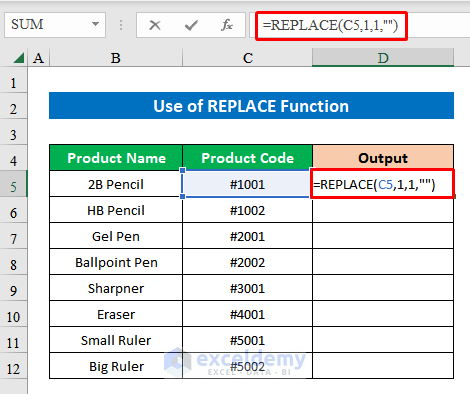
- Just click ENTER and pull the Fill Handle down to fill the other cells.
- Within the blink of an eye, you will get all the specified characters removed.

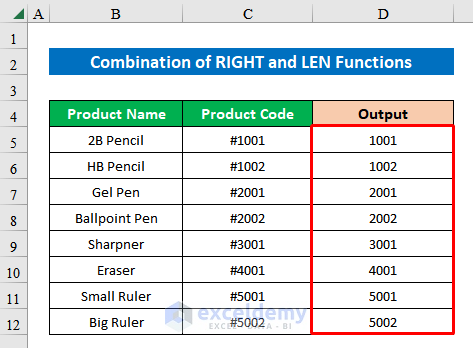
4. Combining RIGHT and LEN Functions to Remove Specific Characters
With the combination of RIGHT and LEN functions, you can remove specific characters too.
Steps:
- In the same fashion, select a cell (D5) and put the below formula in the cell-
=RIGHT(C5,LEN(C5)-1)Where,
- The LEN function returns the length of the chosen cell (C5).
- The RIGHT function then extracts a specified number of text from right to left. Thus, the output stands as –1001.

- To finish, click ENTER and drag down the Fill Handle.
- In summary, we have successfully deleted specific characters in Excel.
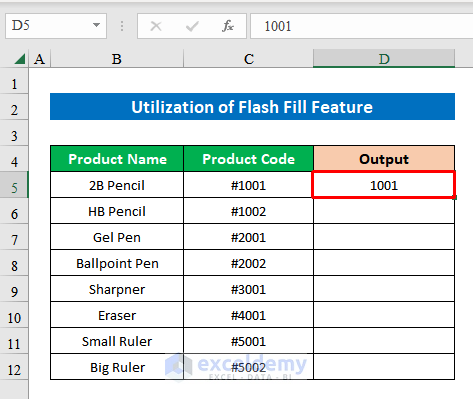
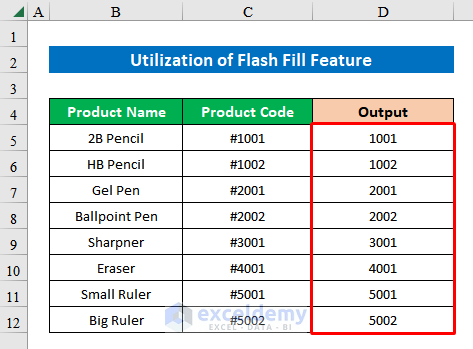
5. Utilizing Flash Fill to Erase Specific Characters
Using the Flash Fill is another simple way to erase specific characters. In the below method, I have deleted specific characters utilizing the flash fill option.
Steps:
- Simply, choose a cell (D5) and type the values from the cells without the specific characters.
- Then, choose the next cell (D6) and select Flash Fill from the Home Ribbon.
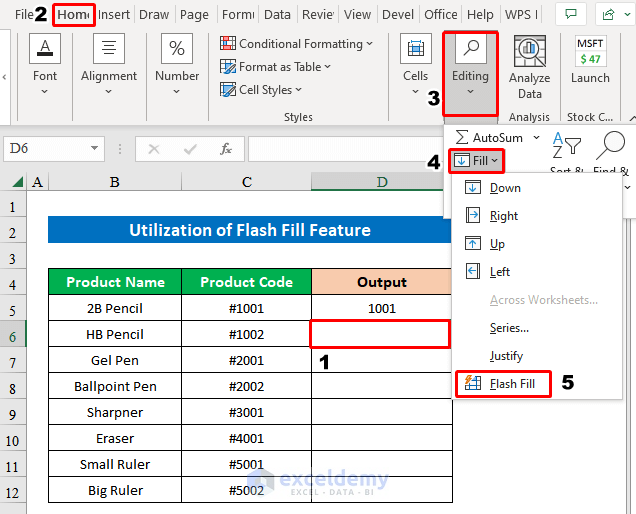
- Within a glimpse, you will see the column is filled by erasing specific characters.
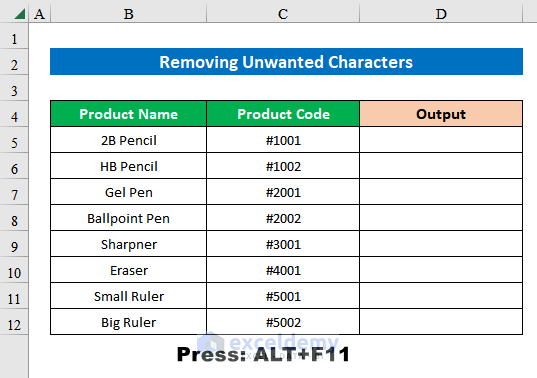
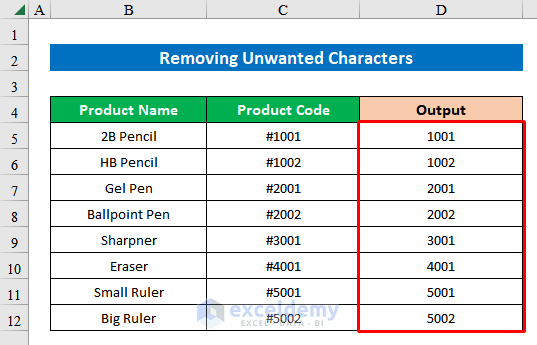
How to Remove Unwanted Characters in Excel
Often working with a large dataset you will get to see some unwanted characters which are not desirable. Removing those manually is a hectic job. Well, you can delete all those unwanted characters with a simple trick. Please go through the steps below to learn-
Steps:
- While opening the workbook, press ALT+F11 to open the “Microsoft Visual Basic for Applications” window.
- Now, open a module and place the following code, and press “Save”-
Function del_char(txt As String, chr As String)
If ("" <> chr) Then
txt = Replace(txt, Left(chr, 1), "")
chr = Right(chr, Len(chr) - 1)
del_char = del_char(txt, chr)
Else
del_char = txt
End If
End Function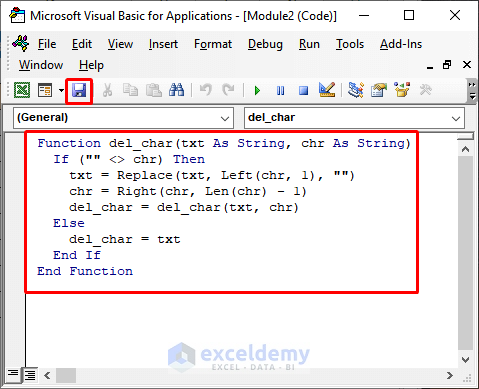
In this section, we’ll explain the VBA code used to remove specific characters in Excel.
- In the first place, the function name is the function del_char().
- Then, define the two arguments txt and chr as the String data type.
- Afterward, use an If Then statement and Replace function to switch the specified character with a white space character.
=del_char(C5,"#")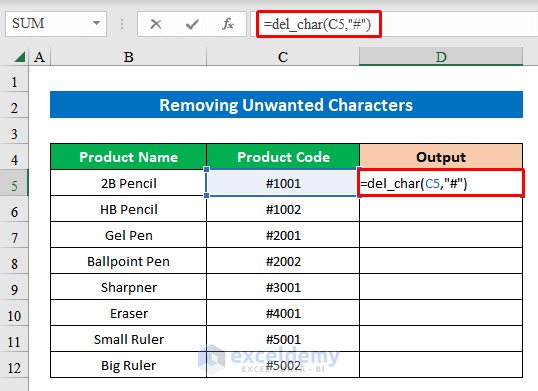
- Simply, press the ENTER key and drag the Fill Handle down to fill.
- Finally, we have removed unwanted characters from all the cells. Simple, isn’t it?
Download Practice Workbook
Download this practice workbook to exercise while you are reading this article.
Conclusion
In this article, I have tried to cover almost all the methods on how to remove specific characters in Excel. Take a tour of the practice workbook and download the file to practice by yourself. I hope you find it helpful. Please inform us in the comment section about your experience.
Remove Specific Characters in Excel: Knowledge Hub
- Remove Numeric Characters from Cells in Excel
- Remove Parentheses in Excel
- Remove Semicolon in Excel
- Remove Dashes in Excel
- Remove Dashes from Phone Number in Excel
- Remove Dashes from SSN in Excel
- Remove Apostrophe in Excel
- Remove Asterisk in Excel
<< Go Back To Excel Remove Characters | Data Cleaning in Excel | Learn Excel
Get FREE Advanced Excel Exercises with Solutions!
