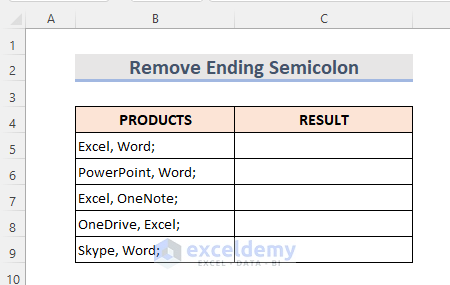
Method 1 – Removing Ending Semicolon from Cells
In the dataset below (B4:B9) containing some Microsoft Product names, there is a semicolon at the end of every cell value. Let’s use an Excel formula with the combination of LEFT function, LEN function & RIGHT functions to remove them.
STEPS:
- In cell C5, enter the following formula:
=LEFT(B5,LEN(B5)-(RIGHT(B5)=";"))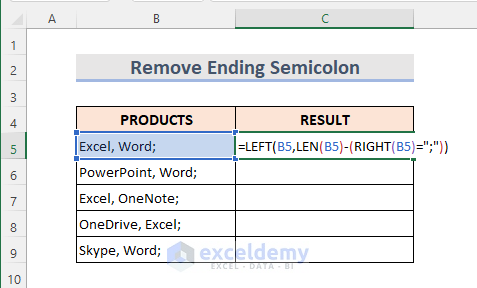
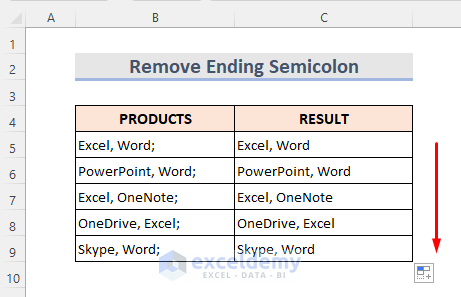
- Press Enter and use the Fill Handle tool to autofill the cells below.
Read More: How to Remove Non-Alphanumeric Characters in Excel
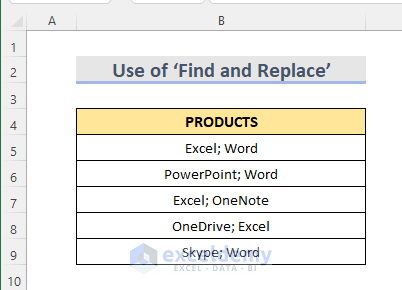
Method 2 – Using ‘Find and Replace’ Feature to Remove Semicolons
The ‘Find and Replace’ only works on cells containing text, so is suitable for removing semicolons in Excel.
In the following dataset (B4:B9) of Microsoft Products, let’s replace every semicolon with a comma.
STEPS:
- Select the dataset (B4:B9).
- Go to the Home tab.
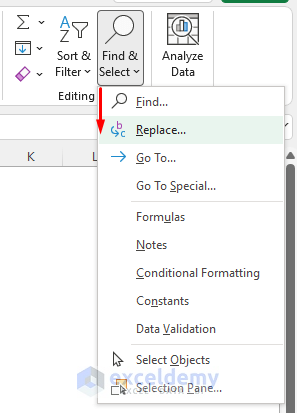
- Select the Find & Select drop-down from the Editing section.
- Click on Replace.
A Find and Replace message box pops up.
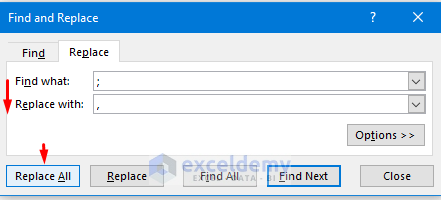
- Go to the Replace tab.
- In the Find what box, type ‘;’.
- In the Replace what box, type ’,’.
- Select the Replace All option.
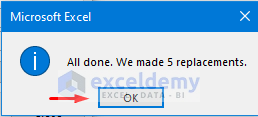
A confirmation window pops up.
- Click on OK.
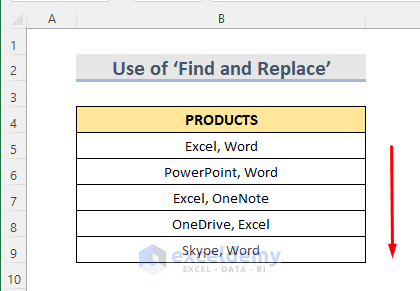
All the semicolons are replaced with commas.
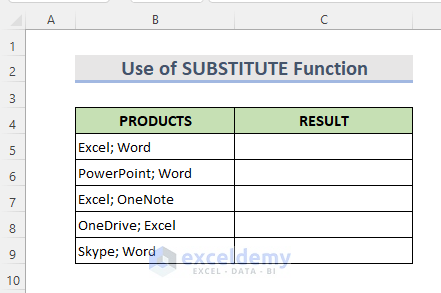
Method 3 – Using the SUBSTITUTE Function to Remove Semicolons
The SUBSTITUTE function replaces specified old text with specified new text. In our dataset (B4:B9) of Microsoft Products, let’s use the SUBSTITUTE function to replace the semicolons with commas and return the results in the range C4:C9.
STEPS:
- Select cell C5 and enter the following formula:
=SUBSTITUTE(B5,";",",")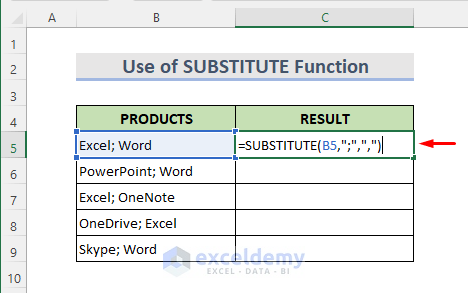
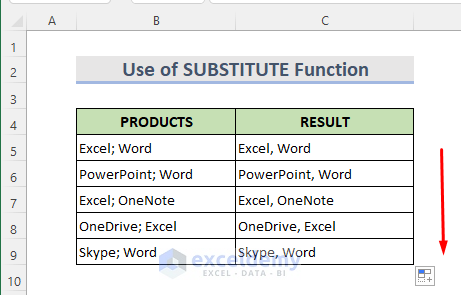
- Press Enter and use the Fill Handle tool to copy the formula to the cells below.
All semicolons are replaced successfully with commas.
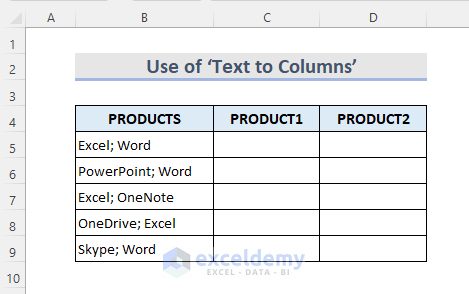
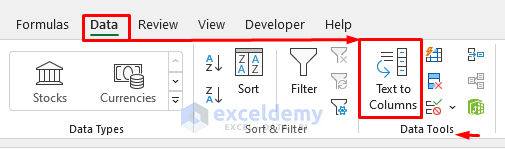
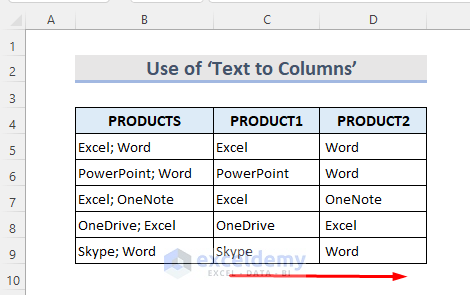
Method 4 – Using the ‘Text to Columns’ Wizard to Remove Semicolons and Separate Text into Columns
The ‘Text to Column’ wizard separates text cells into multiple columns using specified delimiters. In the below dataset (B4:D9) of Microsoft Products, let’s remove the semicolons by splitting the text into columns (PRODUCT1 & PRODUCT2) using the semicolons as delimiters.
STEPS:
- Select the data range B5:B9.
- Go to the Data tab.
- From the Data Tools section, select the Text to Columns option.
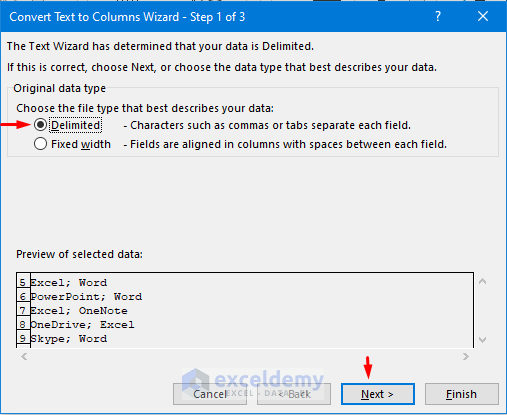
The Convert Text to Columns Wizard Step 1 window opens.
- Select the Delimited option.
- Click on Next.
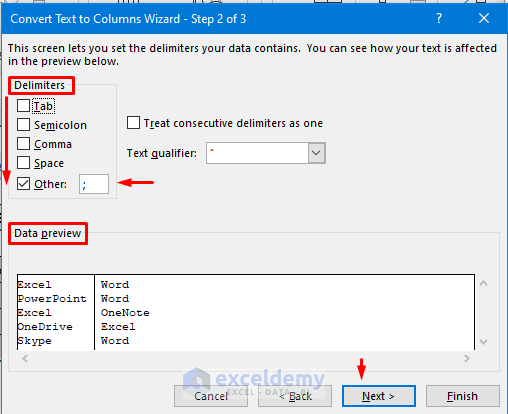
- Tick the Other option from the Delimiters section, and type ‘;’ in the blank box.
We can see the preview in the Data Preview section.
- Click on Next.
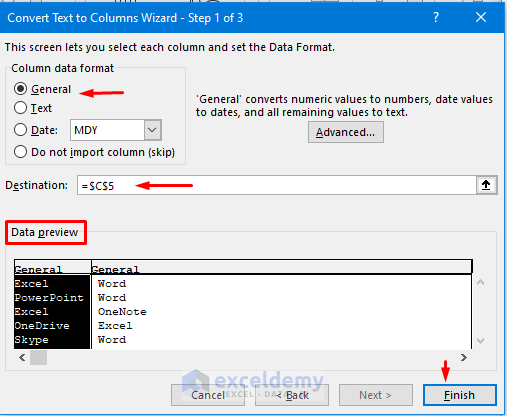
- Select General from the Column data format section.
- Select the Destination where we want to see the result.
In the Data Preview section, we can see the preview of our final dataset.
- Click on Finish.
The texts are separated into columns and the semicolons are gone.
Download Practice Workbook
Related Articles
- How to Remove Parentheses in Excel
- How to Remove Dashes from Phone Number in Excel
- How to Remove Dashes from SSN in Excel
- How to Remove Dashes in Excel
- How to Remove Apostrophe in Excel
- How to Remove Asterisk in Excel
- How to Remove Blank Characters in Excel
- How to Remove Non-Printable Characters in Excel
<< Go Back To Remove Specific Characters in Excel | Excel Remove Characters | Data Cleaning in Excel | Learn Excel
Get FREE Advanced Excel Exercises with Solutions!

Have to say, for a change from these usual spammy sites, that was really useful thanks!
You are welcome, G. 🙂
This post was super helpful! I never realized removing semicolons could be done so easily with Excel’s find and replace feature. Thanks for the clear steps and examples!
Hello,
Thanks for your feedback and appreciation. Keep exploring Excel with ExcelDemy to get such useful articles.
Regards
ExcelDemy