Download the Practice Workbook
What Is the Group Item Command in Excel?
The term Group items groups multiple items according to their defined categories. It has several advantages:
- It makes a summary of a large dataset.
- It is easy to understand and analyze an Excel dataset by grouping items.
- It enables the application of several formulas and calculations according to their categories distinctively.
- It enables easy expansion and contraction of cells.
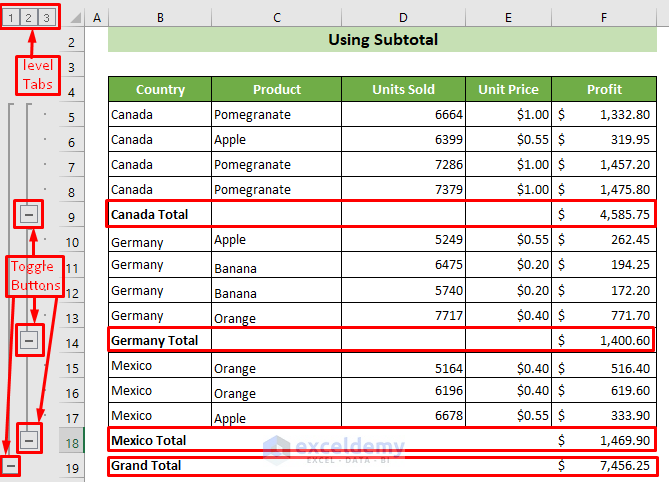
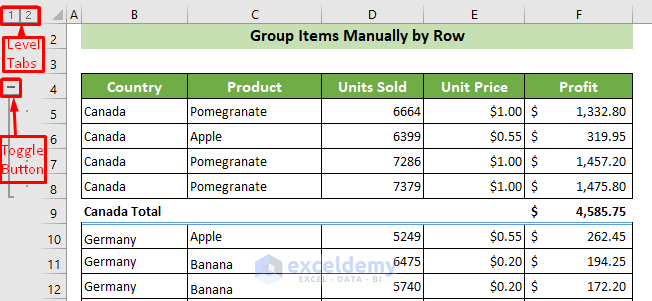
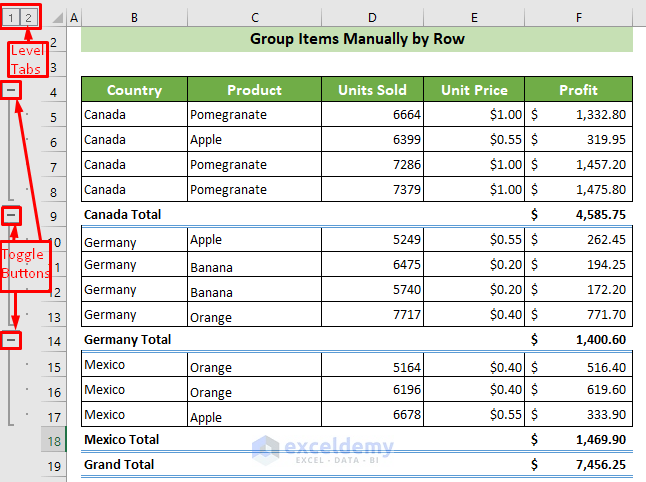
Toggle Buttons:
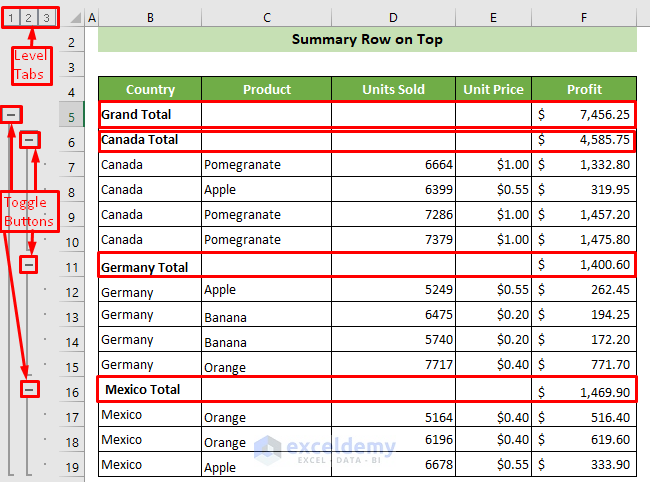
Toggle buttons are the buttons that are used to hide and show the groups. Each group will have toggle buttons. They show up on the left side of the groups just beside the Excel row headings or above the column headers.
For example, let’s hide the Canada country group by clicking on the toggle button. Afterward, we can also show this group by clicking the toggle button.
Level Tabs:
Level tabs are positioned on the top-left corner of the workspace. If you click on the levels, Excel will show you the different levels of your groups.
3 Methods to Group Items in Excel
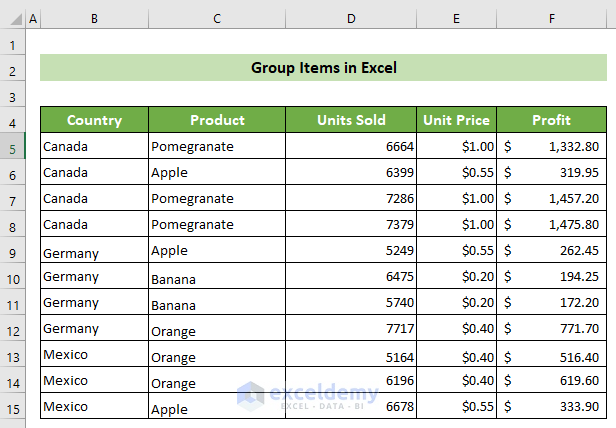
We have a dataset containing Country, Product, Units Sold, Units Price, and Profit columns. We want to group items by the countries.
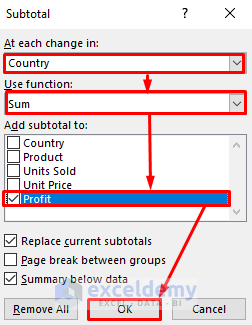
Method 1 – Use the Subtotal to Group Items
Steps:
- Click on any cell of your desired range or table where you want to group your data.
- Go to the Data tab, and in the Outline group, select the Subtotal tool.

- The Subtotal dialog box will appear. Select Country at the At each change in: options.
- For the Use function: option, put Sum.
- Check the Profit option from the Add subtotal to: list.
- Click on the OK button.
- The dataset is now divided into groups by countries. Each group has the respective sum of profits calculated. You will get toggle buttons to hide and show the groups and level tabs.
Read More: How to Group Columns Next to Each Other in Excel (2 Easy Ways)
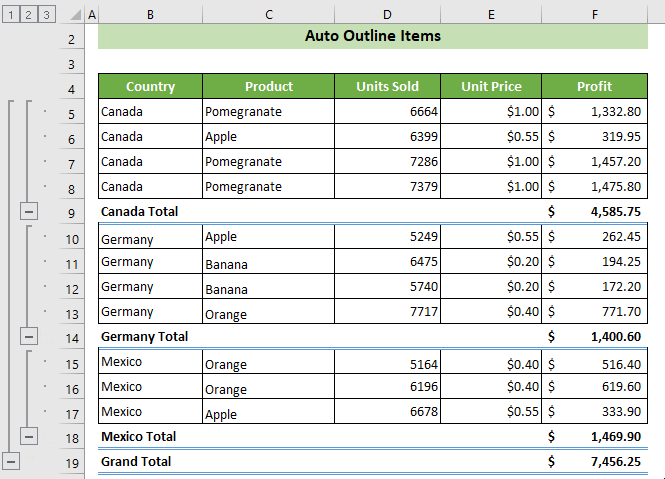
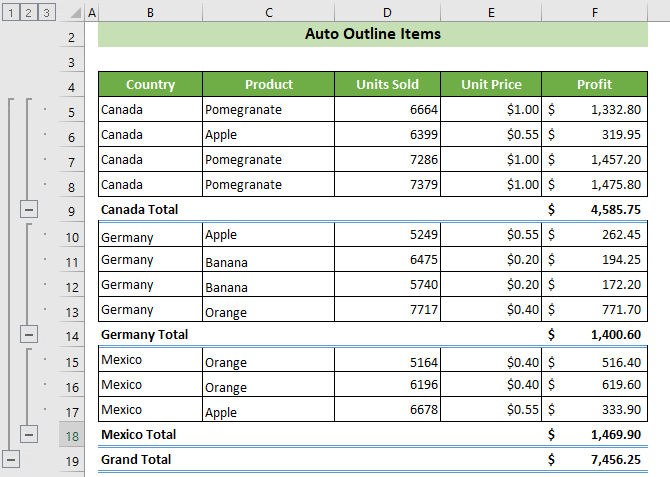
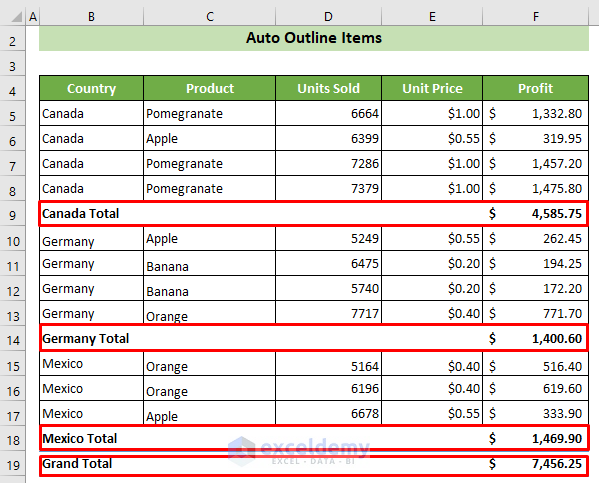
Method 2 – Use the Auto Outline Feature
Steps:
- Add the subtotals of your categories manually or by the Subtotal feature (Method 1).
- Your dataset will look like this.
- Click on any of the cells in the range.
- Go to the Data tab and the Outline group.
- Select the Group tool and choose the Auto outline option.
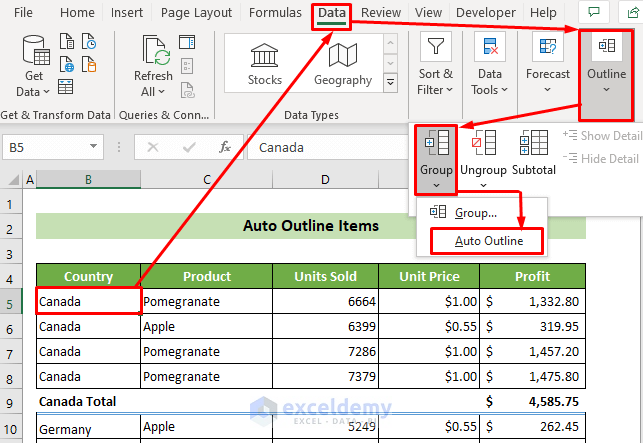
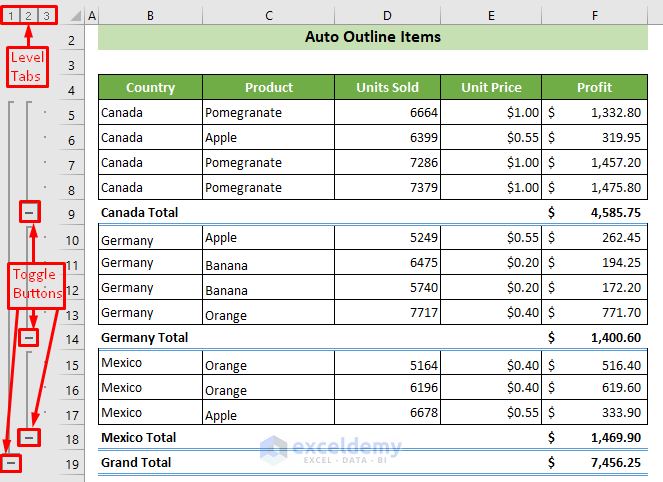
- The dataset has been separated into several groups according to the countries.
Read More: How to Group Similar Items in Excel (4 Common Ways)
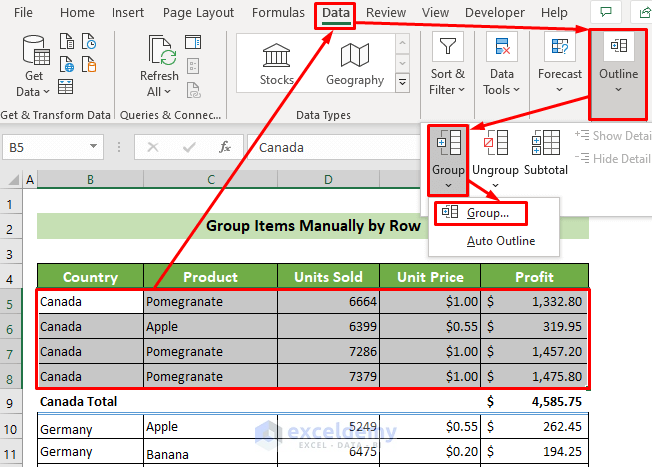
Method 3 – Use the Excel Group Command
Steps:
- Add the subtotal manually or by using the Subtotal feature.

- Select a group. We selected the B5:F8 data series for Canada.
- Go to the Data tab and the Outline group.
- Select the Group tool and choose the Group option.
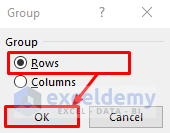
- The Group dialog box will appear.
- Check the Rows option and click on the OK button.
- You will see that the Canada country group has been created.
- Group the other two countries accordingly.
Read More: How to Create Multiple Groups in Excel (4 Effective Ways)
Keep the Summary Row on Top While Grouping
Steps:
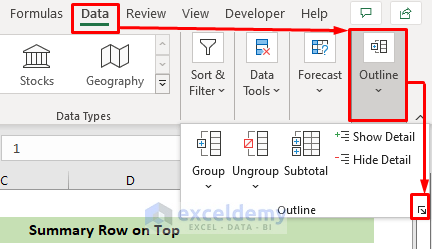
- Go to the Data tab and the Outline group, then select Outline.
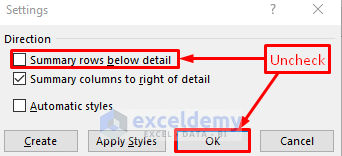
- The Settings dialog box will appear. Uncheck the option Summary rows below detail.
- Click on the OK button.
- You’ll get the summary row on top.
Note
Sort your dataset by the column you’re trying to group to avoid errors or duplicated values.
Related Articles
- How to Remove Grouping in Excel (2 Suitable Examples)
- Group Data in Excel Chart (2 Suitable Methods)
- How to Group Time Intervals in Excel (3 Suitable Ways)
- Make a Grouped Bar Chart in Excel (With Easy Steps)
<< Go Back to Group Cells in Excel | Outline in Excel | Learn Excel
Get FREE Advanced Excel Exercises with Solutions!
