What Is Named Range in Excel and How to Create It
Names frequently refer to individuals, things, and locations in daily life. For instance, you would say “Washington, DC” rather than “the city lying at latitude 38.9072° N and longitude 77.0369° W.”
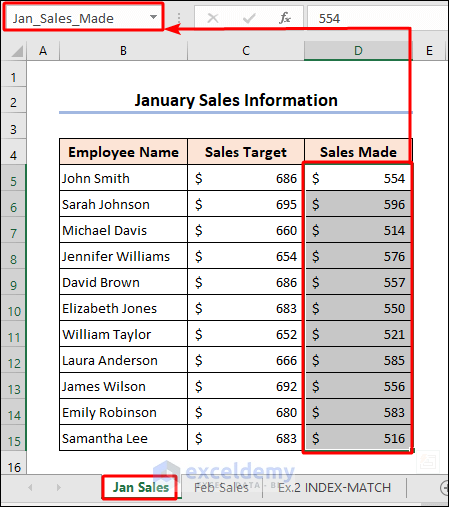
Similarly, you can refer to a single cell or a range of cells in Excel by name rather than by cell reference. Now, you can use the name you gave it rather than the cell reference (such as C4 or C4:C15). You can also use the name in formulas. Suppose you have named the range C6:C15 as “Jan_Sales_Target”. So, in a formula, instead of writing this:
=SUM(C6:C15)You can write this:
=SUM(Jan_Sales_Target)The practice of naming ranges of cells comes in handy when you are dealing with large sets of data. This gives you a short approach to selecting a data range.
But how can you create a Named Range? There are a couple of ways you can create a Named Range. We will show you the most effective one.
Steps:
- Select your range like we selected range B5:B15 and go to Formulas
- Select Define Name from Defined Names
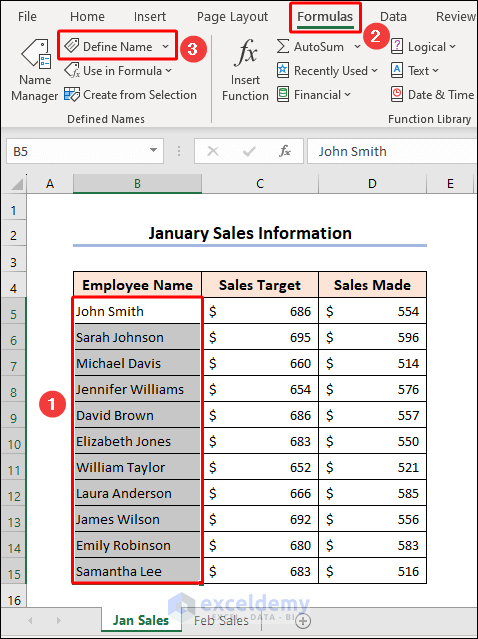
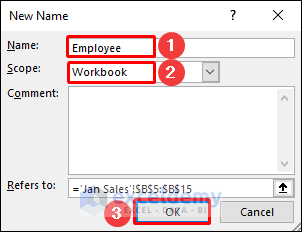
- In the Name box, type your preferred name. We gave our range name “Employee” as the range lists the imaginary names of employees of a company.
- The names of your worksheets can be seen in the Scope box. Remember, the named range will be applicable only to the worksheet if you choose a specific worksheet. Since we want our range name to be available on every worksheet, we select “Workbook.”
- You will notice the range you selected in the Refers to box.
- Press OK to apply the changes.
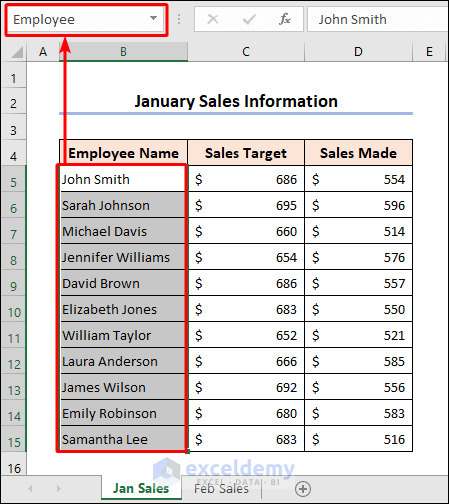
- You can see the name you typed in the Name Box beside the Formula.
You can give every range of datasets you have selected a unique name, which gives you an excellent opportunity to fast-track your work and save some time.
Read More: How to Create Dynamic Named Range in Excel
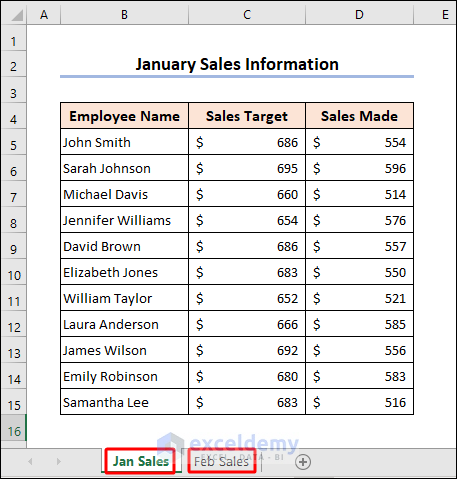
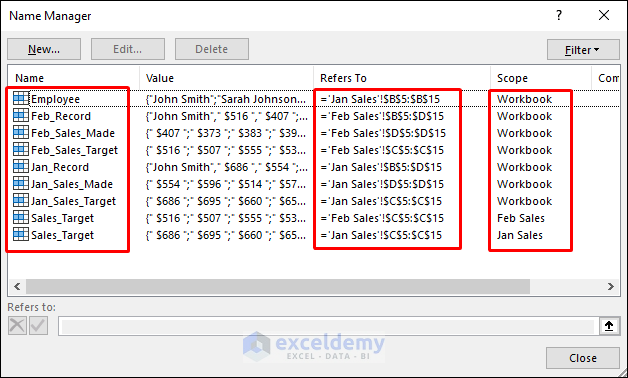
Below are two worksheets (Jan Sales and Feb Sales) that contain our data: sales information (Sales Target & Sales Made) for a company for two months (January and February). We will use the data from these sheets to reference in other worksheets.
We have named each column in each of our worksheets. Here’s what we have named, their cell references, and their scope in the following image. As you can see, we have fixed “Workbook” as the Scope for every named range except for the last two. The last two named ranges contain the same name, “Sales_Target,” but in different worksheets. The difference between using a Workbook as Scope instead of a certain worksheet is discussed in the first method.
We can create more worksheets and reference these data using their names instead of cell ranges.
Read More: How to Change Scope of Named Range in Excel
Method 1 – Excel Reference Named Range in Another Sheet: Default Referencing Technique
1.1. Referencing the Range of Unique Names from Different Sheets
Steps:
- Select the cell where you want to reference your named range. We have selected cell B5.
- Type the name of the range you created. You don’t have to type the whole name. Excel will pick up the name from the first 2/3 letters.
=Jan_Sales_Made- Press Enter.
- If you want to reference a named range in a formula, like the SUM function, type the function first, then the range name, and press Enter.
=SUM(Jan_Sales_Made)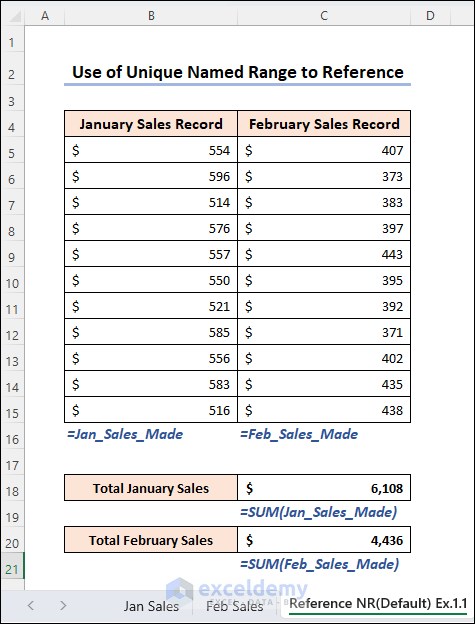
1.2. Referencing the Range of Similar Names from Different Sheets
Steps:
- Select the cell where you want to reference your named range. We have selected cell B5.
- Type the worksheet name where the named range is. Remember to use “!” after the worksheet name. You must include the worksheet name in single quotation marks if it contains spaces or other non-alphabetical characters.
='Jan Sales'!Sales_Target- Press Enter.
- Type the function first if you want to reference a similarly named range in a formula.
- Follow the method mentioned and press Enter.
=SUM('Jan Sales'!Sales_Target)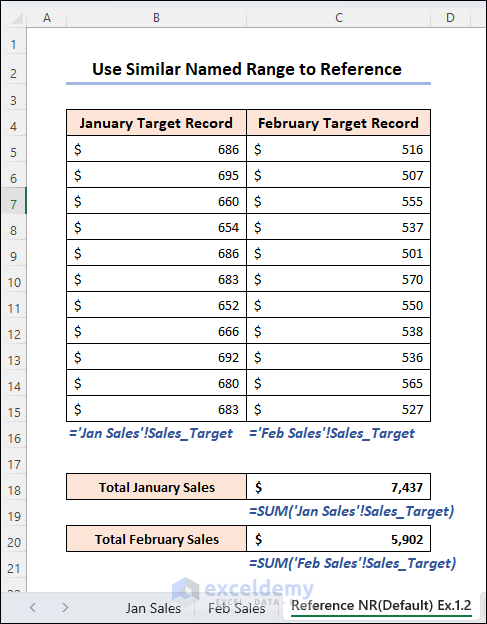
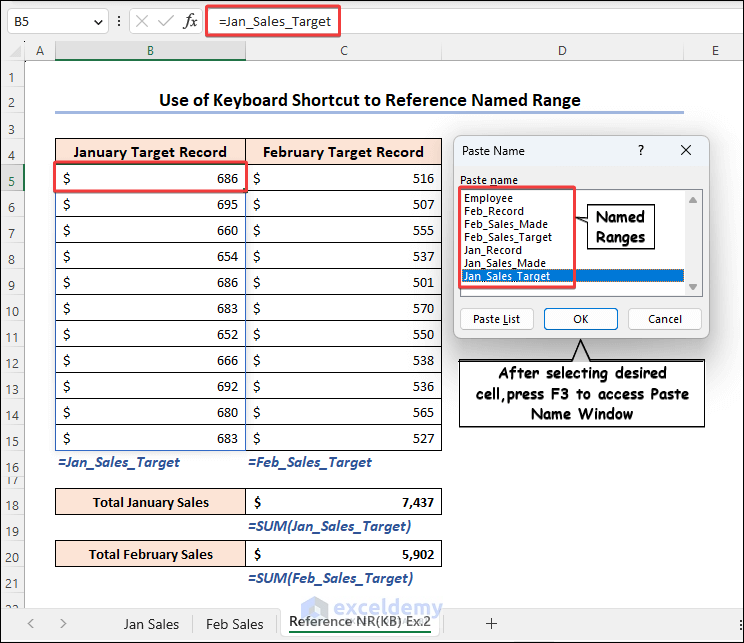
Method 2 – Reference Named Range Using Keyboard Shortcut
Steps:
- Select the first cell where you want to reference your named range. We have selected cell B5.
- Press F3 to get to the Paste Name Here.
- Select the named range you want to reference. We are selecting Jan_Sales_Target.
- Press OK and press Enter.
- Type the function if you want to reference a named range in a formula.
- Press F3 and select the named range. Press OK and Enter.
Read More: How to Paste Range Names in Excel
Method 3 – Use the INDIRECT Function to Reference Named Range
3.1. Referencing Different Named Ranges from Different Sheets Using INDIRECT Function
Steps:
- Select your output cell C5 and insert this formula.
=INDIRECT(B5)- Press Enter to import your data.
- You can also use the INDIRECT function nested in another function. In our example, we used it with the SUM function to get the total of Jan_Sales_Made.
=SUM(INDIRECT(B5))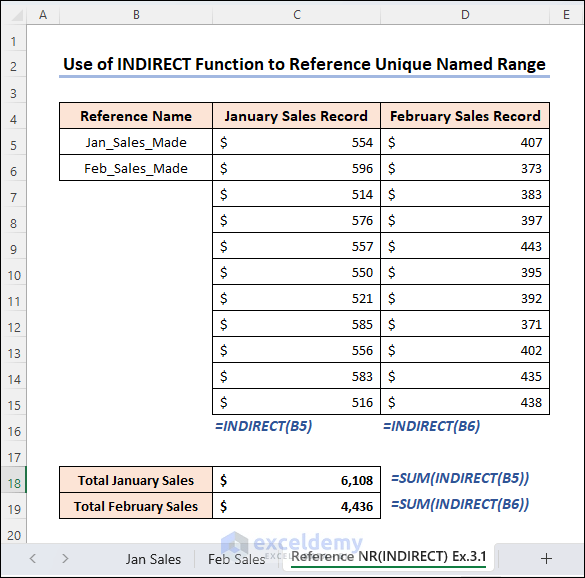
3.2. Referencing the Range of Similar Names from Different Sheets Using INDIRECT Function
Steps:
- To import the sales target from the Jan Sales worksheet, select your output cell C5 and insert this formula.
=INDIRECT("'"&"Jan Sales"&"'!"&$B$5)- Press Enter to import your data.
- Follow the same rule while nesting the INDIRECT function into another function. In our example, we used it with the SUM function to get the total of Sales_Target for January.
=SUM(INDIRECT("'"&"Jan Sales"&"'!"&$B$5))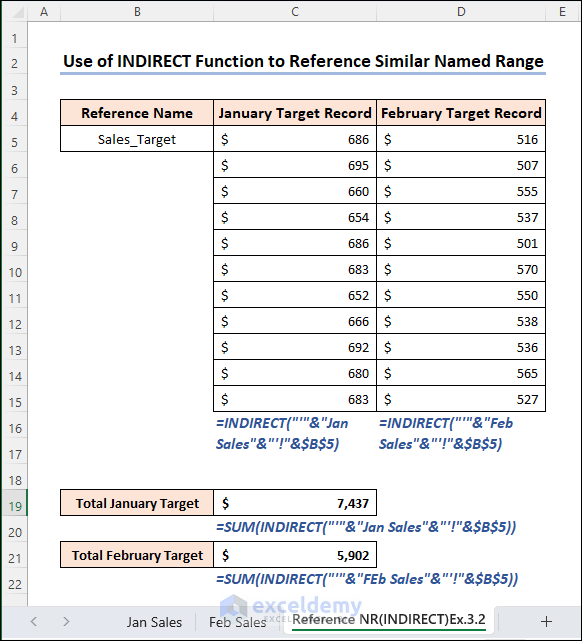
Note:
You don’t need to use single quotation marks if there are no spaces or non-alphabetical characters in the worksheet names. For example, if we named our worksheets JanSales or just Sales, we could’ve referenced our named range on another sheet like this.
=INDIRECT("JanSales!"&$B$5)Be careful with the naming, as using the wrong method while referencing may result in a #REF error.
Read More: Excel INDIRECT Function with Named Range
Practical Examples of Excel Reference Named Range in Another Sheet
Let’s see some examples of referencing named ranges in another worksheet while working with other functions in Excel. We will show the VLOOKUP function and a combination of INDEX-MATCH functions for reference.
Example 1: Employing the VLOOKUP Function to Reference Named Range in Another Sheet
If you have named your entire table range and want to import data from that range matching certain values in another sheet, you can reference the named range using the VLOOKUP function.
For this example, we have named range B5:D15 from both the Jan Sales and Feb Sales worksheets Jan_Record and Feb_Record. Now, we will reference them in a new worksheet, “Ex.1 VLOOKUP.”
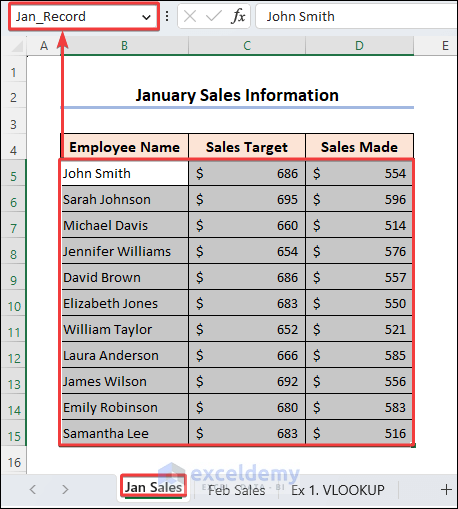
Now, in column B of the new worksheet, “Ex.1 VLOOKUP,” we have the employees. We want to import their sales for January and February using the VLOOKUP function.
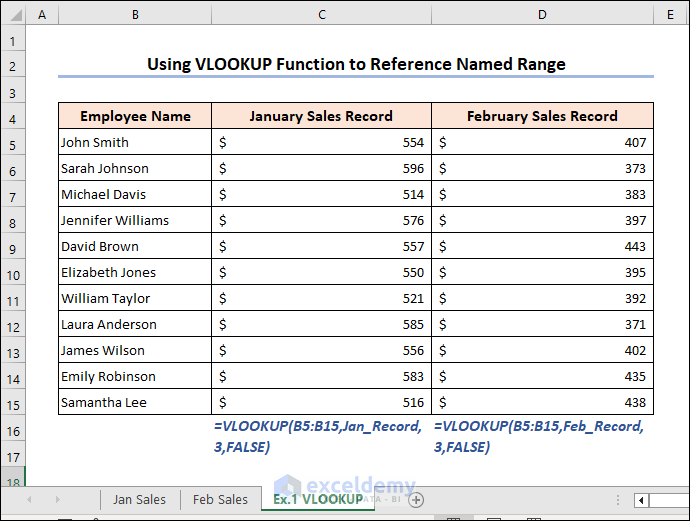
- In our named ranges (Jan_Record and Feb_Record), the 3rd column (D5:D15) contains the necessary data. So, in cell C5 of worksheet “1 VLOOKUP”, enter this formula:
=VLOOKUP(B5:B15,Jan_Record,3,FALSE)- To import data from the Feb Sales worksheet, in cell D5, enter this formula:
=VLOOKUP(B5:B15,Feb_Record,3,FALSE)The formula looks at the range B5:B15 and searches the cell contents in the named range (Jan_Record). Then, it returns the value of the third column from the named range for every row. For an exact match return, we use the last argument as False.
Note:
When using the VLOOKUP function, always remember that the lookup_value must be in the leftmost column of your range. Otherwise, VLOOKUP will show an error.
Read More: How to Use Named Range in Excel VLOOKUP Function
Example 2: Combining the INDEX and MATCH Functions to Reference Named Range
Since the VLOOKUP function has limitations regarding the location of lookup_value, we can remedy that by combining INDEX and MATCH functions.
For this example, we have named the ranges for D5:D15 from the Jan Sales and Feb Sales worksheets Jan_Sales_Made and Feb_Sales_Made. We will reference them in a new worksheet, “Ex.2 INDEX-MATCH.” We also named B5:B15 “Employee,” which was demonstrated at the beginning of the article.
Now, in column B’s new worksheet, “Ex.2 INDEX-MATCH”, we have the employees. We want to import the sales made by the employees in January and February in the new worksheet using the combination of INDEX-MATCH functions.
- In cell C5 of worksheet “2 INDEX-MATCH”, enter this formula:
=INDEX(Jan_Sales_Made,MATCH(B5:B15,Employee,0))- To import data from the Feb Sales worksheet, enter the following formula in cell D5:
=INDEX(Feb_Sales_Made,MATCH(B5:B15,Employee,0))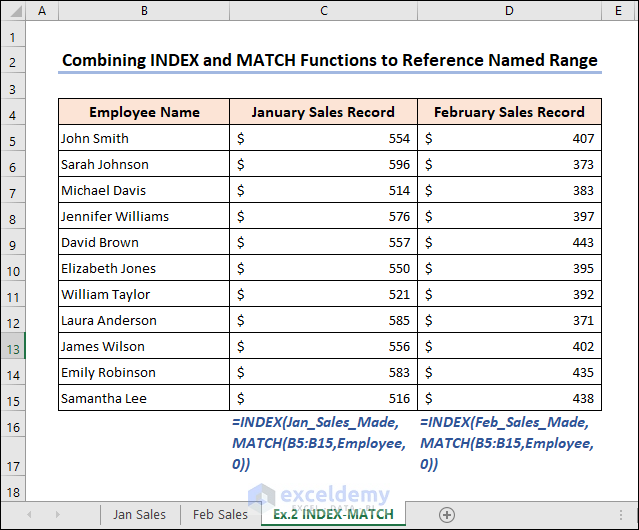
Formula Breakdown
- MATCH(B5:B15,Employee,0)
Returns the relative position of an item in an array matching the given value. When the function matches the contents of the range B5:B15 with the named range Employee, it will return 1. The last argument, 0, indicates we want to match the exact value.
Result: [1, 1, 1, 1, 1, 1, 1, 1, 1, 1, 1]
- INDEX(Feb_Sales_Made,MATCH(B5:B15,Employee,0))
Now, the INDEX function takes the returned value(1) of the MATCH function for each row and returns sales made by that particular employee from the named range Feb_Sales_Made.
Result: [407, 373, 383, 397, 443, 395, 392, 371, 402, 435, 438]
How to Reference Named Range from Another Open Workbook in Excel
Sometimes, you want to import data from another Excel file. In that case, you need to reference externally to import data. Depending on whether the source workbook is open or closed, you can reference a named range externally in two ways.
If your source workbook is opened, then you need to mention the source workbook name followed by an exclamation point (!) in the formula. Now, referencing a named range can get complicated depending on the Scope.
If the scope is set to “Workbook” while naming the range, you can reference it externally like this.
=Workbook_name.extension!Named RangeIf Scope is set to a particular worksheet while naming range, you can reference it externally like this.
=[Workbook_name.extension]Sheet_name!Named RangeFor our example, we have the source workbook, “Workbook1.xlsx,” which we have named range Jan_Record and set Scope to Workbook. We want to import Jan_Record to “Workbook2.xlsx.”
- Selecting cell B5, we give external references like this:
=Workbook1.xlsx!Jan_Record
If we had set the Scope to Jan Sales worksheet, we would’ve referenced it like this.
='[Workbook1.xlsx]Jan Sales'!Jan_Record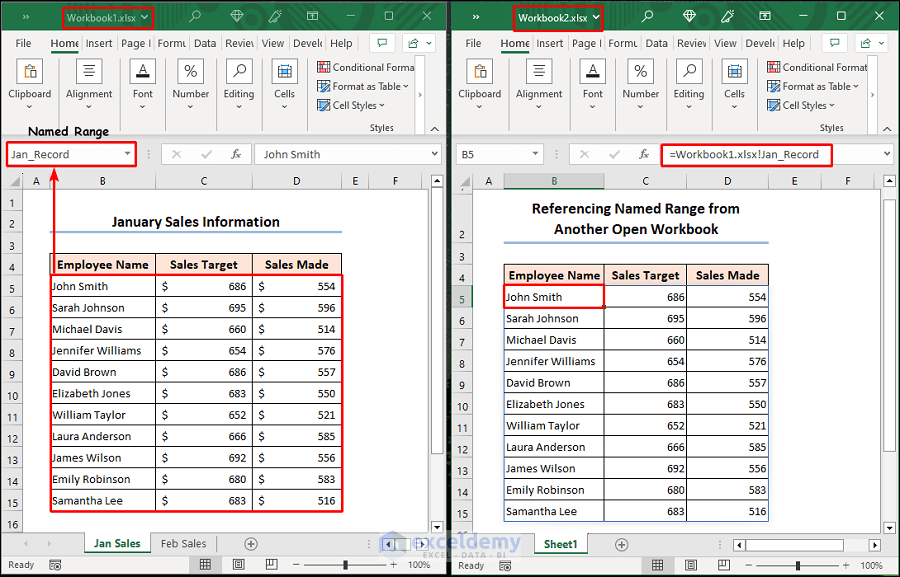
How to Reference Named Range from a Closed Workbook in Excel
You can also reference a named range externally when the source workbook is closed. If the source workbook is closed, you must include the location address for your external reference.
If your source workbook is closed, mention the source workbook’s file path before the workbook name, followed by an exclamation mark (!) in the formula. Now, referencing the named range can get complicated depending on the Scope.
If Scope is set to “Workbook” while naming range, then you can reference externally like this:
='File Path\Workbook_name.xlsx'!Named Range
If Scope is set to a particular worksheet while naming range, then you can reference externally like this.
='File Path\[Workbook_name.xlsx]Sheet_name'!Named RangeFor our example, we have a closed-source workbook, “Workbook1.xlsx,” located within the Documents folder on drive C. We want to import Jan_Record to “Workbook2.xlsx.”
- Selecting cell B5, we reference externally like this.
='C:\Users\Shuvo\Documents\Workbook1.xlsx'!Jan_Record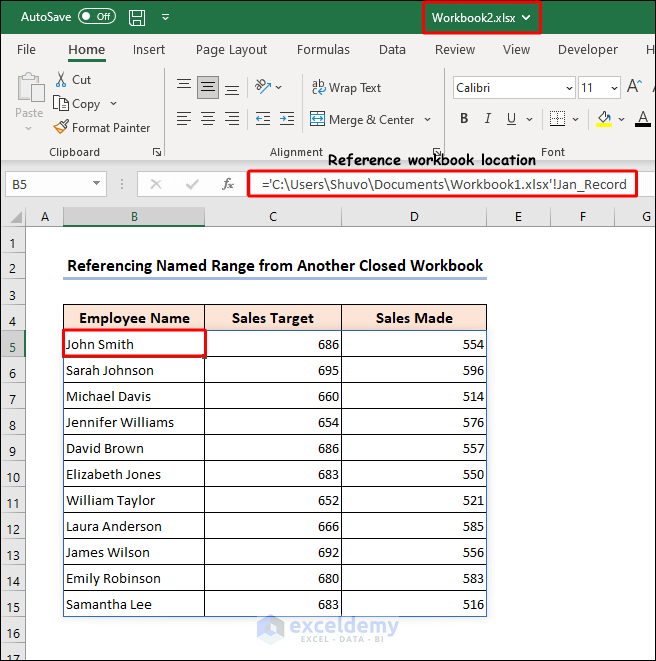
Download the Practice Workbook
Download this file to practice.
Related Articles
- How to Create Dynamic Named Range in Excel
- How to Use Dynamic Named Range in an Excel Chart
- How to Ignore Blank Cells in Named Range in Excel
<< Go Back to Named Range | Excel Formulas | Learn Excel
Get FREE Advanced Excel Exercises with Solutions!
