Here’s an overview of a textbox that is linked to a specific cell.

How to Link a Textbox to Multiple Cells in Excel: 4 Easy Ways
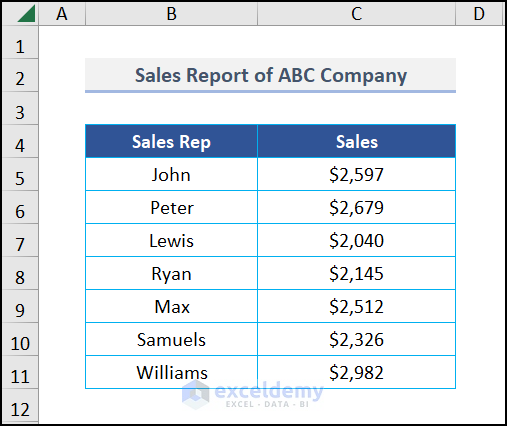
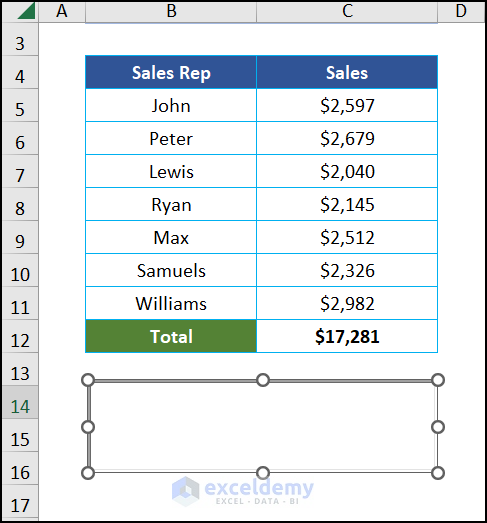
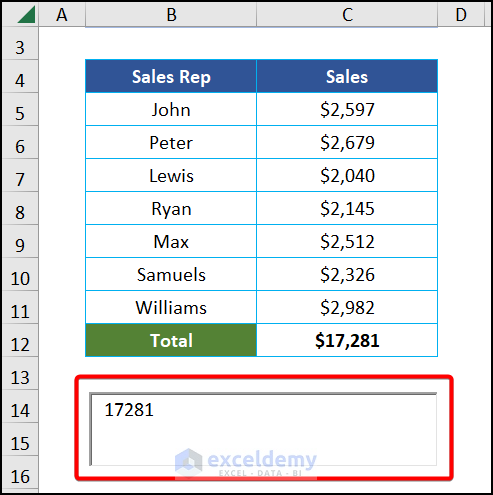
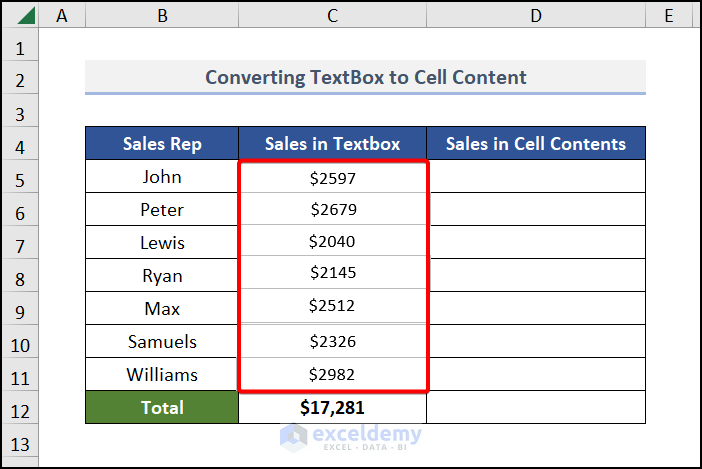
We have a dataset of the Sales Report of a company. We will link the total sales in a textbox.
Method 1 – Applying the Ampersand Operator
Steps:
- Calculate the Total Sales, then link the two cells in cell B13 with the following formula:
=B12&" "&C12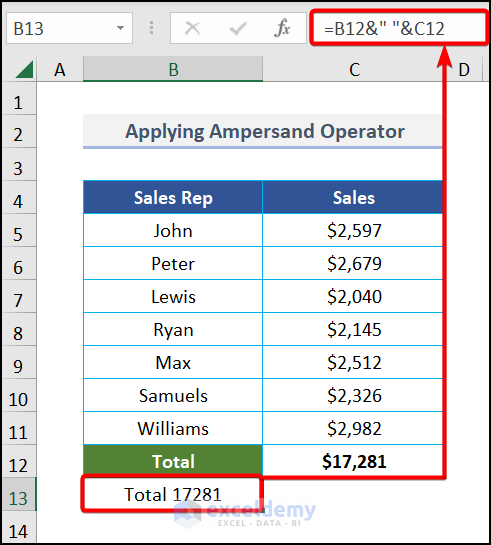
- Move to the Insert tab, choose Text, and select Text Box.
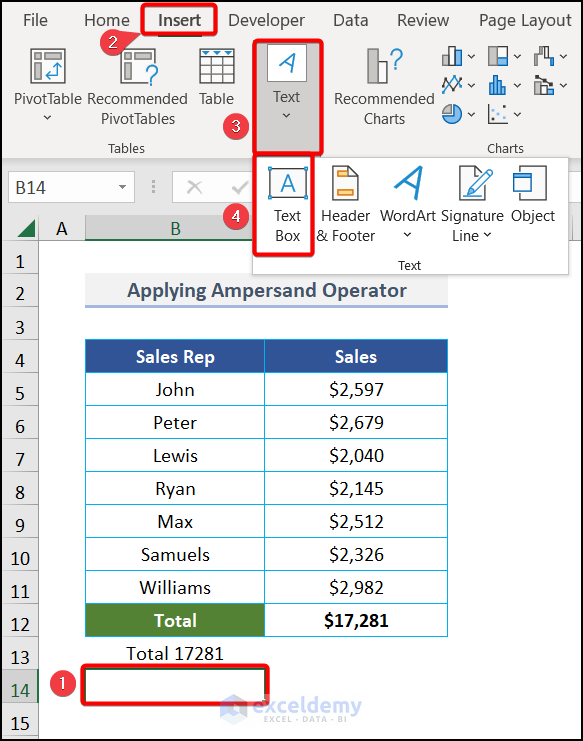
- Draw a textbox into your sheet by clicking and dragging.
- Select the textbox and go to the formula bar.
- Insert the following formula and hit Enter.
=$B$13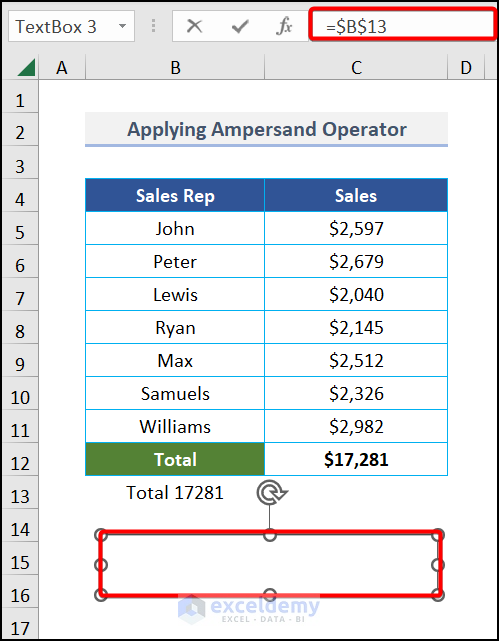
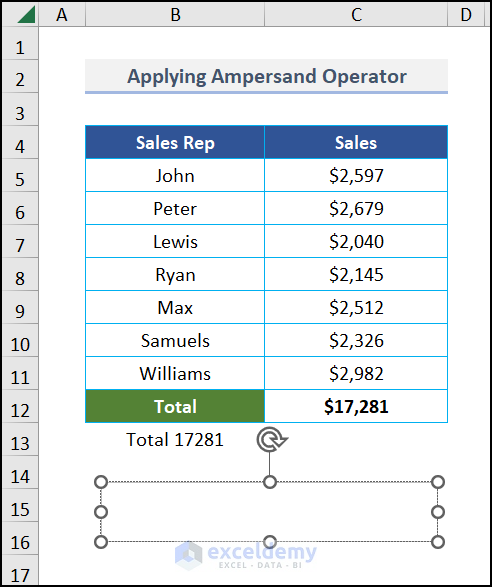
The cell is linked to the text box like in the image below.
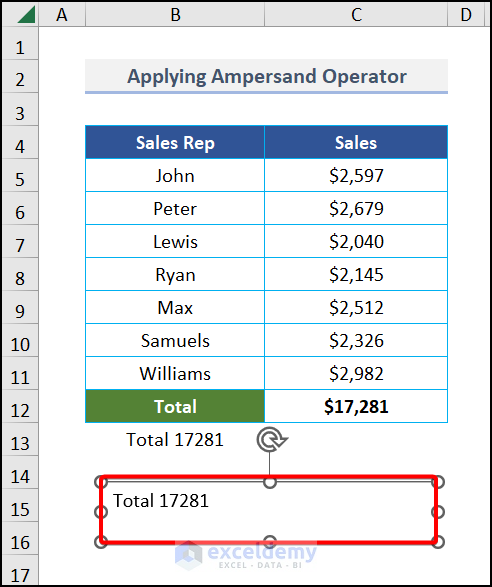
- Do some formatting to give a stylish outlook to the textbox like ours.

Read More: How to Insert Text Box in Excel
Method 2 – Using the CONCATENATE Function
Steps:
- Move to cell B13 and enter this formula.
=CONCATENATE(B12," ",C12)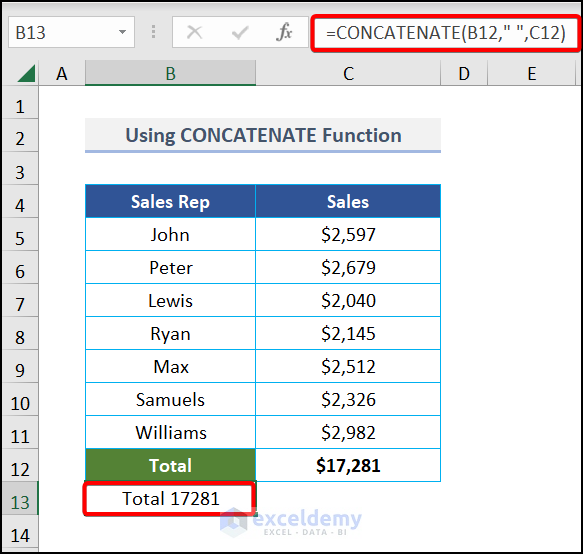
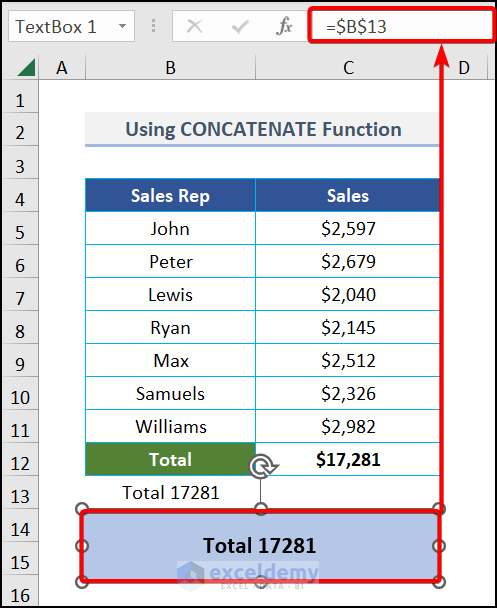
- Insert the textbox as we mentioned in Method 1 and link it with this formula.
=$B$13- Press Enter and format the textbox.
Method 3 – Employing VBA Macros to Link Textbox to Multiple Cells
Steps:
- Navigate to the Developer tab.
- Choose Insert from the Controls option,
- Pick Text Box under ActiveX Control.
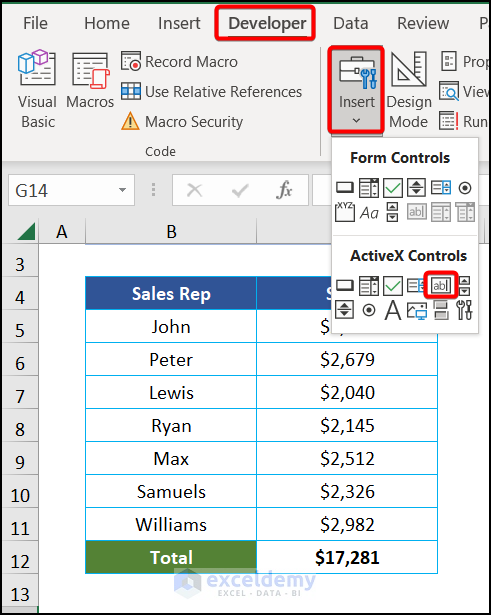
- Draw a text box (click on the sheet and drag, then release).
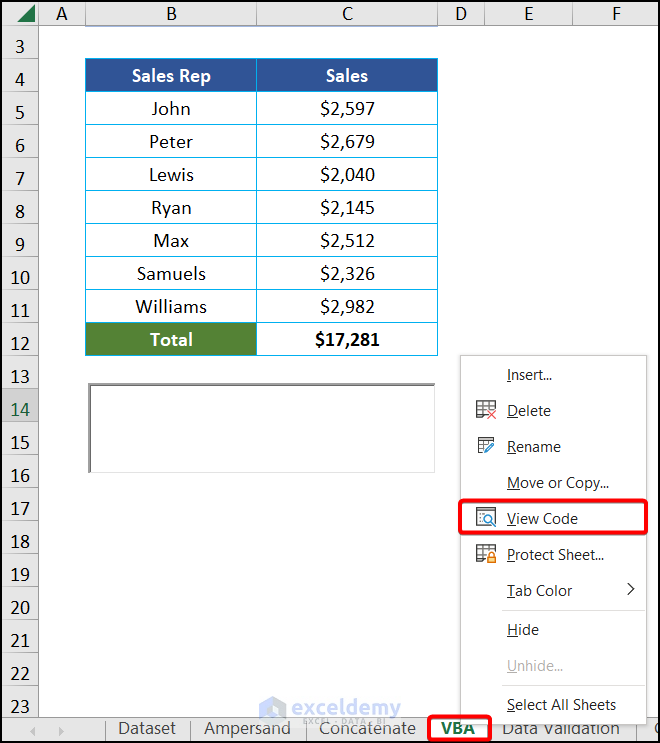
- Right-click on the sheet name and choose View Code from the Context Menu.
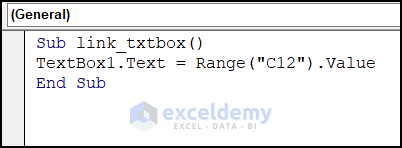
- In the Visual Basic editor, insert the following code.
Sub link_txtbox()
TextBox1.Text = Range("C12").Value
End Sub
The above code will link up the cell value of C12 to the textbox as we entered the command TextBox1.Text = Range(“C12”).Value
- Run the code with the F5 key, and you will find that the cell is linked to the textbox.
Read More: How to Align Text Boxes in Excel
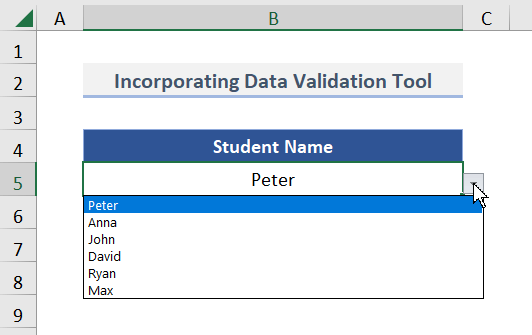
Method 4 – Incorporating Data Validation
Steps:
- Select cell B5 and go to the Data tab, then choose Data Validation from the Data Tools
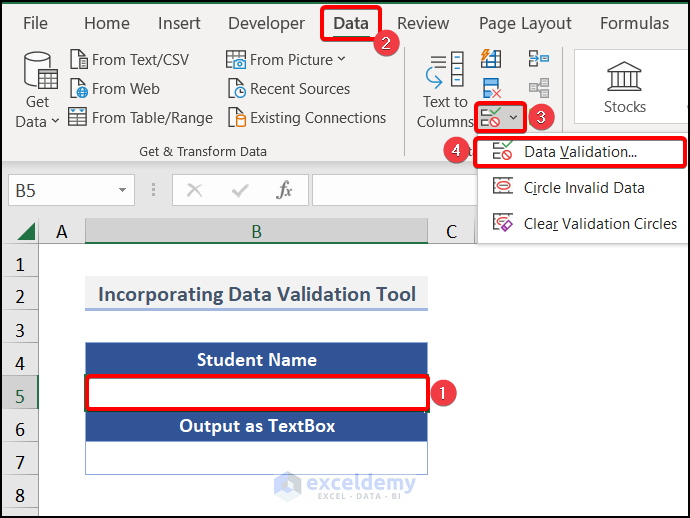
- The Data Validation window pops out.
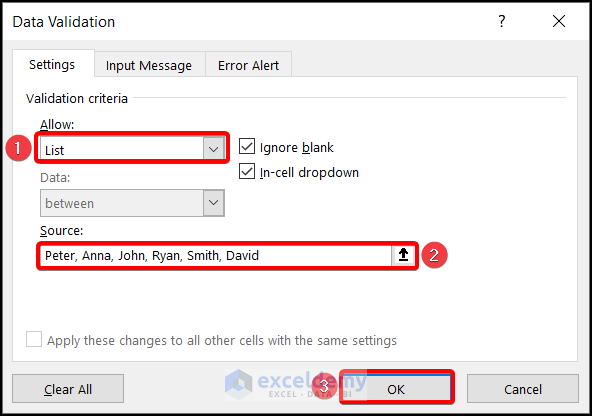
- Select List in the Allow box and insert all student names in the Source. Alternatively, use an array from the table or a named range.
- Hit OK.
- Insert a textbox in cell B7, as mentioned in Method 1.
- Use the following formula in the textbox’s formula bar.
=$B$5The textbox is attached with cell B5.
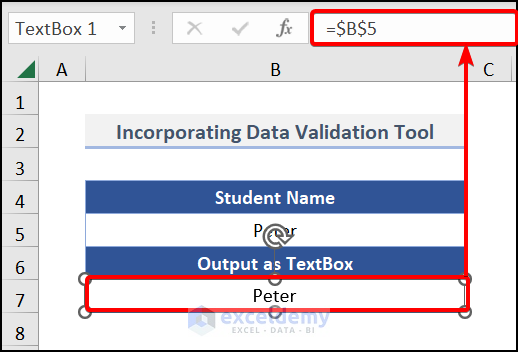
If you change the value from the dropdown, the textbox will change accordingly.
Read More: How to Edit Text Box in Excel
How to Convert a TextBox to a Cell in Excel
- Insert textboxes to the cell B5:B11 range.
- Navigate to the Developer tab and choose Visual Basic.
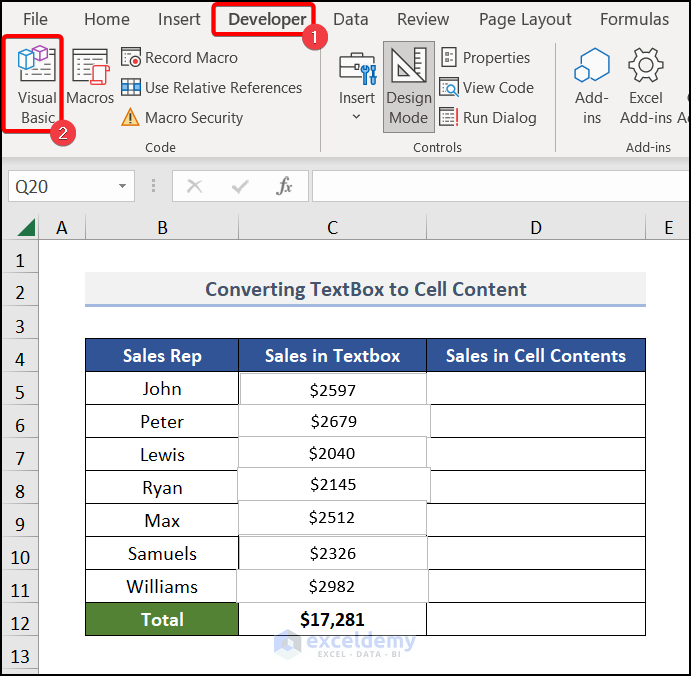
- From the Visual Basic editor, select the Insert tab and choose Module.
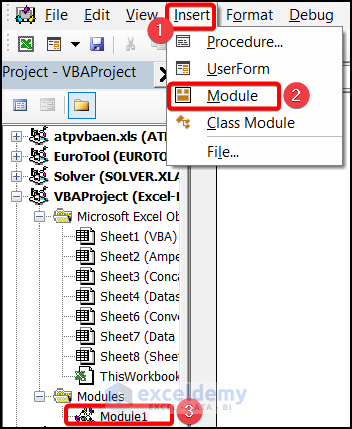
- Insert the following code in the module that opens.
Sub ConvertTextBoxToCell()
    Dim Sh_xRg As Range
    Dim Sh_xRow As Long
    Dim Sh_xCol As Long
    Dim Sh_xTxtBox As TextBox
    Set Sh_xRg = Application.InputBox("Select a cell):", "Convert Text Box to Cell ", _                    ActiveWindow.RangeSelection.AddressLocal, , , , , 8)
    Sh_xRow = Sh_xRg.Row
    Sh_xCol = Sh_xRg.Column
    For Each Sh_xTxtBox In ActiveSheet.TextBoxes
        Cells(Sh_xRow, Sh_xCol).Value = Sh_xTxtBox.Text
               Sh_xRow = Sh_xRow + 1
    Next
End Sub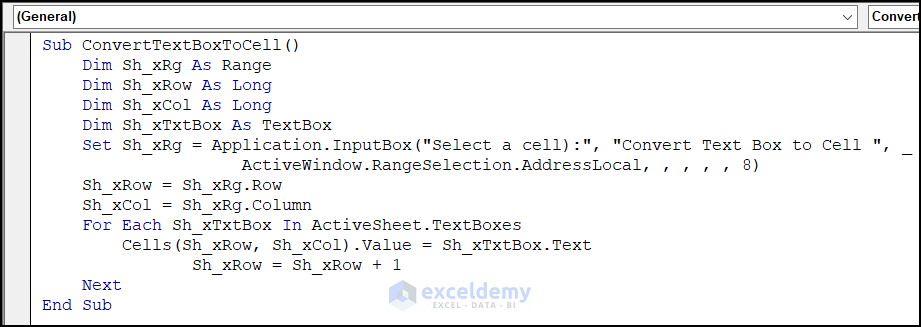
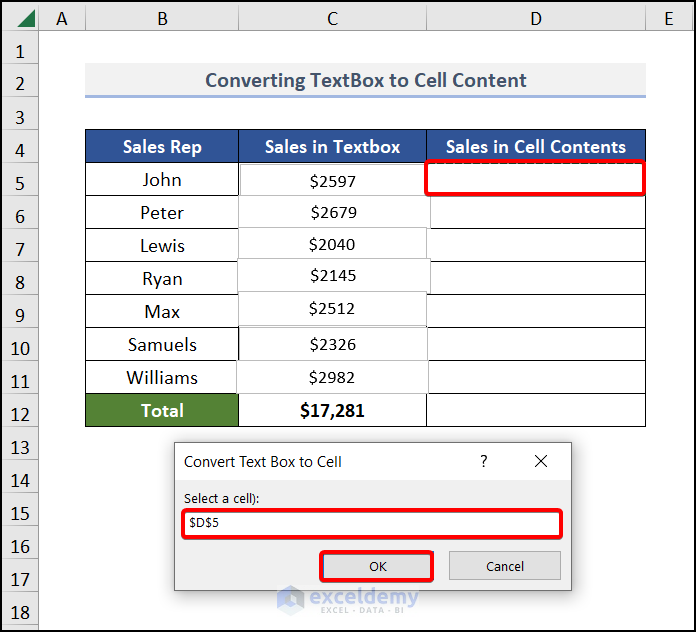
- Run the code with the F5 key, and you will find the InputBox for selecting a cell where to start. In our case, it is cell $D$5.
- Hit OK.
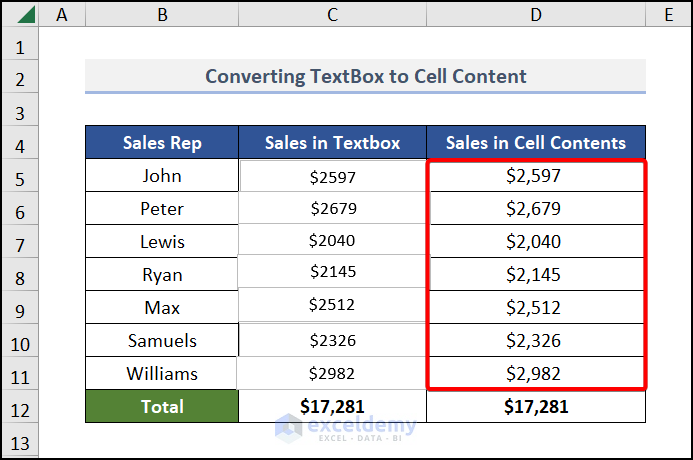
The textboxes have been converted into the cell values.
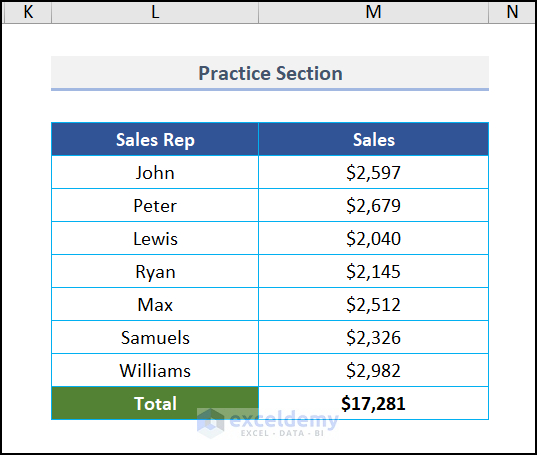
Practice Section
We have provided a practice section on each sheet on the right side for your practice.
Download the Practice Workbook
Related Articles
<< Go Back to TextBox | Learn Excel
Get FREE Advanced Excel Exercises with Solutions!
