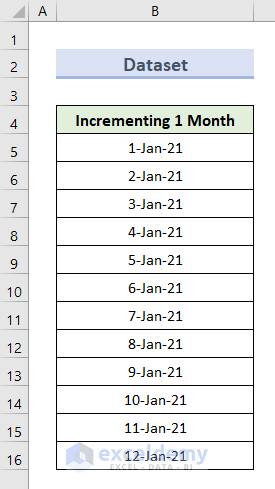
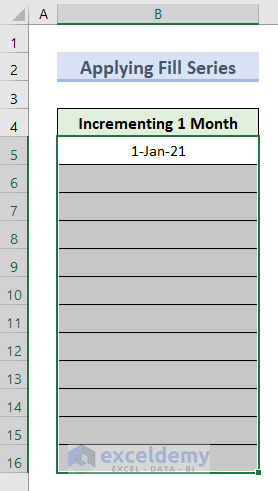
We have a dataset of dates in the cell range B5:B16. We will calculate the 1-month increment of the given dates.
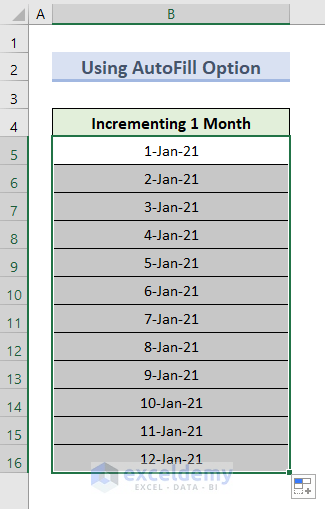
Method 1 – Use the AutoFill Option to Increment by 1 Month
- Go to cell B5 and type the first date from the dataset.
- Select cell B5 and move the cursor to the lower right corner of the cell.
- Drag down the cursor using the AutoFill tool.
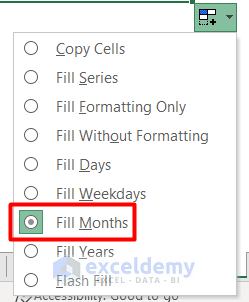
- You’ll see the AutoFill options. Select Fill Months.
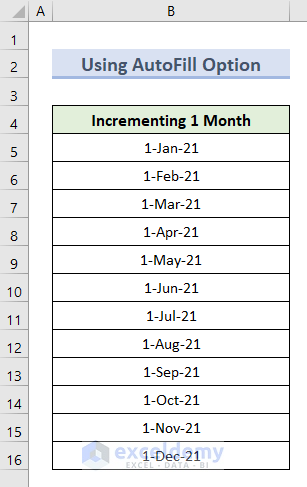
- The results will be like the following.
Read More: How to AutoFill Months in Excel
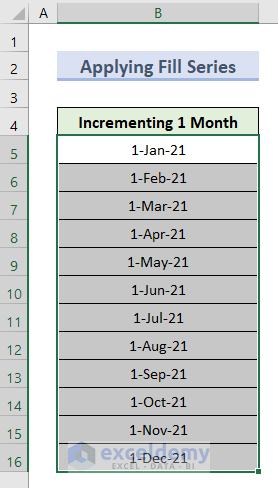
Method 2 – Apply Excel Fill Series for Incrementing Months in a Series
- Choose cell B5 and type a date.
- Select a cell range you want to insert, including the cell B5.
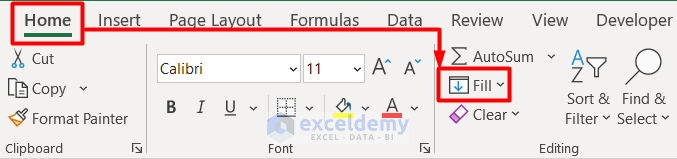
- Go to the Home tab and click on Fill from the Editing group.
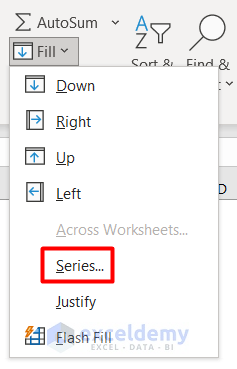
- Select Series from the drop-down section.
- Select Columns, Date, and Month for the Series in, Type, and Date unit options, respectively.
- Declare the Step value as 1.
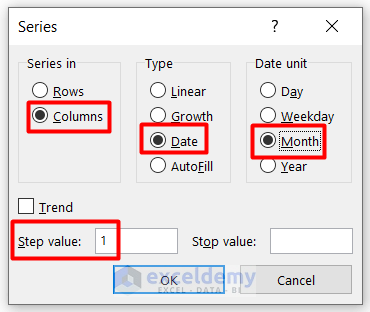
- Press OK.
- You’ll get the output like the following figure.
Method 3 – Insert the DATE Function to Increment by Month in Excel
- Insert the following formula in cell C5, next to the original date:
=DATE(YEAR(B5),MONTH(B5)+1,DAY(B5))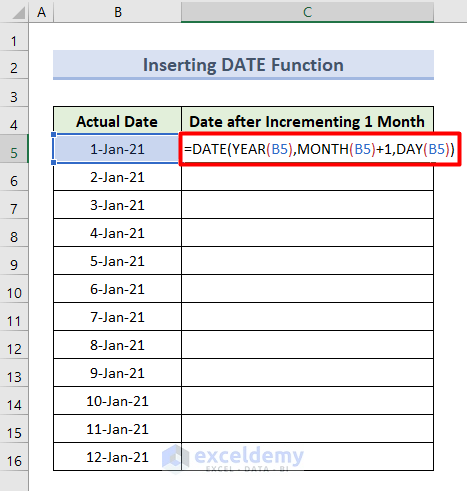
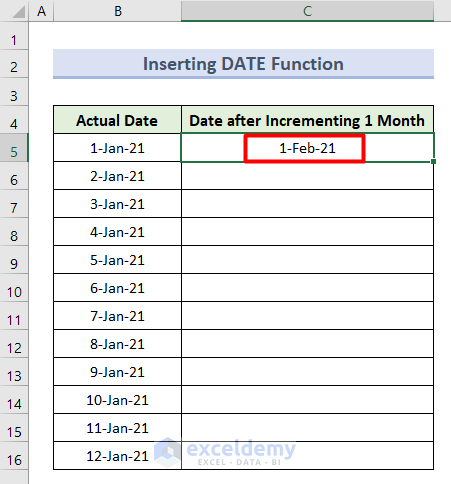
- Press Enter and you will see the first output.
The DATE function returns the serial number from the date of cell B5. The YEAR and MONTH functions extract the year and month from that given date. Lastly, the DAY function returns the day of the month as a number between 1 to 31 from the given date as well.
- Apply the same formula in the cell range C6:C16 (drag the Fill Handle down) to get the final result.

Read More: How to Autofill Days of Week Based on Date in Excel
Method 4 – Increment Month by 1 with the EDATE Function
- Select cell C5 and insert this formula:
=EDATE(B5,1)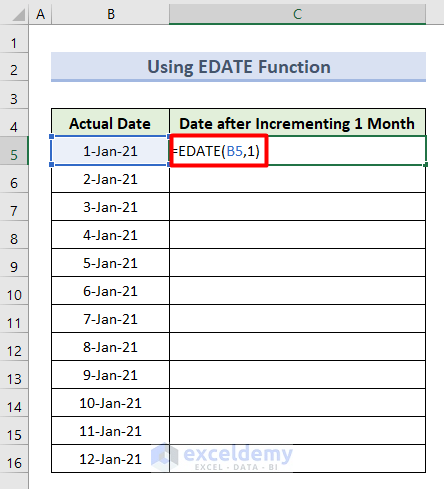
- Press Enter.
- Apply the AutoFill tool to get all the incremented dates.
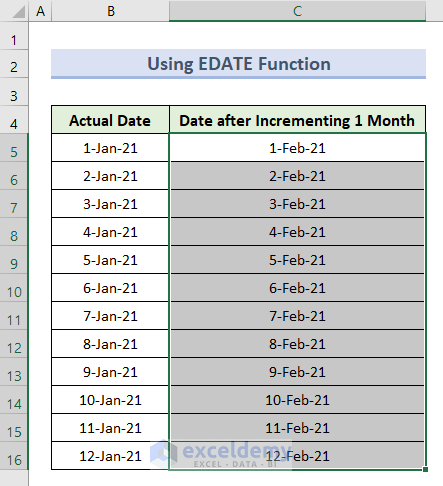
In the EDATE formula, cell B5 is the actual date before incrementing, and 1 is for incrementing 1 month.
Read More: How to Enter Sequential Dates Across Multiple Sheets in Excel
Method 5 – Utilize the IF Function for Incrementing in Excel
- Copy this formula into cell C5:
=IF(DAY(EDATE(B5,1))<DAY(B5),NA(),EDATE(B5,1))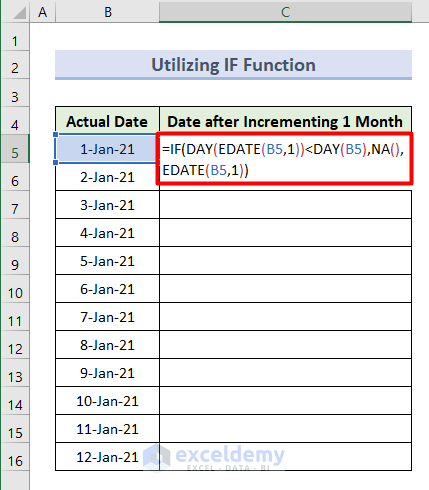
- Hit Enter.
- Drag the Fill Handle from the first result cell through the column.
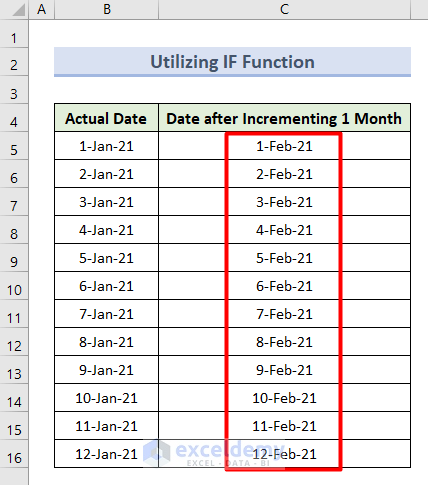
This formula compares the converted date to the original date’s day with the IF function. We have to utilize it along with the DAY and EDATE functions for incrementing the given actual dates by 1 month. Furthermore, we have to use the NA function along with the IF function to return the #N/A error code for any blank cell.
Method 6 – Increment the Month by 1 with the EOMONTH Function
Let’s say we don’t need to increment the month exactly, but to move from the first to the last day of the given month.
- Copy this formula in cell C5:
=EOMONTH(B5,0)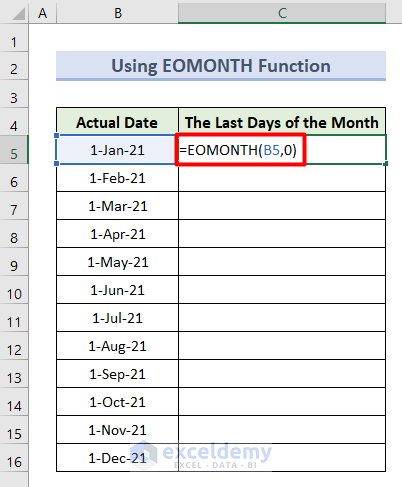
- Press Enter to get the first output.
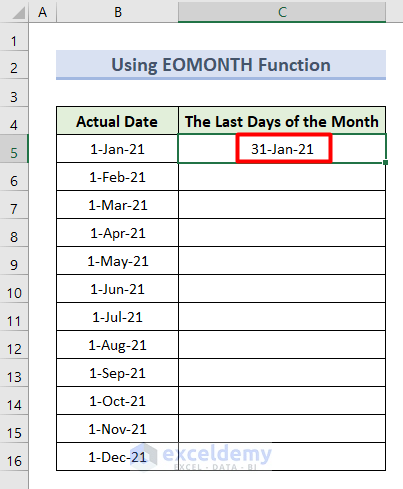
Here, cell B5 is the actual date before incrementing and 0 for the same month in the EOMONTH function.
- Use the AutoFill tool to get all the last days in the cell range C6:C16.
Read More: How to Create Automatic Rolling Months in Excel
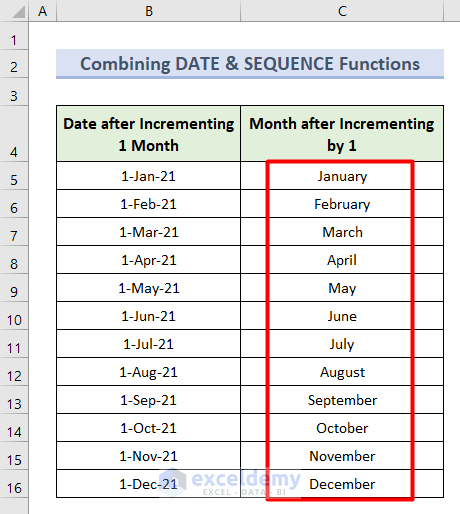
Method 7 – Combine DATE and SEQUENCE Functions to Serialize Months
- Select cell B5 to insert this formula:
=DATE(2021,SEQUENCE(12),1)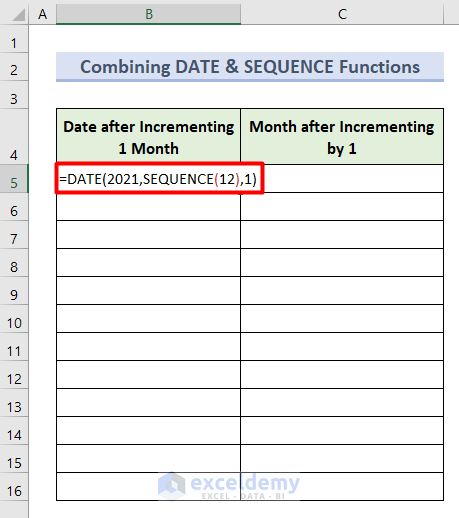
- Hit Enter and you will get the series of incremental dates in the cell range B5:B16.
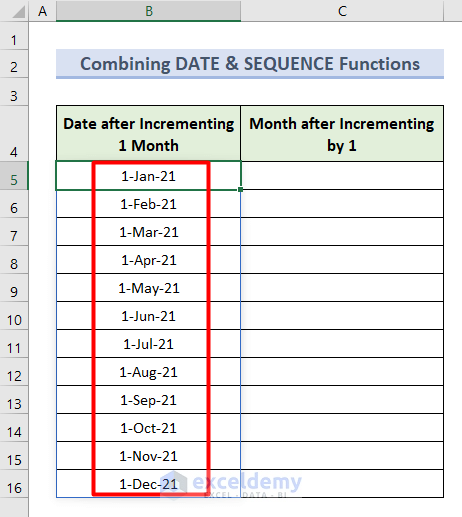
In this case, the target year 2021 is in the 1st argument and the day as 1 in the 3rd argument. In the 2nd argument, the SEQUENCE function will return the sequential numbers from 1 to 12. Based on these parameters, the DATE function will produce a series of dates.
- Apply the same formula in the cell range C5:C16.
- Right-click on it and select Format Cells from the Context Menu.

- Go to the Custom section from the Number tab.
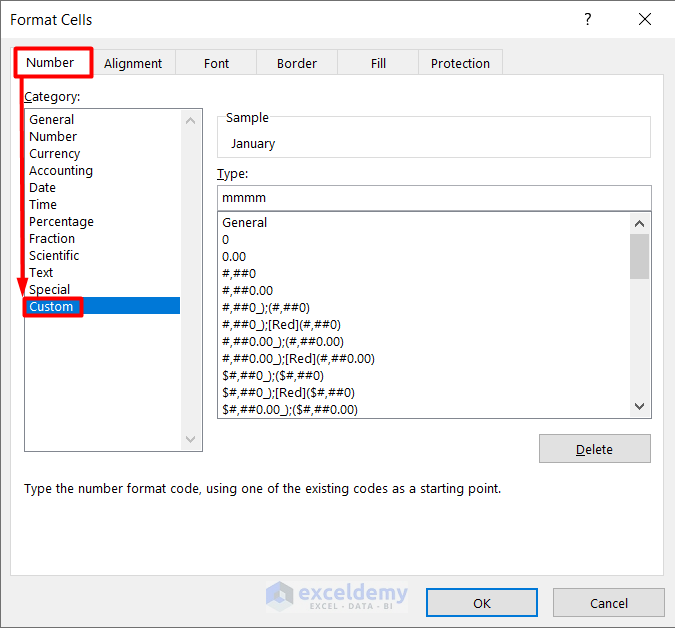
- Insert the Type as mmmm and press OK.
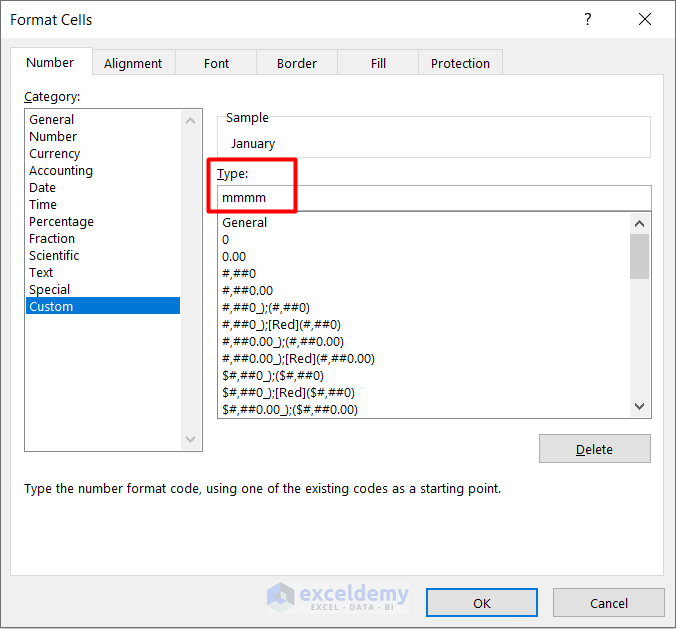
- You will get a series of months.
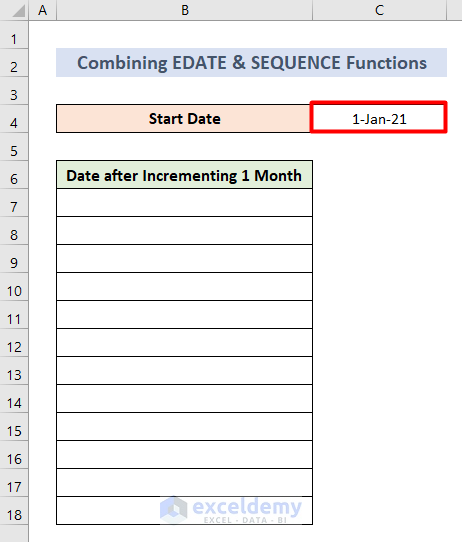
Method 8 – Combine EDATE and SEQUENCE Functions for Incrementing
We have a given starting date in a separate cell and will create a series of dates by incrementing the month.
- Input your required Start Date in cell C4.
- Insert the following formula in cell B7.
=EDATE(C4, SEQUENCE(12, 1, 0))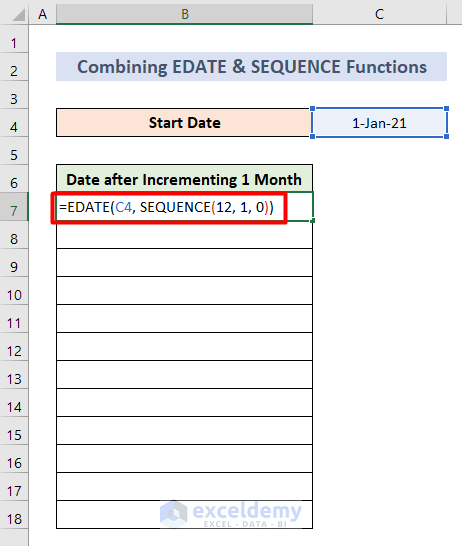
- Hit Enter.
- You will get the sequential dates.
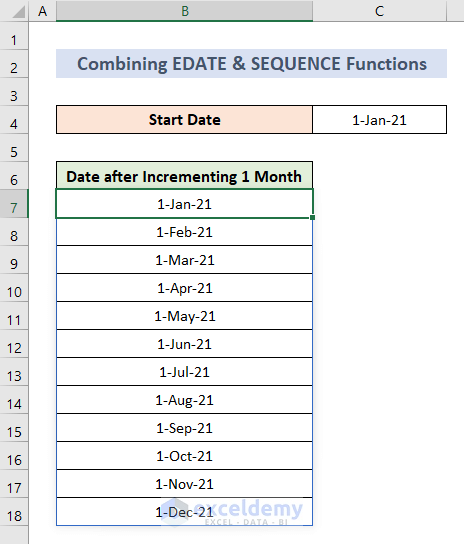
The EDATE function returns a date along with a month before or after the start date in cell C4. Then, the SEQUENCE function creates an array of 12 numbers as we want to output for 12 months. We used 1 as the 2nd argument for one-month increments. Also, the start argument is set to 0 and included in the formula.
Things to Remember
- Make sure all the dates are in the same format after incrementing them by 1. Otherwise, if you get any numeric value after applying any of the above methods, simply change the format from the Format Cells section.
- If the array formulas don’t work, use Ctrl + Shift + Enter instead of Enter.
Download the Practice Workbook
Related Articles
- Applications of Excel Fill Series
- How to Fill Down Blanks in Excel
- How to Repeat Number Pattern in Excel
- How to Repeat Formula Pattern in Excel
- How to Perform Predictive AutoFill in Excel
<< Go Back to Autofill Dates | Excel Autofill | Learn Excel
Get FREE Advanced Excel Exercises with Solutions!
