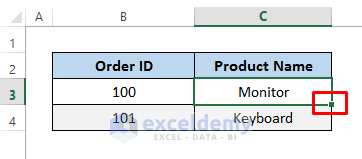
In any Excel sheet, the active cell or selection has a small square at the bottom right corner called the Fill Handle. Drag it or double-click on it to activate the AutoFill option.
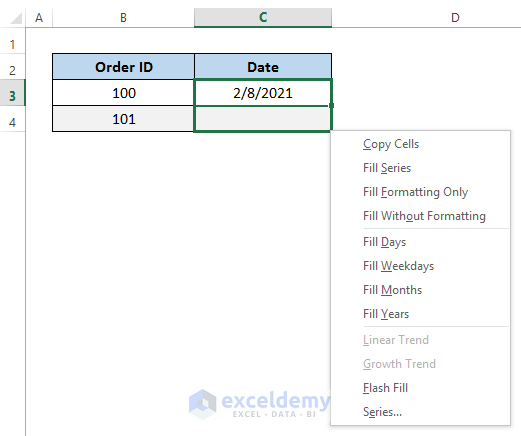
Pressing the left mouse button while dragging will apply the default settings. However, pressing the right mouse button opens a drop-down menu from which the desired settings to be applied can be selected.
Read More: Applications of Excel Fill Series
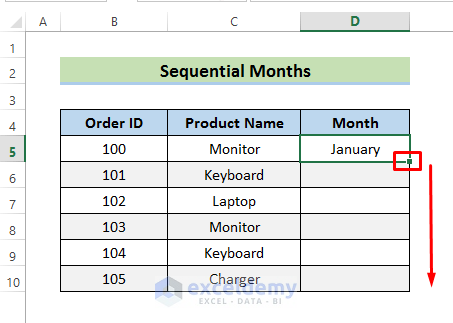
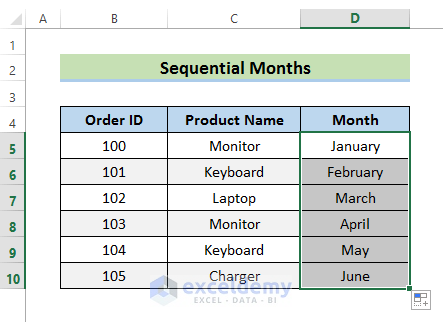
Method 1 – Using AutoFill to Create Sequential Month Names
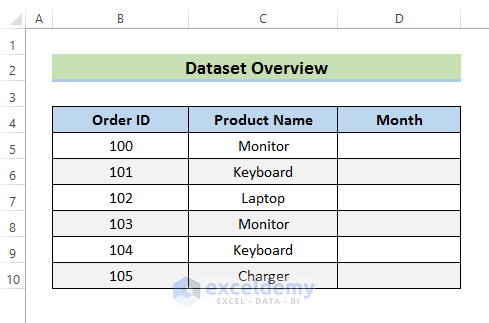
We will use a dataset that contains Order ID, Product Name, and Month as columns and will use Autofill to insert Month names into the Month column.
STEPS:
- In Cell D5, enter the name of the month you want to start with, for example January.
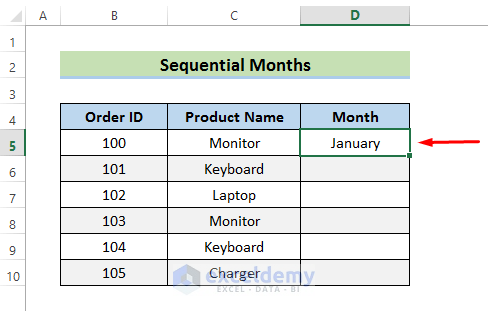
- Select the Fill Handle and drag it down.
- Month names will be auto-filled sequentially.
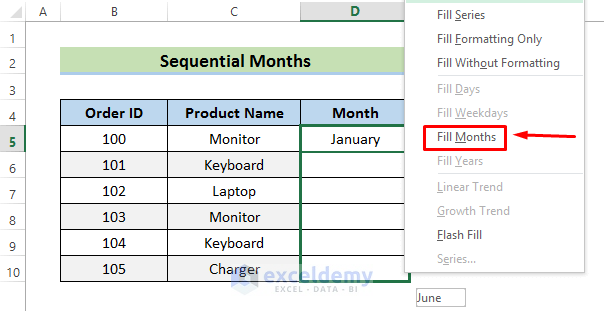
- Alternatively, click the right mouse button while dragging, then select Fill Months from the drop-down menu.
Read More: How to Add Sequence Number by Group in Excel
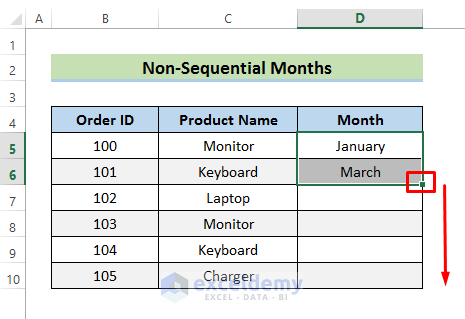
Method 2 – Using AutoFill to Create Non-Sequential Month Names
Let’s autofill a January, March, May…. pattern.
STEPS:
- In Cell D5 enter January.
- In Cell D6 enter March.
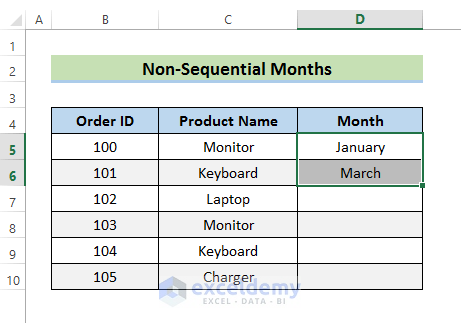
- Select Cell D5 and Cell D6, then use the Fill Handle to fill the cells below.
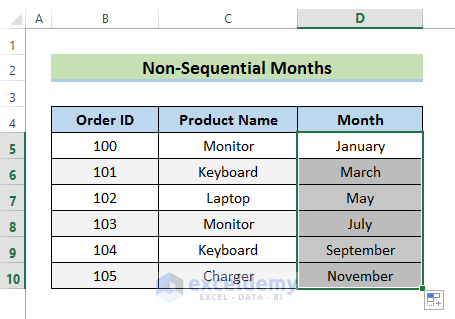
- The range will be automatically filled with the desired sequence.
Read More: How to Increment Month by 1 in Excel
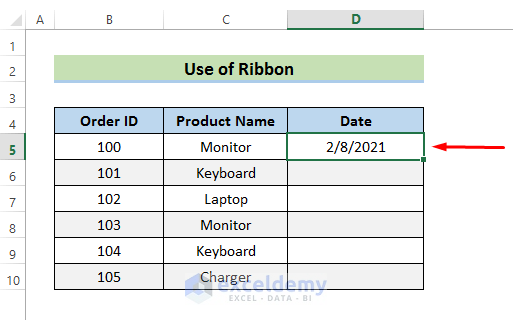
Method 3 – Using the Ribbon to AutoFill Months in Excel
We will use a Date Column instead of a Month Column.
STEPS:
- In Cell D5, enter a date.
- Select the range of cells into which values will be AutoFilled.
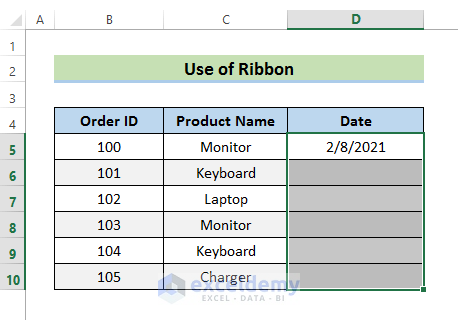
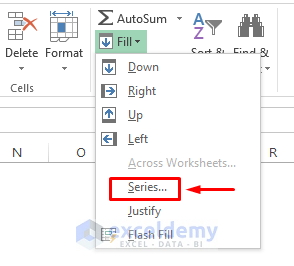
- Select the Fill option from the Home tab on the ribbon.
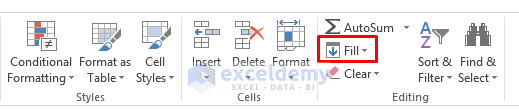
- Select Series from the drop-down menu that opens.
- A Series window opens.
- Select Month from the Date unit section.
- For non-sequential patterns, the Step value can be adjusted here.
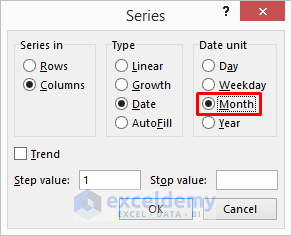
- Press OK.
- Date values are automatically filled in the specified range.

Alternatively, the right mouse button can also be used to open the Series window, as described above.
Read More: How to Create Automatic Rolling Months in Excel
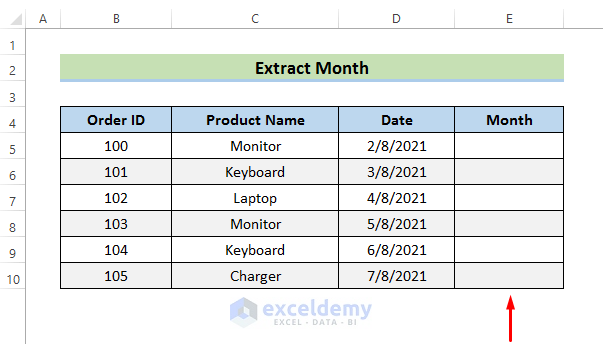
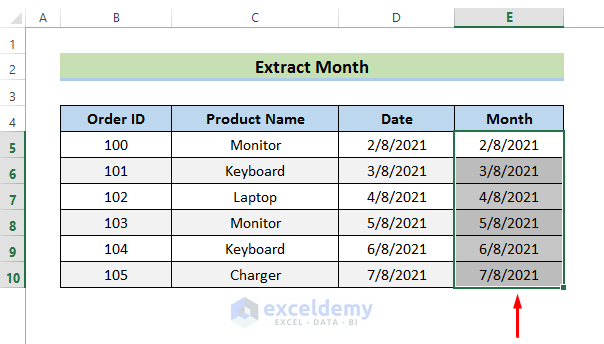
Method 4 – Extracting Month from Date Using Functions and AutoFill
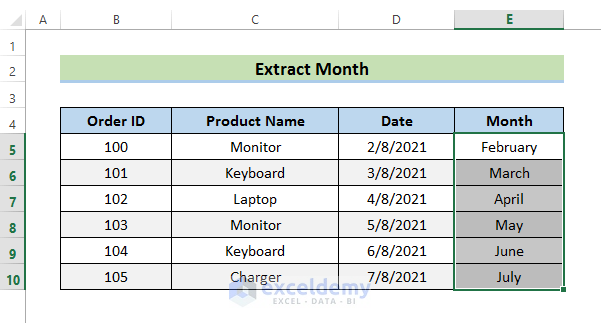
We can extract the month name from any given date, then use the AutoFill feature to fill the rest of the cells. We added a Month Column to the dataset generated in Method 3 above.
STEPS:
- Copy the values in Column D and paste them into Column E.
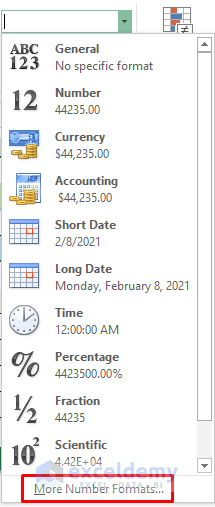
- Select the Date format option in the Home tab and click the drop-down menu icon.

- Select More Number Formats.
- A Format Cells window opens. Select Custom and enter ‘mmmm’ in the Type field. The ‘mmmm’ syntax will display the name of the month in long form (January, February etc). Enter ‘mmm’ to return short-form month names (Jan, Feb, Mar, etc).
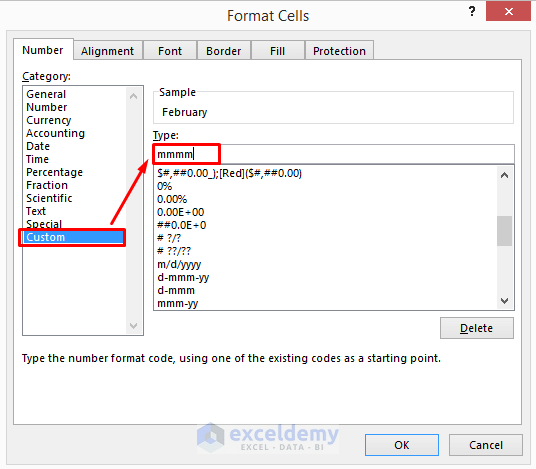
- Click OK to return the results.
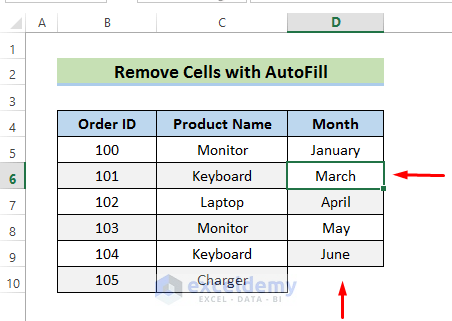
Method 5 – Removing Cells Containing Months with AutoFill
STEPS:
- Select the cell you want to remove, in this case Cell D6.
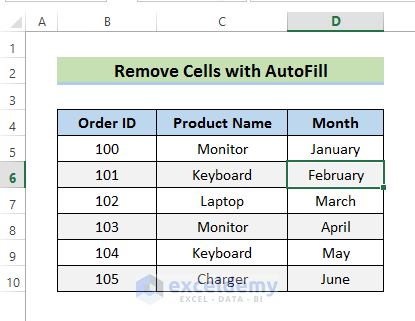
- While holding Shift, use the Fill Handle to drag up on the cell.
- The cell is removed automatically, with the cells below it moving one cell up in the column.
Download the Practice Workbook
Further Reading
- How to Autofill Days of Week Based on Date in Excel
- How to Fill Down Blanks in Excel
- How to Repeat Number Pattern in Excel
- How to Enter Sequential Dates Across Multiple Sheets in Excel
- How to Repeat Formula Pattern in Excel
- How to Perform Predictive AutoFill in Excel
<< Go Back to Autofill Dates | Excel Autofill | Learn Excel
Get FREE Advanced Excel Exercises with Solutions!
