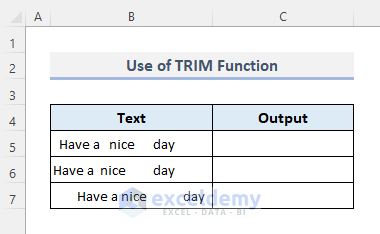
Method 1 – Use Excel TRIM Function to Remove All Leading and Trailing Spaces
The TRIM function removes all spaces from a text string except for single spaces between words. In the following table, we have texts that have added spaces and want to remove them.
- The required formula in the output Cell C5 will be:
=TRIM(B5)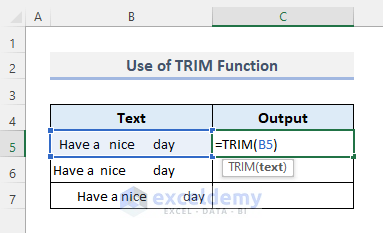
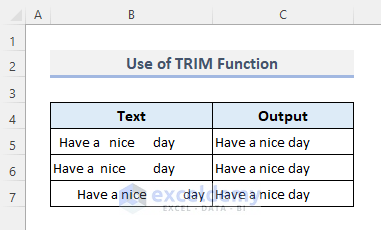
- After pressing Enter and auto-filling the rest of the cells in the Output column, we’ll get the texts without the extra spaces.
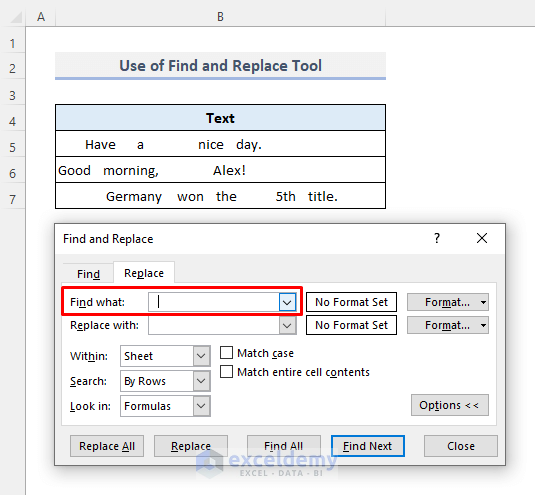
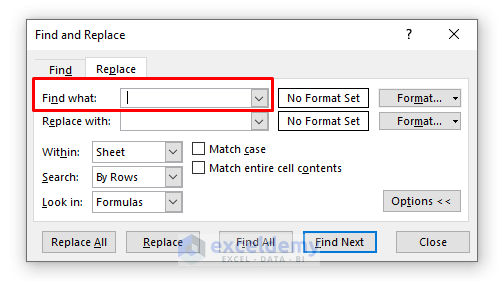
Method 2 – Apply the Find & Replace Tool to Erase Extra Spaces in Excel
Steps:
- Press CTRL+H to open the Find and Replace tool.
- In the Find What box, press the Space button twice.
Step 2:
- Tap Space only once in the Replace with box.
- Press the Replace All button.
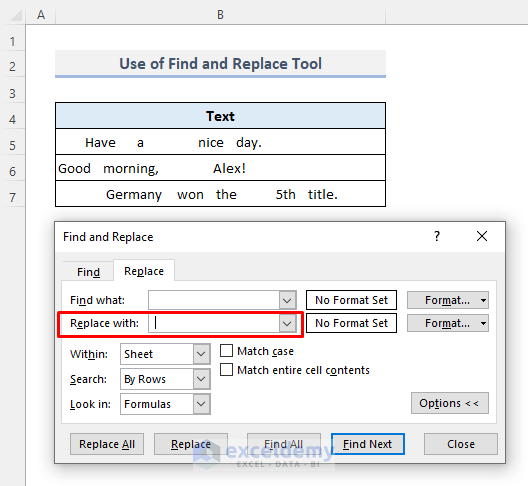
- A message box will display the total number of replacements in the worksheet.
- You must repeat the procedure to remove all excess spaces.
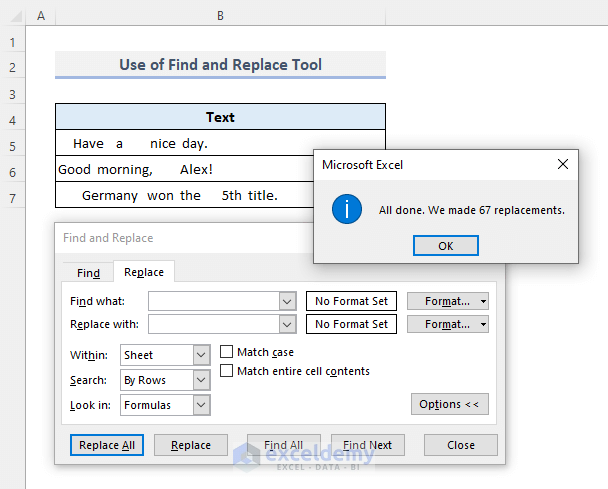
Step 3:
- Keep the Find and Replace window open since the previous replacements were made.
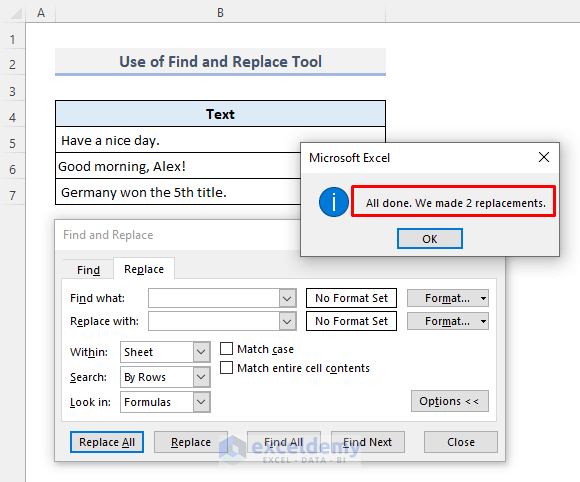
- Press Replace All again.
- More spaces have been removed from the data table.
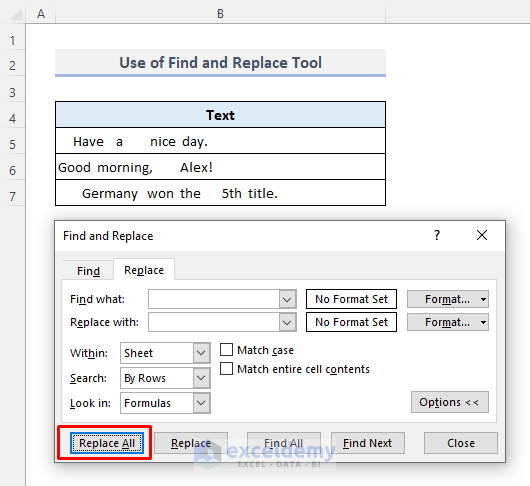
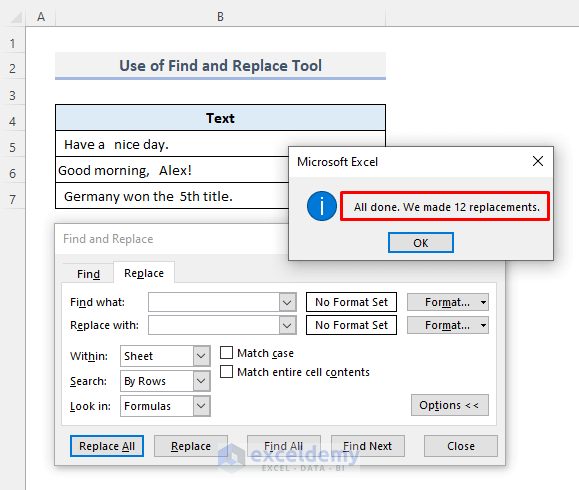
- Click the Replace All button, showing 12 more replacements have just been made.
- Here’s the fourth use of the Replace All button.
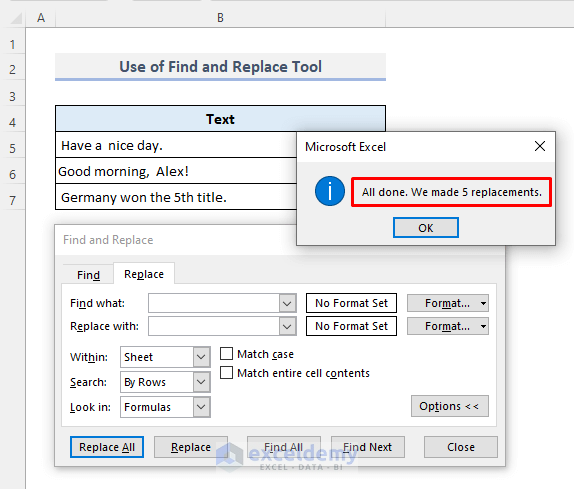
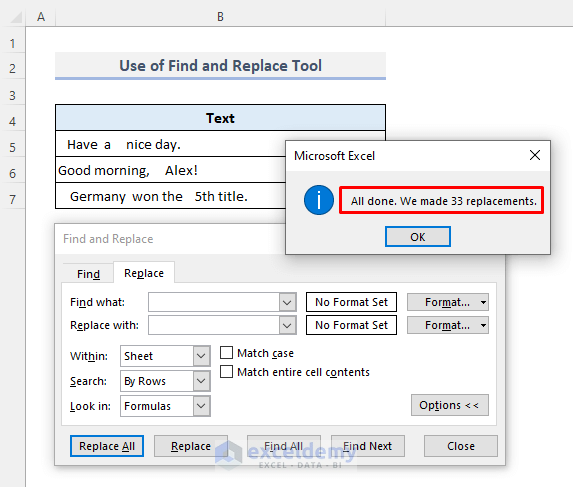
- After the fifth replacement, tere are only leading spaces remaining. You can’t remove these leading spaces with the Find and Replace tool unless you remove all spaces from the dataset.
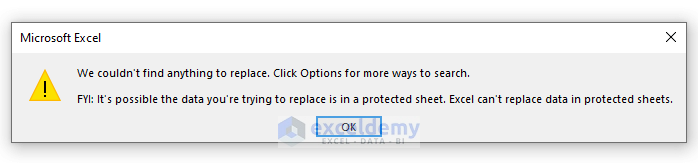
- To check if we can replace more double spaces with single spaces, press the Replace All button again. A different message box will appear saying that the tool can’t find anything to replace.
Method 3 – Delete Unnecessary Spaces along with Line Breaks
If you copy text from another source, it can port over line breaks.
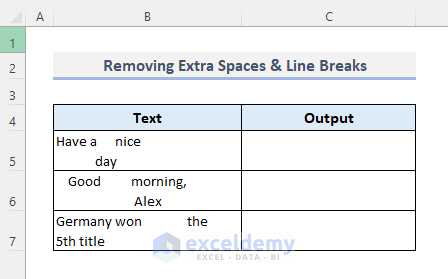
The CLEAN function removes all non-printable characters from the text.
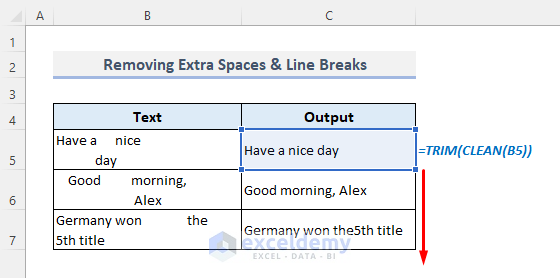
- The required formula in Cell C5 should be:
=TRIM(CLEAN(B5))Find the text with no more line breaks or unwanted spaces.
Method 4 – Remove Non-Breaking Spaces with a Combined Formula
After erasing all unnecessary spaces, non-printable characters, and line breaks, some stubborn spaces can still lie in the text. It might be difficult to find those unwanted spaces. The combination of TRIM and CLEAN functions cannot erase these non-breaking spaces, as shown in the picture below.
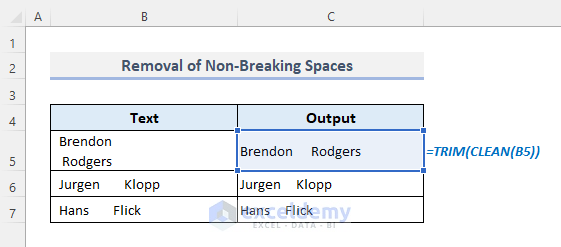
Non-breaking spaces usually appear with the CHAR function having an ASCII code of 160.
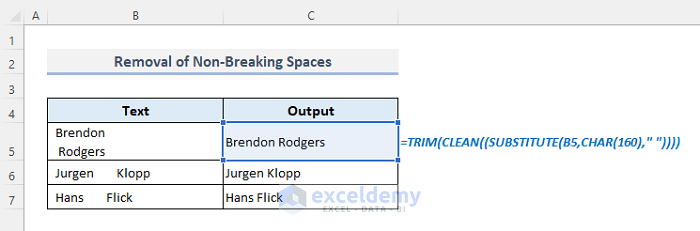
- The required combined formula in Cell C5 will be:
=TRIM(CLEAN((SUBSTITUTE(B5,CHAR(160)," "))))Get back your texts to a regular format.
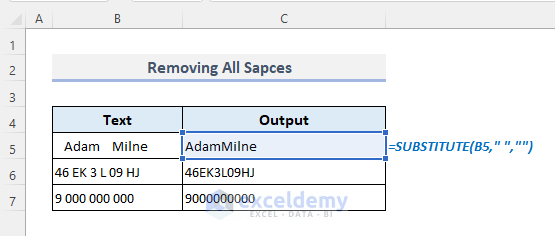
Method 5 – Insert the SUBSTITUTE Function to Erase All Spaces in Excel
- The required formula with the SUBSTITUTE function to replace a regular space with no space will be:
=SUBSTITUTE(B5," ","")After pressing Enter, find your texts with no space.
Method 6 – Use the MID Function to Delete Leading Spaces Only
- To delete the leading spaces only, the required combined formula in the output Cell C5 will be:
=MID(B5,FIND(MID(TRIM(B5),1,1),B5),LEN(B5))Press Enter, and we’ll find our text with no leading spaces.

How Does the Formula Work?
- LEN(B5): The LEN function here counts the characters of the text in Cell B5 and returns 20.
- TRIM(B5): The TRIM function removes all regular spaces from B5 and returns “Adam Milne”.
- MID(TRIM(B5),1,1): The MID function in this section returns the starting character of the text, which is “A”.
- FIND(MID(TRIM(B5),1,1),B5): This part of the formula returns the starting character of “A” from Cell B5 is 11.
- The entire formula starts the text based on the starting character (11) found in the previous section.
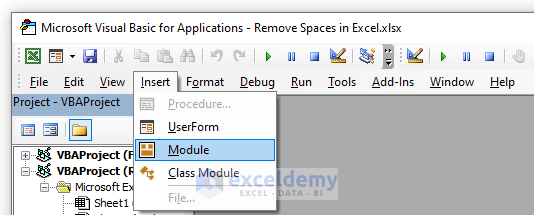
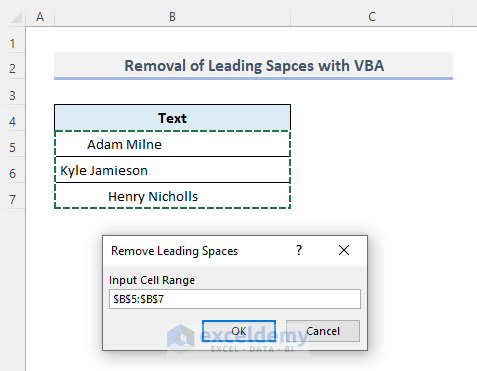
Method 7 – Embed VBA Code to Remove Only Leading Spaces in Excel
Step 1:
- Press ALT+F11 to open the VBA window first.
- From the Insert tab, select the Module option.
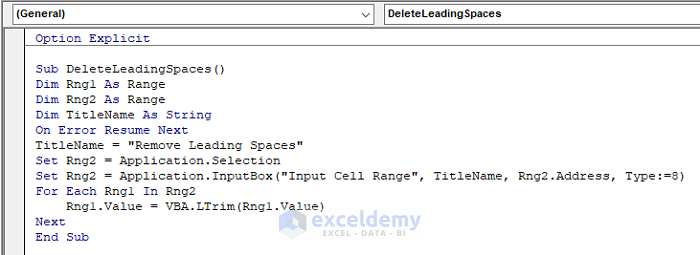
Step 2:
- In the module window, copy and paste the following code:
Option Explicit

Sub DeleteLeadingSpaces()
Dim Rng1 As Range
Dim Rng2 As Range
Dim TitleName As String
On Error Resume Next
TitleName = "Remove Leading Spaces"
Set Rng2 = Application.Selection
Set Rng2 = Application.InputBox("Input Cell Range", TitleName, Rng2.Address, Type:=8)
For Each Rng1 In Rng2
    Rng1.Value = VBA.LTrim(Rng1.Value)
Next
End Sub- Press F5 to run the VBA macro.
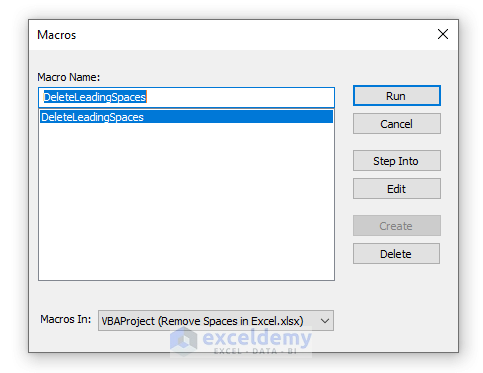
Step 3:
- The Macros window will appear. Press Run.
Step 4:
- In the application box, input the range of cells containing texts from where you want to erase the leading spaces.
- Press OK.
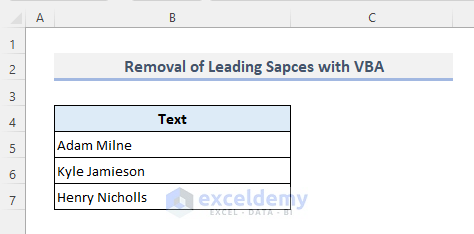
All the texts in the selected range of cells will have no leading spaces now.
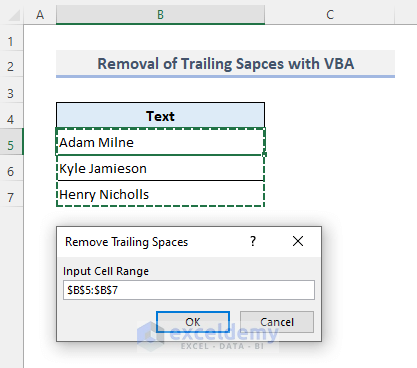
Method 8 – Excel VBA to Remove Only Trailing Spaces
Trailing spaces are hard and irritating to find since they are not visible. The user has to enable editing a cell to check if it incorporates any trailing spaces. But you can go for the VBA codes to remove all trailing spaces from the selected range of cells.
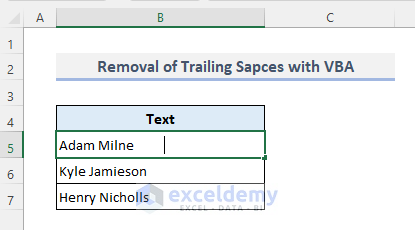
The required code to remove all trailing spaces from the texts is given below:
Option Explicit

Sub EraseTrailingSpaces()
Dim Rng1 As Range
Dim Rng2 As Range
Dim TitleName As String
On Error Resume Next
TitleName = "Remove Trailing Spaces"
Set Rng2 = Application.Selection
Set Rng2 = Application.InputBox("Input Cell Range", TitleName, Rng2.Address, Type:=8)
For Each Rng1 In Rng2
    Rng1.Value = VBA.RTrim(Rng1.Value)
Next
End Sub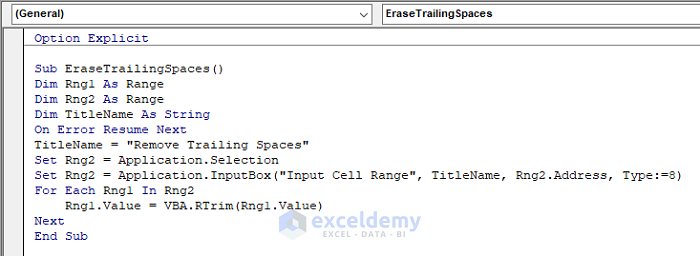
While saving and playing the macro, you’ll see the application box to input the range of cells from where all trailing spaces must be deleted.
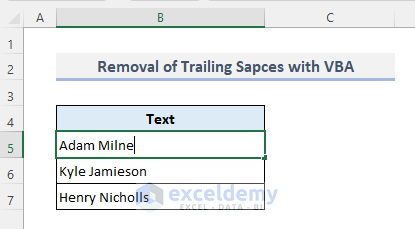
After you execute the application, you can verify the text once again in a cell if it still has a trailing space. You shouldn’t expect to find any trailing space here while checking.
Method 9 – Remove Particular Spaces from Text in Excel
The following dataset has unwanted spaces before commas (,). This space character is the second occurrence in each text.
- The required formula in the output Cell C5 to erase this unwanted space will be:
=SUBSTITUTE(B5," ","",2)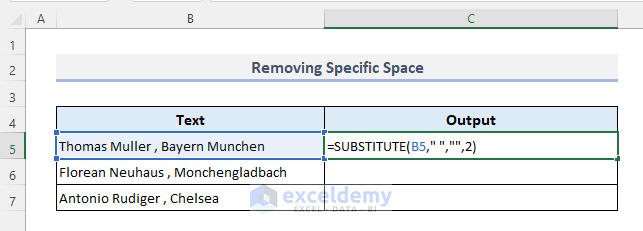
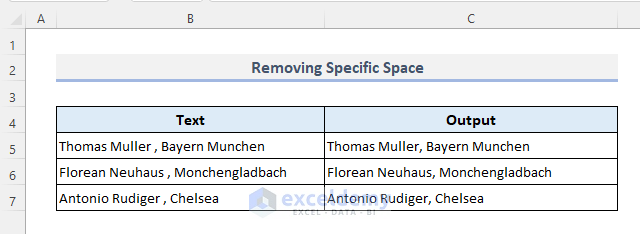
After applying the formula, the texts will look like the following. There are no longer unwanted spaces before commas.
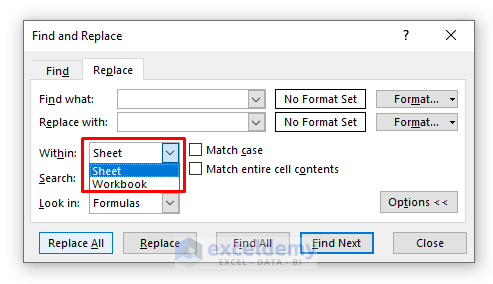
Method 10 – Delete Spaces from the Entire Excel Sheet or Workbook
With the Find & Replace tool, we can remove all spaces from the current worksheet or even from an entire workbook in seconds.
- Put a space in the Find What box.
- Select Sheet or Workbook from where we want to remove all spaces. After pressing the Replace All button, you’ll find no space anymore in the selected region (Sheet or Workbook).
Method 11 – Using Excel Power Query to Erase Blank Spaces
Step 1:
- Go to the Data tab and select the From Table/Range command. A window named Create Table will open up.
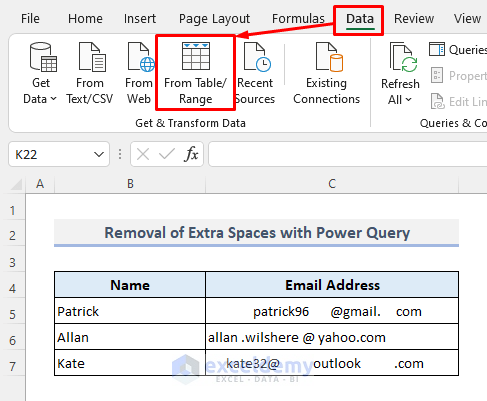
Step 2:
- Select the entire data table along with the headers.
- Put a check mark on the option- ‘My table has headers’.
- Press OK, and your data table will be visible in the Power Query window.

Here’s a visual representation of the Power Query Editor with the data table.
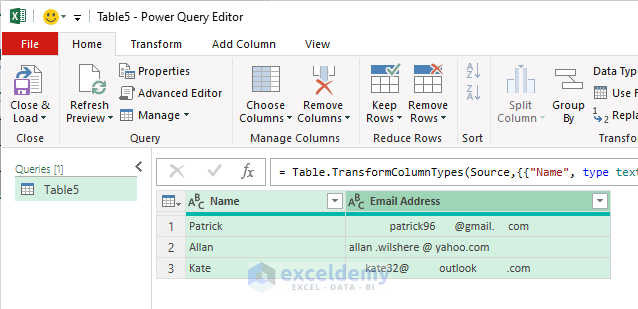
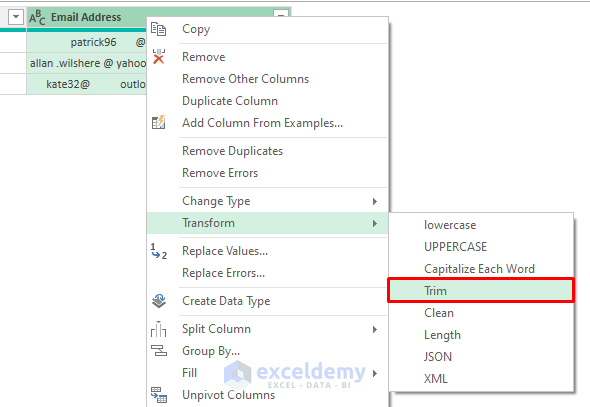
Step 3:
- Select the Email Address column and open the Context Menu by right-clicking.
- From the Transform sidebar menu, select Trim.
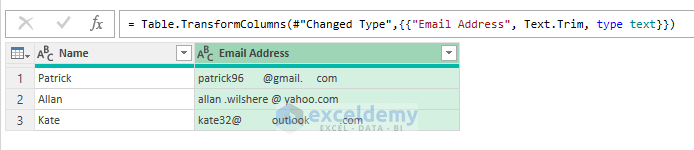
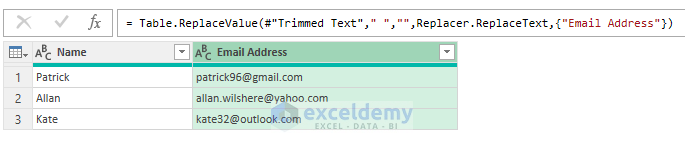
Find that only leading spaces have been removed. The Trim command in the Power Query is not precisely similar to the TRIM function available in the Excel spreadsheets. The Trim command in the Power Query only removes the leading and trailing spaces but cannot erase any space inside the text. Use the Replace command now to remove all spaces from the texts.
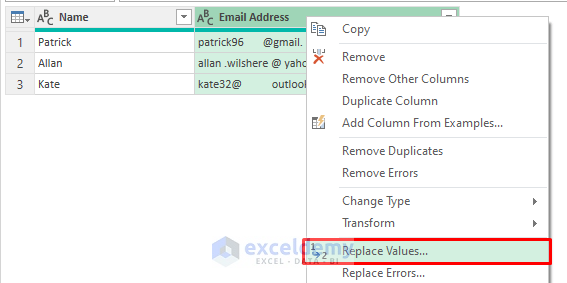
Step 4:
- Launch the Context Menu once again.
- Select the Replace values option.
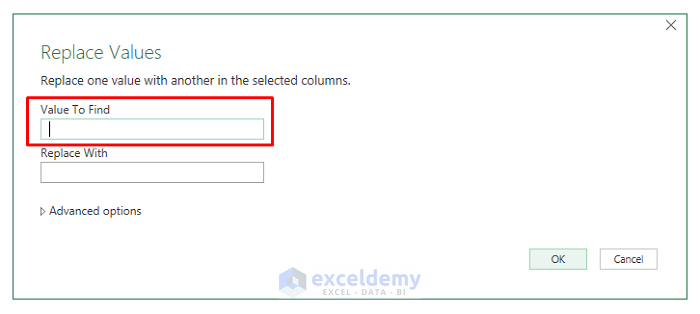
Step 5:
- In the Value to Find box, put a space once.
- Keep the Replace With box empty.
- Press OK.
The email addresses have no more unwanted or blank spaces inside. To remove all spaces from any position in a text, it’s better to use the Replace command in the Power Query. The Trim command is suitable for removing only leading and trailing edges when needed.
Step 6:
- Press the Close & Load button at the window’s top-left corner.
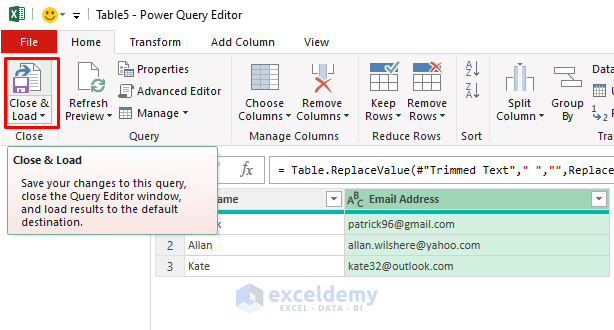
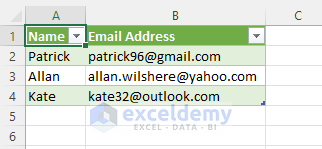
The Power Query window will shut down and open a new worksheet in Excel to transfer all the modified data to a filtered table. Copy this data from the table to our desired region in any other worksheet.
Download the Practice Workbook
Remove Space in Excel: Knowledge Hub
- Find and Replace Space in Excel
- Remove Space in Excel Before Numbers
- Remove Space after Number in Excel
- Remove Space Before Text in Excel
- Remove Space between Rows in Excel
- Remove Tab Space from Excel
<< Go Back To Data Cleaning in Excel | Learn Excel
Get FREE Advanced Excel Exercises with Solutions!
