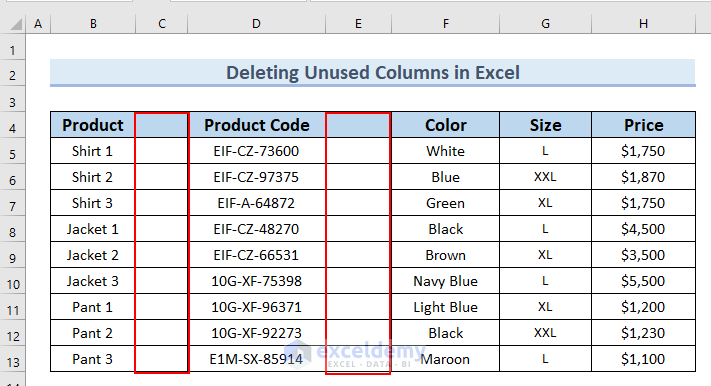
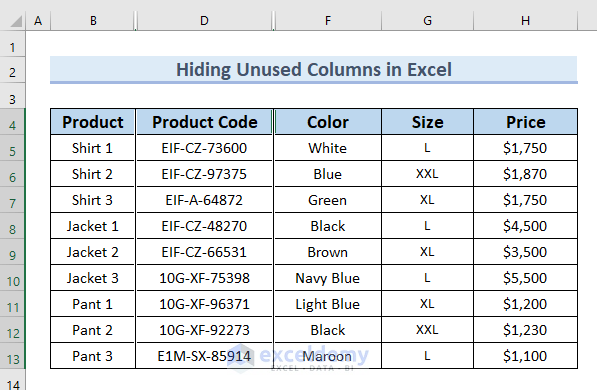
The sample dataset contains Product, Product Code, Color, Size, and Price columns and two unused columns as indicated in red to be deleted.
Method 1 – Using Go To Special Feature to Delete Unused Columns in Excel
Steps:
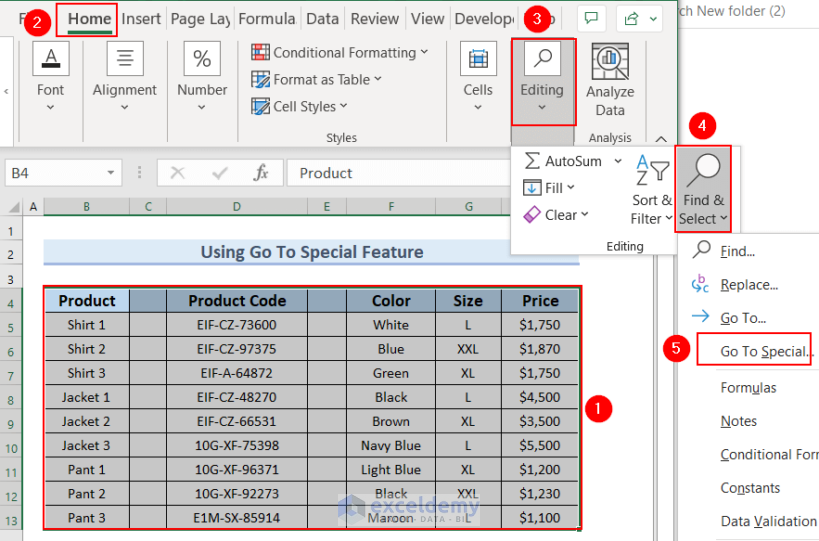
- Select the entire dataset by selecting range B4:H13.
- Go to the Home tab.
- Select Editing.
- Click on Find & Select.
- Select Go To Special.
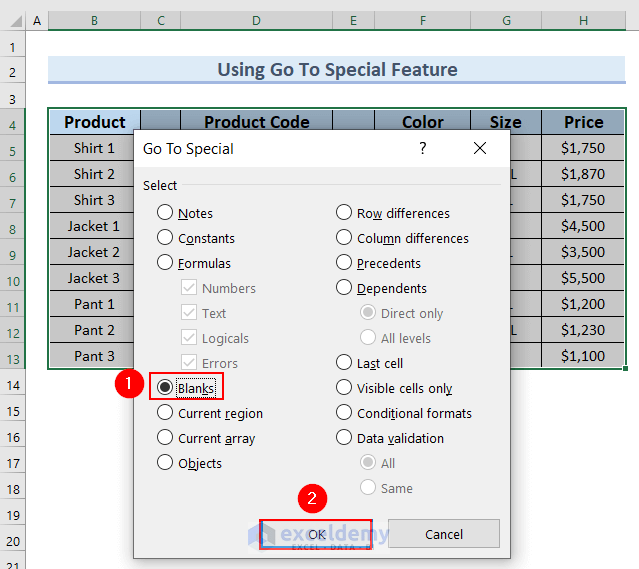
- The Go To Special dialog box will appear.
- Select the Blanks option.
- Press OK.
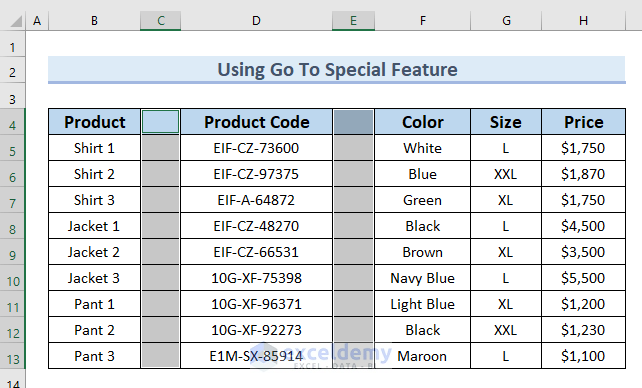
- The two unused columns will be highlighted as below.
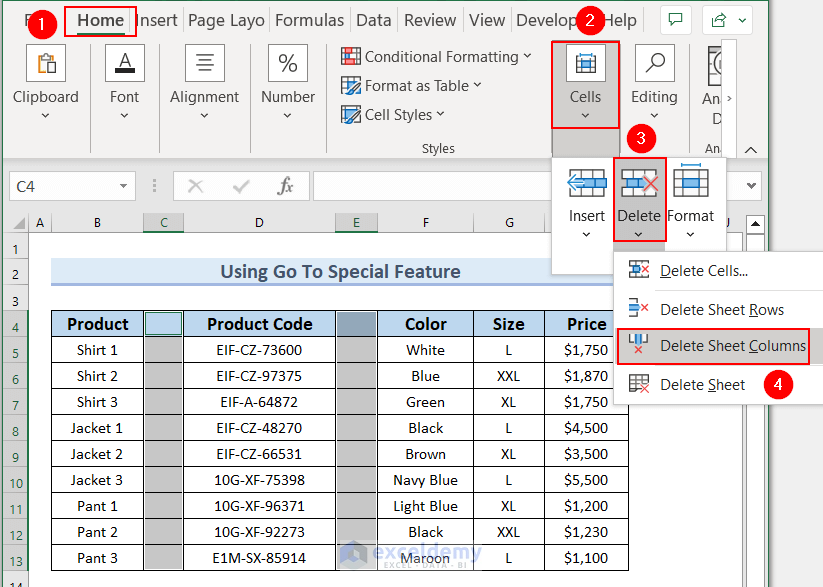
- To delete these columns, go to the Home tab.
- Click on Cells.
- Select Delete.
- Click on Delete Sheet Columns.
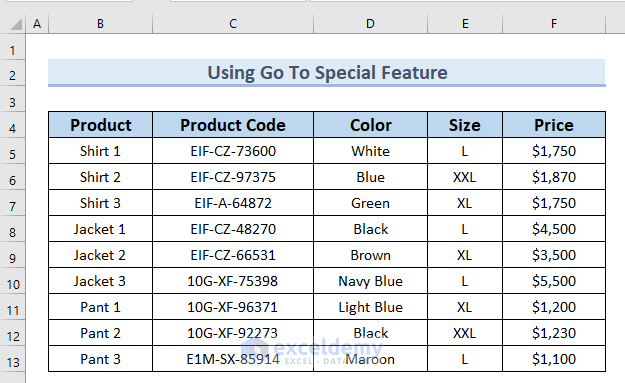
- The unused columns will be deleted, and the following table will appear.
Read More: How to Delete Every Other Column in Excel
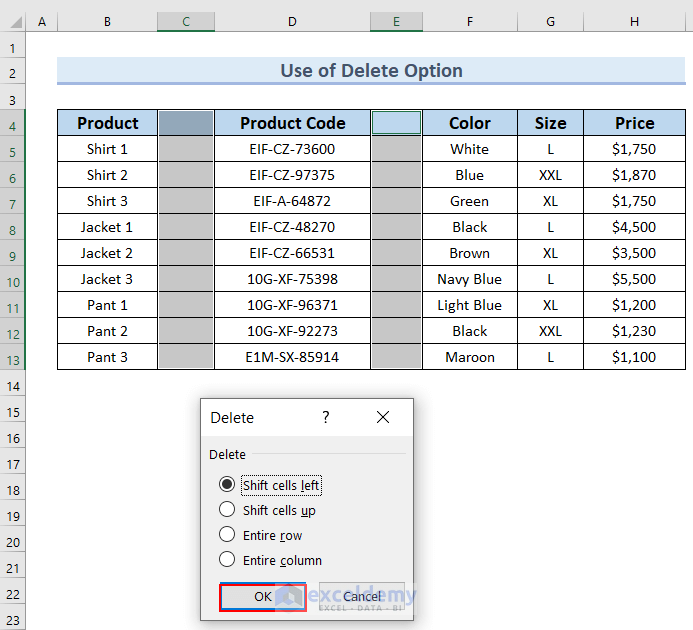
Method 2 – Use of Delete Option
Steps:
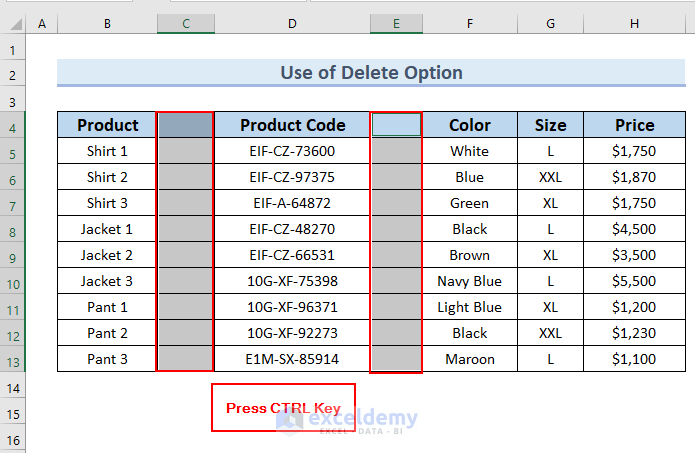
- Select the first blank column.
- Press the CTRL key.
- Select another blank column.
Note: You must press the CTRL key to select non-adjacent columns.
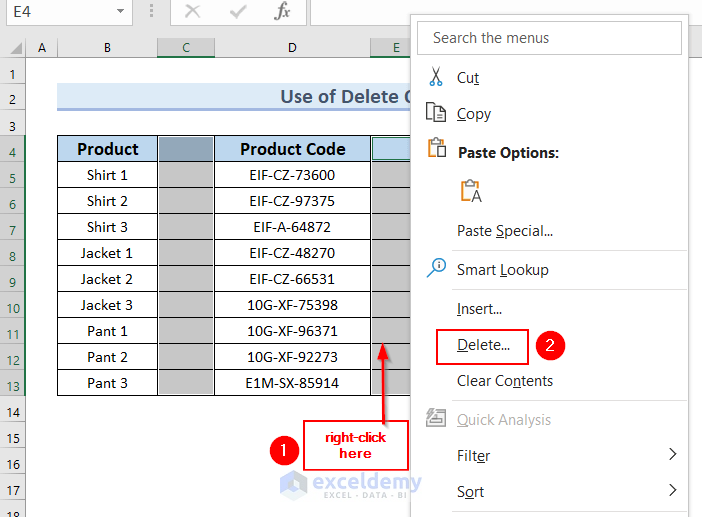
- Right-click on these selected columns.
- Select the Delete option from the Context Menu.
- The Delete dialog box will appear.
- Make sure the Shift cells left option is selected.
- Press OK.
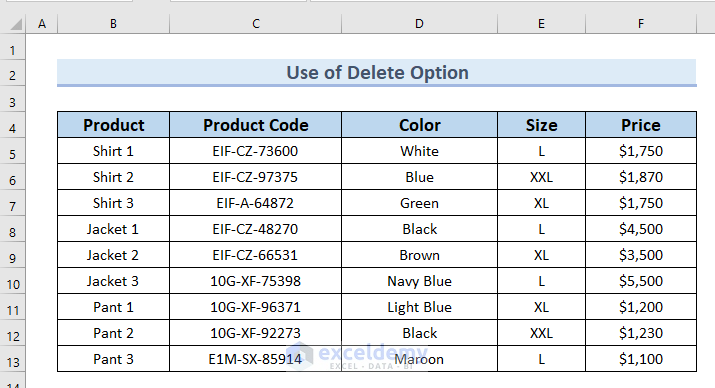
- The unused columns will be deleted.
Read More: How to Delete Infinite Columns in Excel
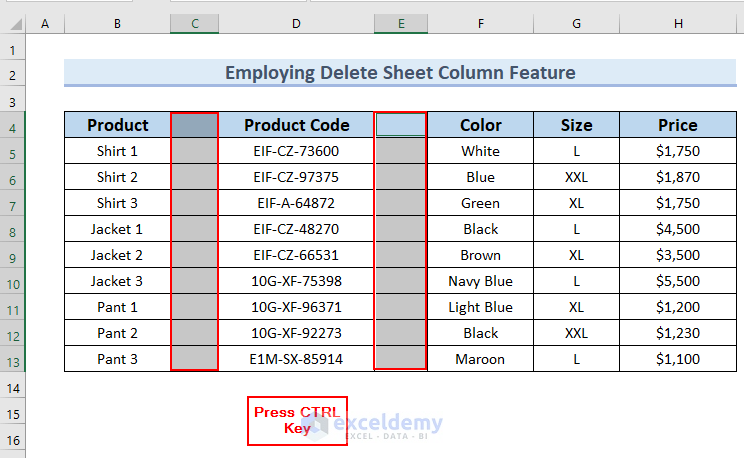
Method 3 – Employing Delete Sheet Columns Feature
Steps:
- Select the unused columns.
- Press the CTRL key.
- Select another blank column.
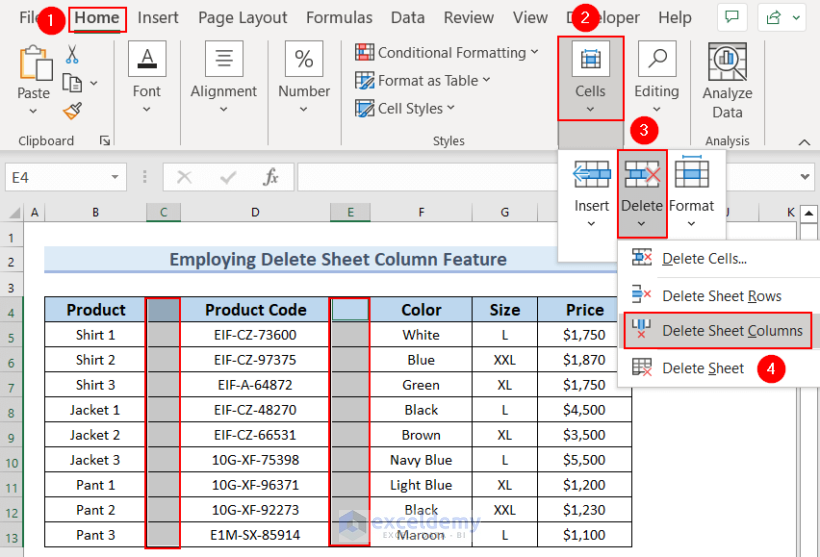
- Go to the Home tab >> Cells >> Select Delete.
- Select Delete Sheet Columns.
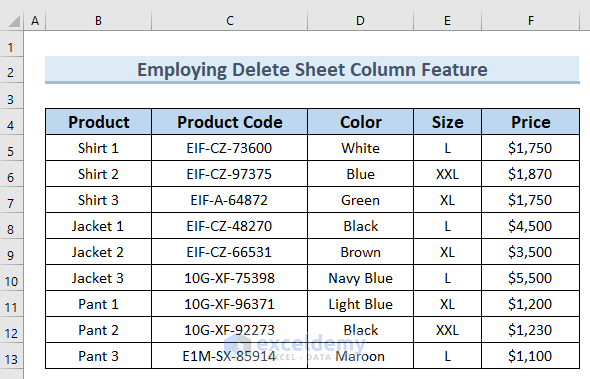
- The unused columns will be deleted as below.
Method 4 – Applying COUNTA Function
Steps:
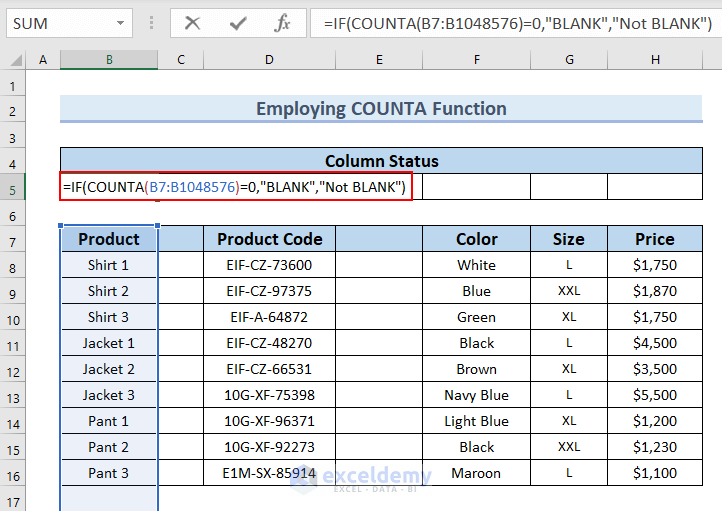
- Type the following formula in cell B5 to find out the column status.
=IF(COUNTA(B7:B1048576)=0,"BLANK", "Not BLANK")
Formula Breakdown
- COUNTA(B7:B1048576)=0 is a logical test; BLANK will return if the logical test is true otherwise it will return Not BLANK.
- B1048576 is used because Excel has 1048576 cells in a column. The COUNTA function will count the number of cells that are not empty.
- COUNTA(B7:B1048576)=0 → becomes
- Output: FALSE
- IF(COUNTA(B7:B1048576)=0,”BLANK”,”Not BLANK”) → becomes
- IF(FALSE,”BLANK”,”Not BLANK”)
- Output: Not BLANK
- Explanation: Since the logical test is true, the IF function returns Not BLANK.
- IF(FALSE,”BLANK”,”Not BLANK”)
- Press ENTER.
- The result appears in cell B5.
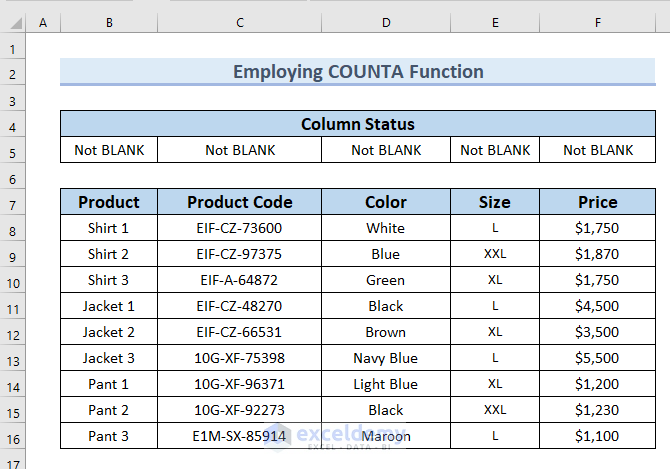
- Drag the formula toward the right with the Fill Handle tool.

- You can see the complete column status.
- Select the blank indicated columns and follow Method 3 to delete these columns.

- The unused columns will be deleted as below.
Method 5 – Using Sort Option
Steps:
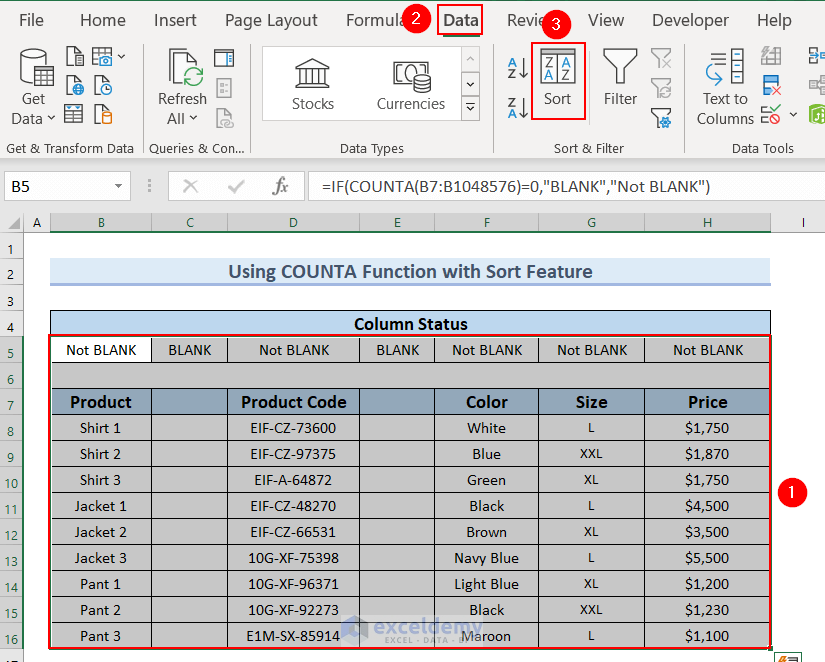
- Select the entire dataset along with the Column Status.
- Go to the Data tab.
- Select Sort.
- The Sort dialog box will appear.
- Select Options.
- Another dialog box Sort Options will appear.
- Select Sort left to right.
- Press OK.
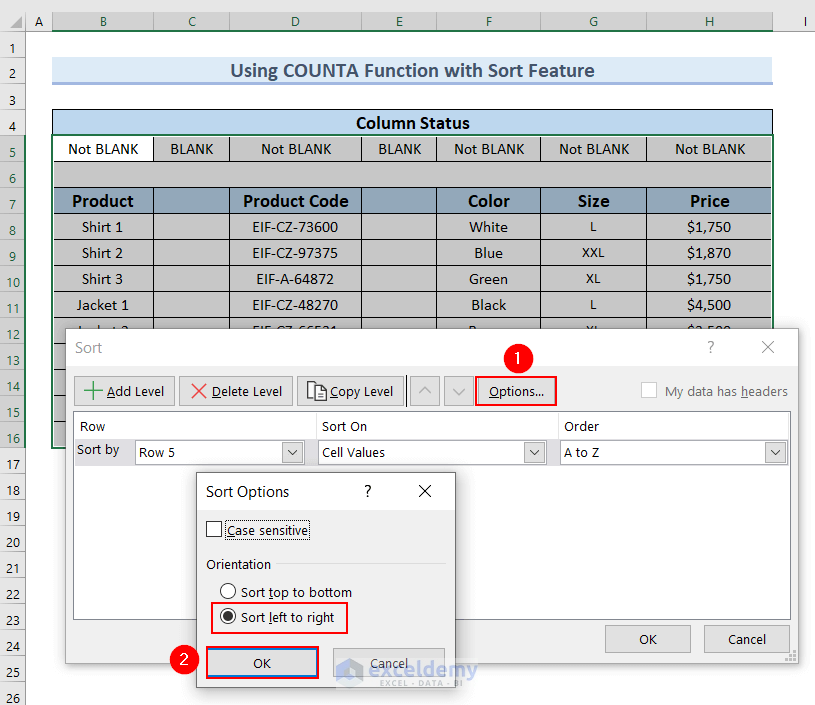
- Select Row 5 in the Sort by box.
- Select Cell Values in the Sort On box.
- In the Order box select A to Z.
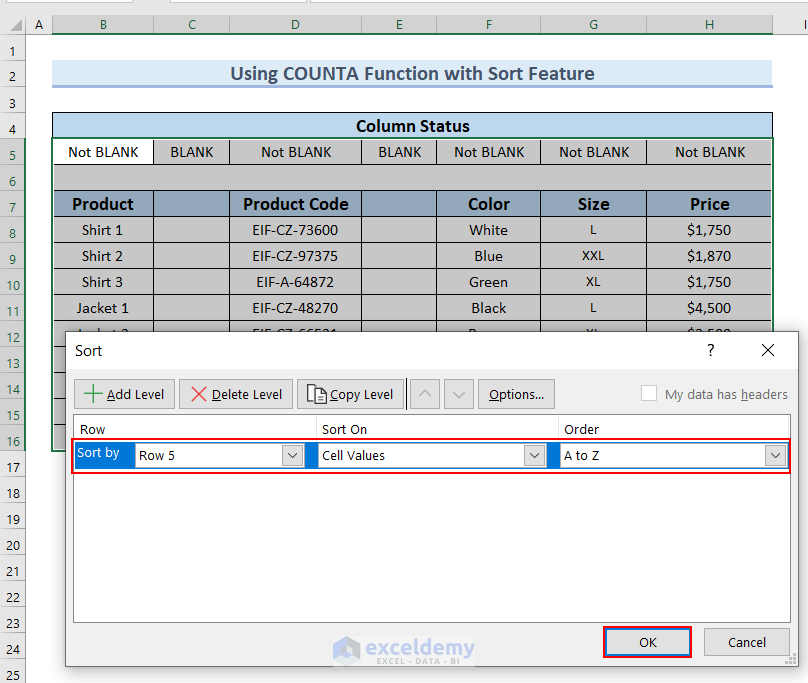
- The blank columns will be arranged together as below.
- Delete the blank columns by following Method 3.

- After deleting the blank columns the following table will appear.

Read More: [Solved!] Can’t Delete Extra Columns in Excel
Method 6 – Inserting VBA Code to Delete Unused Columns in Excel
Steps:
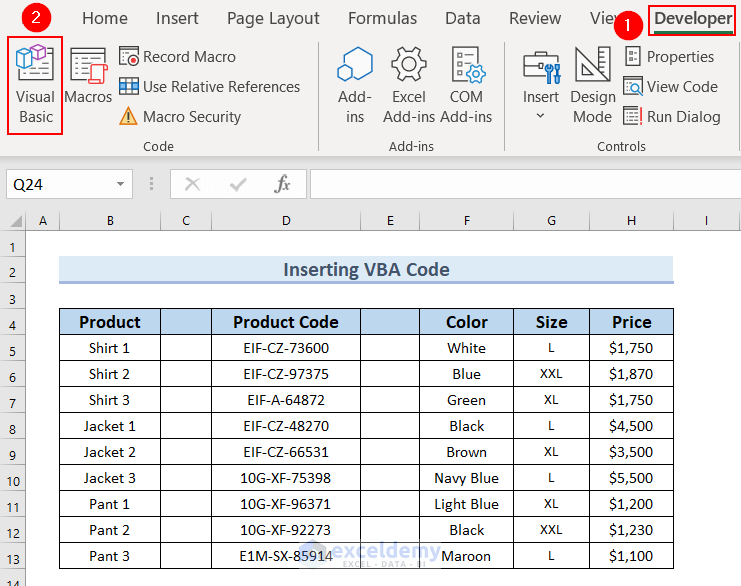
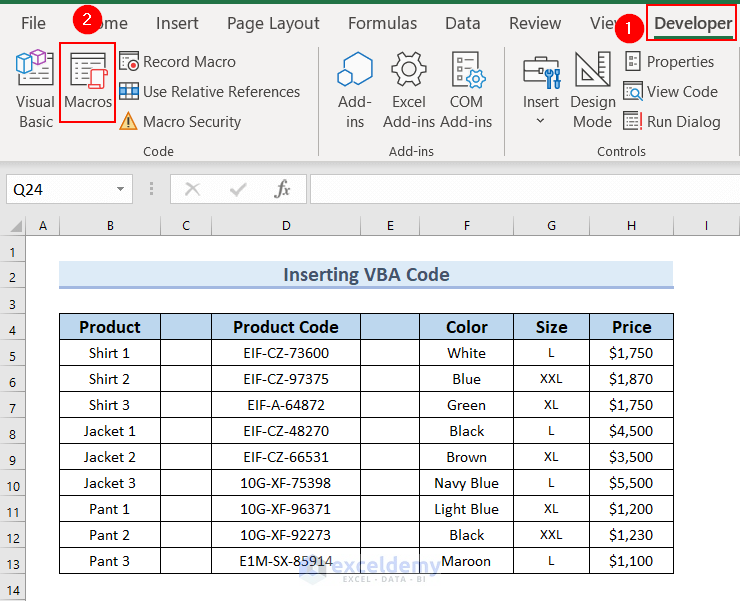
- Go to the Developer tab and select Visual Basic.
- You can also press ALT+F11 to bring up the VBA Editor window.
- The Visual Basic Editor window will appear.
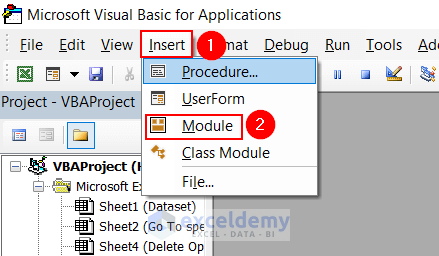
- From the Insert tab select Module.
- Enter the following code in the Module.
Sub Remove_Unused_Columns()
    Dim product_rng, whole_col As Range

 Set product_rng = Application.InputBox( _
        "Choose your range:", "Remove Unused Columns", _
        Application.Selection.Address, Type:=8)

    If Not (product_rng Is Nothing) Then
        Application.ScreenUpdating = False

        For i = product_rng.Columns.Count To 1 Step -1
            Set whole_col = product_rng.Cells(1, i).EntireColumn
            If Application.WorksheetFunction.CountA(whole_col) = 0 Then
                whole_col.Delete
           End If

        Next

    End If
End Sub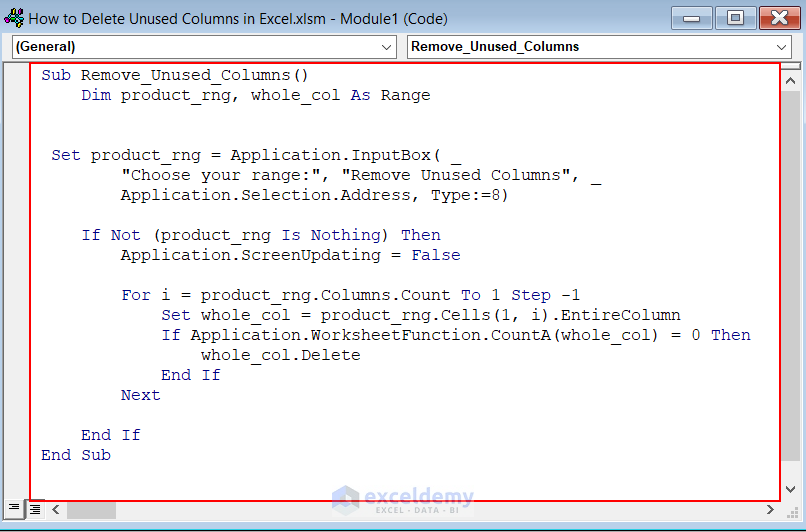
- Save the code.
- Return to the worksheet.
- To run the code we will go to the Developer tab and select Macros.
- The Macro window will appear.
- Select the Sub.
- Click on Run.

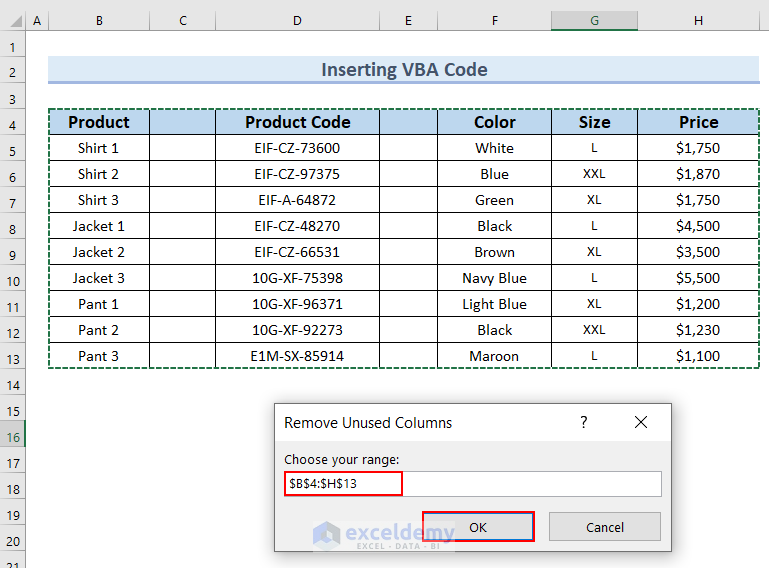
- The Remove Unused Columns input box will appear.
- Select range B4:H13.
- Press OK.
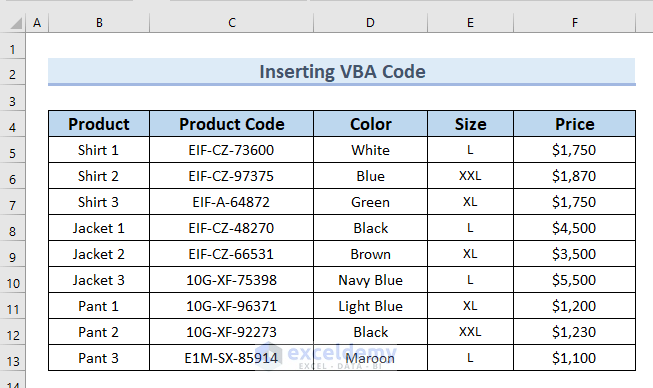
- The unused columns will be deleted.
How to Hide Unused Columns in Excel
Steps:
- Select the first blank column.
- Press the CTRL key.
- Select another blank column.

- Go to the Home tab.
- Select Cells.
- Select Format >> Hide & Unhide.
- Select Hide Columns.

- The columns will be hidden as below.
Read More: How to Delete Hidden Columns in Excel
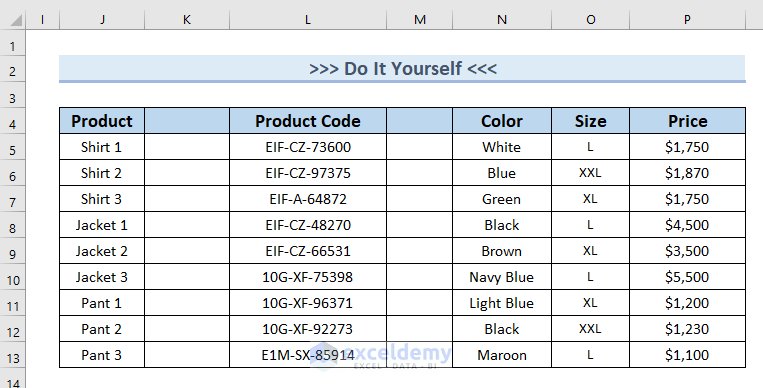
Practice Section
You can download the above Excel file and practice the explained methods.
Download Practice Workbook
Related Articles
- How to Delete Multiple Columns in Excel
- How to Delete Multiple Columns in Excel
- How to Delete Column in Excel Without Affecting Formula
- How to Delete Column in Excel Without Affecting Formula
- How to Delete Multiple Columns in Excel with Condition
- How to Delete Columns with Specific Text in Excel
<< Go Back to Delete Columns | Learn Excel
Get FREE Advanced Excel Exercises with Solutions!
