Here’s an overview of deleting columns in Excel. We’ll go through each method in more detail below.
Download the Practice Workbook
Delete Columns in Excel: 6 Different Cases with Ways
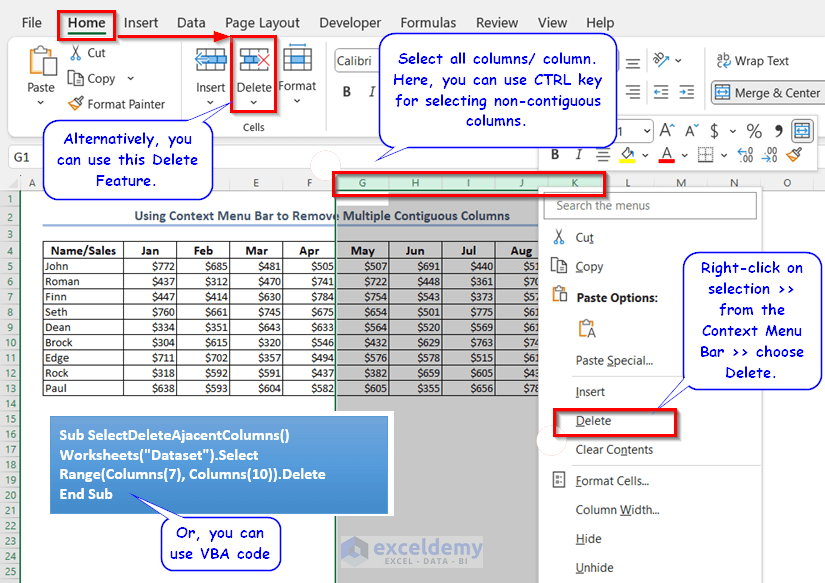
Case 1 – Use the Delete Feature to Remove Multiple Contiguous Columns
- Select the columns by holding the left click and dragging over column headers.
- Alternatively, you can select all columns by pressing the Ctrl key and selecting column headers.
- Right-click on the selection and choose Delete.
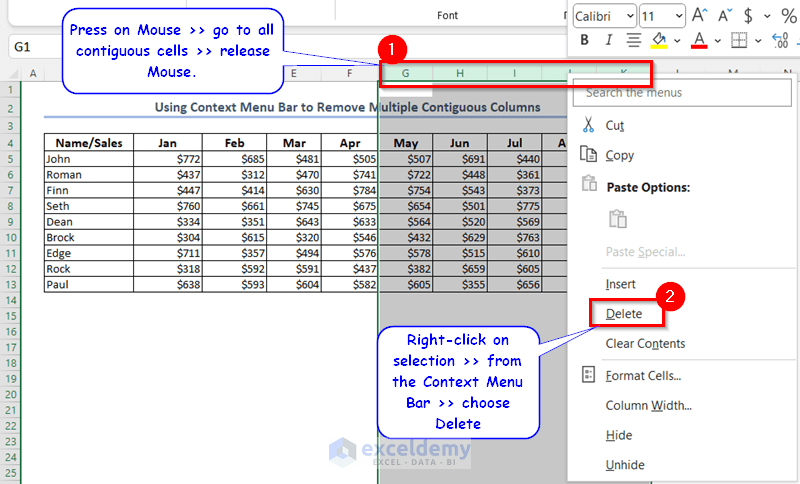
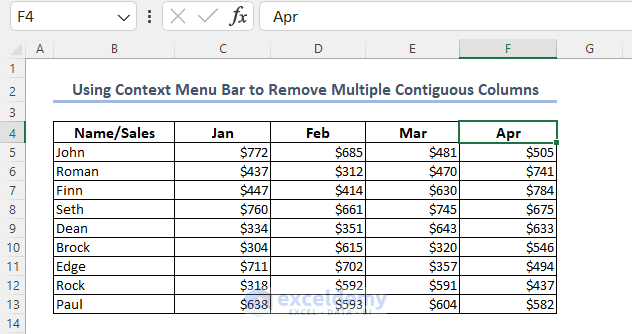
- All the selected columns are deleted.
Alternatively:
- Save your workbook with the .xlsm extension.
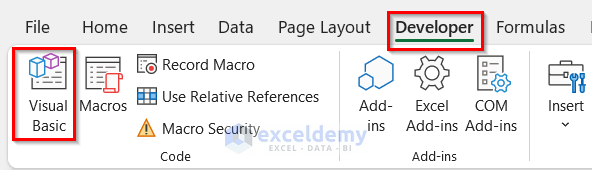
- In the Developer tab, go to Visual Basic.
- The VBA Editor will appear. From the Insert tab, select Module.
- Copy the following code in Module1.
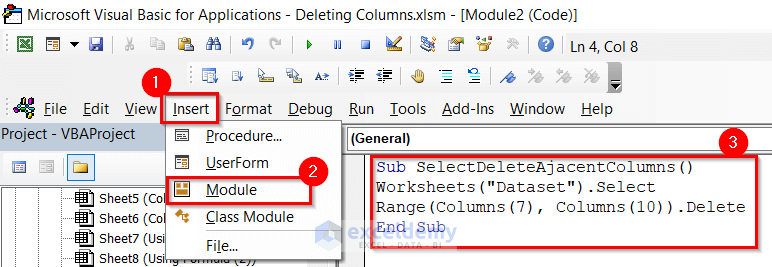
Sub SelectDeleteAjacentColumns()
Worksheets("Dataset").Select
Range(Columns(7), Columns(10)).Delete
End Sub- In the Range property, you have to set the column range. Put the first and last columns as arguments of the Range that you want to delete.
Case 2 – Deleting Columns in Excel That Go on Forever
We have some unwanted values in a single row across many columns (from the E column to the rest of the columns).
- Select the E4 cell (the first cell with a value that you want to delete).
- Press Ctrl + Shift + Right Arrow to select all cells to the right.
- From the Home tab, under the Cells group, select Delete and choose Delete Sheet Columns.
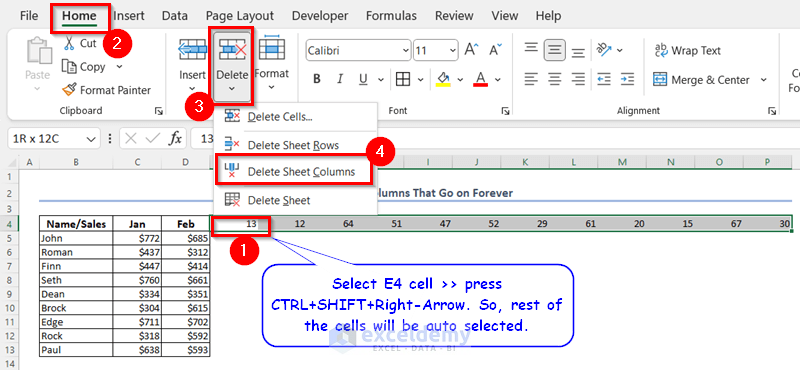
- We removed all the columns.

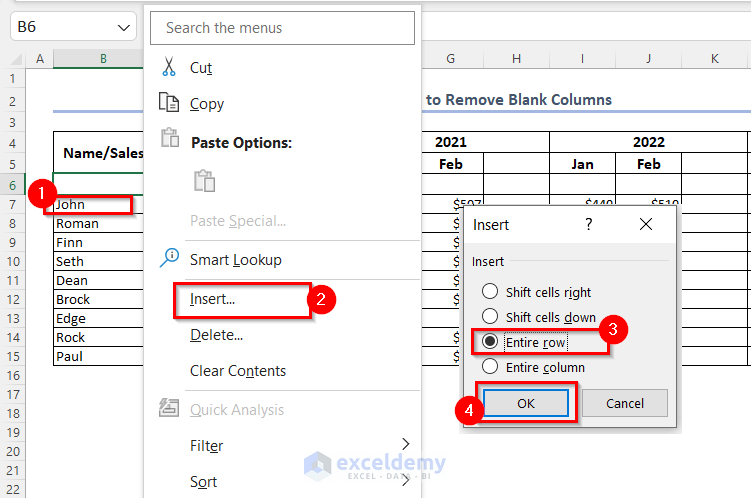
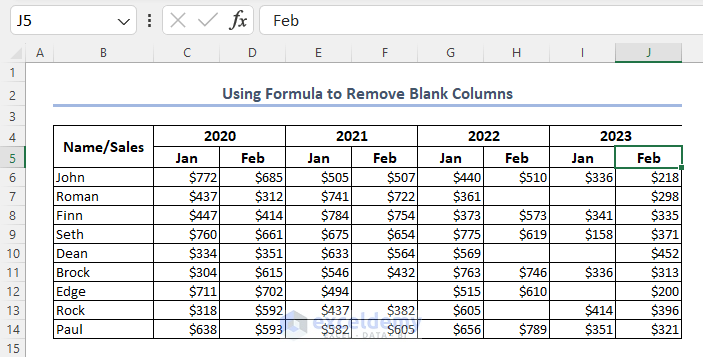
Case 3 – Using Formula to Remove Blank Columns
- Select the cell above which you want to insert the row, right-click, and select Insert.
- From the Insert dialog box, select Entire row and press OK.
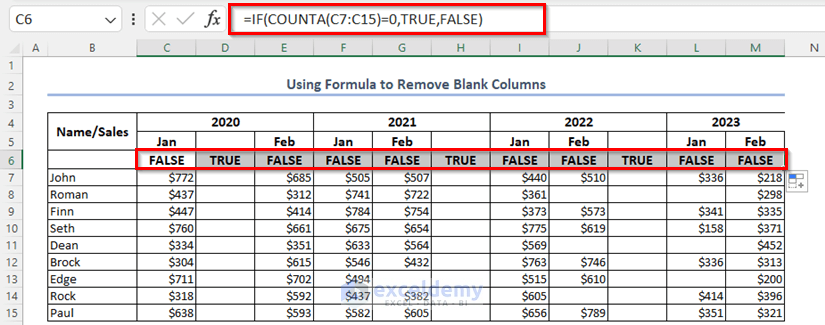
- In the C6 cell, enter the following formula:
=IF(COUNTA(C7:C15)=0,TRUE,FALSE)In this formula, the COUNTA function will count the cells which are not empty. So, the logic in the IF function will be whether all the cells contain a value or not.
- Use the Fill Handle icon row-wise to copy the formula for the rest of the cells in the row.
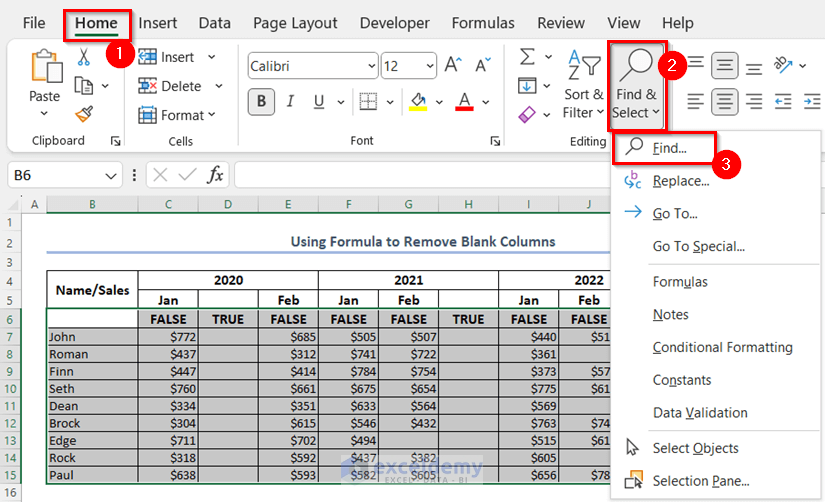
- From the Home tab, go to the Editing group, then to Find & Select and choose Find.
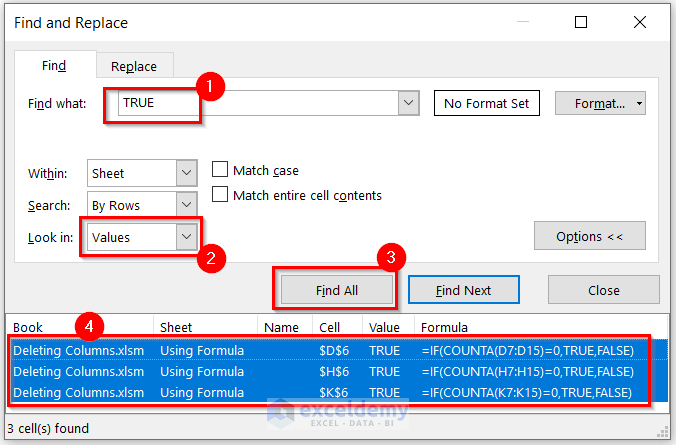
- You will get the Find and Replace dialog box. Write TRUE in the Find what box.
- Choose Values in the Look in box.
- Select Find All.
- You will get a list of all the cells having TRUE below.
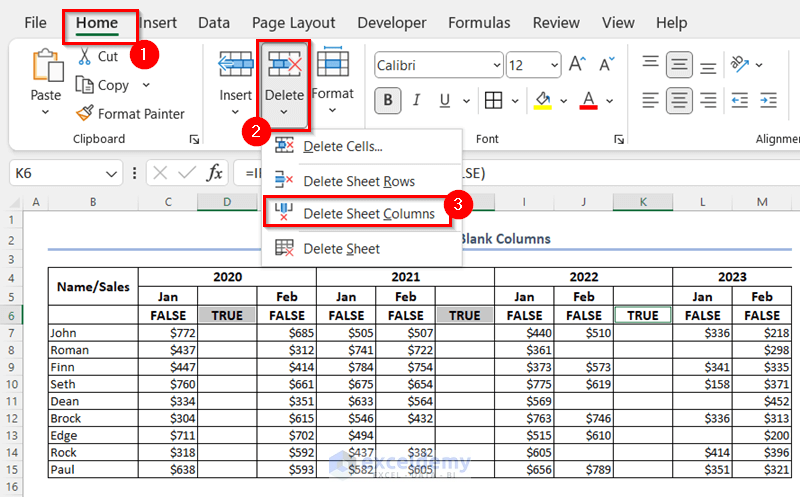
- Click on a result from the list, then press Ctrl + A to select them all.
- From the Home tab, go to the Cells group, select the Delete section, and choose Delete Sheet Columns.
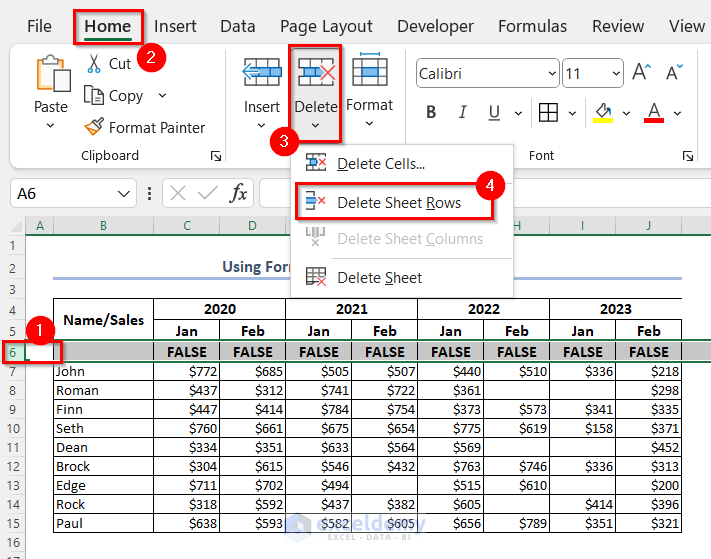
- Delete the row added for the check in a similar way.
- You will get the dataset without empty columns.
Case 4 – Using VBA to Delete Columns with a Certain Text
- Check out the following article if you don’t have the tab on your ribbon: How to Display Developer Tab on the Ribbon in Excel.
- From the Developer tab, click on Visual Basic, and the VBA Editor will be opened.
- From the Insert tab, click on Module.
- Insert the following code in the module.
Sub Delete_Columns_having_Specific_text()
Dim my_cell As Range
For Each my_cell In Range("C5:N5")
If my_cell.Value = "Mar" Then
my_cell.EntireColumn.Delete
End If
Next my_cell
End Sub
Here, this code will remove all the columns (from the C column to the N column) if the cell value is “Mar”.
- Save the code and go back to the worksheet.
- From the Developer tab, select Macros.
- In the Macro dialog box, select the name of the macro Delete_Columns_having_Specific_text and press Run.

The code checks for the value “Mar” but you can change that to a string or value you need to remove.
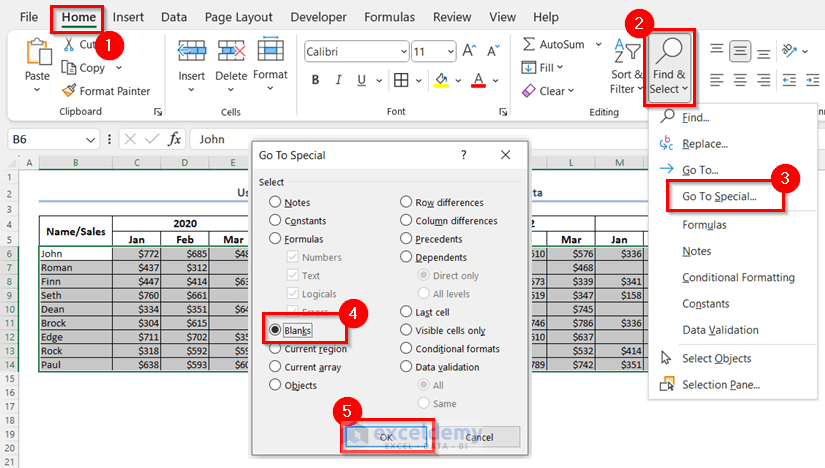
Case 5 – Use Go To Special to Delete the Columns without Data
- From the Home tab, go to the Editing group, click on Find & Select, and choose Go To Special.
- Select Blanks in the Go To Special dialog box and press OK.
- You will get all the blank cells selected.
- From the Home tab, go to the Cells group, select the Delete segment and choose Delete Sheet Columns.
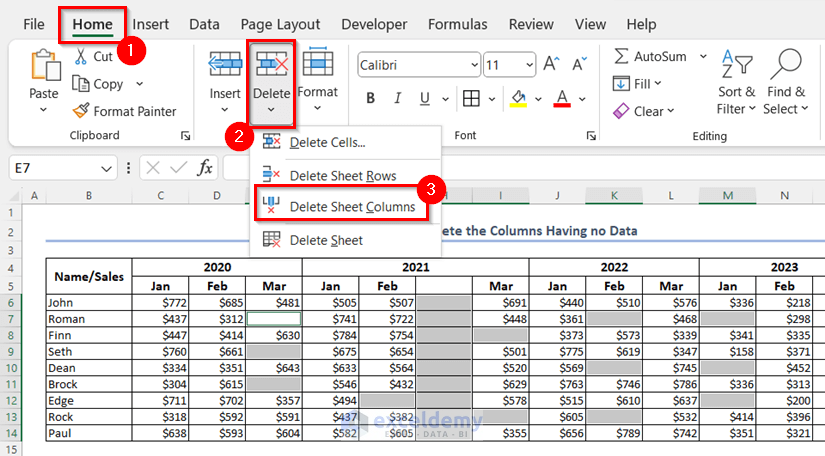
Note: If a column has at least one blank value, it will be deleted regardless of how many non-blanks it has, so proceed with caution.
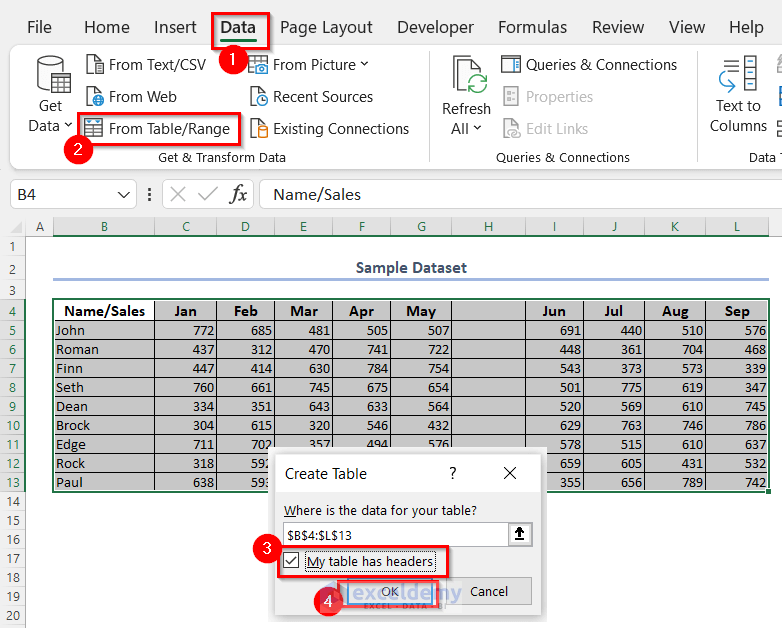
Case 6 – Reducing Columns from Power Query
- Select the entire dataset.
- In the Data tab, go to the Get & Transform Data group and select From Table/Range.
- You will get the Create Table dialog box. Check My table has headers (if your dataset contains the headers) and press OK.
Note: As there is a blank column in the dataset, Excel can’t define the headers.
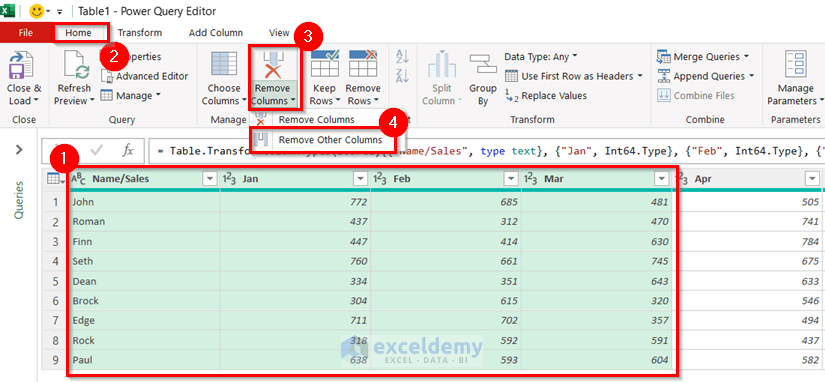
- In the Power Query Editor, go to the Home tab.
- From the Manage Columns group, click on Remove Columns.
- Select the columns you want to keep.
- Press Remove Other Columns.
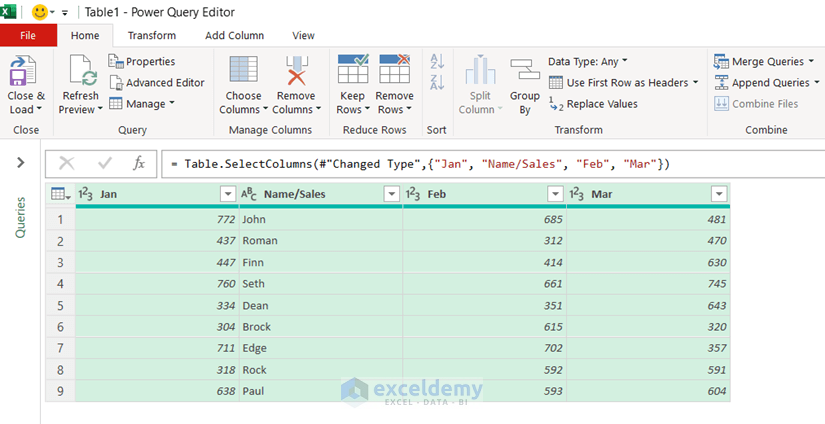
- From the File tab, choose Close & Load.
- You will get your updated data in the worksheet.
- If you have a created Power Query, click on any cell of the table.
- From the Query tab, press Edit and you’ll get the Power Query Editor.
- Use the Manage Columns group for deleting columns. In Power Query, there is a section named APPLIED STEPS, which can be used to revert various functions.

Read More:
How to Delete Rows in Excel
- Select all the rows by clicking and dragging through their index numbers. Use Ctrl + click for non-contiguous selection.
- From the Home tab, go to the Cells group.
- In the Delete section, select Delete Sheet Rows.

Read More:
How to Delete Cells in Excel
- Select a cell or a group of cells.
- Go to Cells, then Delete, and select Delete Cells.
- You will get a dialog box of Delete.
- Choose the option you want to apply from the list (shifting the cells in the row or column, or deleting the entire row or column).
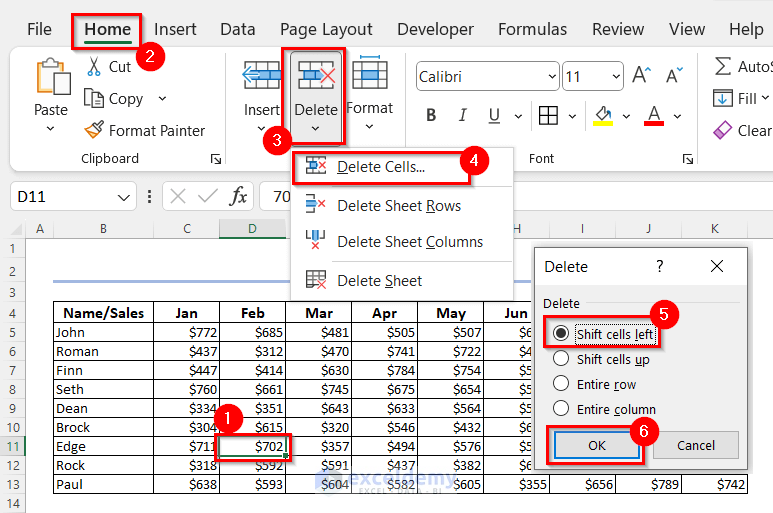
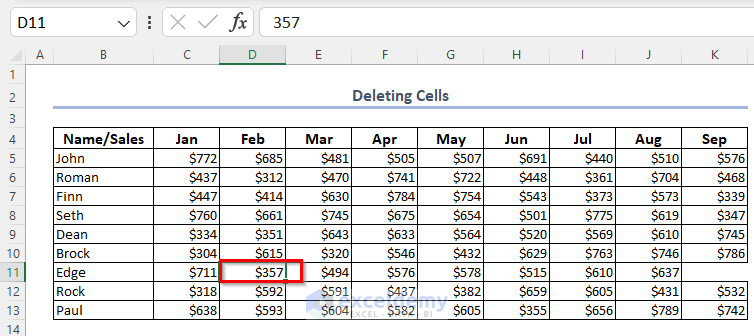
- We have chosen Shift cells left, so the selected cell is removed, and all the other cells of the right-hand side shift towards the left, so the last column in the row doesn’t have a value any more.
Read More:
Frequently Asked Questions
What is the Shortcut for deleting columns?
Press Ctrl + Minus(–) keys together to delete the selected column(s).
How do I remove columns from all sheets in Excel?
Press Ctrl + A, then go to Delete and select Delete all columns.
How do I delete 1000 columns in Excel?
Select the first column you want to delete, hold down the Shift key, and press the right arrow key (→) 999 times. This will select a range of 1000 columns. Press Ctrl + minus (-) to delete them, then confirm your choice.
Delete Columns in Excel: Knowledge Hub
- Delete Infinite Columns
- Delete Column Without Affecting Formula
- [Solved!] Can’t Delete Extra Columns
<< Go Back to Learn Excel
Get FREE Advanced Excel Exercises with Solutions!
