When we have a large amount of data with lots of unnecessary rows in our Excel worksheet, it is hard to understand sometimes. If we remove the rows that we don’t need, then it becomes quite easier to understand the sheet later. Implementing VBA is the most effective, quickest, and safest method to run any operation in Excel. In this article, we will show you how to delete every other row in Excel with the VBA macro.
VBA to Delete Every Other Row in Excel: 6 Criteria
In the following section, you will learn how to delete every other second row and third row, every other odd and even row, every other row when the row count starts from the first row and when the count starts after the first row of the dataset with VBA macro in Excel.
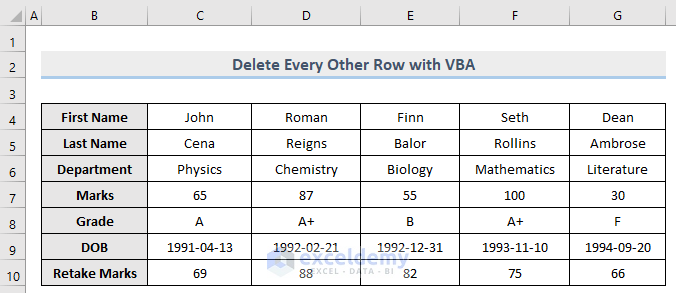
We will use the above dataset as an example.
1. Embed VBA to Delete Every Second Row in Excel
This section will let you know how to delete every second row of a range in the Excel dataset.
Steps:
- In the beginning, press Alt + F11 on your keyboard or go to the tab Developer -> Visual Basic to open Visual Basic Editor.

- Next, in the pop-up code window, from the menu bar, click Insert -> Module.

- Then, copy the following code and paste it into the code window.
Sub DeleteEverySecondRow()
Dim iRange As Range
Set iRange = Application.InputBox("Select Range to Delete Rows", "Range", Type:=8)
    For i = iRange.Rows.Count To 1 Step -1
        If i Mod 2 = 0 Then
            iRange.Rows(i).Delete
        End If
    Next i
End Sub
Your code is now ready to run.

- Now, press F5 on your keyboard, or from the menu bar select Run -> Run Sub/UserForm. You can also just click on the small Run icon in the sub-menu bar to run the macro.

After the successful code execution, look at the image below to see the result.

As we can see in the above image, rows that were previously known as the second rows of our dataset (shown in the introductory section) are deleted now.
Read More: How to Use Macro to Delete Rows Based on Criteria in Excel
2. Apply VBA Macro to Delete Every Third Row
In this section, you will learn how to delete every third row of a range in an Excel worksheet.
Steps:
- Same way as before, open Visual Basic Editor from the Developer tab and Insert a Module in the code window.
- Then, in the code window, copy the following code and paste it.
Sub DeleteEveryThirdRow()
Dim iRange As Range
Set iRange = Application.InputBox("Select Range to Delete Rows", "Range", Type:=8)
    For i = iRange.Rows.Count To 1 Step -1
        If i Mod 3 = 0 Then
            iRange.Rows(i).Delete
        End If
    Next i
End Sub
Your code is now ready to run.

- Later, Run the macro. The result is shown in the image below.

Finally, we can see that rows that were previously known as the third rows of our dataset are deleted now.
3. Implement Macro to Remove Odd Rows in Excel
This section will let you know how to remove every odd row in a range of Excel datasets.
Steps:
- As shown before, open Visual Basic Editor from the Developer tab and Insert a Module in the code window.
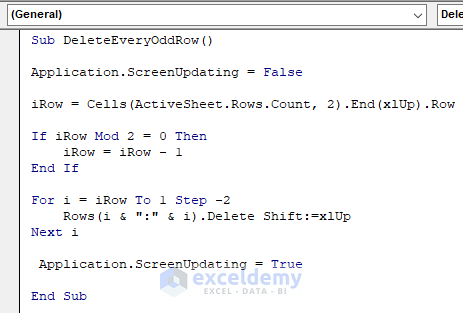
- Then, in the code window, copy the following code and paste it.
Sub DeleteEveryOddRow()
Application.ScreenUpdating = False
iRow = Cells(ActiveSheet.Rows.Count, 2).End(xlUp).Row
If iRow Mod 2 = 0 Then
    iRow = iRow - 1
End If
For i = iRow To 1 Step -2
    Rows(i & ":" & i).Delete Shift:=xlUp
Next i
 Application.ScreenUpdating = True
End Sub
Your code is now ready to run.
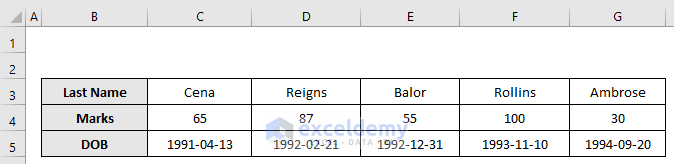
- Now, Run the macro and look at the following image to see the output.

Lastly, you can see that rows that were previously known as the odd rows of our dataset are now deleted.
4. Embed VBA to Erase Even Rows in Excel
In the above section, you have learned how to remove every odd row in a range of Excel datasets. In this section, you will learn how to erase even rows in a range of the dataset.
Steps:
- First, open Visual Basic Editor from the Developer tab and Insert a Module in the code window.
- Second, in the code window, copy the following code and paste it.
Sub DeleteEveryEvenRow()
Application.ScreenUpdating = False
iRow = Cells(ActiveSheet.Rows.Count, 2).End(xlUp).Row
If iRow Mod 2 = 0 Then
    Else
    iRow = iRow - 1
End If
For i = iRow To 1 Step -2
    Rows(i & ":" & i).Delete Shift:=xlUp
Next i
 Application.ScreenUpdating = True
End Sub
Your code is now ready to run.

- Third, Run the macro. Look at the image below to see the result.
Finally, we can see that rows that were previously known as the even rows of our dataset are deleted now.
5. Macro to Remove Every Other Row Starting From the First Row
If you want to remove every other row of a dataset in a way that will take the first row under consideration and start removing rows from the very first row of the selected range, then follow the steps shown in this section.
Steps:
- First, open Visual Basic Editor from the Developer tab and Insert a Module in the code window.
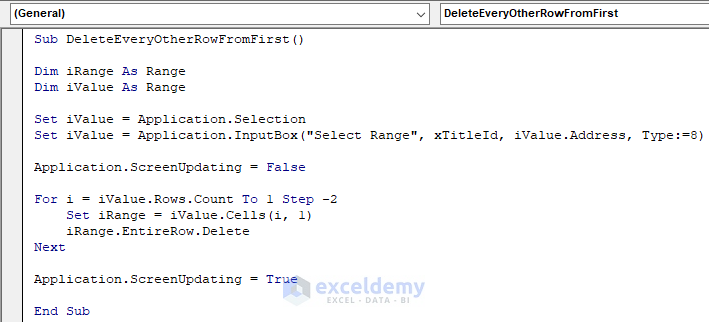
- Then, in the code window, copy the following code and paste it.
Sub DeleteEveryOtherRowFromFirst()
Dim iRange As Range
Dim iValue As Range
Set iValue = Application.Selection
Set iValue = Application.InputBox("Select Range", xTitleId, iValue.Address, Type:=8)
Application.ScreenUpdating = False
For i = iValue.Rows.Count To 1 Step -2
    Set iRange = iValue.Cells(i, 1)
    iRange.EntireRow.Delete
Next
Application.ScreenUpdating = True
End Sub
Your code is now ready to run.
- Now, Run the macro code.
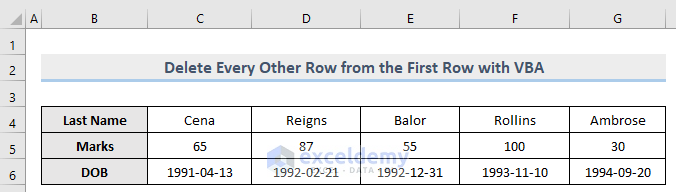
Look at the above image. After executing the macro code, it starts scanning and deleting from the very first row of the selected range and keeps deleting every other row from there.
Read More: Excel VBA to Delete Row If Cell Contains Partial Text
6. VBA Macro to Delete Every Other Row Starting After the First Row
Suppose, you want to remove every other row in a way that it will start removing rows after the very first row of the selected range. The steps to do that are given below.
Steps:
- Firstly, open Visual Basic Editor from the Developer tab and Insert a Module in the code window.
- Then, copy the following code and paste it into the code window.
Sub DeleteEveryOtherRow()
Dim iRange As Range
Set iRange = Application.Selection
Set iRange = Application.InputBox("Select Range", "Range", iRange.Address, Type:=8)
    If iRange.Rows.Count >= 2 Then
        Dim iCell As Range
        Dim iRow As Integer
        Application.ScreenUpdating = False
        For iRow = iRange.Rows.Count - (iRange.Rows.Count Mod 2) To 1 Step -2
            Set iCell = iRange.Cells(iRow, 1)
            iCell.EntireRow.Delete
    Next
    Application.ScreenUpdating = True
    End If
End Sub
Your code is now ready to run.

- Later, Run the macro.
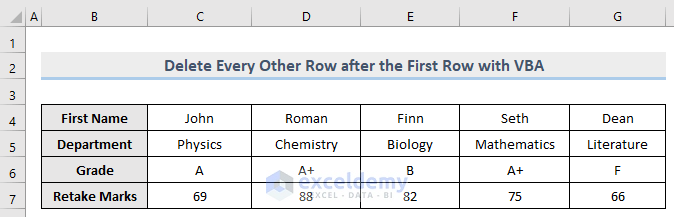
As we can see in the above image, after executing the macro code, it starts scanning and deleting after the very first row of the selected range and keeps deleting every other row from there.
Download Workbook
You can download the free practice Excel workbook from here.
Conclusion
To conclude, this article showed you 6 different criteria on how to delete every other row in Excel with the VBA macro. I hope this article has been very beneficial to you. Feel free to ask any questions regarding the topic.
Related Articles
- How to Filter and Delete Rows with VBA in Excel
- How to Delete Hidden Rows in Excel VBA
- How to Apply VBA Code to Delete Rows Based on Multiple Cell Value
- How to Apply VBA to Delete Rows with Specific Data in Excel
- Excel VBA: Delete Row If Cell Is Blank
- How to Use VBA to Delete Empty Rows in Excel
- How to Delete Row Using Macro If Cell Contains 0 in Excel

