Floating table is a useful tool in Excel worksheets. For data analysis and other practical purposes, we may need to insert this table. In this article, we will show you how you can insert floating tables using built-in Excel features.
Insert Floating Table in Excel: 2 Ways
We are going to create floating windows using simple Excel features. First, we will use the Watch Window feature, and then we will Insert a movable table. So, let’s start these procedures.
1. Use of Watch Window Feature
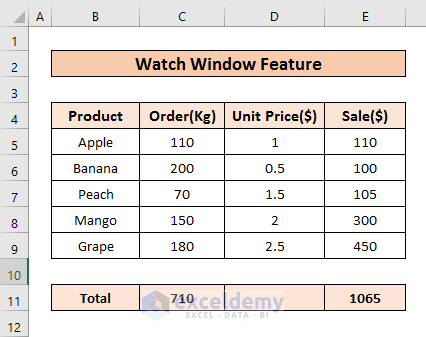
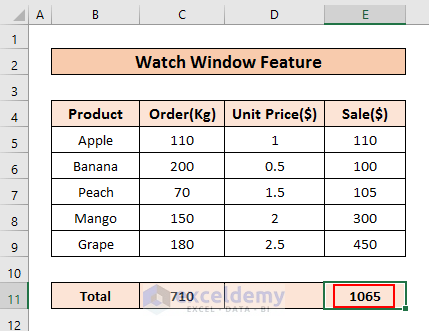
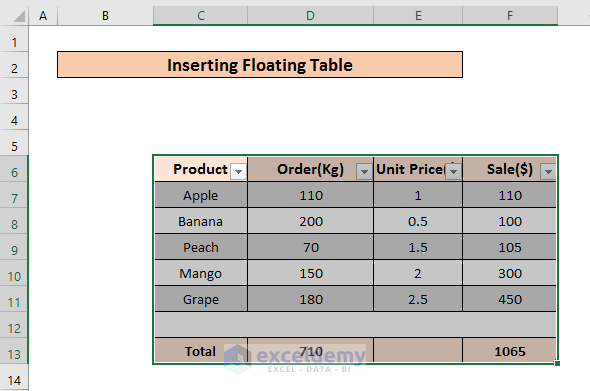
We have taken a dataset of different fruits and their respective selling information.
At the bottom, there are two cells that give the total amount of Order and Sale.
We will add these two cells to the Watch Window box.
Steps:
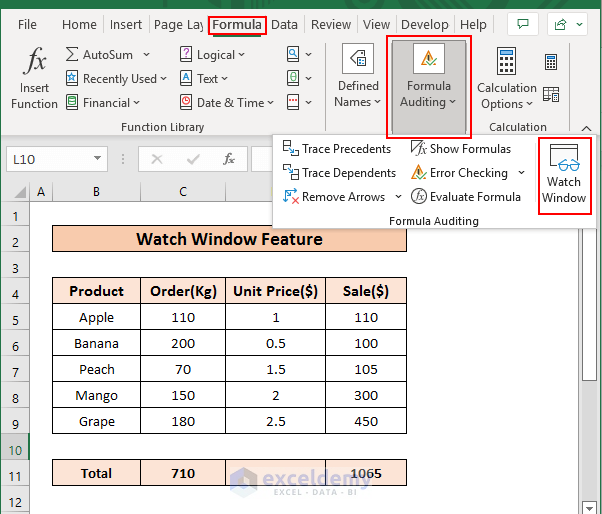
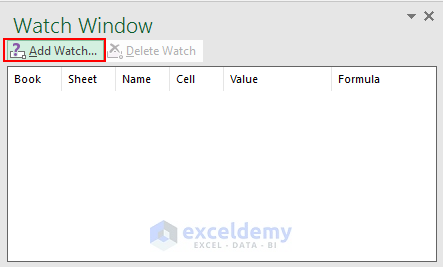
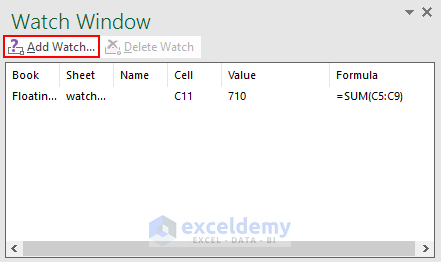
➤ Go to Formula > Formula Auditing and click on Watch Window.
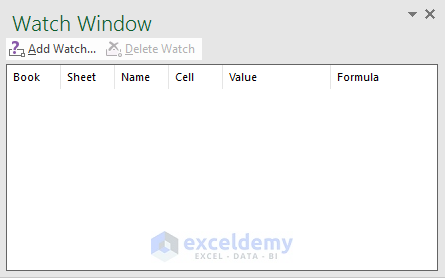
A Watch Window will open.
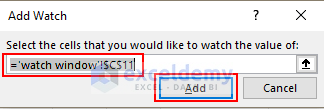
➤ Now, select the cell you want to see in the Watch Window. We selected C11.
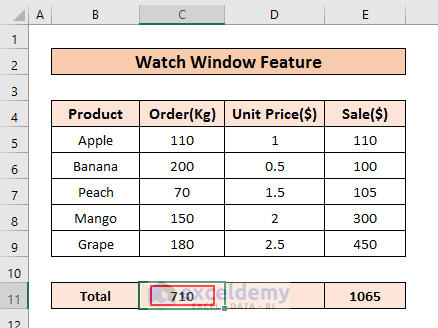
➤ Then, click on Add Watch.
➤ In this new window, click on Add.
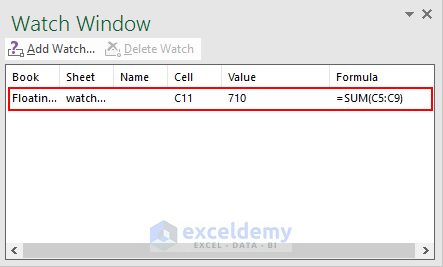
Thus, all the information about C11, including value, formula, etc., will be shown in the first row.
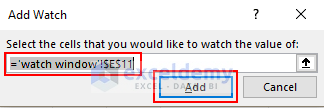
Let’s select another cell. We want to know the total amount of Sales.
➤ So select E11.
➤ Then, click on Add Watch.
➤ And finally, click on Add in the new window.
Thereby, we get these two cells’ information in the floating table.
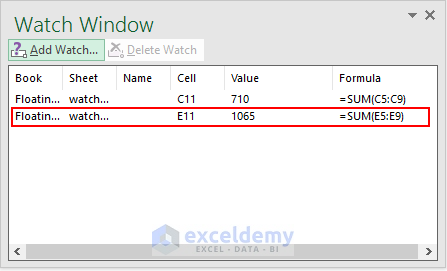
This window floats when you scroll in the Excel workbook.
And this window shows up on every sheet of a workbook.
Read More: Types of Tables in Excel: A Complete Overview
2. Floating Table from Insert Option
We can insert data tables in Excel. And this table is movable. Let’s see the procedure.
Steps:
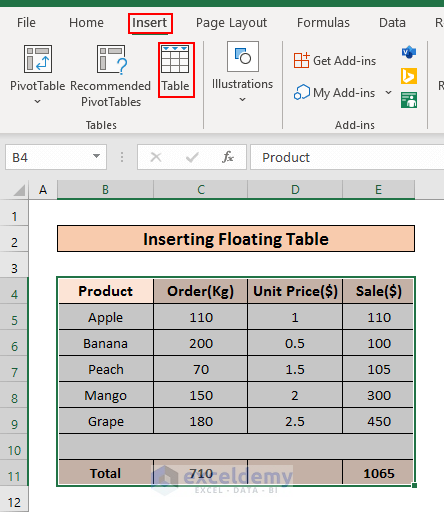
➤ First, select the data table (B4:E11).
➤ Then select the Table option from the Insert ribbon.
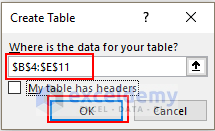
So, the Create Table window will open. You can see the data range in the box.
➤ Now, press OK.
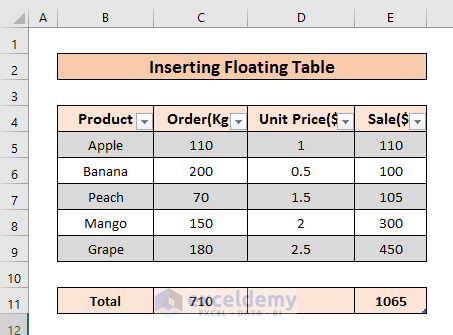
So, the dataset has been set in a table. You can change the color and format as you want.
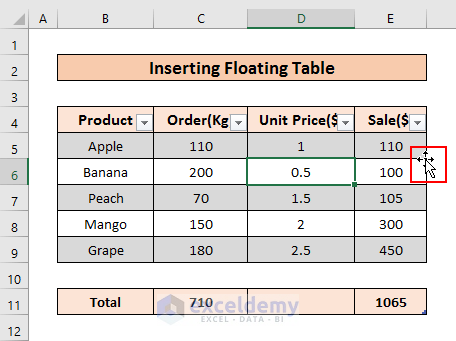
Now we will move this table.
➤ Select any cell within the table and move the mouse cursor at any edge of the table. The cursor will indicate the direction to all four sides.
➤ Now, press the right button of the mouse and drag the cursor to your desired location.
➤ And select Move Here.
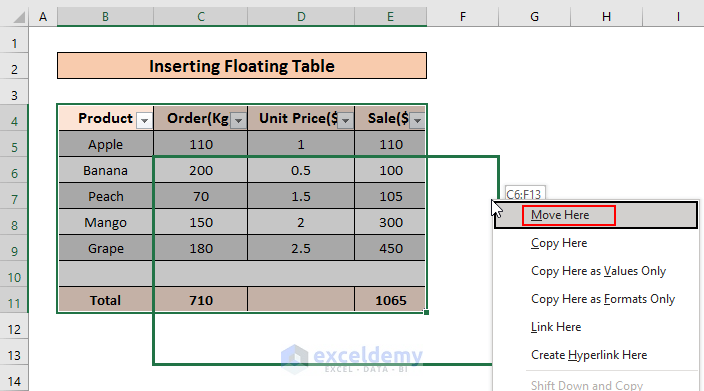
Therefore, the table will move to a new position.
Read More: Does TABLE Function Exist in Excel?
Download Practice Workbook
You can download and practice this workbook.
Conclusion
Thank you for making it this far. We hope that now you can easily insert floating table in Excel. If there are any queries or suggestions regarding any of these procedures, feel free to leave them in the comment section.
Related Articles
- Excel Table vs. Range: What Is the Difference?
- How to Convert Range to Table in Excel
- Navigating Excel Table
- How to Make Excel Tables Look Good
- How to Convert Table to List in Excel
- Table Name in Excel: All You Need to Know
- How to Make a Comparison Table in Excel
- How to Create a Table Array in Excel
- How to Provide Table Reference in Another Sheet in Excel
<< Go Back to Excel Table | Learn Excel
Get FREE Advanced Excel Exercises with Solutions!
