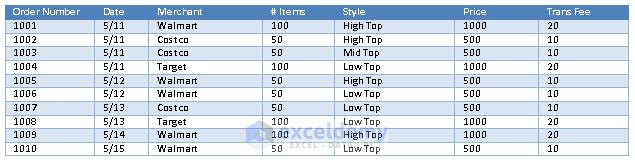
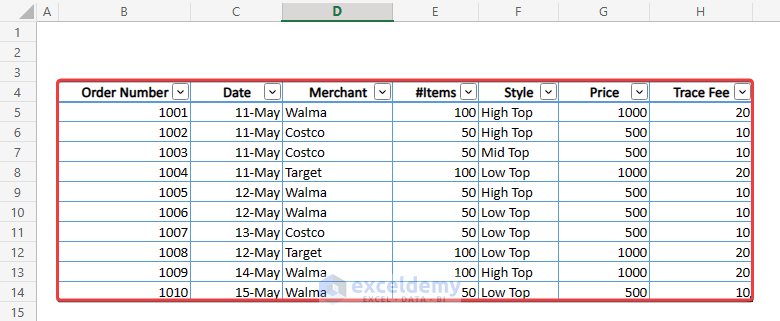
We will add a table from the below image for the methods below.
Method 1 – Using an Image Saved in File Explorer
Steps:
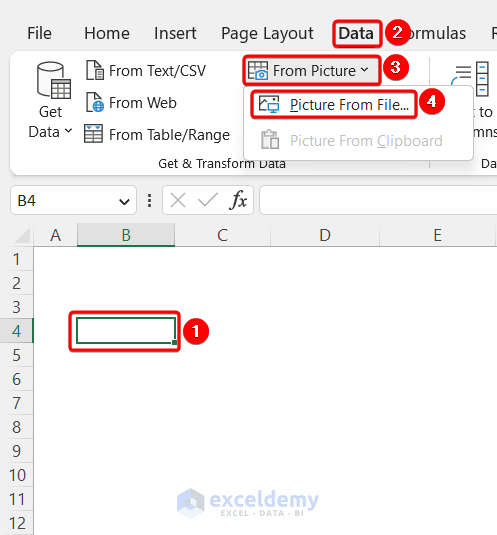
- Select a cell of the worksheet. Here, we selected cell B4.
- Go to the Data tab.
- Expand the From Picture option and choose Picture from File.
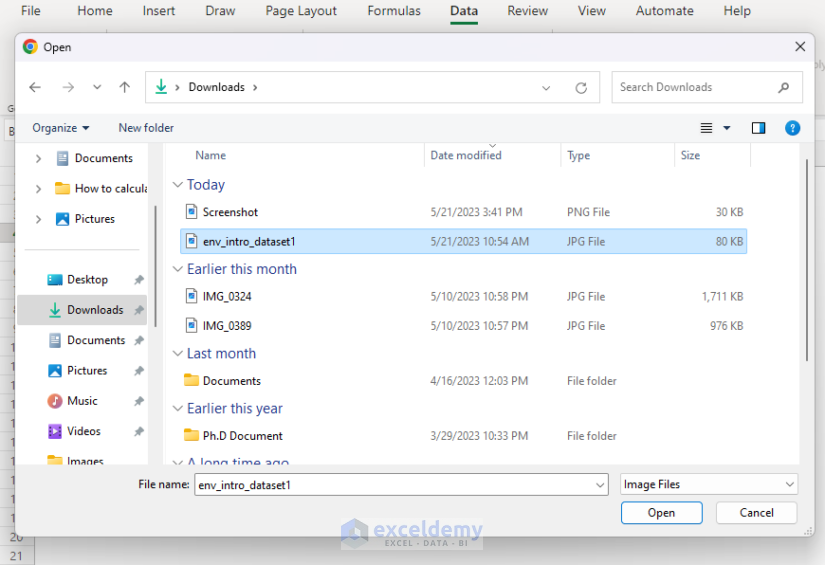
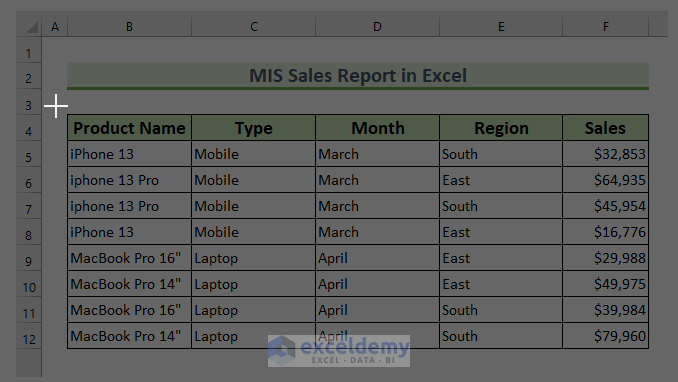
- Select the desired image from File Explorer and click OK.
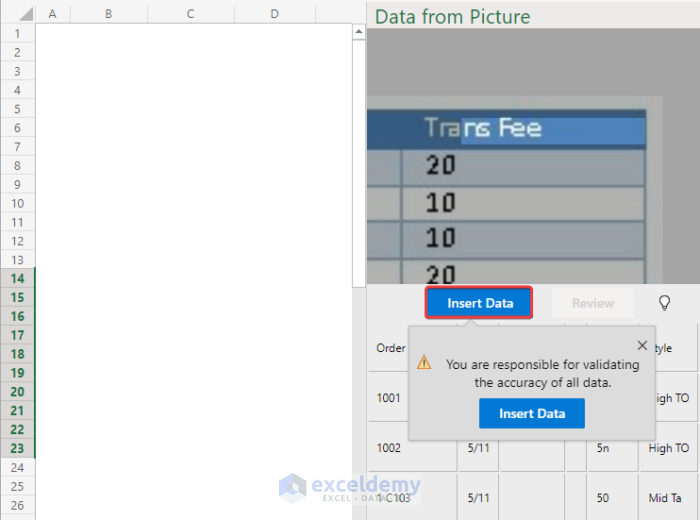
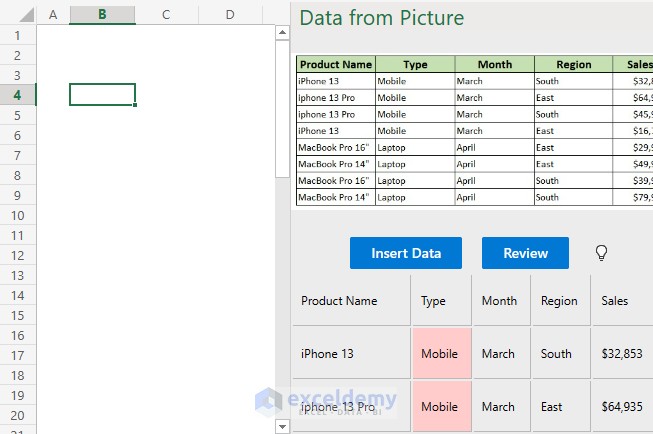
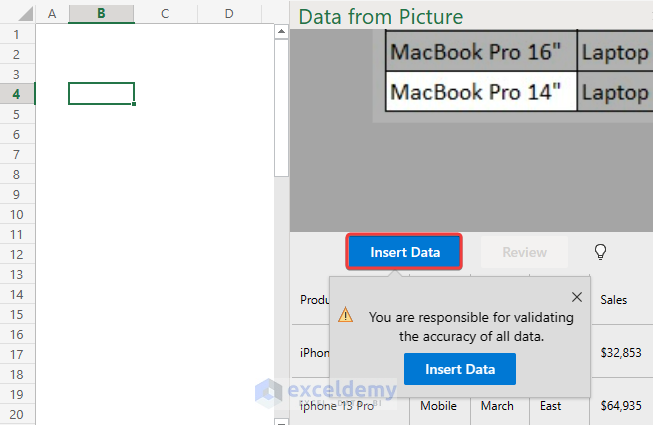
You will find the image opens up with data structure.
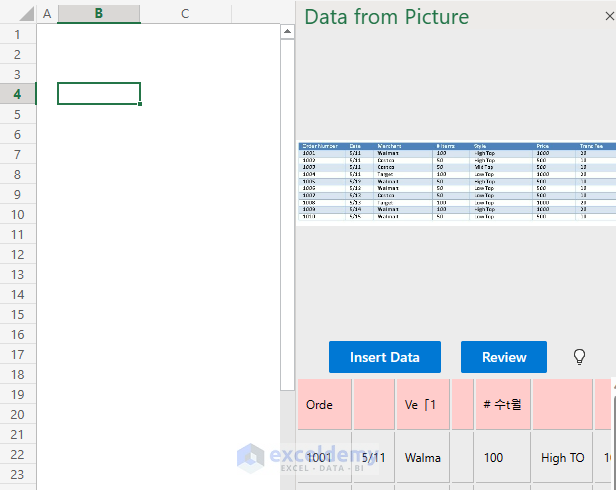
- Click the Insert Data button if there is no need to modify anything.
Or
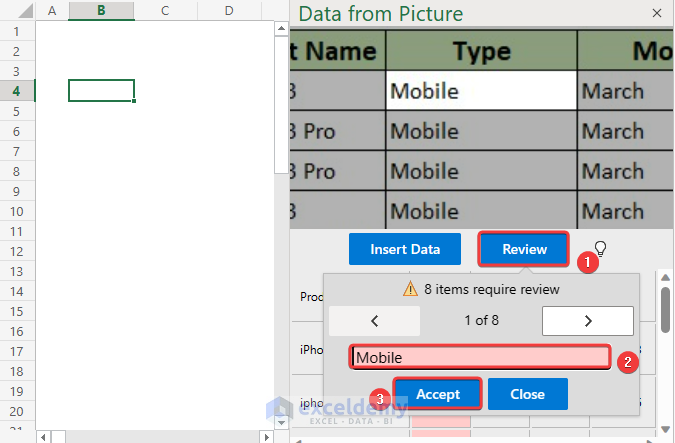
- Click on the Review button to check the data.
- After correction, click Accept.

- After reviewing the entire dataset, click Insert Data.
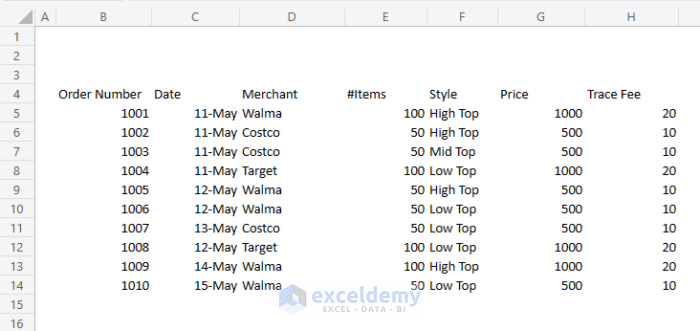
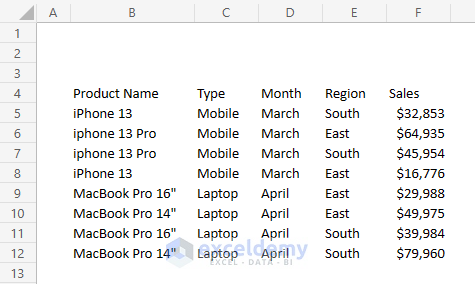
- The dataset is inserted into the worksheet.
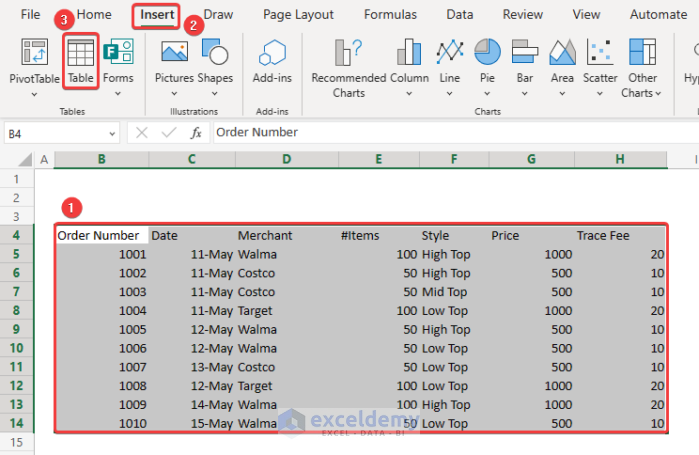
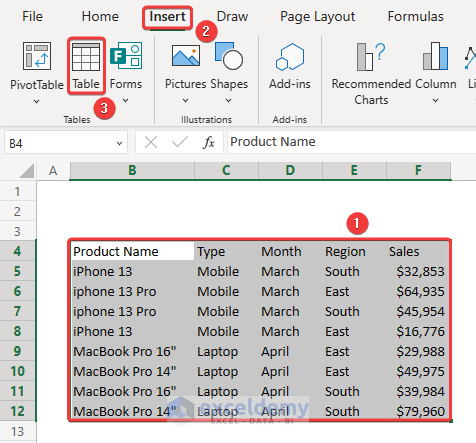
- To convert the dataset into a table, select the whole dataset.
- Go to the Insert tab and select the Table option.
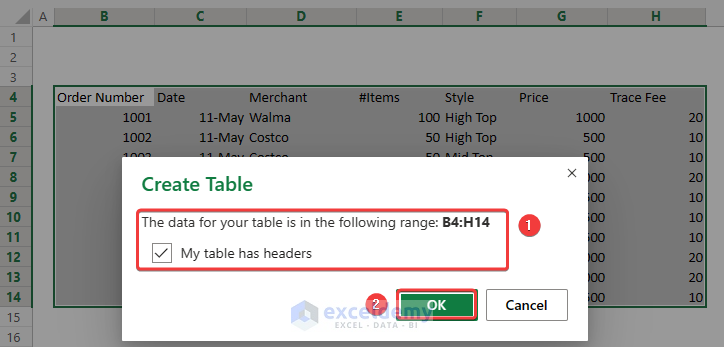
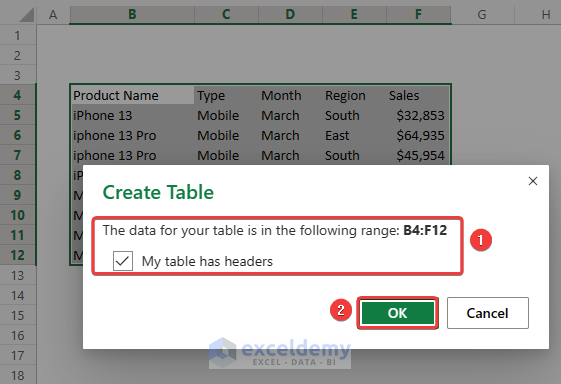
- Check My table has headers in the Create Table dialog box.
- Click OK.
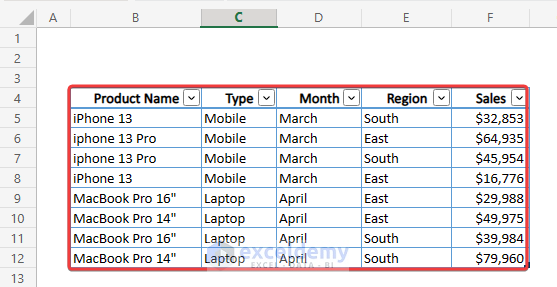
- You will find a well-developed table added to your worksheet, like the image you inserted.
Note: If you do not get the Picture From option on the toolbar of Excel, you have to use the Data From Picture option.

Method 2 – Using the Clipboard Option
Steps:
- Click the shortcut key Windows + Shift + S to take a screenshot.
- Go to the worksheet and open the Data tab.
- Choose the Get & Transform Data group and expand the From Picture icon.
- Select Picture from the Clipboard option.

When we took that screenshot, it was saved on the clipboard. After inserting the clipboard, our dataset will look like below.
- Review the required items and change them where necessary by selecting the Review option.
- Click Accept to move forward.
- Insert the dataset into the worksheet by clicking on the Insert Data option.
You will find the dataset inserted into the worksheet.
- Select the dataset
- Go to the Insert tab, and select the Table option.
- Select the range for the table and check the option My table has headers.
- Click OK.
You will find the table converted from the screenshot.
Things to Remember
- To extract an Excel table from an image, you have to insert data in data form in Excel.
- Screenshots are saved on the clipboard. So, when inserting a screenshot, choose the option Picture from Clipboard.
- To convert downloaded images, choose Method 1.
Download the Practice Workbook
You can download this practice workout below.
Get FREE Advanced Excel Exercises with Solutions!
