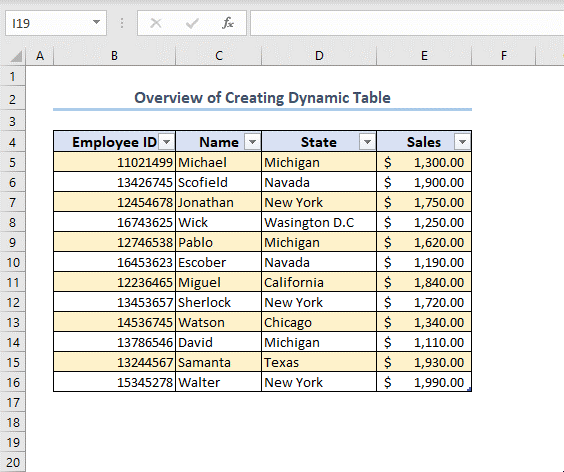
We’ll use the following simple dataset of employees to demonstrate how to create more dynamic tables.
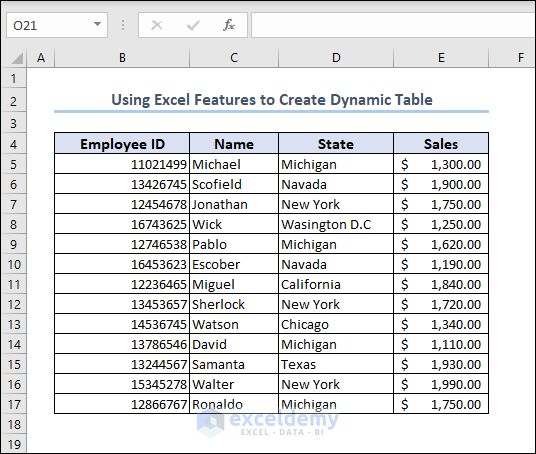
Method 1 – Using the Excel Table and Named Range Feature to Create a Dynamic Table
We used a dataset having a sales report for a company.
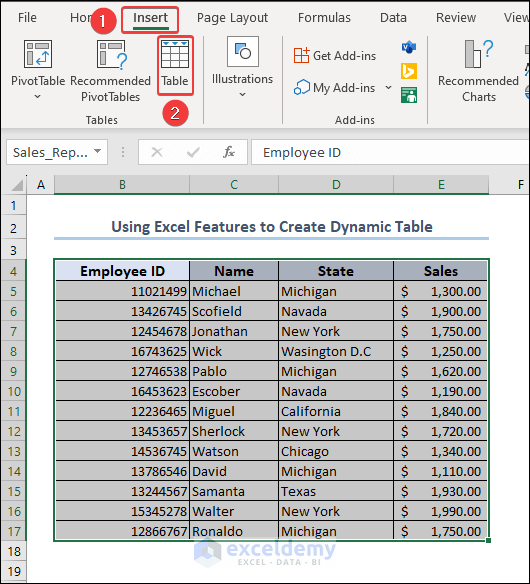
- Select the whole dataset including the header row, then select Insert and choose Table from the ribbon.
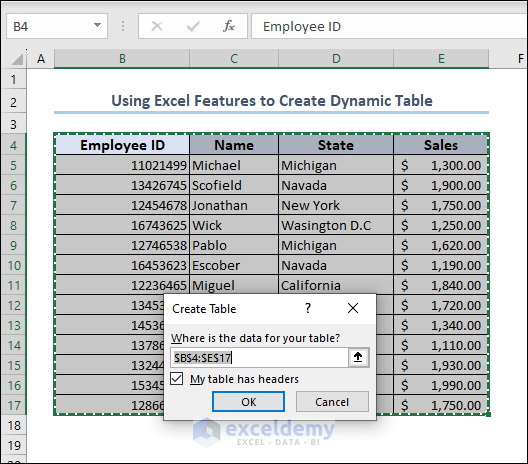
- In the tab, write the cell range for the table if not selected earlier.
- Check My table has headers.
- Press OK.
- Select the whole table again and select the Formulas tab, then go to Define Name.
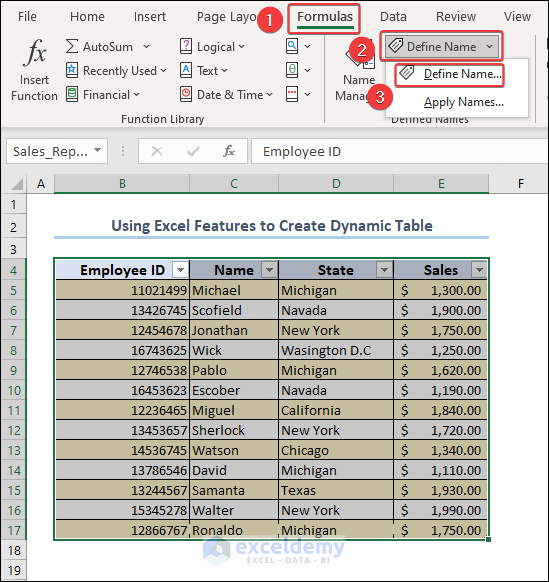
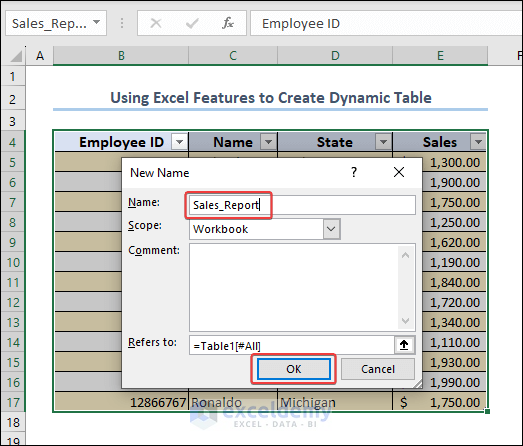
- Give a name to the range and press OK.
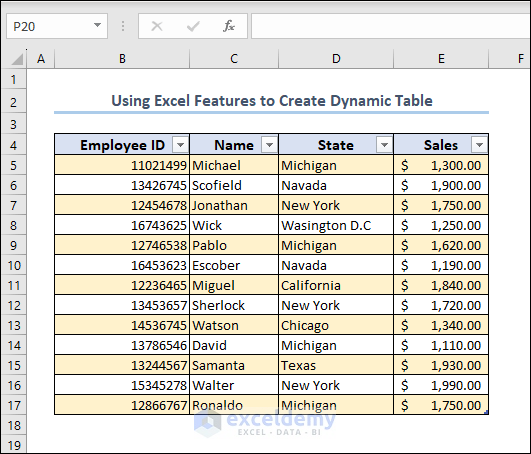
- You created the dynamic table.
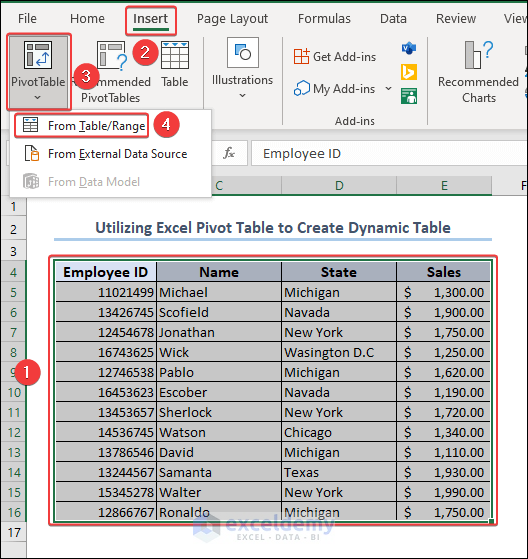
Method 2 – Inserting an Excel Pivot Table to Create a Dynamic Table
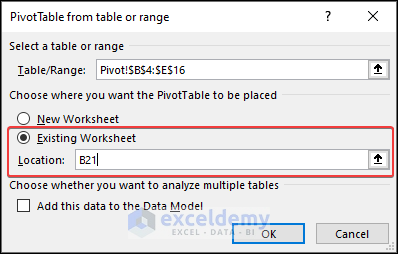
- Select the whole dataset including the header.
- Select Insert > PivotTable > From Table/Range.
- Select Existing Worksheet and write the cell reference where you want the pivot table. We chose cell B21.
- Press OK.
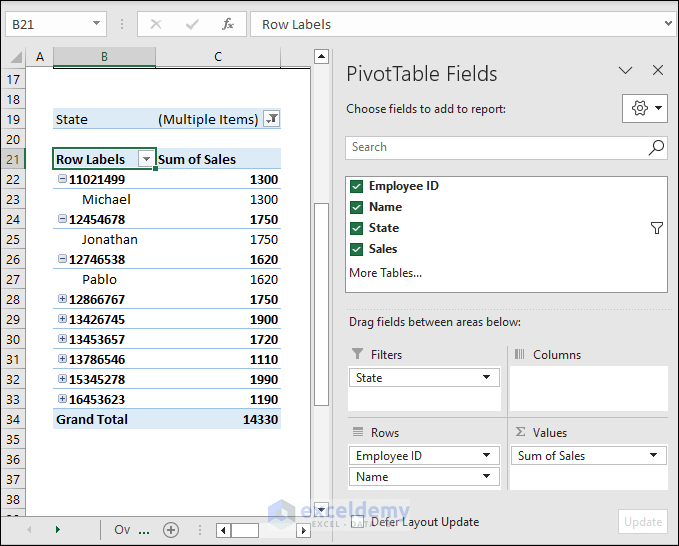
- This creates a pivot table which is a dynamic table.
- Select the pivot table and, from PivotTable Fields, put Employee ID and Name fields in the Rows section, State in the Filter section, and Sales in the Values section.
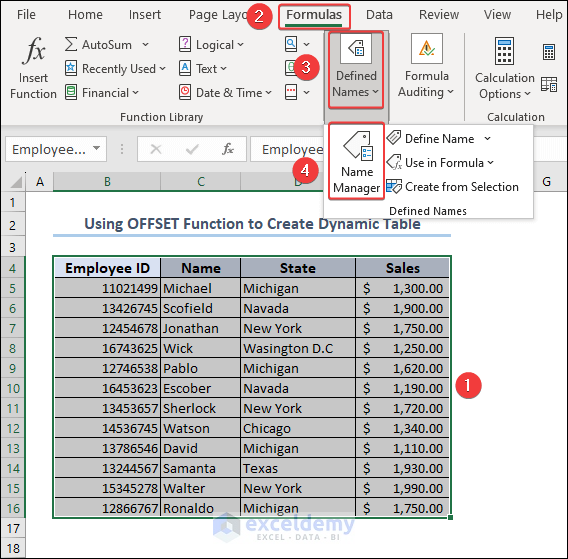
Method 3 – Using the OFFSET Function to Create a Dynamic Table
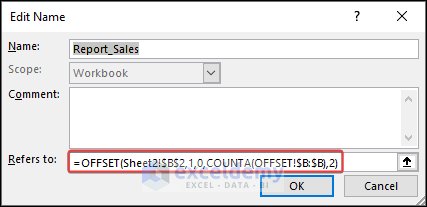
- Define the Name Range for the table.
- Go to the Formulas tab > Defined Names > Name Manager.
- Select the unique name we defined for the table. Double-click on it. We have given the name Report_Sales.
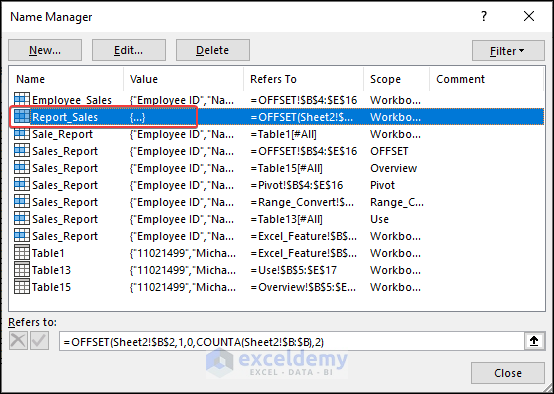
- In the Edit Name tab Refers to section, use the following formula and press OK.
=OFFSET(OFFSET!$B$2,1,0,COUNTA(OFFSET!$B:$B),2)- The table is made dynamic.
How to Use a Dynamic Table in Excel Formula
- Use the following formula in cell C20.
=SUMIF(Table13[State],C19,Table13[Sales])- You’ll see the sum of Sales from Michigan State in the cell.
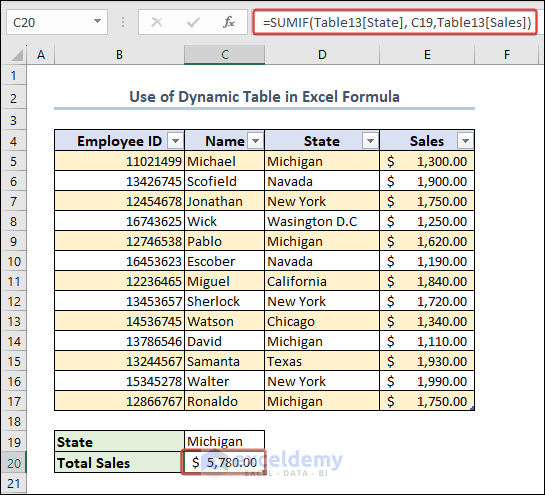
The value of cell C19 is searched in the State column of the dynamic table, and the SUM functions adds the Sales for the state Michigan.
- Let’s add another Sales data for Michigan State and check if the sum in cell C20 gets updated because the table is dynamic.
- The sum result changed accordingly.

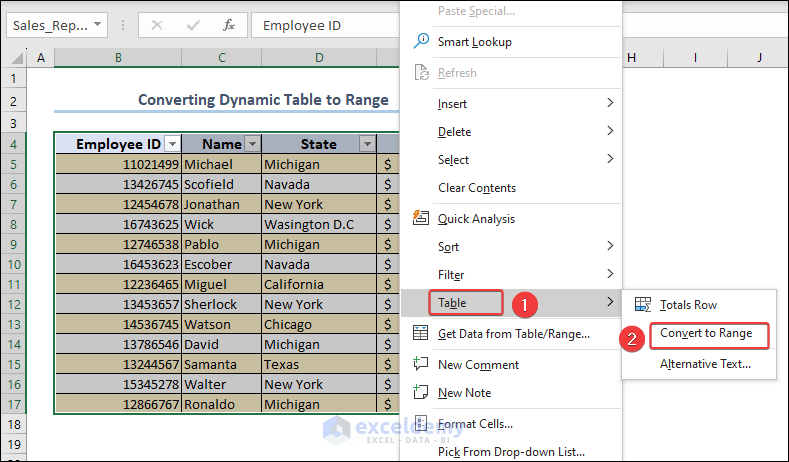
How to Convert a Dynamic Table to a Range
- Select the table and right-click on it.
- Select Table > Convert to Range.
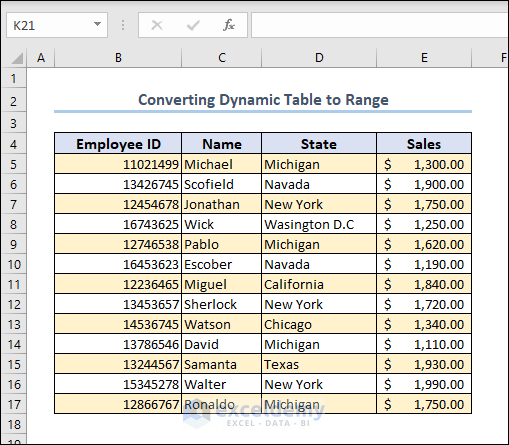
- You’ll see our dynamic table changed to the normal range.
Download the Practice Workbook
Advantages of Creating Dynamic Table in Excel
- Automatic resizing: To save time and effort, the table automatically contracts and expands as data changes.
- Simple data entry: Since the table expands fluidly, it is easier to enter data outside of its current range.
- Enhanced organization: For effective data organization, dynamic tables include built-in sorting, filtering, and formatting capabilities.
- Structured referencing: Formulas are simpler to comprehend and maintain when meaningful names are used in place of cell references.
- Formula Extension: The application of formulas is made easier since dynamic tables dynamically extend formulas as the amount of data increases, guaranteeing accuracy.
- Validating data and drop-down menus: Enforce data consistency and give data entry possibilities that are already predetermined.
- Integration with other features: For dynamic reports and visualizations, dynamic tables easily interface with PivotTables, charts, and other Excel capabilities.
Frequently Asked Questions
Can dynamic tables handle expanding datasets?
Yes, dynamic tables can easily accommodate expanding datasets by automatically adjusting their size to include new rows or columns.
Can dynamic tables be used for data analysis?
Yes, dynamic tables can be used as a foundation for data analysis. They integrate well with other Excel features like PivotTables and charts, allowing for dynamic reports and visualizations.
How do dynamic tables save time and effort?
Dynamic tables automatically resize as data changes, reducing the need for manual adjustments. They also offer features like sorting, filtering, and structured referencing, which streamline data management tasks.
Things to Remember
- In a few cases, we used cell references. Be Careful about using cell references so that it has to change according to your dataset.
- Save the Excel file after bringing some changes to the worksheet.
Get FREE Advanced Excel Exercises with Solutions!

