We sometimes protect our Excel workbook with a password to restrain further structural modifications of our dataset. However, at the time of any updates in the file structure, we need to make the workbook an unprotected worksheet. Excel has several options to unprotect a workbook. If you are also interested in getting familiar with how to unprotect an Excel workbook with a password, download our practice workbook and follow the content.
How to Unprotect Excel Workbook with Password in Excel: 3 Easy Methods
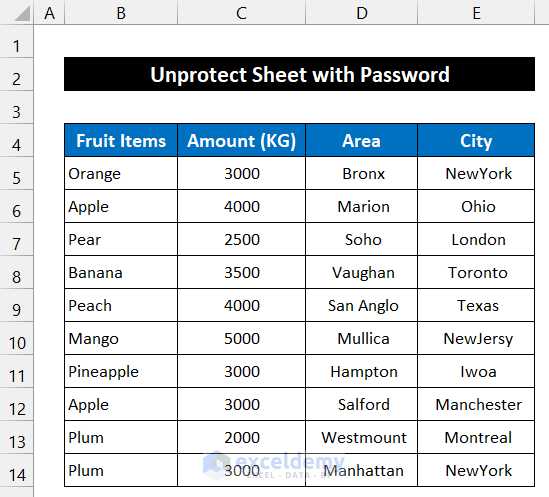
To demonstrate the approaches, we are considering a dataset of 10 fruit items, their amount, and delivery destination. The name of the fruit items are in column B, their quantity is in column C, and their delivery destination is in columns D and E. So, we can claim that our dataset is in the range of cells B5:E14. We are applying ‘aaaa’ as the password of our workbook. As a result, you will see that we cannot change the structure of our workbook. If you don’t know how to protect your workbook with a password, you can protect the workbook in several ways.
1. Unprotect Workbook from Review Tab
In this following method, we will unprotect the Excel workbook from the Review tab. You will find this tab in the Toolbar between the Data and the View tab. The steps of this process are given below as follows:
📌 Steps:
- First, go to the Review tab from the Toolbar.
- Then, select the Protect Workbook option from the Protect group.

- A small dialog box called Unprotect Workbook will appear. In that dialog box, you will see an empty box entitled Password.
- Now, write down the password you set while protecting the workbook. In our case, write the password ‘aaaa’ as we mentioned earlier.
- Click OK.

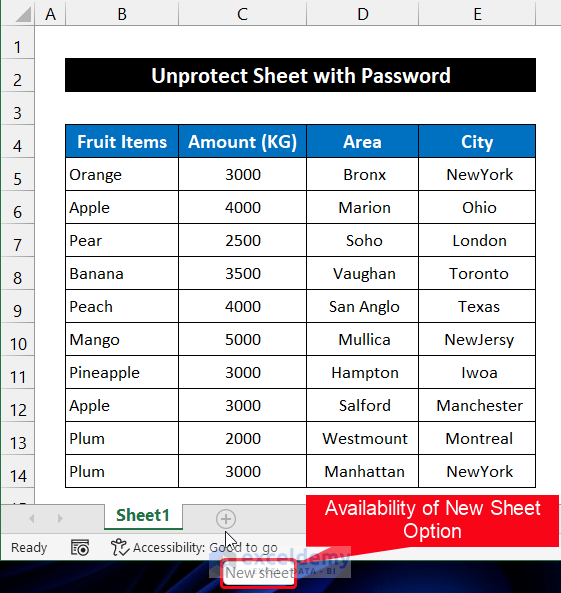
- You will get your protected workbook as an unprotected workbook and we are able to change the structure of the file by adding or deleting any sheet.
Thus, we can say that our process worked effectively and we can unprotect the Excel workbook with a password.
2. Using Excel’s Info Feature
The built-in Info feature of Microsoft Excel can also help us to unprotect our workbook from the protected option. If you set a password through this option, it will restrict the access of that person who doesn’t know your password. It is the best way to ensure the privacy of your data from others.

The steps of this process are explained below:
📌 Steps:
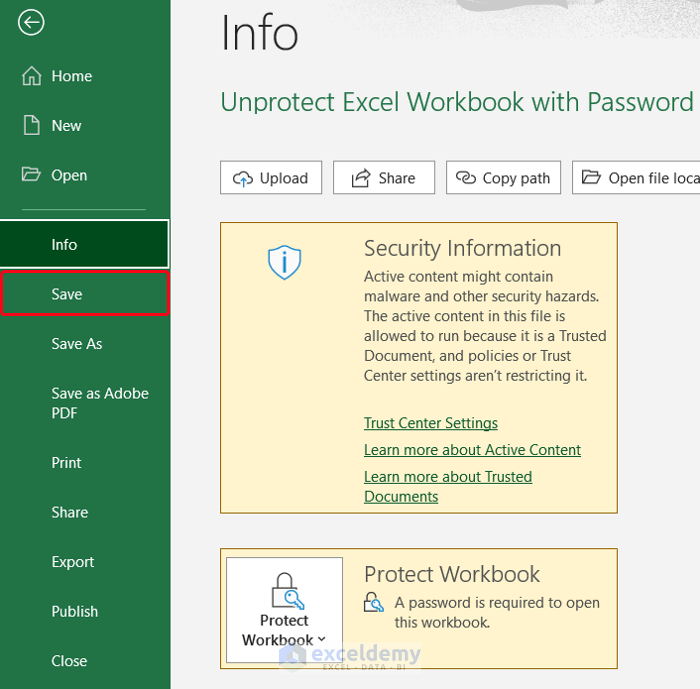
- First of all, select File > Info.
- As our workbook contains a VBA code, you may see a security warning here, Don’t get panic about it.
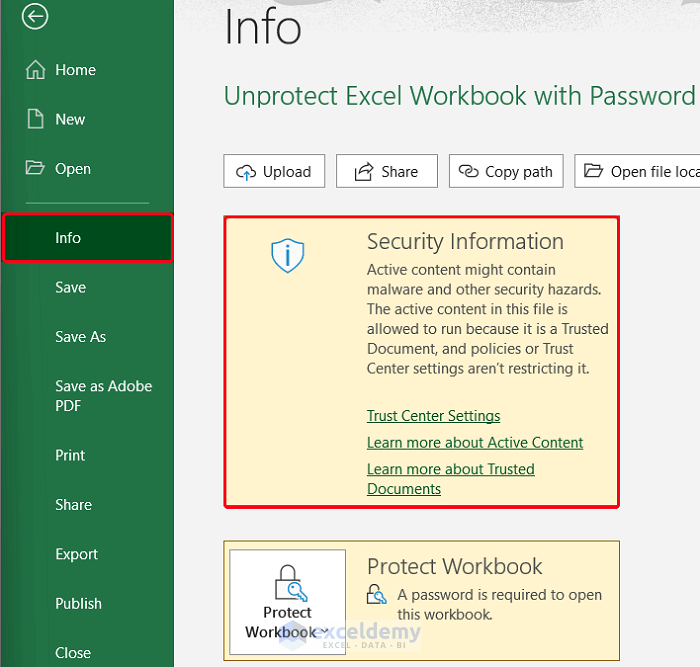
- Now, select the drop-down arrow of Protect Workbook > Encrypt with Password option.

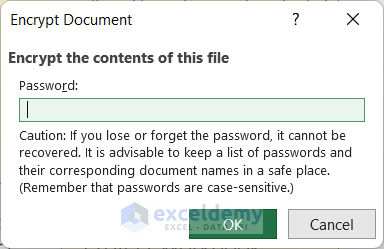
- A small dialog box titled Encrypt Document will appear.
- As the password is set before, you will see the 4-digit password in the box called Password.
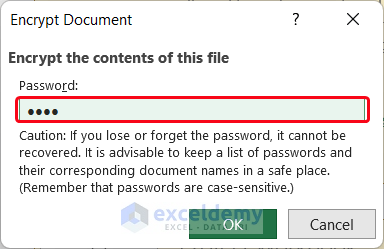
- Now, press the Delete key on your keyboard to delete it.
- Finally, click OK.
- Select the Save option to save the workbook.
- Then click the close button at the right-conner of Excel to close the file.
- Now, if you double-click on the file to open, you will see the password is not required further.
In the end, we can say that our method worked perfectly and we can unprotect the Excel workbook with a password.
3. Show Password with VBA Code
Writing a VBA code will also help you to unprotect the Excel workbook with a password. We will use the same Excel workbook to show the procedure of this method. Our dataset is in the range of cells B5:E14. The method is described below step by step:
📌 Steps:
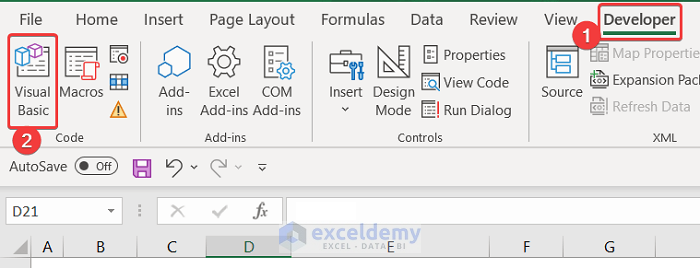
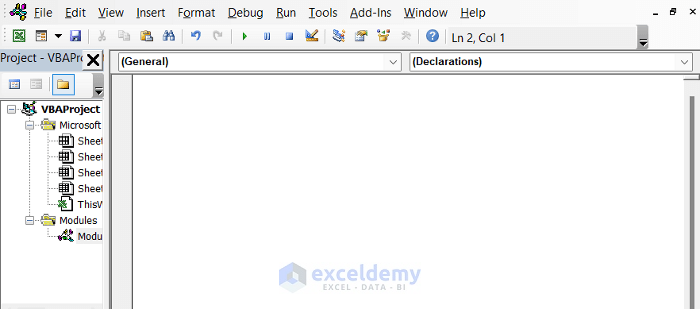
- To start the approach, go to the Developer tab and click on Visual Basic. If you don’t have that, you have to enable the Developer tab. Or You can also press ‘Alt+F11’ for opening the Visual Basic Editor.
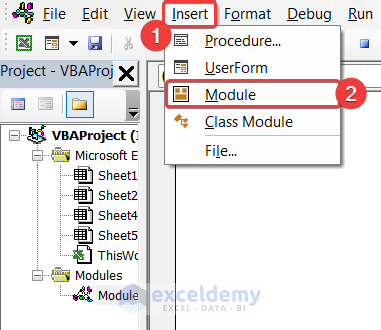
- A dialog box will appear.
- Now, in the Insert tab on that box, click Module.
- Then, write down the following visual code in that empty editor box.
Sub Unprotect_Workbook_with_Password()
Dim p As Integer, q As Integer, r As Integer
Dim s As Integer, t As Integer, u As Integer
Dim X_1 As Integer, X_2 As Integer, X_3 As Integer
Dim X_4 As Integer, X_5 As Integer, X_6 As Integer
On Error Resume Next
For p = 65 To 66: For q = 65 To 66: For r = 65 To 66
For s = 65 To 66: For t = 65 To 66: For X_1 = 65 To 66
For X_2 = 65 To 66: For X_3 = 65 To 66: For X_4 = 65 To 66
For X_5 = 65 To 66: For X6 = 65 To 66: For u = 32 To 126
ActiveSheet.Unprotect Chr(p) & Chr(q) & Chr(r) & _
Chr(s) & Chr(t) & Chr(X_1) & Chr(X_2) & Chr(X3) & _
Chr(X_4) & Chr(X_5) & Chr(X6) & Chr(u)
If ActiveSheet.ProtectContents = False Then
MsgBox "Possible password:  " & Chr(p) & Chr(q) & _
Chr(r) & Chr(s) & Chr(t) & Chr(X_1) & Chr(X2) & _
Chr(X_3) & Chr(X_4) & Chr(X_5) & Chr(X_6) & Chr(u)
Exit Sub
End If
Next: Next: Next: Next: Next: Next
Next: Next: Next: Next: Next: Next
End Sub- Close the Editor tab.
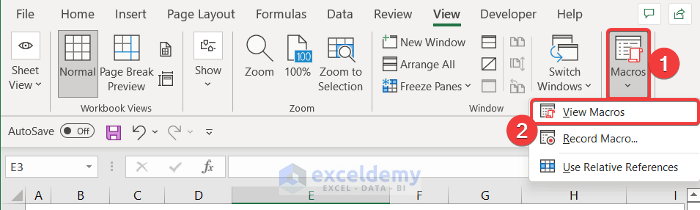
- Now, from the View ribbon, click on Macros > View Macros.
- A new dialog box called Macro will appear. Select Unprotect_Workbook_with_Password.

- Click on the Run button to run this code. It may take a quite long time to complete.
- At last, you will see the possible password in the message box.
Lastly, we can say that our visual code worked successfully and we were able to unprotect the Excel workbook with a password.
Download Practice Workbook
Download this practice workbook for practice while you are reading this article. Apply ‘aaaa’ as the password of this workbook.
Conclusion
That’s the end of this article. I hope that this article will be helpful for you and you will be able to unprotect your Excel workbook with a password. If you have any further queries or recommendations, please share them with us in the comments section below.
Keep learning new methods and keep growing!
Related Articles
- How to Unprotect Excel Workbook without Password
- How to Remove Password from Excel File
- How to Recover Excel File Password
<< Go Back to Unprotect Workbook in Excel | How to Unprotect in Excel | Learn Excel
Get FREE Advanced Excel Exercises with Solutions!
