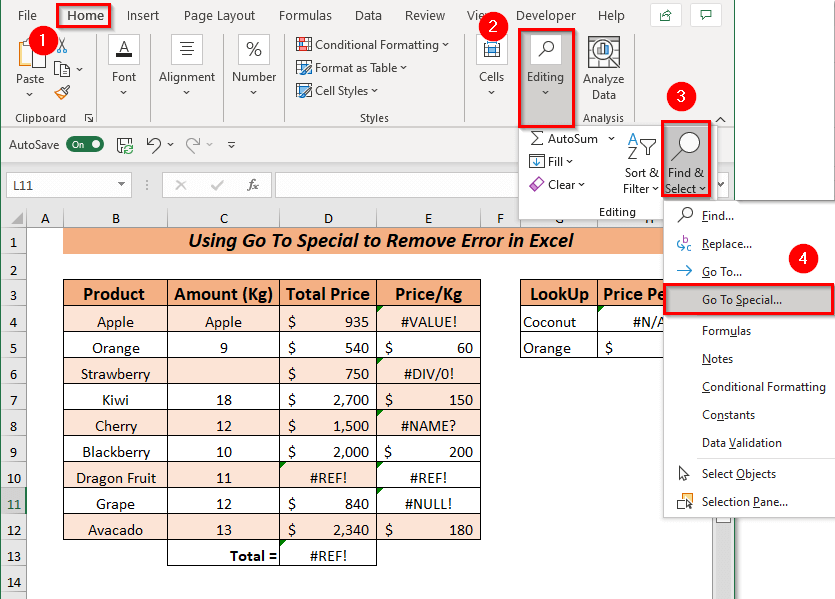
Method 1 – Using Go To Special to Remove Error
Remove errors; use the Go To Special.
Open the Home tab >> go to Editing group >> from Find & Select >> select Go To Special
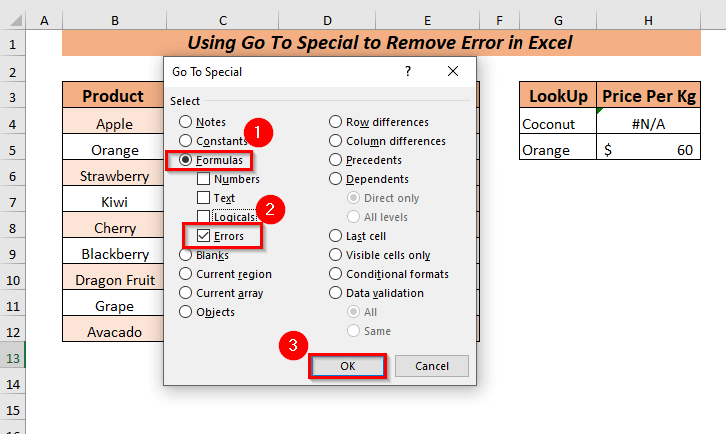
➤ A dialog box of Go To Special will pop up.
Select the type of your choice to remove.
➤ Selected Formulas, Errors in the dialog box.
➤ Click OK.
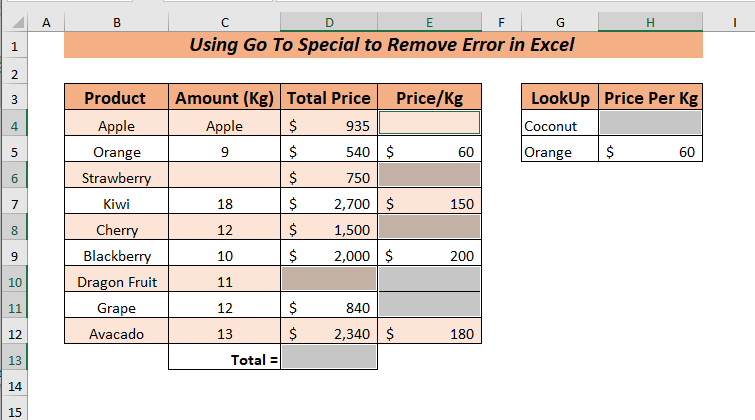
All the Formulas that contain errors are selected. Press the DELETE key to remove the Errors.
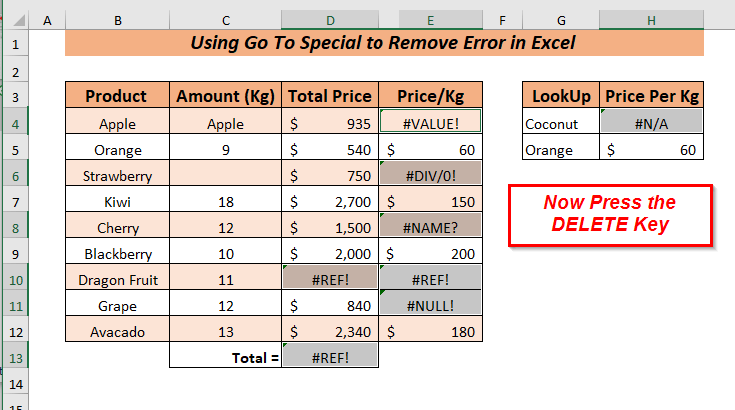
All the errors will be removed.
Method 2 – Using the IFERROR Function
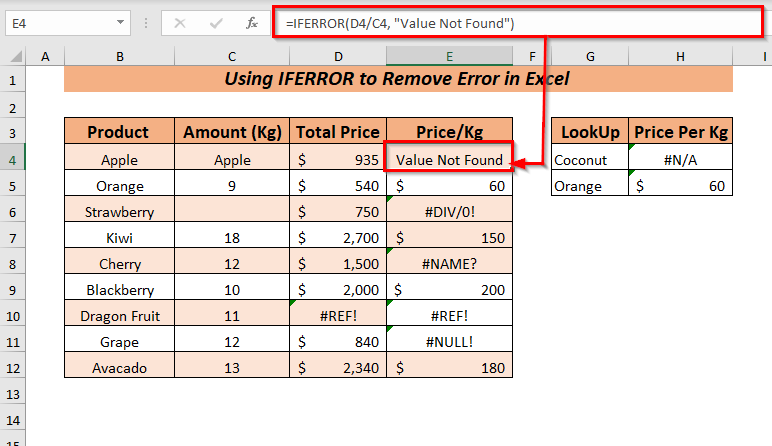
Use the IFERROR function to remove errors.
Select a cell with a formula where the error exists.
➤ I selected the E4 cell.
Type the following formula with the existing one.
=IFERROR(D4/C4, "Value Not Found")
The IFERROR function will consider the divide formula as a value and will trigger the formula first. Use a text Value Not Found as value_if_error. If the division encounters any error, rather than showing it will show the text I have used.
Press the ENTER key.
You can use this function to wrap up the formulas for the rest of the cells of errors.
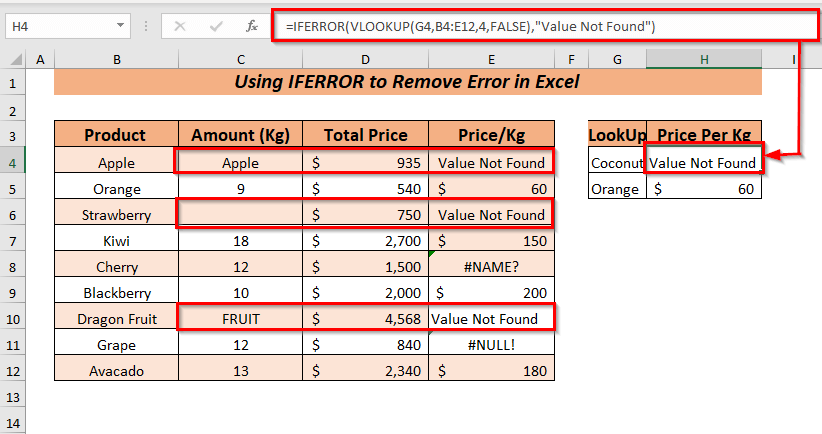
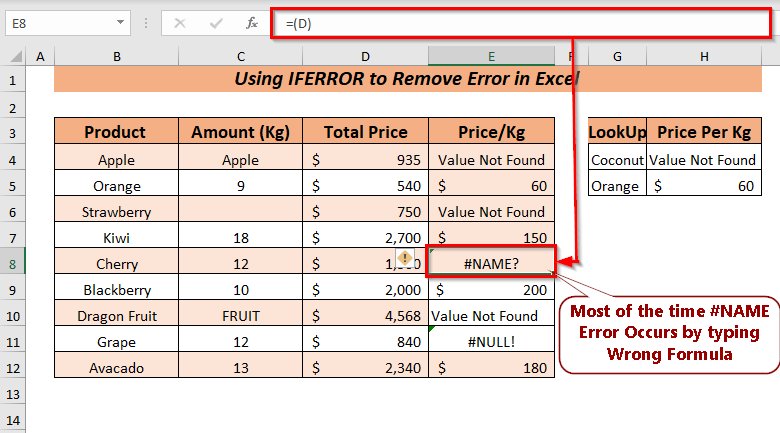
In case you have errors like #NAME! you should check the formula you typed because this error occurs when the formula is misspelled.
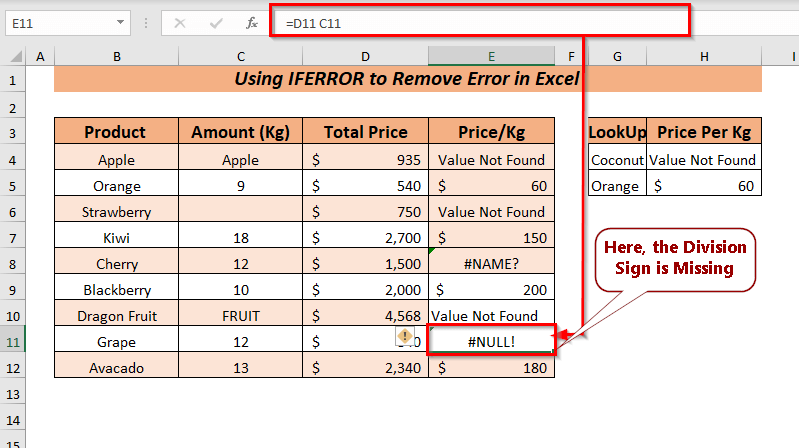
You have errors like #NULL! then you should check how you referenced the cells in the formula.
Method 3 – Using the IFNA Function to Remove Error
You can use the IFNA function only for the #N/A! error, it doesn’t work with any other errors.
See the use of the function,
Select a cell with a formula where the error exists.
➤ I selected the E4 cell.
Type the following formula with the existing one.
=IFNA(D4/C4,0)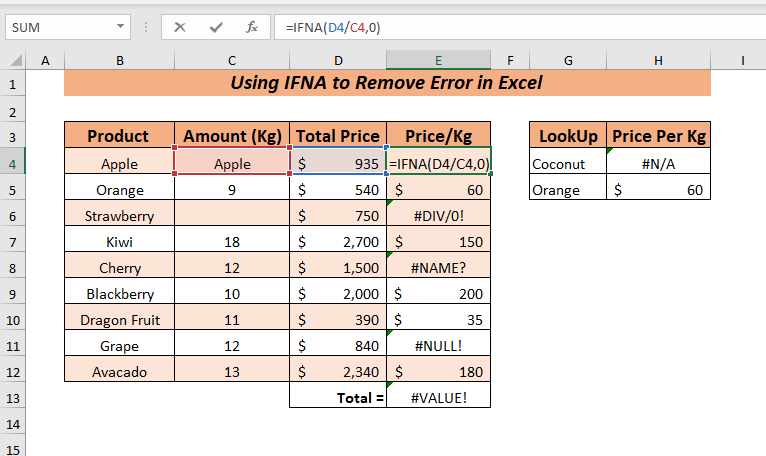
For the IFNA function, I’ve taken the divide function as a value and then used 0 as value_if_na to show 0 instead of an error.
Press the ENTER key.
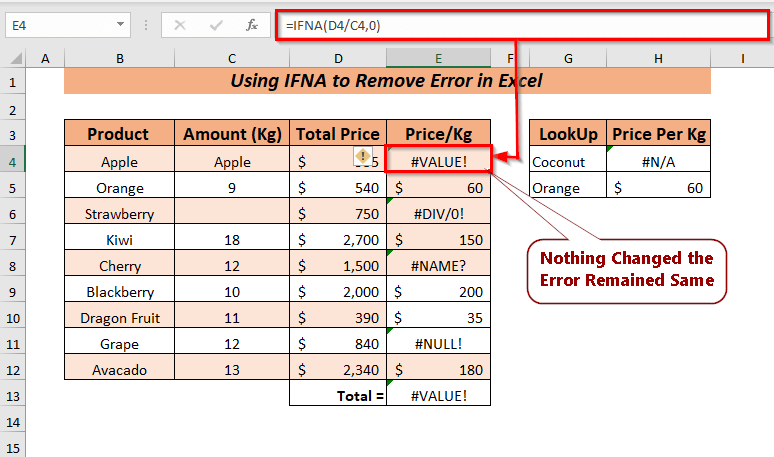
Still exists the error because the error is #VALUE error. We know the IFNA function can’t handle other errors except for the #N/A error.
Select a cell where #N/A error exists.
➤ I selected the H4 cell.
Type the following formula with the existing one.
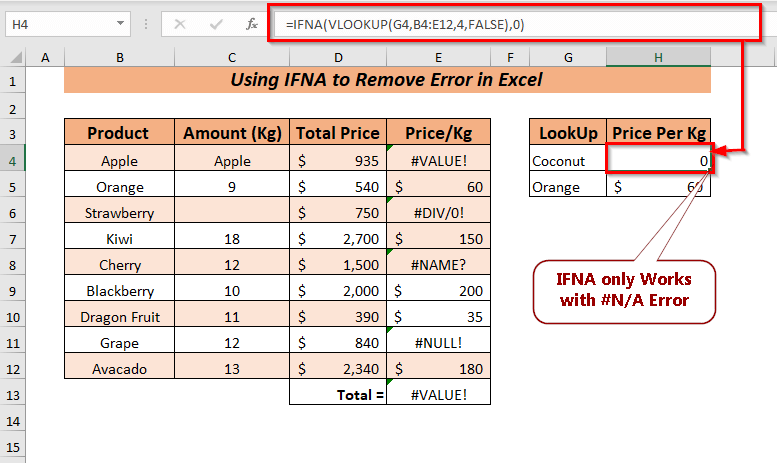
=IFNA(VLOOKUP(G4,B4:E12,4,FALSE),0)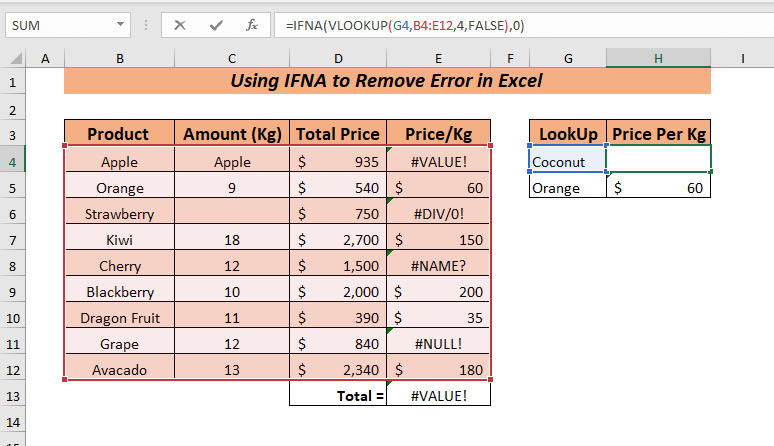
Within IFNA, I’ve taken the VLOOKUP function as a value and then used 0 as value_if_na. There exists no information regarding Coconut instead of showing a #N/A error it will show 0.
Press the ENTER key to see that the error is removed from that selected cell.
Method 4 – Using the ISERR Function
Use the ISERR function to remove all types of errors except the #N/A error. It doesn’t handle #N/A errors.
Jump into the procedure,
Select a cell with a formula where the error exists.
➤ I selected the E4 cell.
Type the following formula with the existing one.
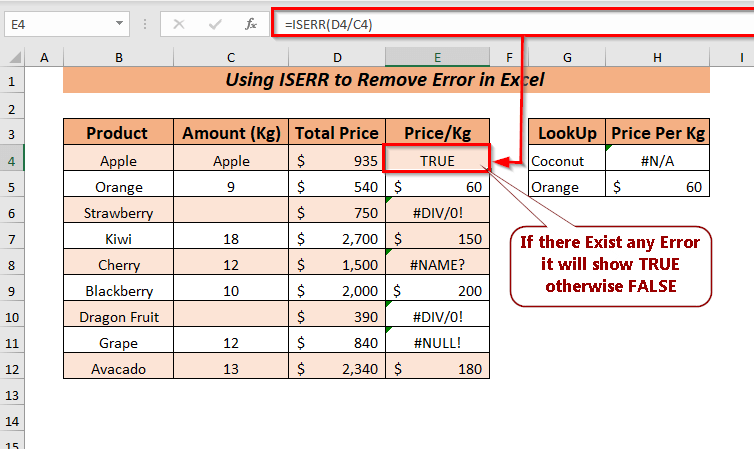
=ISERR(D4/C4)
The ISERR function takes the whole formula or function as a value and returns TRUE for Error and FALSE for Correct values.
Press the ENTER key, it will remove the error with TRUE or FALSE.
You also can use the –ISERR function if you want (1, 0) instead of TRUE or FALSE.
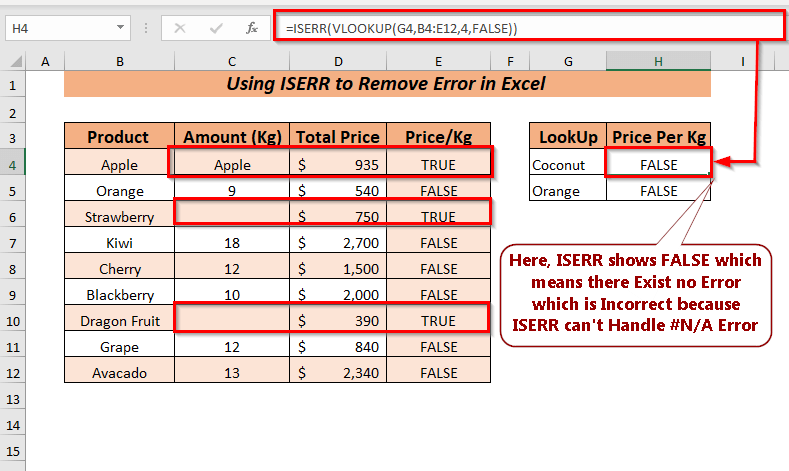
I used the exact formula for the #N/A error but it won’t work because the ISERR function can’t handle the #N/A error.
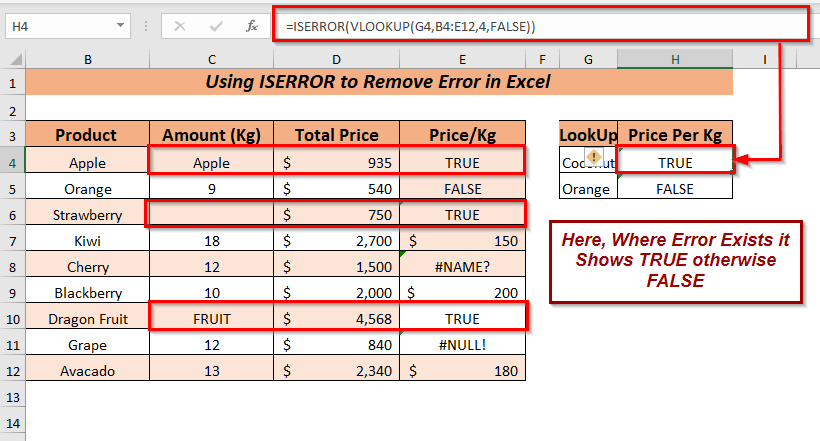
Method 5 – Using the ISERROR Function to Remove Error
You can use the error function to remove errors. The ISERROR function shows TRUE for Error otherwise shows FALSE where it considers all types of errors.
To use this function, select a cell with a formula where the error exists.
➤ I selected the H4 cell.
Type the following formula with the existing one.
=ISERROR(VLOOKUP(G4,B4:E12,4,FALSE))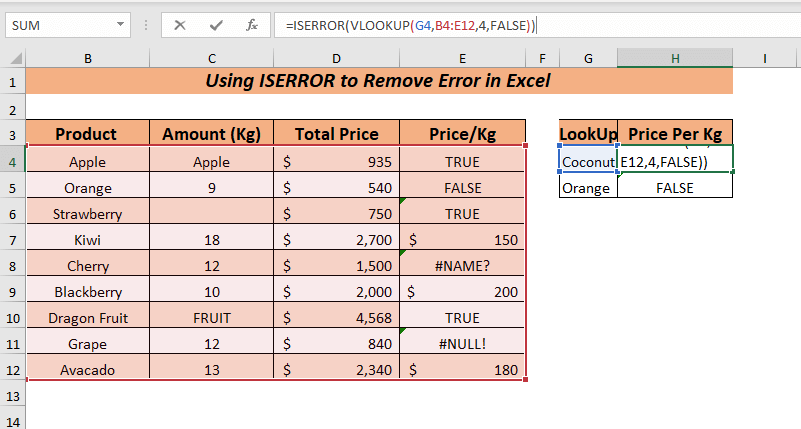
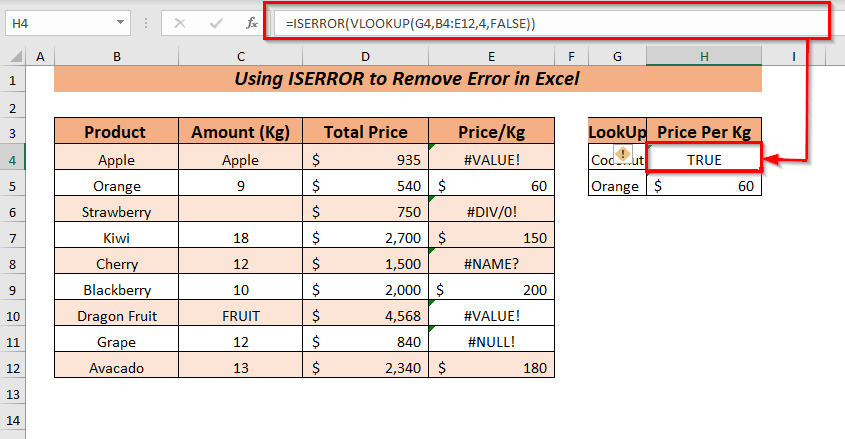
The ISEORR function takes the whole formula or function as a value and returns TRUE for Error and FALSE for correct values. It considers all types of errors.
Press the ENTER key. Remove the error with TRUE.
Use this function to wrap up the formulas for the rest of the cells of errors.
If you don’t want TRUE or FALSE as the output, you can combine IF along with ISERROR, the combination of IF and ISERROR works the same as IFERROR.
Method 6 – Using the ISNA Function
In case you only have #N/A! error, you can use the ISNA function because it doesn’t work with any other errors.
To use this function,
Select a cell with a formula where the error exists.
➤ I selected the E4 cell.
Type the following formula with the existing one.
=ISNA(D4/C4)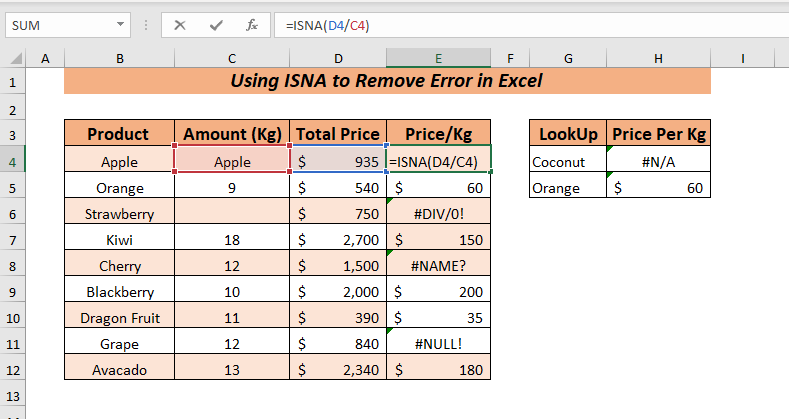
The ISNA function takes the used formula as a value then it tests the value to find out whether it is a #N/A error or not. In the ISNA function, TRUE means Error, and FALSE means Correct.
Press ENTER.
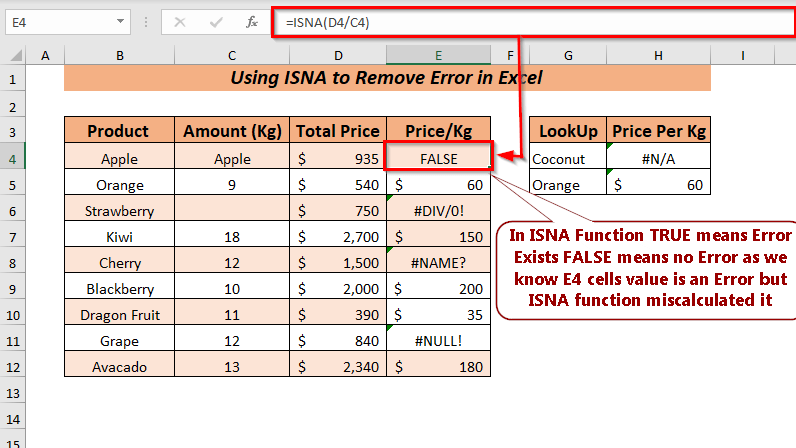
We selected cell has a #VALUE error the ISNA function won’t consider it an error as it only knows one error, which is the #N/A error.
Select a cell where #N/A error exists.
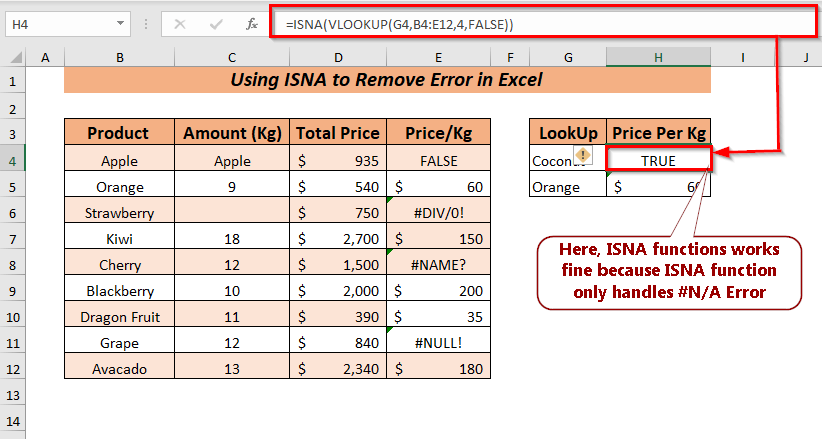
➤ I selected the H4 cell.
Type the following formula with the existing one.
=ISNA(VLOOKUP(G4,B4:E12,4,FALSE))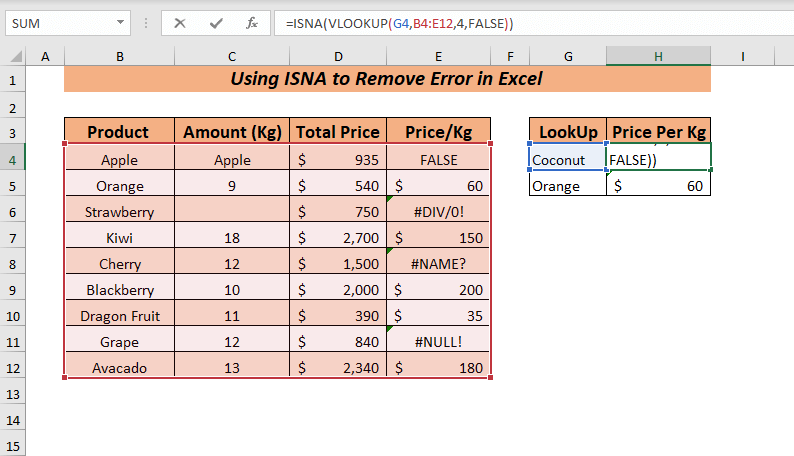
Within the ISNA function, I’ve taken the VLOOKUP function as a value. There exists no information regarding Coconut instead of showing #N/A errors it will show TRUE.
Press the ENTER key, and you will see that the error is removed from that selected cell.
If you don’t want TRUE or FALSE as the output, you can combine IF with ISNA, the combination of IF and ISNA works the same as IFNA.
Method 7 – Using VBA to Remove Error
Remove the error in Excel you can also use the VBA.
Use the VBA editor,
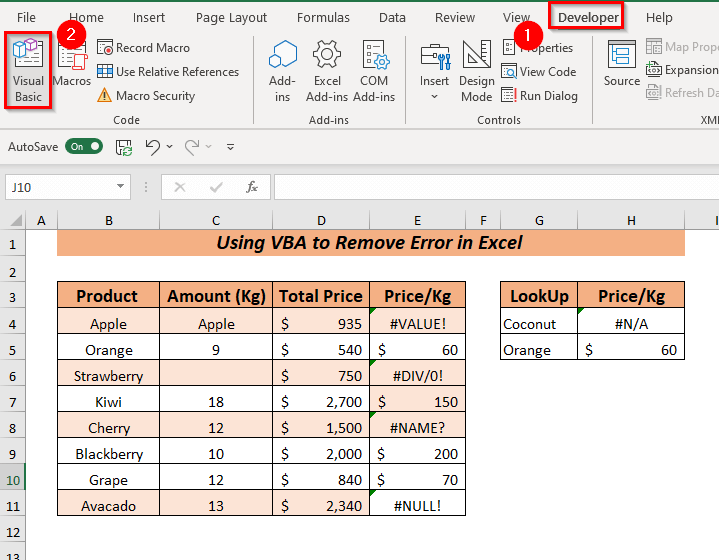
Open the Developer tab >> select Visual Basic (Keyboard Shortcut ALT + F11 )
It will open a new window of Microsoft Visual Basic for Applications.
Open Insert >> select Module
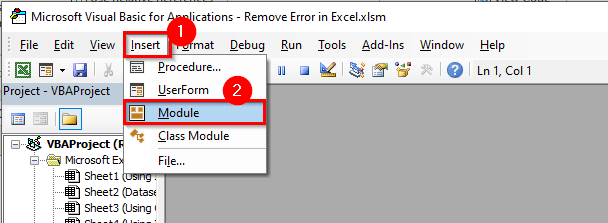
A Module will open, type the following code in the opened Module.
Sub Remove_Error()
On Error Resume Next
Columns("E").SpecialCells(xlFormulas, xlErrors).ClearContents
Columns("H").SpecialCells(xlFormulas, xlErrors).ClearContents
On Error GoTo 0
End Sub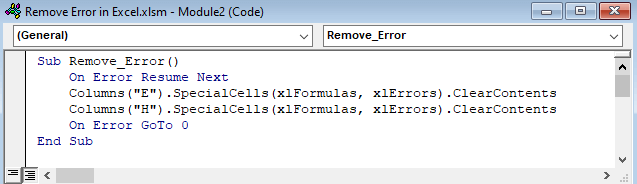
I declared the Sub procedure Remove_Error
Select the column from where I want to remove errors( you can use the column of your choice or need)
➤We took the E and H columns.
We used the ClearContents method to remove the errors from the selected column.
Save the code and go back to the worksheet.
Open the Developer tab >> from Insert >> select Button
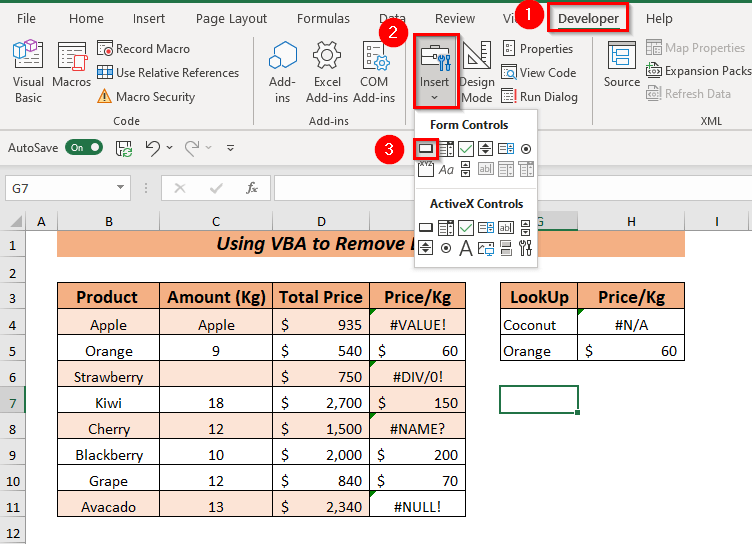
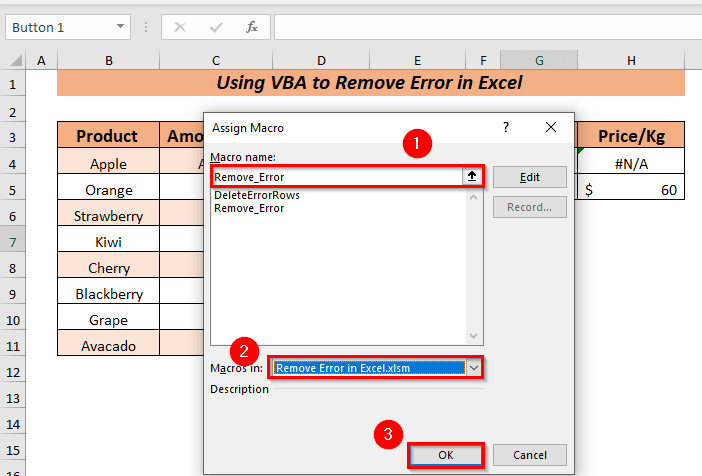
Assign the Macro in the Button.
➤ From the Macro name select the Remove_Error select the workbook within Macros in.
Click OK.
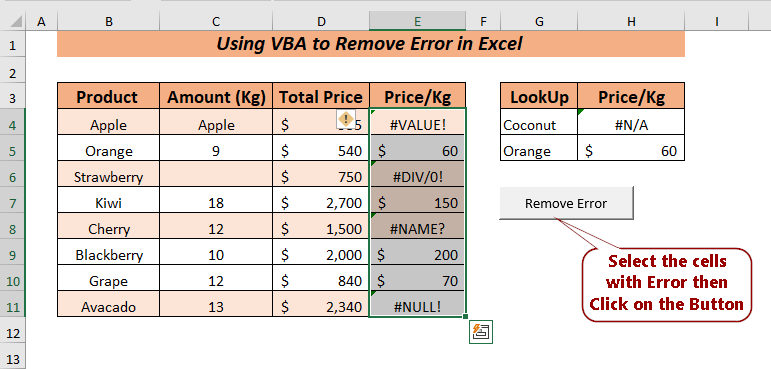
Select the column cells from where you want to remove the errors.
We selected column C.
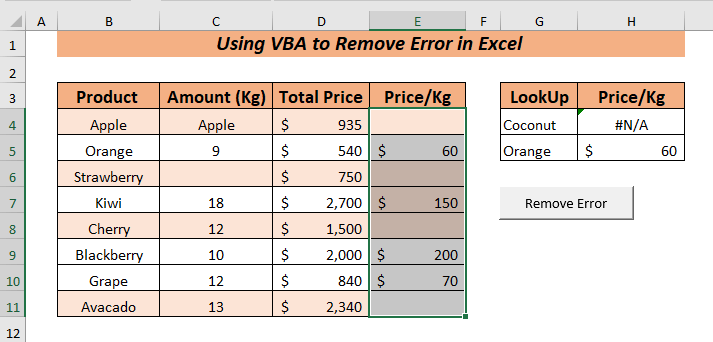
➤To Run the Macro click on the Button.
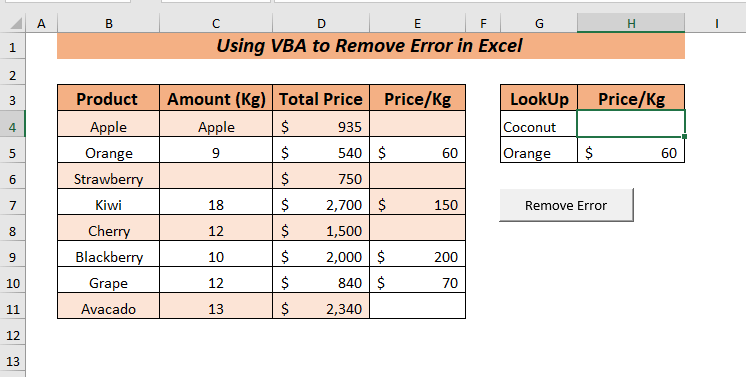
The error from the selected cells will be removed.
Select the value from the H column.
Click the Button.
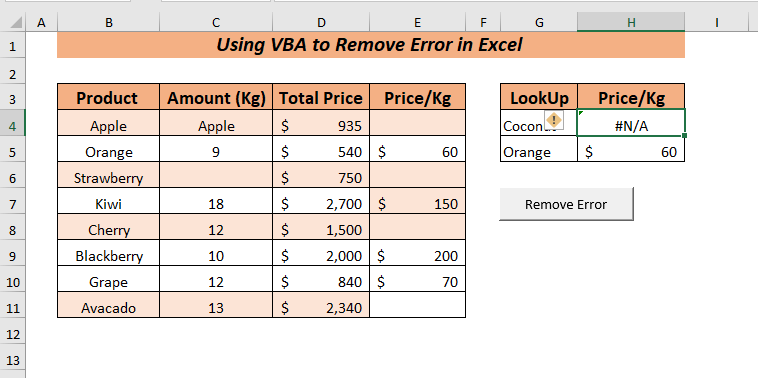
The error from the selected cells will be removed.
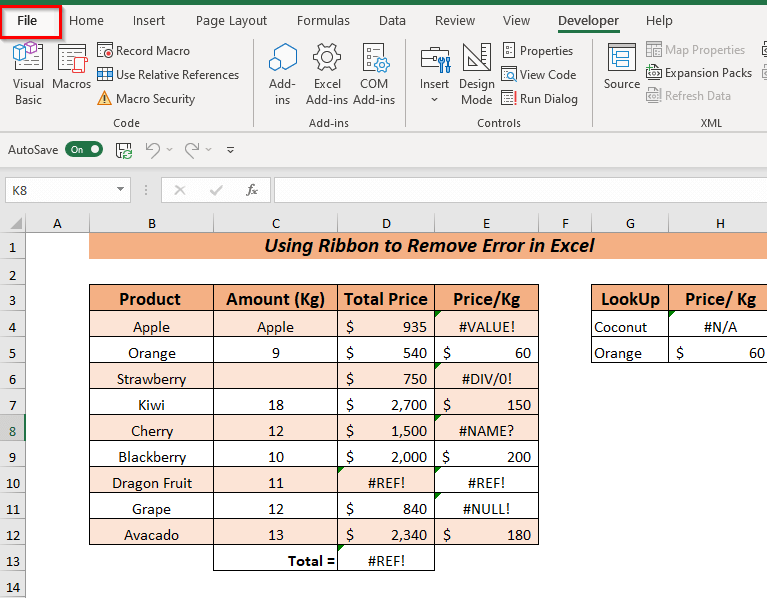
Method 8 – Using Ribbon to Remove Error
To use the ribbon,
Open File.
Select Options.
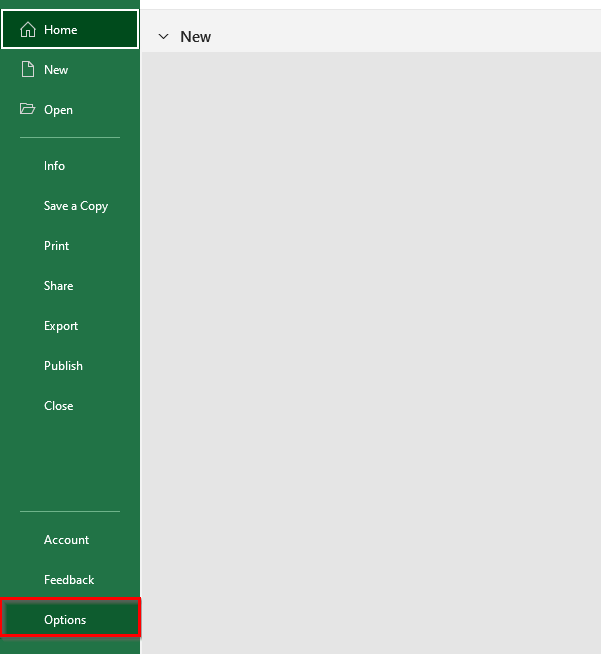
A new window will pop up.
Select Formulas >> then Uncheck all those error-checking rules you don’t want to see in your dataset.
Click OK.
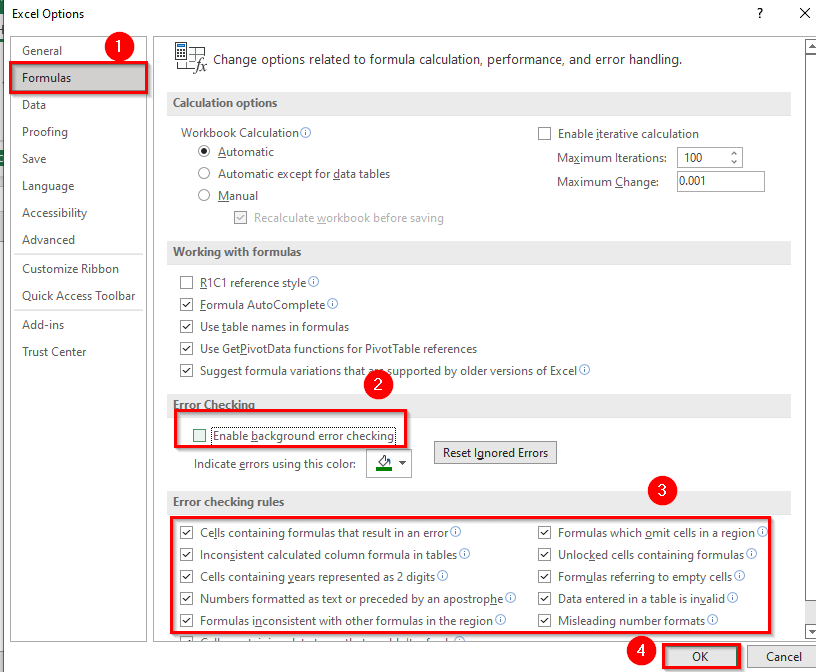
if you make any mistakes while typing functions or working with formulas, any background error won’t arise.
Download to Practice
Related Articles
<< Go Back To Errors in Excel | Learn Excel
Get FREE Advanced Excel Exercises with Solutions!
