It is very common for a bigger text to not fit in the given cell size while working with Excel. So, to fit a bigger text in a cell, you have to make a cell bigger. In this article, you will get five easy ways how to make a cell bigger in Excel.
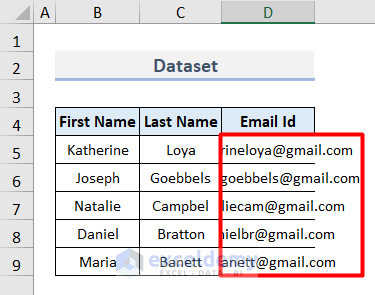
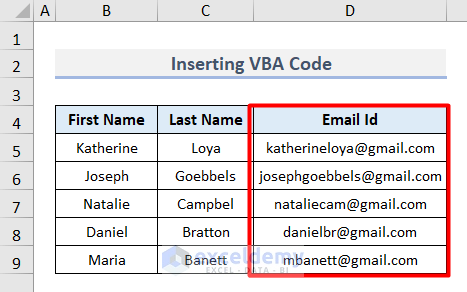
To describe the methods, we need a sample dataset. In the following data table, we have three columns, among which the last column named Email ID has texts that are not fitted in the cells. So, to fit these texts in the cells, we have to enlarge these cells.
1. Using the Merge and Center Options to Make a Cell Bigger in Excel
The Merge & Center option in the Excel Ribbon is very effective in making cells bigger. For this, follow these steps.
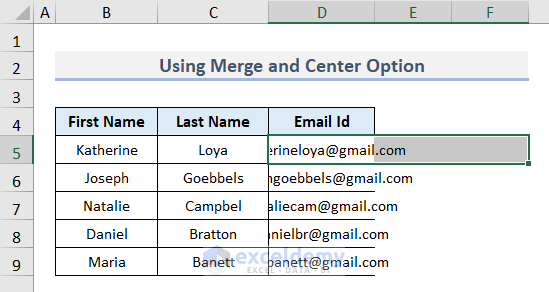
- First, select Cell D5 and its adjacent cells that are required to make the cell bigger.
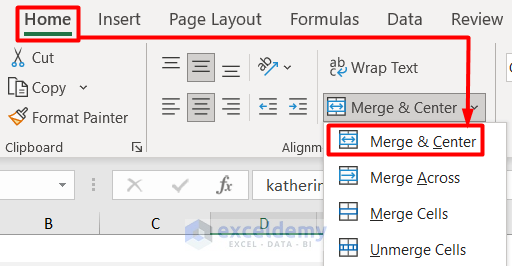
- Then, select Home > Merge & Center Group > Merge & Center option.
- After that, the first cell will be bigger and the Email ID is fitted here.
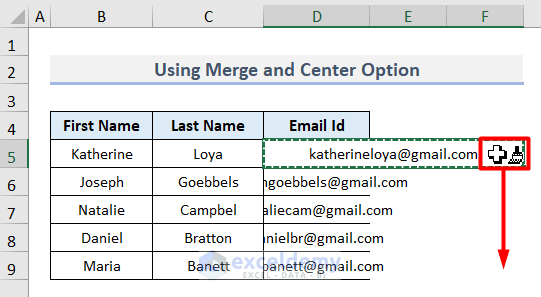
- Now, we need to copy this format to the following cells.
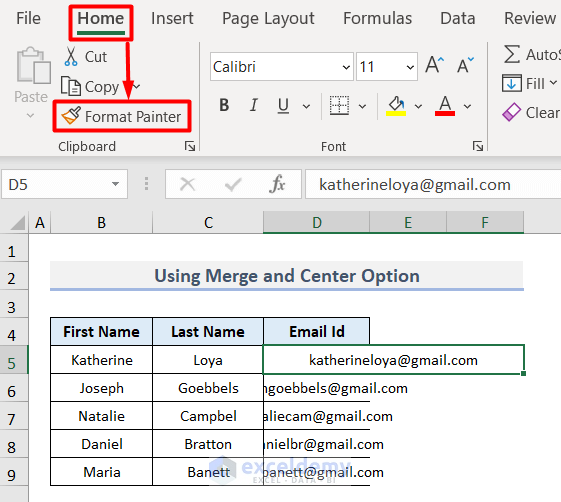
- Therefore, choose Format Painter from the Home tab.
- Next, drag the brush icon downwards all through the column.
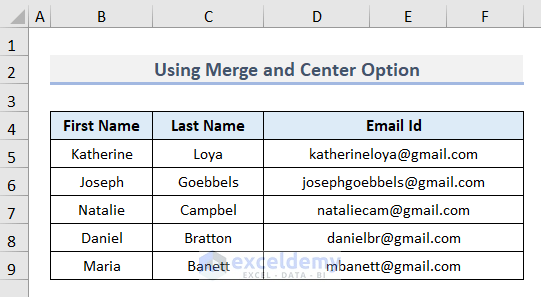
- In this way, we will get bigger cells like this.
Read More: How to Change Cell Size in Excel
2. Applying Wrap Text Feature for Making a Cell Bigger
Wrap Text is another powerful tool to create bigger cells.
- First, select the first cell of the Email ID column, which is Cell D5.
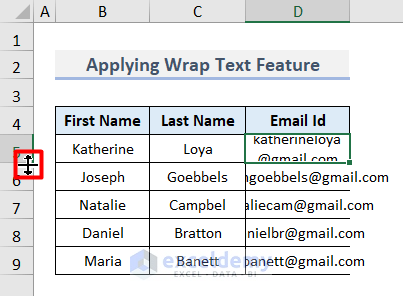
- Then, click on Wrap Text from the Home tab.
- After that, double-click on the both-sided arrow icon to make the cell bigger.
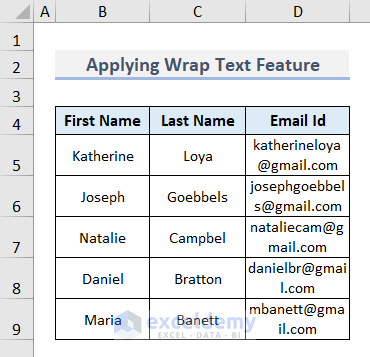
- Now, right-click on it and select the Format Painter icon from its Context Menu.
- Lastly, drag it through the column.
- In this way, you will get all the texts fitted in the bigger cells.
Read More: How to Reset Cell Size to Default in Excel
3. Changing Column Width to Expand a Cell with Mouse Click
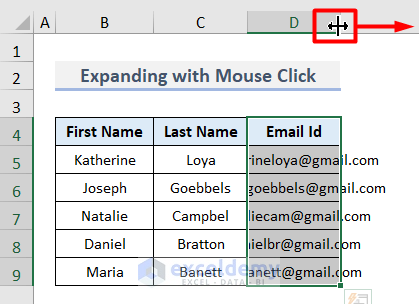
You can also make multiple cells bigger with simple mouse clicks. Let’s see how it works.
- First, select the Email ID column.
- Then, drag the indicated sign to the right to fit in the Email IDs in the cells.
- Also, you can double-click on this sign.
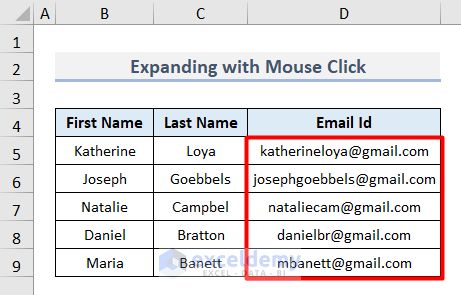
- In this way, the following result will appear.
4. Making a Cell Bigger Using Keyboard Shortcut in Excel
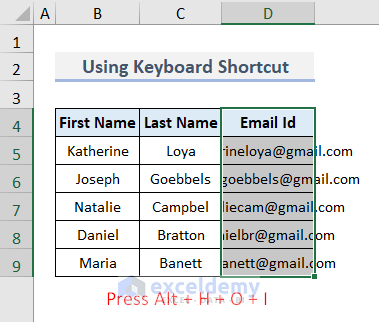
Many of you may not know, but it is possible to make cells bigger with keyboard shortcuts as well.
- First, select the column in which the cells are to be enlarged.
- Then, press Alt + H + O + I on your keyboard one after another.
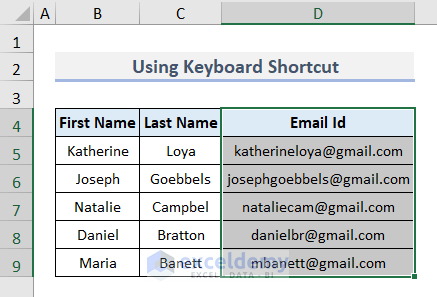
- In this way, the texts will be fitted into a bigger cell automatically.
Read More: How to Make Cells Independent in Excel
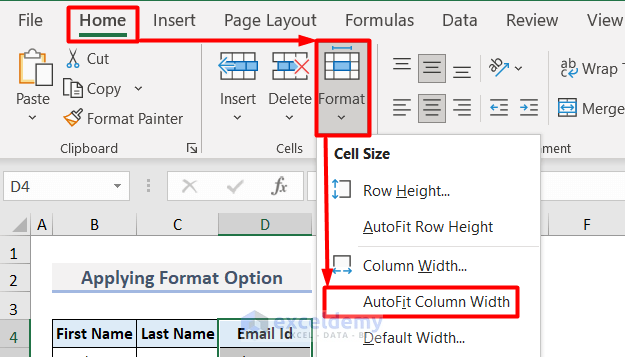
5. Applying Format Option to Create a Bigger Cell
The Format option in Excel is also very useful to make cells bigger. For this, follow the simple process below.
- First, select the Email ID column.
- Then, choose Home > Format > AutoFit Column Width.
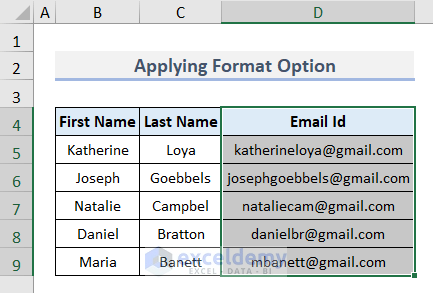
- Accordingly, the texts will be fitted in a bigger cell automatically.
Read More: How to AutoFit in Excel
6. Fixing Row Height with Format Option to Make a Bigger Cell
The Format option is also effective in adjusting row height and making the cells bigger.
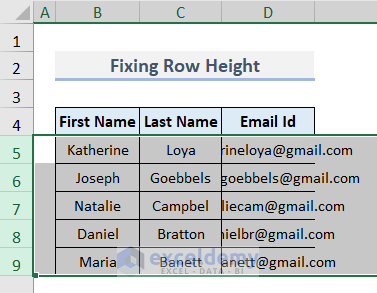
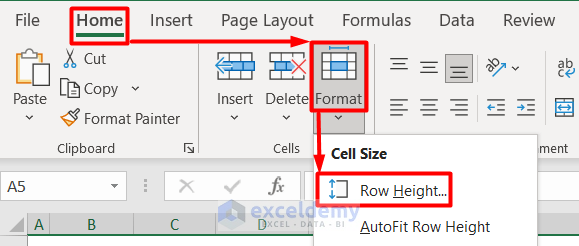
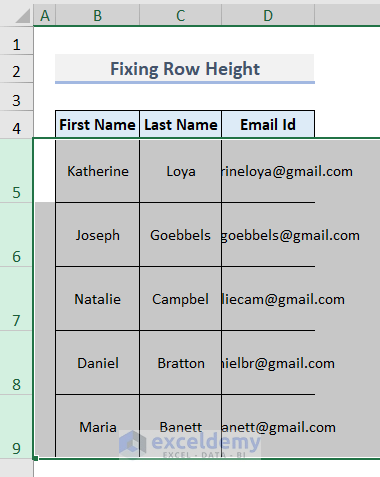
- First, select the range of rows that you want to enlarge, like here is Row 5 to Row 9.
- Then, select Home > Format > Row Height.
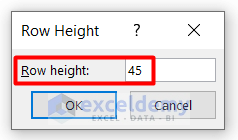
- Next, a Row Height dialog box will appear.
- Here, give a value for Row Height according to your needs.
- For example, we have given 45 points as Row Height.
- Afterward, press OK and the row heights will enlarge.
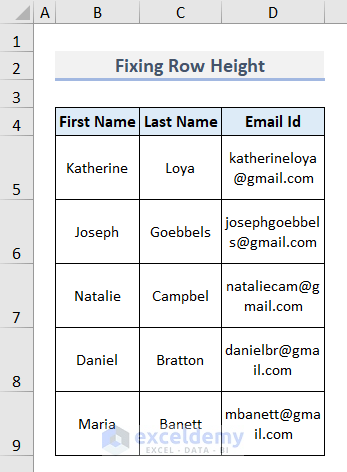
- Now, select the Email ID column and click on Home > Wrap Text.
- Finally, you will be able to fit the texts in the cells as shown below.
Read More: How to Make Excel Cells the Same Height and Width
7. Making a Cell Bigger with Excel VBA Code
In this last method, let us apply VBA code to enlarge cells in Excel.
- First, choose Visual Basic from the Developer Tab. You can do this by pressing Alt + F11 also.
- After that, the Microsoft Visual Basic for Applications window will appear.
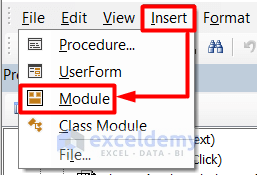
- Here, select Module from the Insert tab.
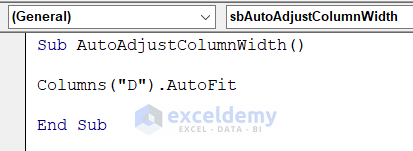
- Then, type this code on the blank page.
Sub AutoAdjustColumnWidth()
Columns("D").AutoFit
End Sub- Lastly, press F5 and the following result will appear.
Read More: How to Use AutoFit Shortcut in Excel
Download Practice Workbook
Conclusion
In this article, I tried to cover the seven easy ways to make a cell bigger in Excel. Hope this article will be helpful to you. If you have any further suggestions, feel free to share them with us.
Related Articles
- How to Make All Cells the Same Size in Excel
- How to Change Cell Size Without Changing Whole Column
- [Fixed] AutoFit Row Height Not Working for Merged Cells in Excel
- How to Fix Cell Size in Excel
<< Go Back to Cell Size | Excel Cells | Learn Excel
Get FREE Advanced Excel Exercises with Solutions!