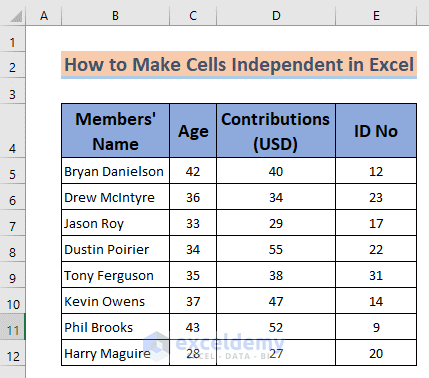
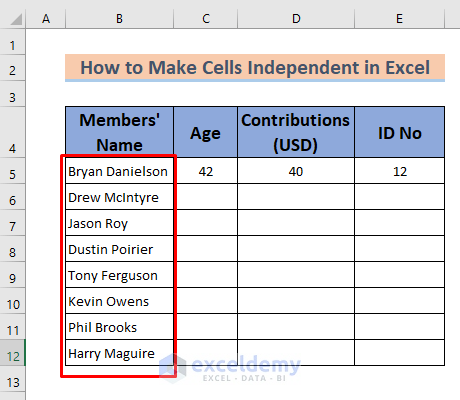
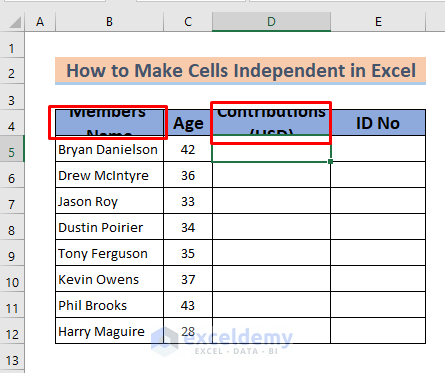
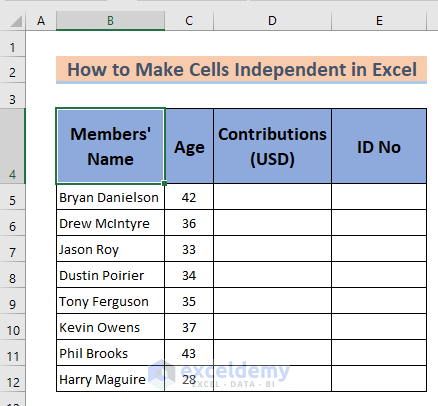
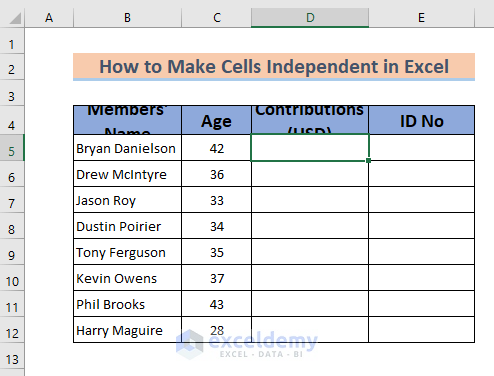
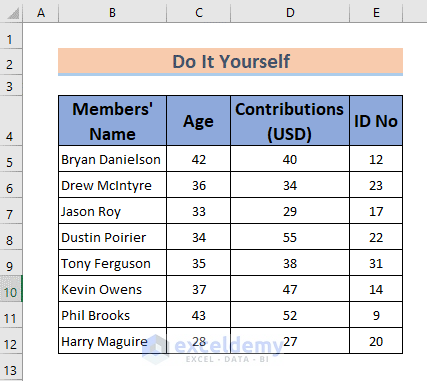
The dataset below shows information about some people in a charity organization, including their names, ages, contributions per month, and ID numbers.
How to Make Cells Independent in Excel: 5 Easy Methods
Method 1 – Adjusting the Column Width to Make Cell Size Independent
Case 1.1 – Using Double-Click to Adjust
If we need to write a word like a person’s name, the characters in that name don’t fit in a cell most of the time.
- We want to type the first name, which is Bryan Danielson, but it overflows the cell B5. This problem may occur for other names too.
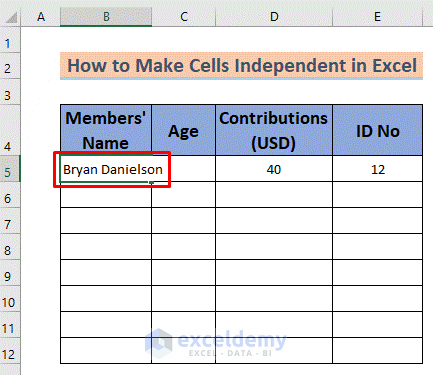
- To solve this problem, press Enter after typing Bryan Danielson.
- Insert other names one by one.

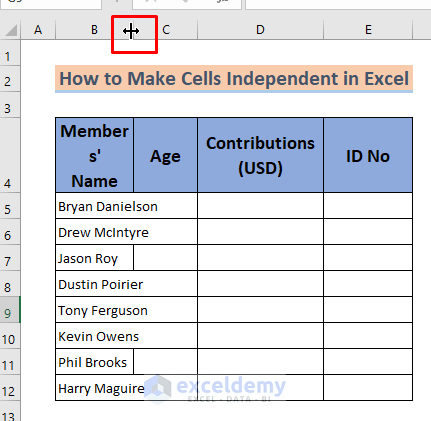
You can see that some of the names don’t fit in the cells (I didn’t put the other entries for convenience).
- Put your cursor on the separator between columns B and C in the table headers.
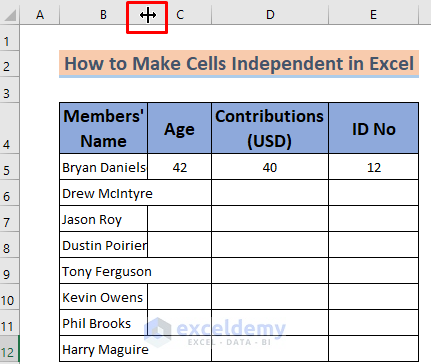
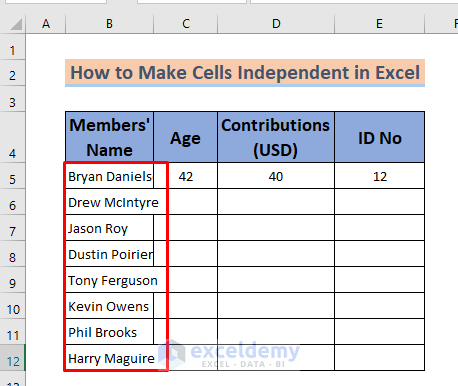
- An icon will appear that looks like a plus with arrows on the horizontal line. Double-click on it, which resizes the column B based on its contents.

Case 1.2. – Using the AutoFit Command from Format
- Type the names of members in cells B5 to B12.
- Select cells B5 to B12.
- Go to Home, then to Format, and select AutoFit Column Width.
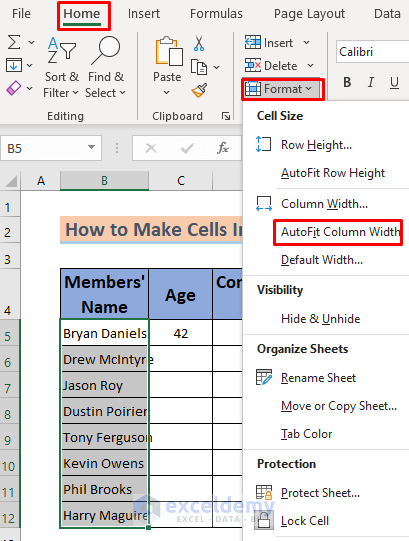
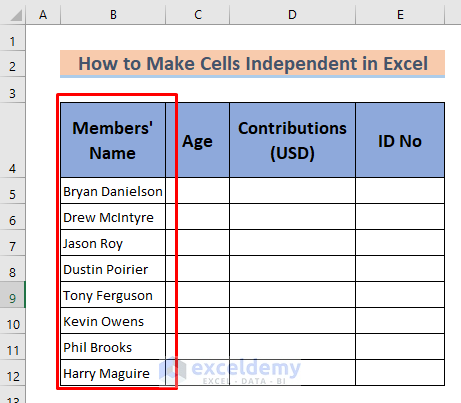
- This will fit the names in their cells and make them independent of others.
Read More: How to Use AutoFit Shortcut in Excel
Method 2 -Adjusting Row Height to Make Cell Size Independent in Excel
Case 2.1 – Using Double-Click to Adjust
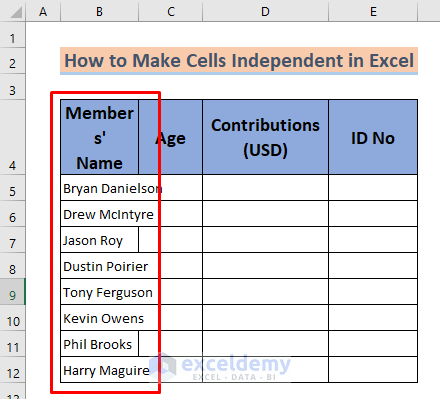
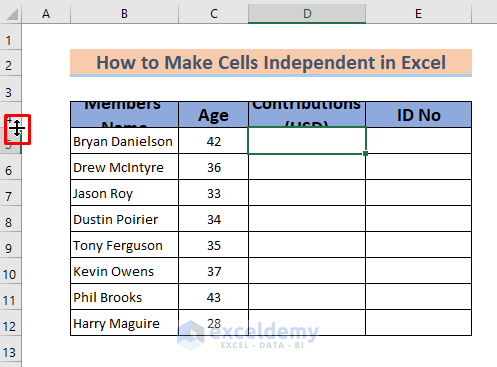
- Type “Members’ Name” in cell B4. Press Alt + Enter before typing Name. This inserts a line break.
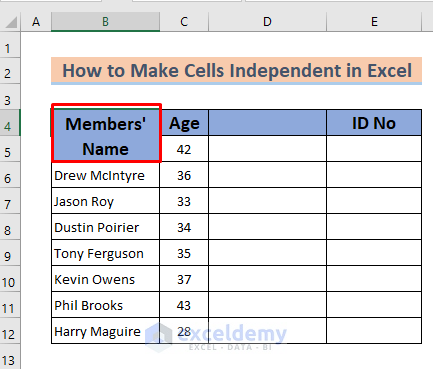
- Press Enter.
The heading Members’ Name is not clear in cell B4. The same thing will happen when you type Contributions (USD) in cell D4.
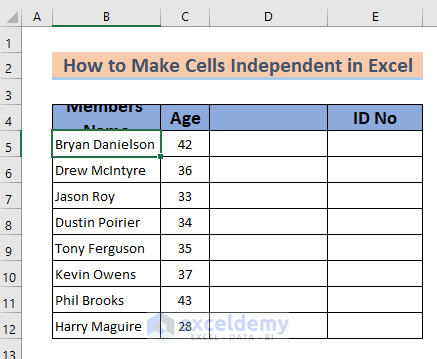
- Put your cursor between row headers 4 and 5.
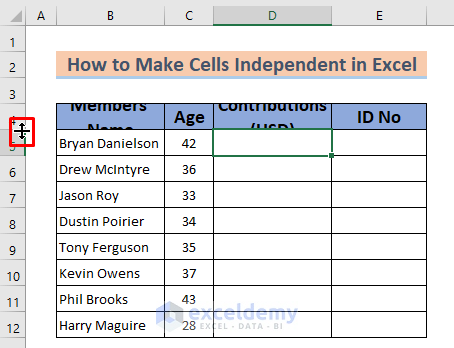
- Double-click on it, and the row will auto-adjust its height independent of other rows.
Read More: How to Auto Adjust Row Height in Excel
Case 2.2 – Using the AutoFit Command from Format
- Insert “Members’ Name” in cell B4, while using Alt + Enter to put a line break between the two words.

- Press Enter.

- The heading Members’ Name and Contributors (USD) don’t fit in their cells due to the height.

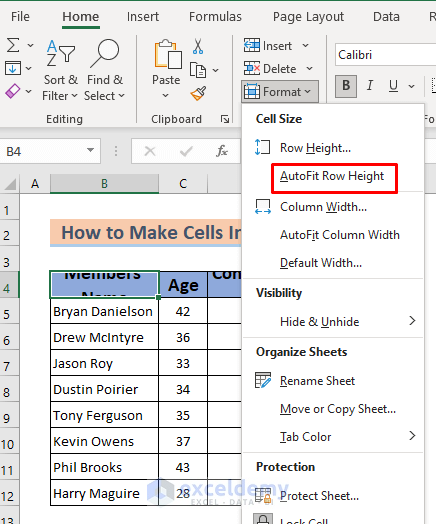
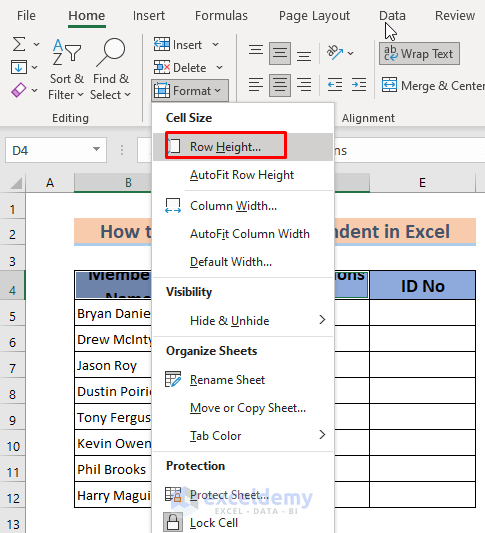
- Select any of the cells of the 4th row and go to Home, then select Format and choose AutoFit Row Height.
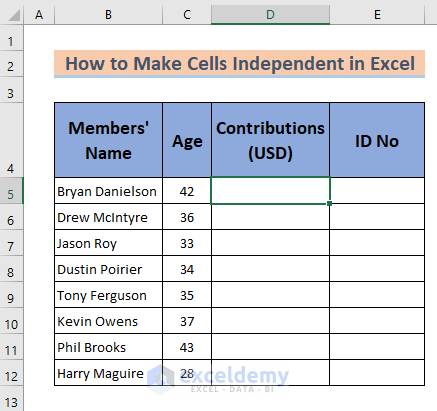
- This will change the height of row 4 to fit all current content.
Read More: How to AutoFit in Excel
Method 3 – Make Cells Independent by Using Column Width
Case 3.1 – Dragging the Mouse to Set a Point
- We put the entries in column B in a new Excel sheet.

- Put your cursor on the right edge of the column B letter header.
- Drag it to the right until the heading and name fit in cells. In this case, we dragged to the point where the column width becomes at least 14.29 units (marked in the following figure).

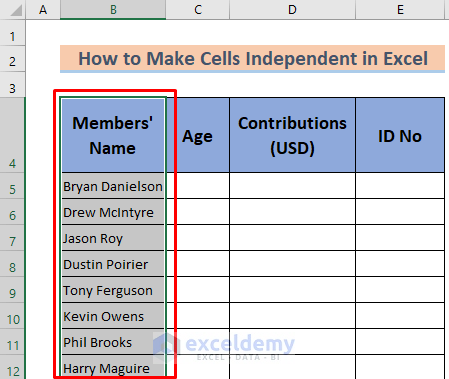
- You will see the names perfectly fitted in the cells independently.
Case 3.2 – Using Column Width from Format
- Input the names so they go over the cell width.
- Select cells from B4 to B12.
- Select Home ,then go to Format and select Column Width.
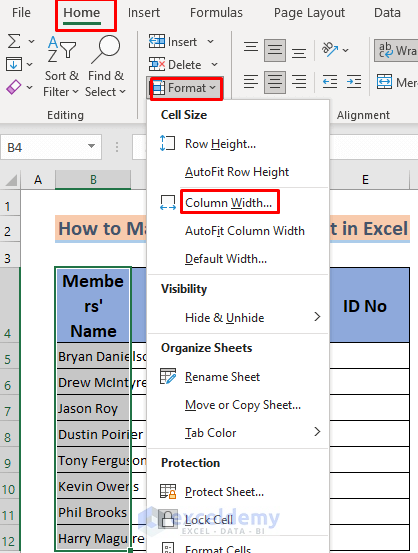
- You will see a dialog box on the screen.
- Type 14.3 or higher column width unit you want to put (for the example).
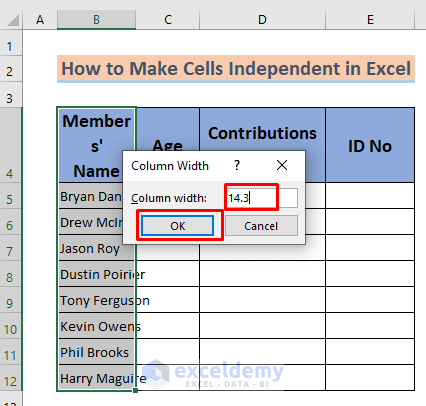
- Click OK.
Method 4 – Defining Row Height to Make Cells Independent
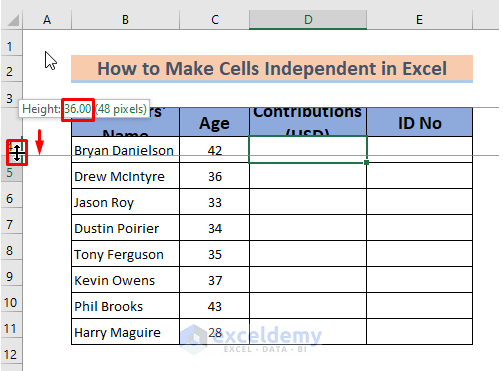
Case 4.1 – Dragging Mouse to Set a Point
- Type Members’ Name in cell B4, like in Case 2.1.

- Press Enter. You cannot see this heading clearly in the cell. The same thing will happen if you type Contributions (USD).
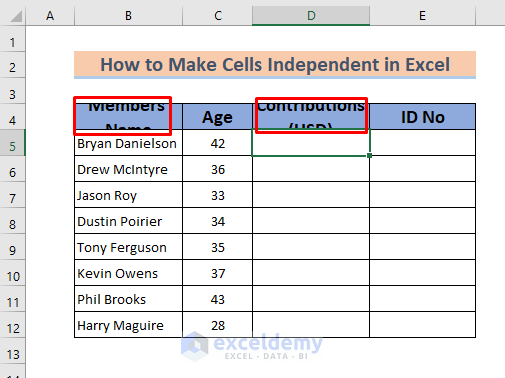
- Put your cursor on the drag icon at the end of the row 4 header.
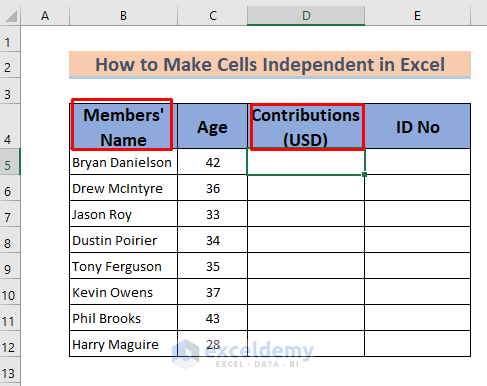
- Drag it down until these headings fit in cells B4 and D4. In this case, we dragged until the row height became 36 units (marked in the figure).
Here’s the result.
Read More: How to Make All Cells the Same Size in Excel
Case 4.2 – Using Row Height from Format
- Type Members’ Name in cell B4.
- Press Enter. You cannot see this heading clearly in the cell. The same thing will happen if you type Contributions (USD) like in section 2.1.
- Select any of the cells in the 4th row.
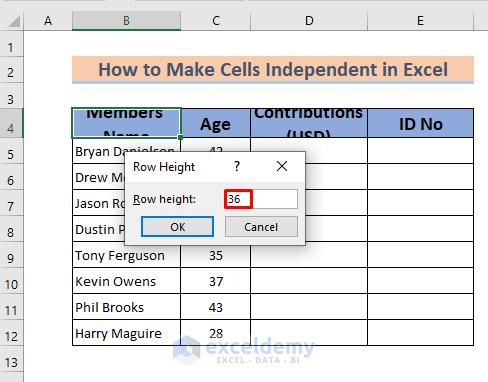
- Select Format and choose Row Height.
- Type 36 or more in the dialog box and click OK.
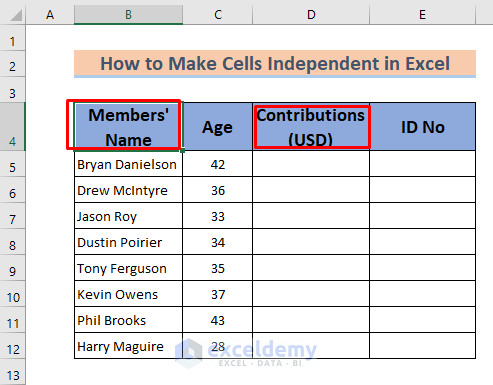
- You will see the headings perfectly fitted in cells B4 and D4.
Read More: How to Make Excel Cells With The Same Height and Width
Method 5 – Merging Cells for Making the Cells Independent in Excel
We want to add another heading above the existing ones that will span the entire table. We moved the information one row down by inserting a new row 4.
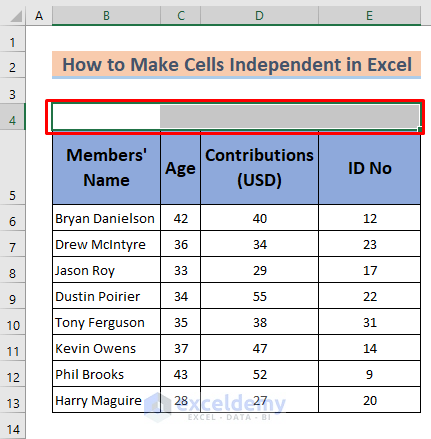
- Select cell B4 and type Members’ Information.
- Press Enter.
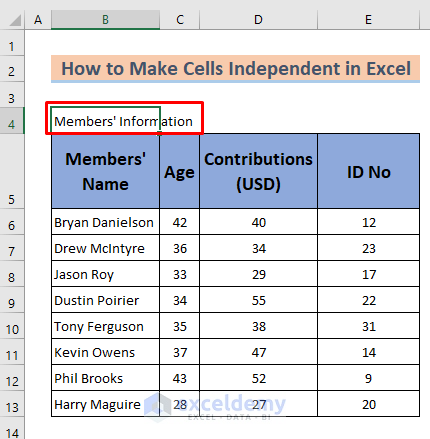
- Select cells B4 to E4.
- Go to Home and click on Merge & Center.
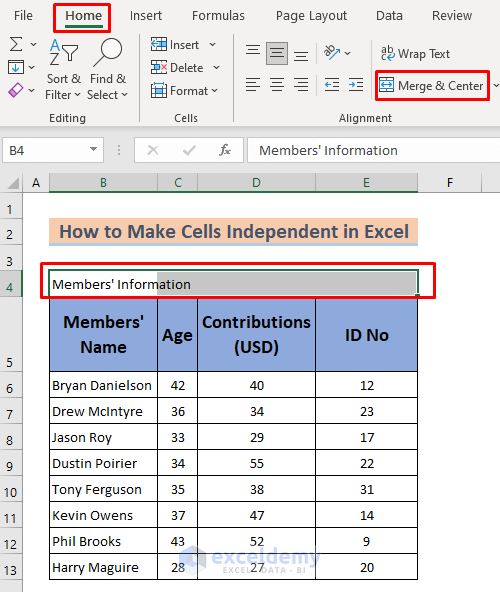
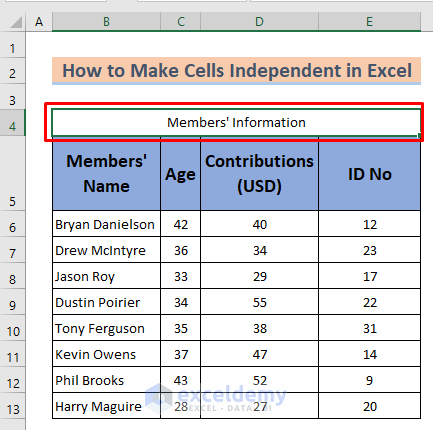
- Those 4 cells (B4 to E4) have turned into one cell. You can format the new cell as you wish. The value of the cell (i.e., the text) is only in B4.
Read More: [Fixed] AutoFit Row Height Not Working for Merged Cells in Excel
Practice Section
We’ve included a sample dataset where you can practice these methods.
Download the Practice Workbook
Related Articles
<< Go Back to Cell Size | Excel Cells | Learn Excel
Get FREE Advanced Excel Exercises with Solutions!

i still have a problem when making cells independent like creating different column sizez within different rows
Hello Francis Vosena,
Thank you for your question. In Excel, column widths are applied to the entire column, so it’s not possible to set different column sizes for different rows within the same column. If you need more space in specific rows, you can try alternatives such as merging adjacent cells, using Wrap Text, or adjusting row height to better fit the content. Another option is to split the data into separate columns or sections where different column widths can be applied.
Regards,
ExcelDemy