Solution 1 – Use an Updated Version of MS Excel (2010, 2013, 2016, 2019, 2021, 365 Versions)
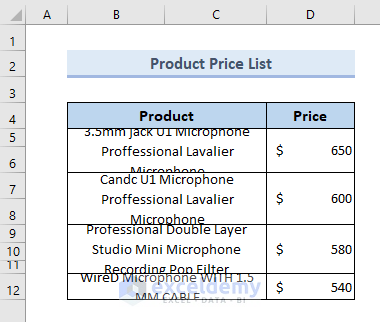
This is the sample dataset.
The Product column contains content in merged cells.
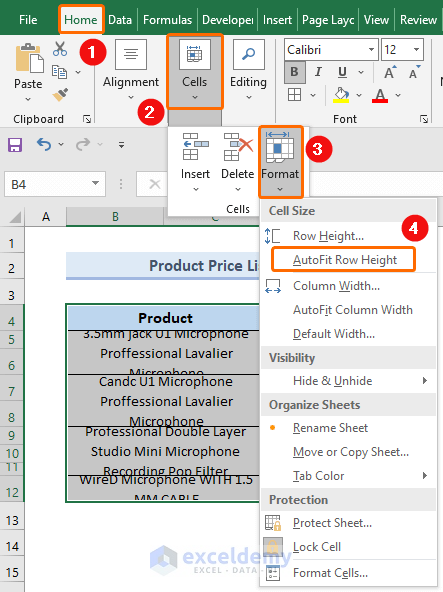
To apply the AutoFit Row Height command:
- Select the entire dataset.
- Go to the Home tab.
- In Cells, click Format.
- Choose AutoFit Row Height.
All cells fit, except the merged cells.
Note
The AutoFit Row Height command doesn’t work with merged cells in Excel 2003 and 2007. This command works in Microsoft Office 365, and other updated versions.
Read More: How to AutoFit in Excel
Solution 2 – Using a VBA code
- Press ALT + F11 to open the VBA editor.
- Go to Insert > Module.
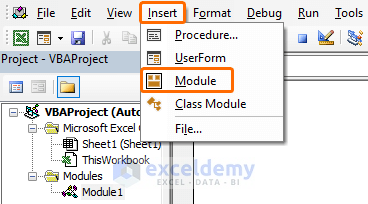
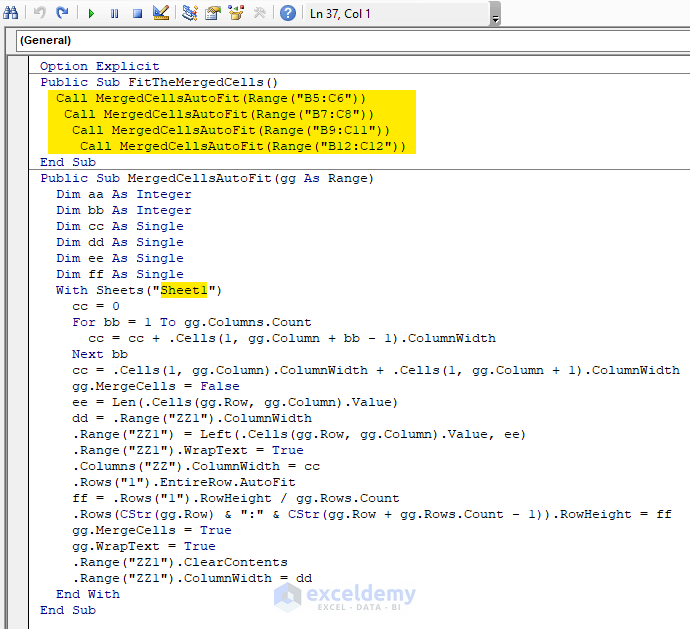
- Enter the following VBA code:
Option Explicit
Public Sub FitTheMergedCells()
Call MergedCellsAutoFit(Range("B5:C6"))
Call MergedCellsAutoFit(Range("B7:C8"))
Call MergedCellsAutoFit(Range("B9:C11"))
Call MergedCellsAutoFit(Range("B12:C12"))
End Sub
Public Sub MergedCellsAutoFit(gg As Range)
Dim aa As Integer
Dim bb As Integer
Dim cc As Single
Dim dd As Single
Dim ee As Single
Dim ff As Single
With Sheets("Sheet1")
cc = 0
For bb = 1 To gg.Columns.Count
cc = cc + .Cells(1, gg.Column + bb - 1).ColumnWidth
Next bb
cc = .Cells(1, gg.Column).ColumnWidth + .Cells(1, gg.Column + 1).ColumnWidth
gg.MergeCells = False
ee = Len(.Cells(gg.Row, gg.Column).Value)
dd = .Range("ZZ1").ColumnWidth
.Range("ZZ1") = Left(.Cells(gg.Row, gg.Column).Value, ee)
.Range("ZZ1").WrapText = True
.Columns("ZZ").ColumnWidth = cc
.Rows("1").EntireRow.AutoFit
ff = .Rows("1").RowHeight / gg.Rows.Count
.Rows(CStr(gg.Row) & ":" & CStr(gg.Row + gg.Rows.Count - 1)).RowHeight = ff
gg.MergeCells = True
gg.WrapText = True
.Range("ZZ1").ClearContents
.Range("ZZ1").ColumnWidth = dd
End With
End Sub- Go back to the VBA editor and press CTRL + V to paste the code.
- Call the functions to fix each of the merged cells:
Call MergedCellsAutoFit(Range("B5:C6"))
Call MergedCellsAutoFit(Range("B7:C8"))
Call MergedCellsAutoFit(Range("B9:C11"))
Call MergedCellsAutoFit(Range("B12:C12"))- Name your worksheet:
With Sheets("Sheet1")- Press CTRL + S to save the code.
- To run the code, press F5 or click Run Sub.
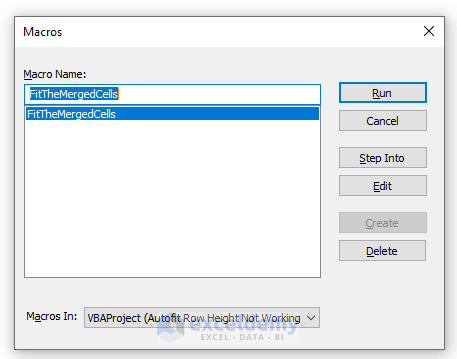
In the Macros dialog box.
- Click Run.
This is the output.
![[Solve] AutoFit Row Height Not Working Against the Merged Cells in Excel](https://www.exceldemy.com/wp-content/uploads/2022/03/excel-autofit-row-height-not-working-merged-cells-6.png)
Read More: How to Use AutoFit Shortcut in Excel
Download Practice Workbook
Download the Excel file here.
Related Articles
- How to Make Excel Cells With The Same Height and Width
- How to Make a Cell Bigger in Excel
- How to Make All Cells the Same Size in Excel
- How to Make Cells Independent in Excel
- How to Change Cell Size in Excel
- How to Fix Cell Size in Excel
<< Go Back to Cell Size | Excel Cells | Learn Excel
Get FREE Advanced Excel Exercises with Solutions!

I use Microsoft Office 2019 and autofit row height preferences is not working for merged cells. There is any suggestion on this issue?
Hello, GOKTUG! All of our contents were prepared based on Excel 365 version only. So, I recommend using the Excel 365 version instead of 2019. Hopefully it should fix your issues!
Hi All,
How can I apply this as a loop to all worksheets in a file (100 tabs). The “With Sheets(“Sheet1″)” in this case will be applicable to all sheet names. Thank you in advance.
Use of “for loop” function is a very simple approach for this purpose. You can use the following code to merged the defined cells to 100 tabs. Based on your sheets, you just need to change the value of “i” in the code.
Option Explicit
Public Sub FitTheMergedCells()
Call MergedCellsAutoFit(Range(“B5:C6”))
Call MergedCellsAutoFit(Range(“B7:C8”))
Call MergedCellsAutoFit(Range(“B9:C11”))
Call MergedCellsAutoFit(Range(“B12:C12”))
End Sub
Public Sub MergedCellsAutoFit(gg As Range)
Dim aa As Integer
Dim bb As Integer
Dim cc As Single
Dim dd As Single
Dim ee As Single
Dim ff As Single
Dim i As Integer
For i = 1 To 100
With Sheets(“Sheet” & i)
cc = 0
For bb = 1 To gg.Columns.Count
cc = cc + .Cells(1, gg.Column + bb – 1).ColumnWidth
Next bb
cc = .Cells(1, gg.Column).ColumnWidth + .Cells(1, gg.Column + 1).ColumnWidth
gg.MergeCells = False
ee = Len(.Cells(gg.Row, gg.Column).Value)
dd = .Range(“ZZ1”).ColumnWidth
.Range(“ZZ1”) = Left(.Cells(gg.Row, gg.Column).Value, ee)
.Range(“ZZ1”).WrapText = True
.Columns(“ZZ”).ColumnWidth = cc
.Rows(“1”).EntireRow.AutoFit
ff = .Rows(“1”).RowHeight / gg.Rows.Count
.Rows(CStr(gg.Row) & “:” & CStr(gg.Row + gg.Rows.Count – 1)).RowHeight = ff
gg.MergeCells = True
gg.WrapText = True
.Range(“ZZ1”).ClearContents
.Range(“ZZ1”).ColumnWidth = dd
End With
Next i
End Sub
Hi all,
Thanks for the provided VBA code. I have a question about the purpose of the line
cc = .Cells(1, gg.Column).ColumnWidth + .Cells(1, gg.Column + 1).ColumnWidth
It seems that it overcomes the previous value of cc calculated on the loop that goes through all the columns of the merged range.
The result, as a consecuence, may not be into the desired adjustement of the merged range.
Please, consider explaining the purpose of the line. Maybe is it a mistake?
Thanks in advance
Thanks, SR DIABLO!
Thanks for your comment!
Yes, you are right! Actually, the purpose of this line is the same as the loop. You can either use this block of code.
Alternatively, you can use this line instead of using the loop.
You can skip the line or comment on the line using an apostrophe in front of the line you wish to turn into non-executable code. It’s actually not a mistake. The code will work properly if you do not remove it! But I suggest you use any one of those.
Good Luck!
Regards,
Sabrina Ayon
Author, ExcelDemy.
ASAP Utilities has, among many other things, a very easy to use command for autofitting cells. It works even with merged cells. No code to write, just select the function from the menu and apply. I don’t work for ASAP or gain any benefit from others using it.
Hello,
Thank you for sharing this tip! Yes, ASAP Utilities is indeed a great add-in with a wide range of handy Excel tools, and its ability to autofit merged cells without coding is super helpful. It’s a fantastic time-saver for those who often deal with formatting issues. Appreciate your input!
Regards
ExcelDemy