In this article we will explain five methods to change cell size in Excel.
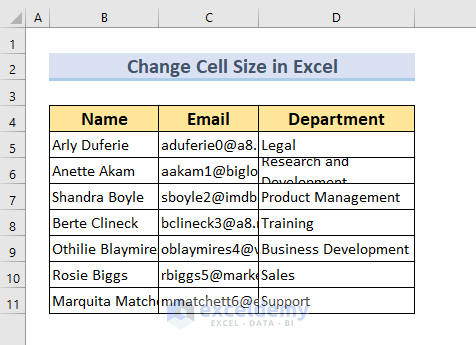
To demonstrate the methods, we’ll use the following sample dataset containing cell contents that don’t fit well in their cells. We’ll change the cell size so the cell contents fit properly.
Method 1 – Using the Format Menu to Change Cell Size
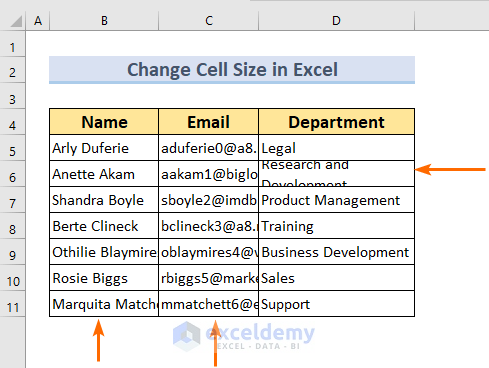
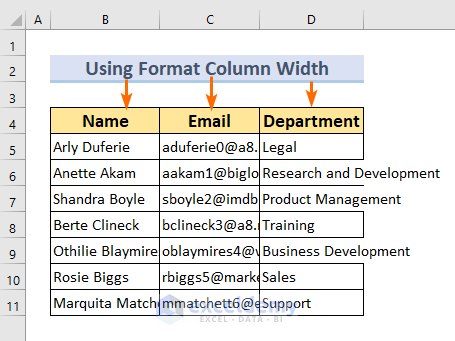
We can’t see the full values in columns Name and Email and cell D6. To show the full contents of these cells, we’ll use Excel’s Format option.
1.1 – Changing the Row Height
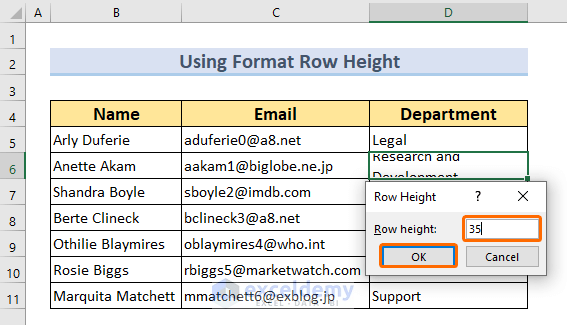
First, we will change the row height of cell D6.
Steps:
- Select cell D6.
- From the Home tab >> go to Format >> select Row Height…
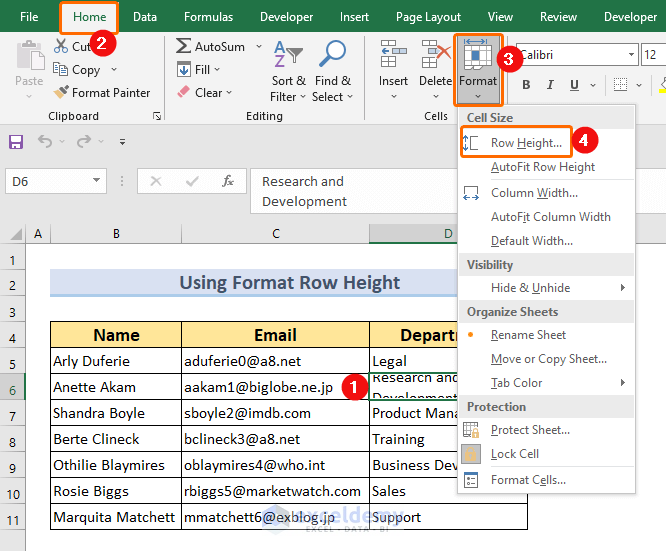
The Row Height dialog box will appear.
- Type 35 in the Row height box.
- Click OK.
This value will have to be set by trial and error. If the contents don’t quite fit right, repeat the process to increase or decrease the row height accordingly.
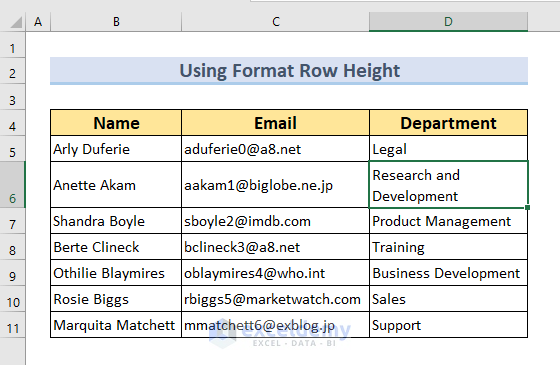
After some tweaks, the value in cell D6 is fully visible.
1.2 – Changing the Column Width
All the columns contain values that are too long to fit properly. We can make them fit by changing the column width.
As not all columns are equal in size, we will change the widths column by column. However, we could select all three columns and perform the same steps to change the widh of all 3 at once.
Steps:
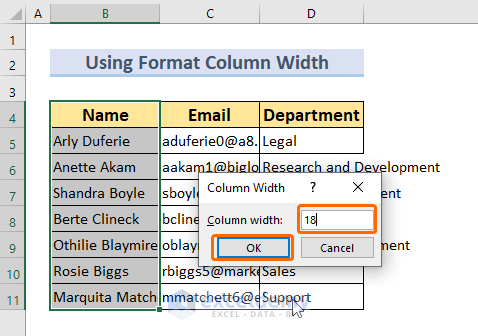
- Select the Name column.
- From the Home tab >> select Format >> Column Width…
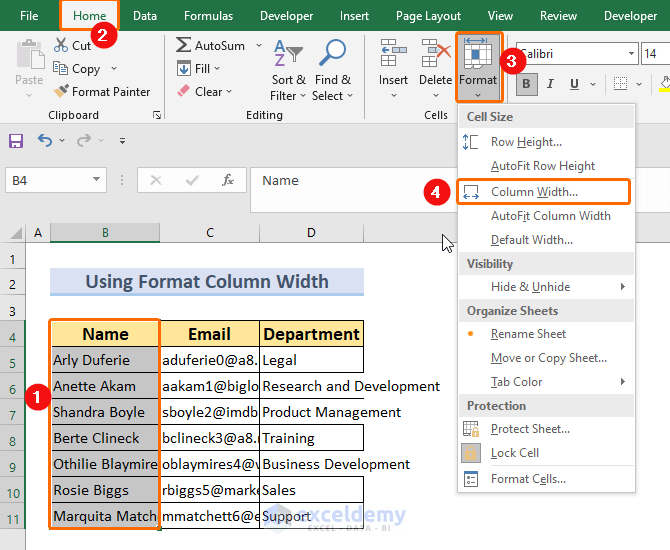
The Column Width dialog box will appear.
- Type 18 in the Column width box.
- Click OK.
The Name column is now fully visible.
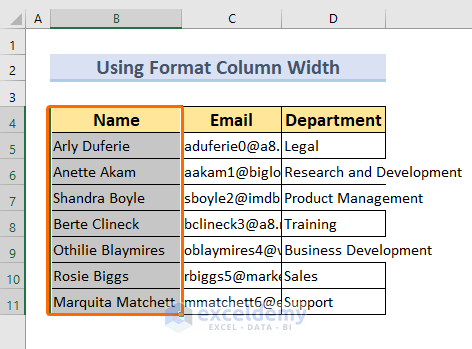
- Repeat the process for the Email and Department columns. Appropriate values for their column widths are 26 and 27 respectively.
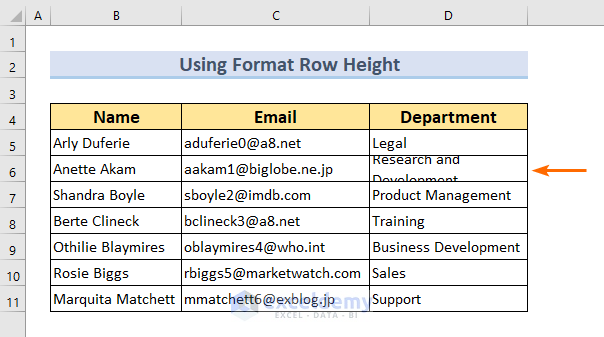
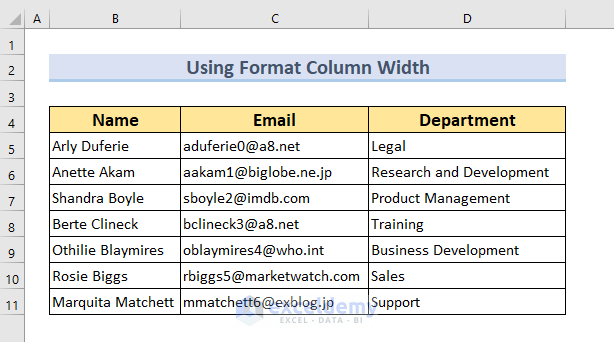
The final table looks like this:
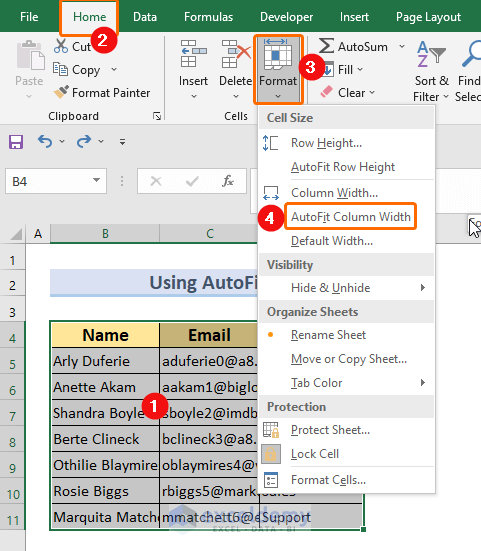
Method 2 – Using AutoFit to Change Cell Size in Excel
We can also use AutoFit in Excel to change the cell size in our dataset.
Steps:
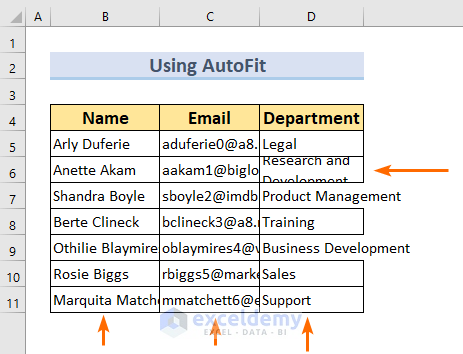
- Select the range to apply AutoFit. Here, B4:D11.
- From the Home tab >> select Format >> AutoFit Column Width.
This will AutoFit the columns.
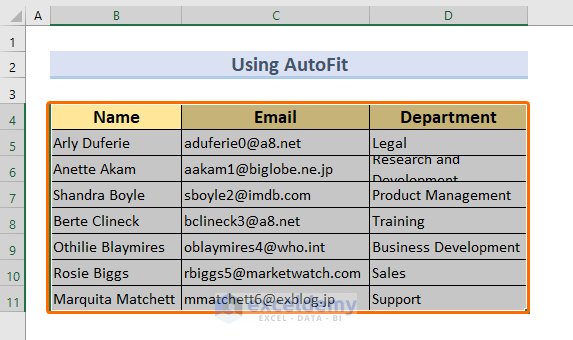
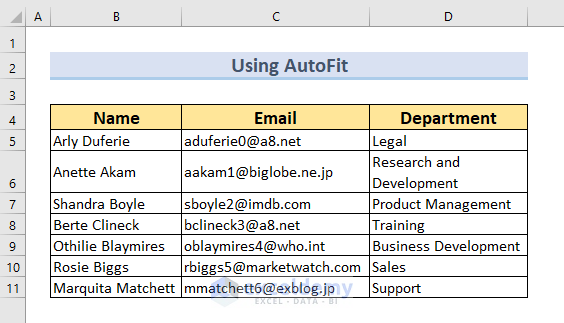
Now we will AutoFit the rows.
- Re-select the table (If it is already selected, no need to do it again).
- Go to Home >> Format >> AutoFit Row Height.

Everything is visible in our dataset.
Read More: How to Use AutoFit Shortcut in Excel
Method 3 – Matching the Column Width to Change Cell Size
Now we’ll use the match column width command from the Paste Special command in Excel to change cell size. Our Email column will match the width of the column Department.

Steps:
- Select the cell range D4:D11.
- Press CTRL + C to copy the cells.
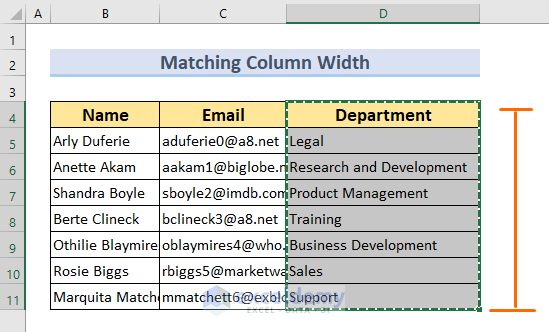
- Select the Email column.
- From the Home tab >> select Paste >> Paste Special…
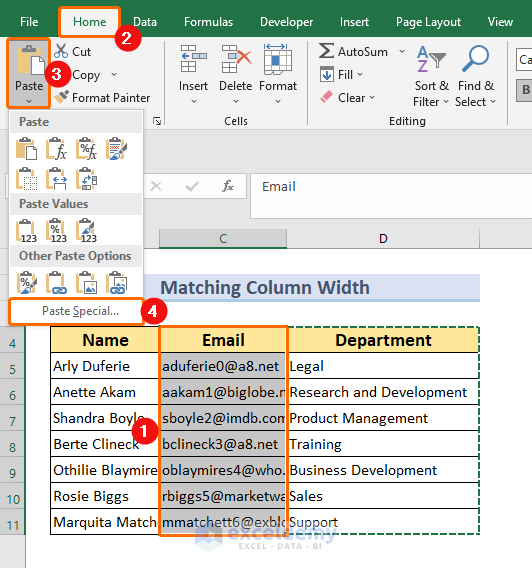
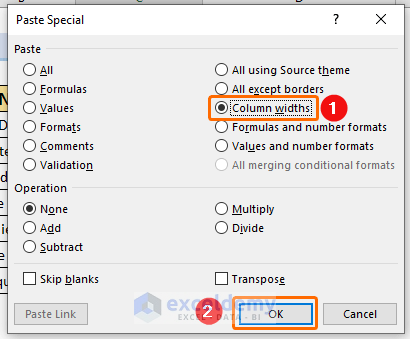
- Select Column widths.
- Press OK.
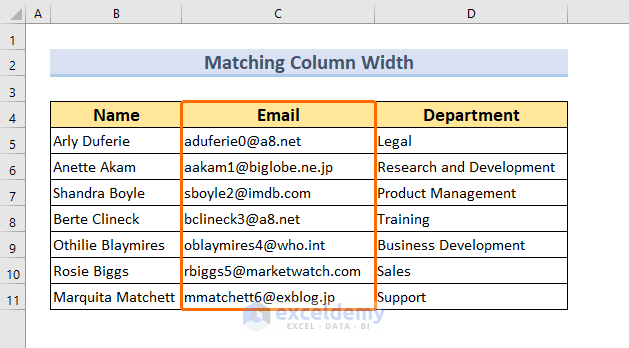
The Email column width is set to the width of the Department column.
Read More: [Fixed] AutoFit Row Height Not Working for Merged Cells in Excel
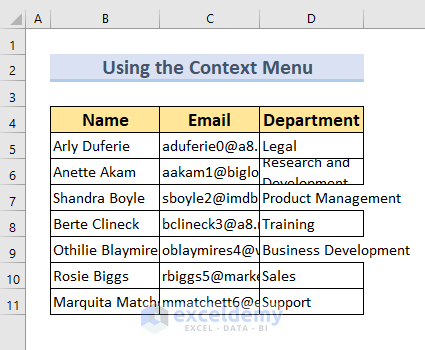
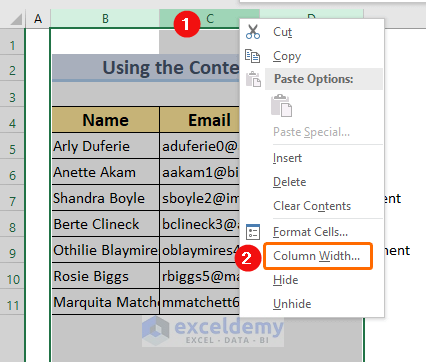
Method 4 – Using the Context Menu to Change Cell Size
We can change the cell size in Excel by utilizing the Context Menu.
Steps:
In this method, we will change all 3 column widths in one go.
- Select all 3 columns.
- Right-click on the mouse to bring up the Context Menu.
- Select Column Width…
The Column Width dialog box will appear.
- Type 22 in the Column width box.
- Click OK.
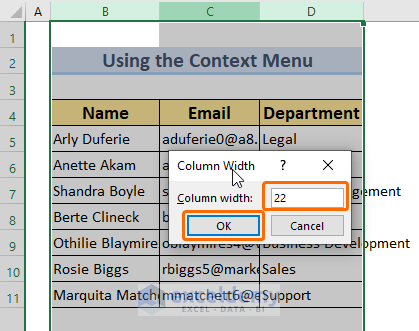
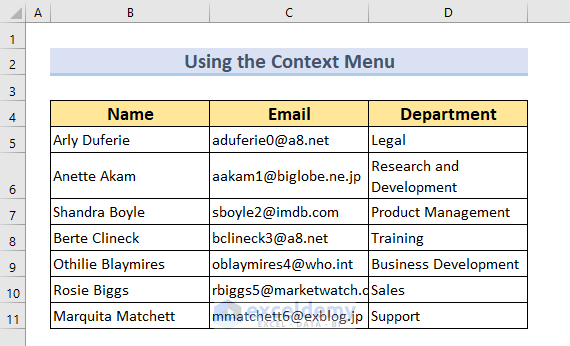
The cell size in all 3 columns changes to the specified width.
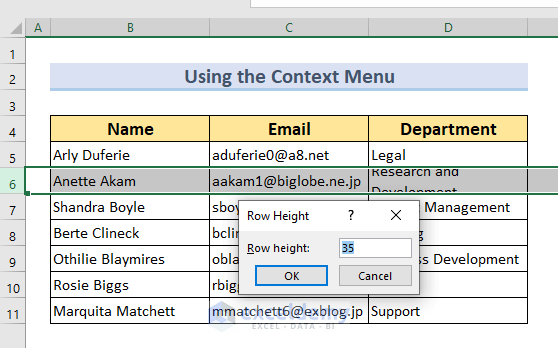
Cell D6 is not fully visible yet. To correct that:
- Select cell D6.
- Right-click on the mouse to bring up the Context Menu.
- Click Row Height…
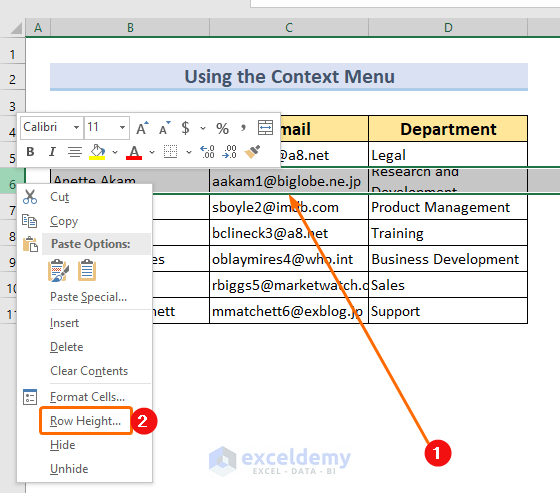
The Row Height dialog box will appear.
- Type 35 in the Row height box.
- Click OK.
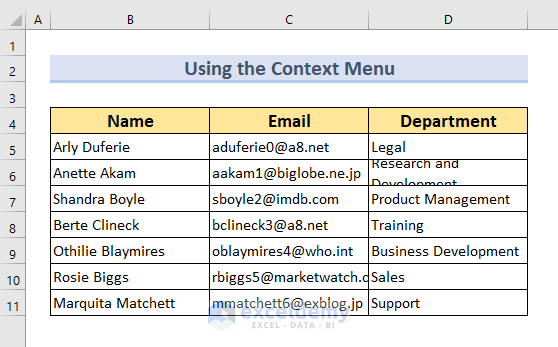
The final table should look like this:
Read More: How to Make All Cells the Same Size in Excel
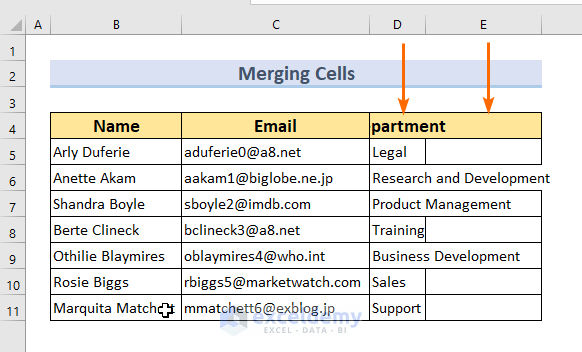
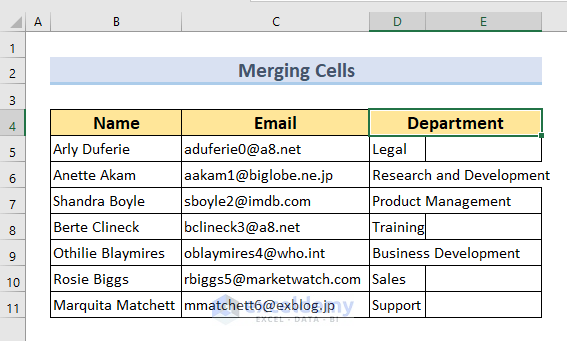
Method 5 – Change Cell Size by Merging Multiple Columns
In our dataset, the column label Department is not showing properly. We can merge column D with column E to change the cell size to fix this.
Steps:
- Select the range D4:E4.
- From the Home tab >> select Merge & Center >> Merge Cells.
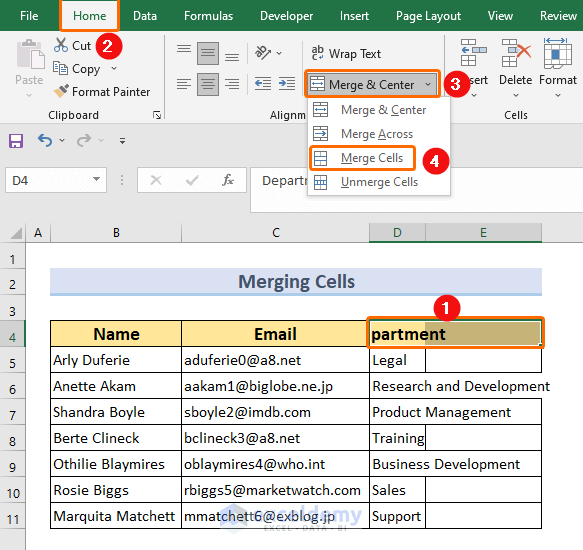
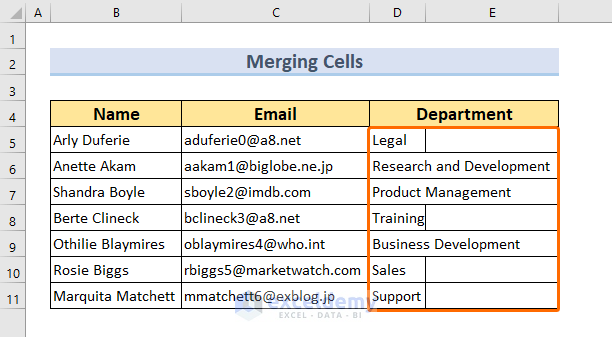
The cell range will be merged. Now, we can see the text Department.
- Similarly, perform the same actions on the rest of the cells, selecting them one by one.
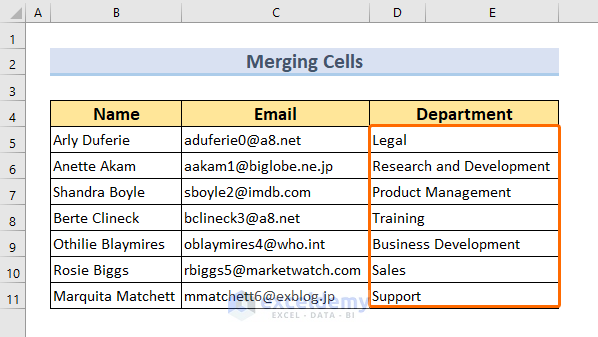
The final table should look like this:
Download Practice Workbook
Related Articles
- How to Make a Cell Bigger in Excel
- How to Make Cells Independent in Excel
- How to Make Excel Cells the Same Height and Width
- How to Fix Cell Size in Excel
<< Go Back to Cell Size | Excel Cells | Learn Excel
Get FREE Advanced Excel Exercises with Solutions!
