Method 1 – Using Column Width Command to Make All Cells Same Size in Excel
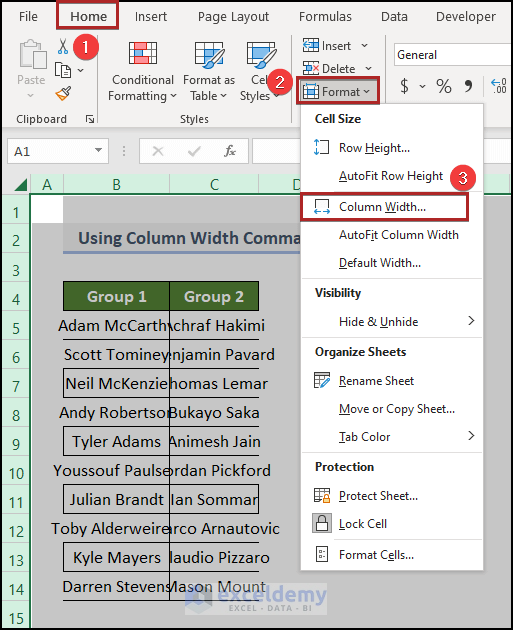
- Click on the Select All option, which is marked inside a highlighted area in the figure below. It’ll select all the cells in the spreadsheet. Or, you can also use shortcut keys CTRL + A.

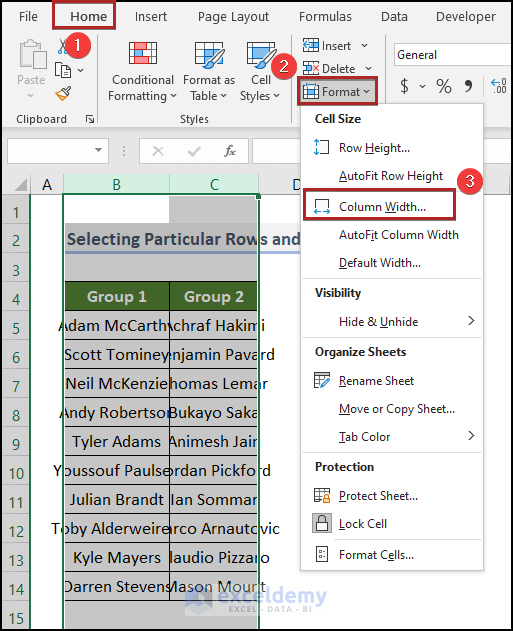
- Go to the Home tab.
- Select the drop-down named Format on the Cells group.
- Tap on the Column Width command on the drop-down list.
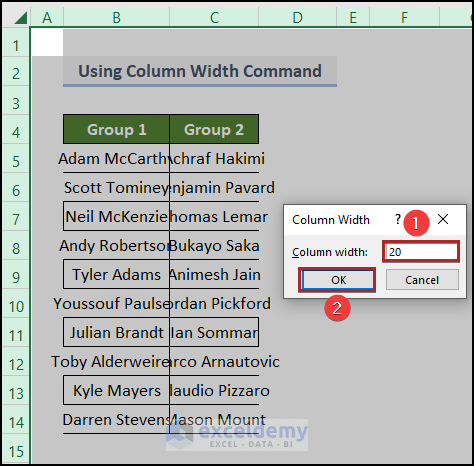
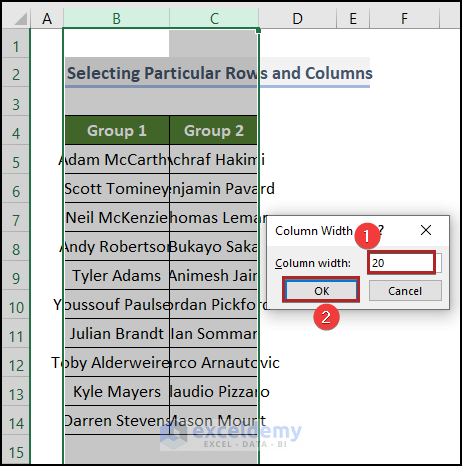
The Column Width input box will appear.
- Enter the desired Column width you want. We’ve entered 20.
- Click OK.
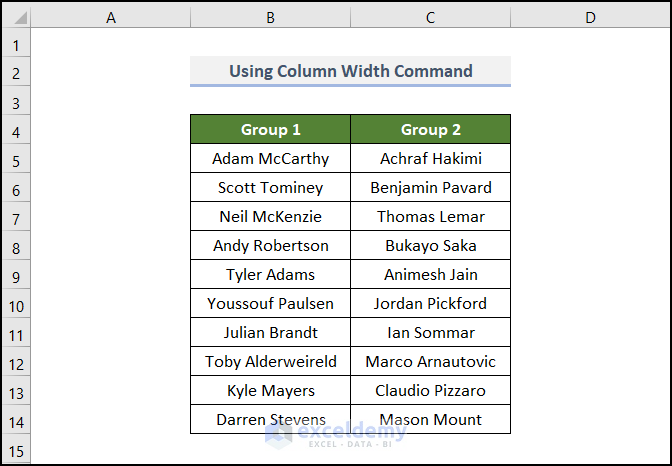
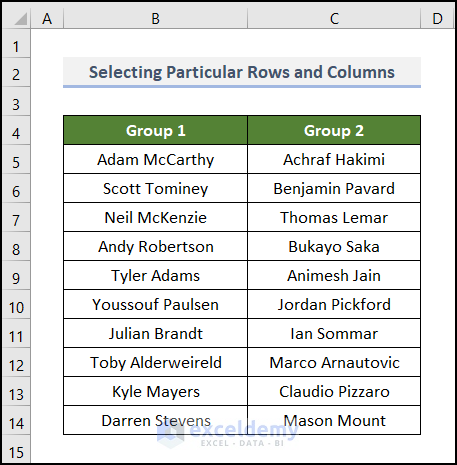
The column widths will become the same size. The two groups of names are now fully visible due to the resizing of the cells.
Method 2 – Selecting Particular Excel Rows and columns to Make the Same Size for All Cells
Steps:
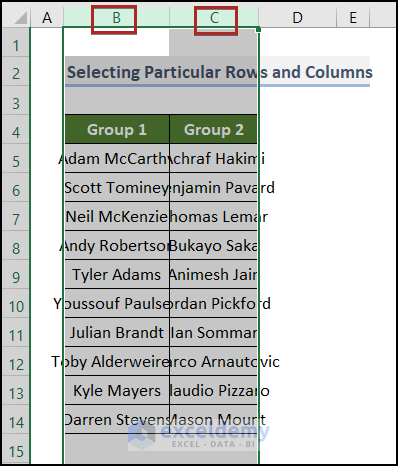
- Select Column A.
- Press the SHIFT key.
- Hold down the SHIFT key and click on Column B. This will select columns A & B together.
- Follow the steps shown in the previous method. Choose the Column Width command & an input box will appear.
- Enter the number you want as the Column width.
- Press ENTER or click OK.
Columns B and C will be resized while other columns will remain unchanged.
You can follow the same procedures to resize rows.
Read More: How to Make Excel Cells the Same Height and Width
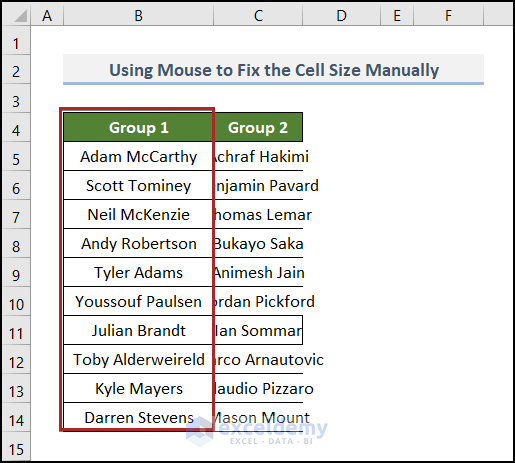
Method 3 – Using the Mouse to Fix the Same Size for All Excel Cells Manually
Steps:
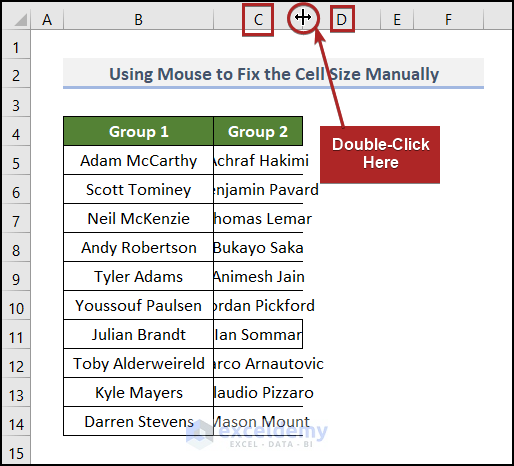
- There is an extension border between columns B and C.
- Hover the mouse cursor over the extension border. The cursor will change its shape into an arrow (or symbol) that indicates you can drag the border to resize it leftward or rightward.
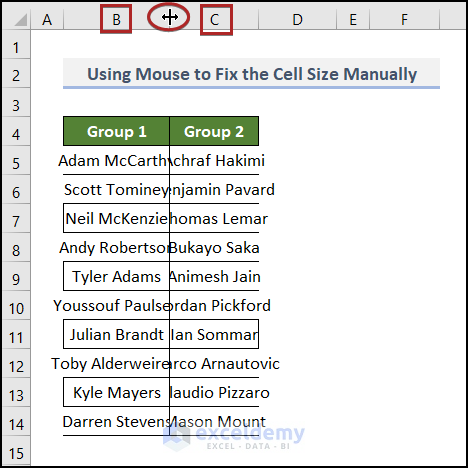
- Double-click the left button of the mouse.
It will resize Column B only.
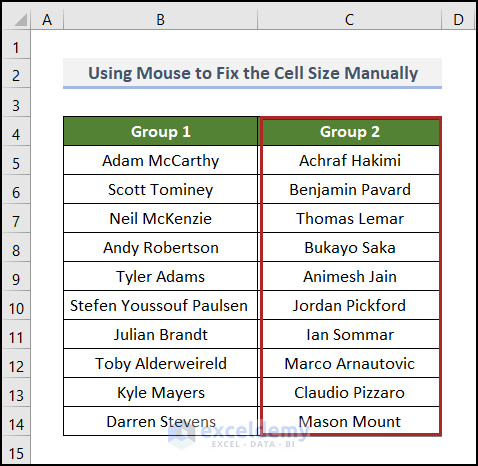
To resize Column C which is currently merged with Column D, follow the same procedure.
- Hover the mouse cursor over the border between columns C and D.
- Double-click the mouse and Column C will be resized automatically.
Read More: How to Fix Cell Size in Excel
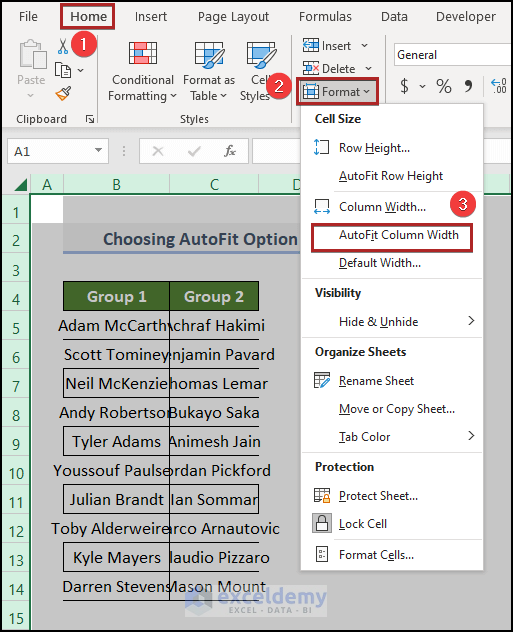
Method 4 – Selecting AutoFit Option for Fixed Column Width & Row Height
Steps:
- Click on the Select All icon in the left top corner under the Name box.

- Go to the Home tab.
- Click on the Format drop-down on the Cells group.
- Select AutoFit Column Width from the list.
The columns will be resized.

Read More: How to Use AutoFit Shortcut in Excel
Method 5 – Applying Excel VBA to Make All Cells the Same Size
Steps:
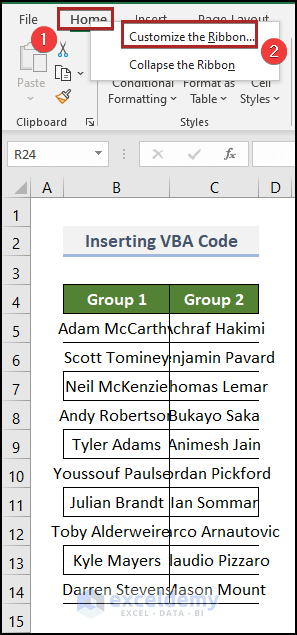
- Right-click on the Home tab.
- Select the Customize the Ribbon… command.
- Under the Customize the Ribbon section on the right, select Main Tabs.
Under Main Tabs, you’ll see the Developer option is unchecked.
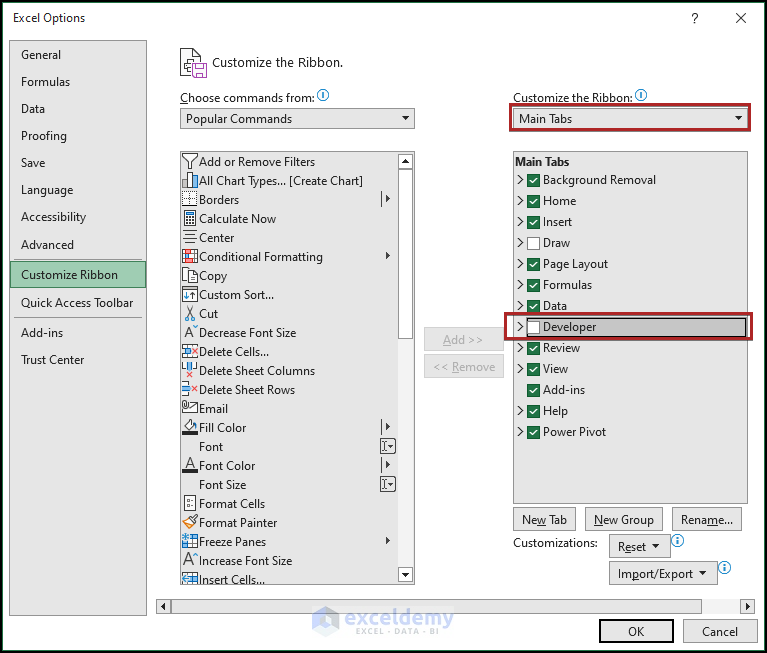
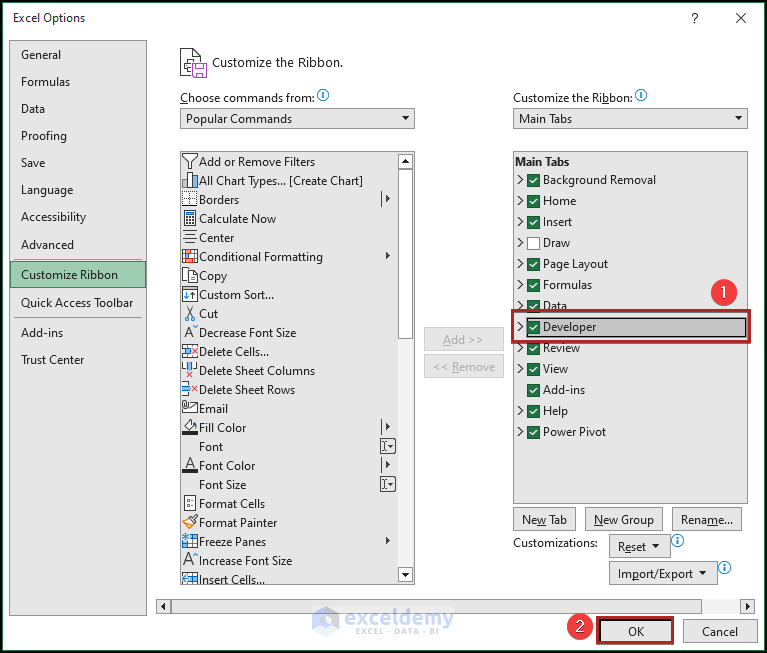
- Check the box of the Developer option & press OK.
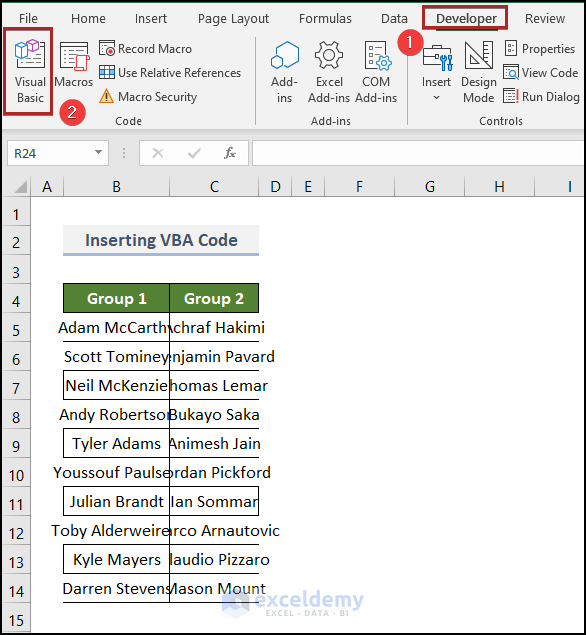
The Developer tab will be added to the Ribbon.
- G to the Deoveloper tab.
- Click on the Visual Basic command.
The Microsoft Visual Basic for Applications window appears.
- Go to the Insert tab.
- Select the Module option.
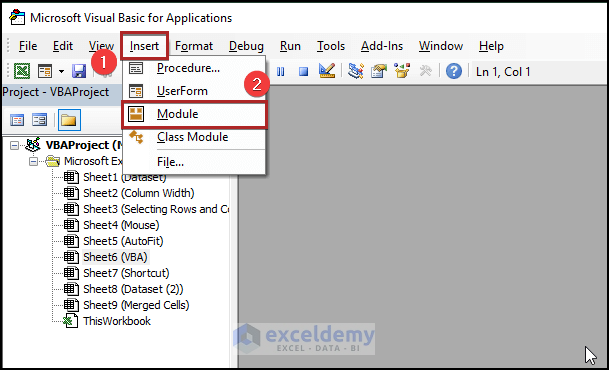
- Add the code below in the module.
Sub resize()
Selection.ColumnWidth = 25
Selection.RowHeight = 20
End Sub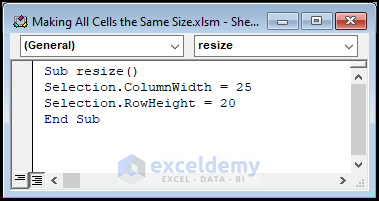
You can change the value for ColumnWidth as well as for the RowHeight which will resize the cells according to your input criteria.
- Run the code by pressing F5 on the keyboard or clicking on the Play (marked inside the red box) button shown in the figure.
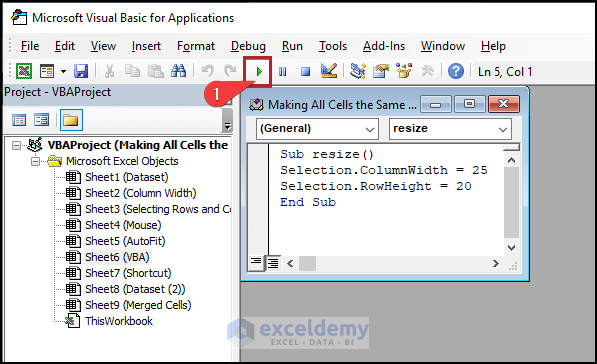
The columns will be resized.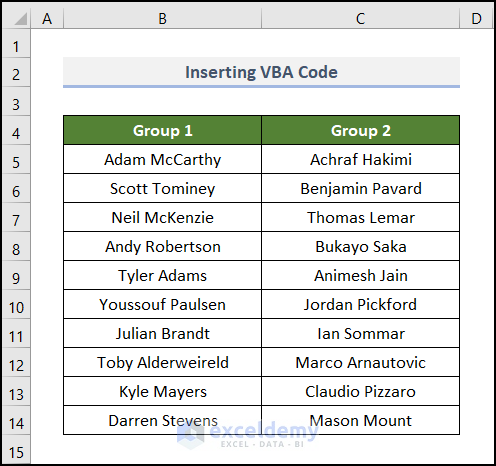
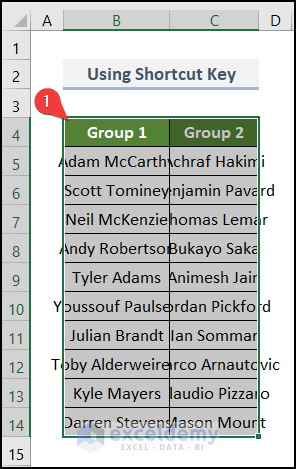
Method 6 – Making All Cells the Same Size Using Shortcut in Excel
Steps:
- Select cells in the B4:C14 range that you want to resize.
- Press the ALT key and without releasing it, press the H, O, and W keys one after another.
- It will open the Column Width input box.
- Set your desired Column width and click OK.

The columns will be resized.

Method 7 – Adjusting All Merged Cells the Same Size in Excel
Steps:
- Select the whole data range in the worksheet.
- Go to the Home tab.
- In the Alignment group, click on the Merge & Center command.
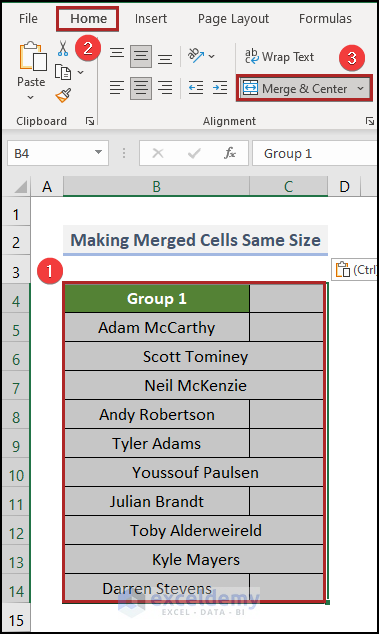
It will unmerge all the selected cells.
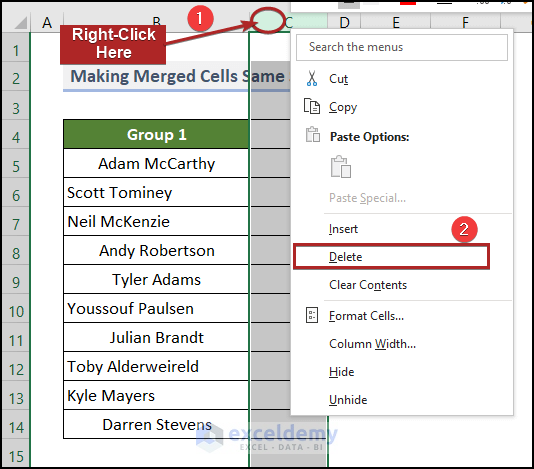
- Right-click on Column C.
- Select the Delete option from the context menu.
- Change the width of Column B as shown in the previous methods.

To fix the alignment of the cells,
- Go to the Home tab.
- Click on the Middle Align icon.
- Click on the Centre Align icon.

The cells in the column will get aligned.

Read More: [Fixed] AutoFit Row Height Not Working for Merged Cells in Excel
Related Articles
- How to AutoFit in Excel
- Make Cells Independent in Excel
- How to Make a Cell Bigger in Excel
- How to Change Cell Size in Excel
<< Go Back to Cell Size | Excel Cells | Learn Excel
Get FREE Advanced Excel Exercises with Solutions!
