Sometimes while working on Excel, we insert too many comments and notes, and often their position needs to change so that they don’t hide the necessary data behind them on the worksheet. But subsequently, we may need to reset the comment position. In this article, I will show you how to reset the comment position in Excel with easy steps.
How to Reset Comment Position in Excel: With Easy Steps
To reset the comment position in Excel, I have divided the whole process into 3 very simple and straightforward steps for convenience. In the first step, we will open the visual basic editor. In the 2nd step, we will write the code on the visual basic editor. Finally, we will run the code and get our desired result. So not wasting time anymore, let’s start the process with the first step. But before discussing the solution, let’s see what the problem looks like. Here is a picture of an Excel worksheet where the default positions of comments have been changed for some reason.
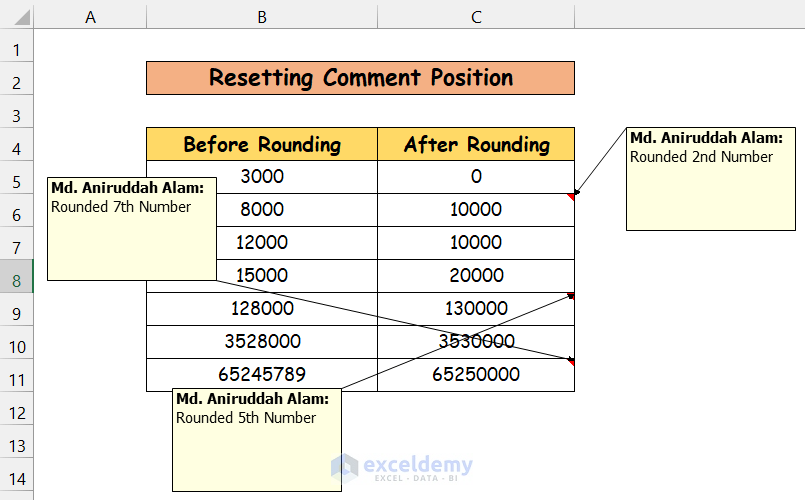
Now, we want to reset their positions. We can do that by running a VBA Code. It is a super easy process. You only need to run a VBA code and the code will itself automatically reset the position of the column. Follow the steps below.
Step 01: Open Visual Basic Editor
Excel allows us to codify customized instructions in the Visual Basic Language. To write code, excel provides an editor. In the first step, we will be opening the editor.
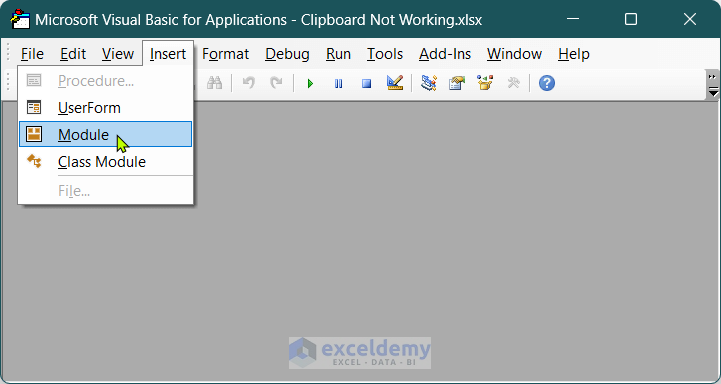
- First of all, open the Visual Basic Editor. To do that, first, go to the Developer Tab and then click on Visual Basic. You can also use the shortcut key Alt+F11.

- Now You should see a Visual Basic Editor window like this.

- As we can see, the editor is currently empty. So, we need to insert a new module here.
- After that, click on Insert and then Module.
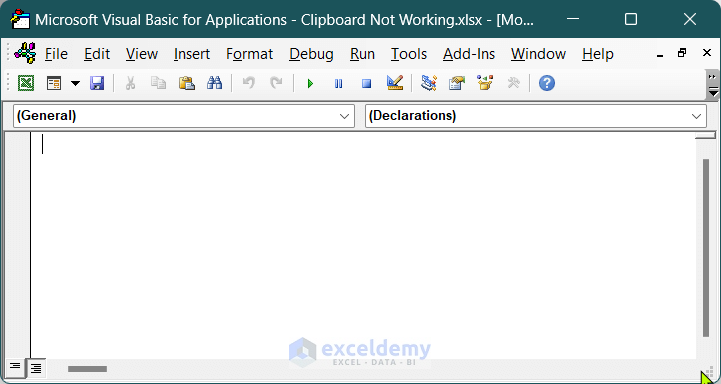
- Consequently, you will see an empty module like this below.
- Now the only tasks remaining are to write code and run it.
Step 02: Enter Code in Editor
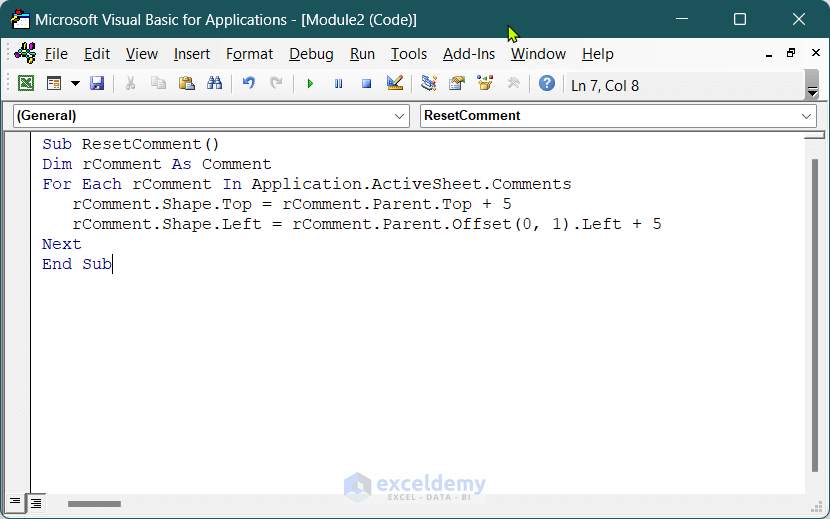
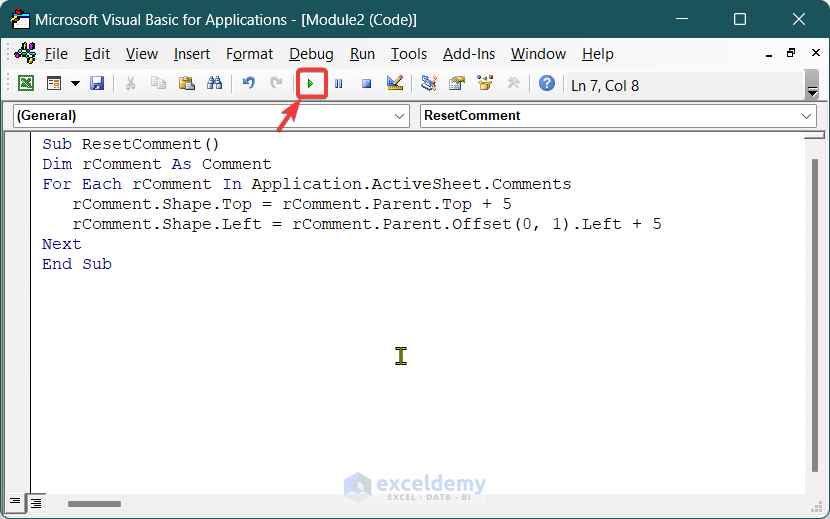
- Here a code is given below. First, copy the code by pressing Ctrl+C and then paste the VBA code into the Editor by pressing Ctrl+V.
Sub ResetComment()
Dim rComment As Comment
For Each rComment In Application.ActiveSheet.Comments
   rComment.Shape.Top = rComment.Parent.Top + 5
   rComment.Shape.Left = rComment.Parent.Offset(0, 1).Left + 5
Next
End Sub- The code on the editor should look like this.
- Now the only task remaining is to run the code.
Step 03: Run VBA Code
- So, you can run the code by clicking the Run command on the command bar or pressing the F5 key.
- After running the code, you will see that all the comments’ positions have reset to default.
Things to Remember
You need to save the current Excel file in .xlsm( macro-enabled file) format if you want to use the code in the future.
Download Practice Workbook
Download this practice workbook to exercise while you are reading this article.
Conclusion
That is the end of this article. I hope, that now you have a clear understanding of how we can reset the comment position in Excel. If you find this article helpful, please share this with your friends. Moreover, do let us know if you have any further queries.
Related Articles
- How to Change Author Name in Excel Comments
- How to Change Default Comment Font Size in Excel
- How to Change Comment Color in Excel
<< Go Back to How to Edit Comment in Excel | Comments in Excel | Learn Excel
Get FREE Advanced Excel Exercises with Solutions!
