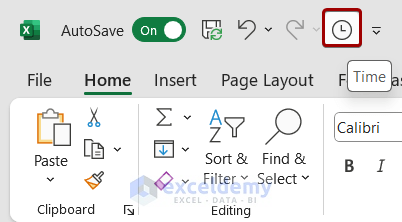
The Quick Access Toolbar is a smart feature of Excel located at the topmost bar of the worksheet. It provides quick access to commonly used commands and functions, allowing users to perform tasks efficiently.
Repeatedly running a macro from the Developer tab can be both time-consuming and tiresome. Moreover, locating the specific macro in a list adds an extra layer of effort. To make this dull task more enjoyable, simply add your preferred macro to the Quick Access Toolbar.
In this article, you will learn the step-by-step process to add a macro in your Quick Access Toolbar.
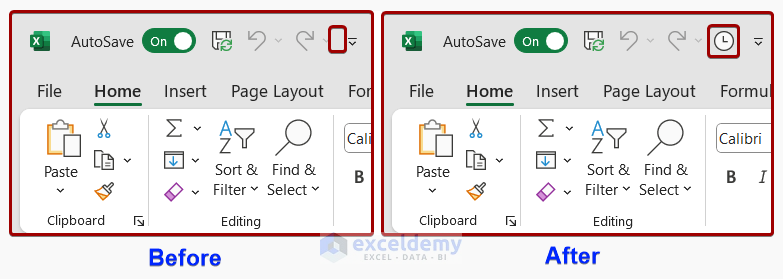
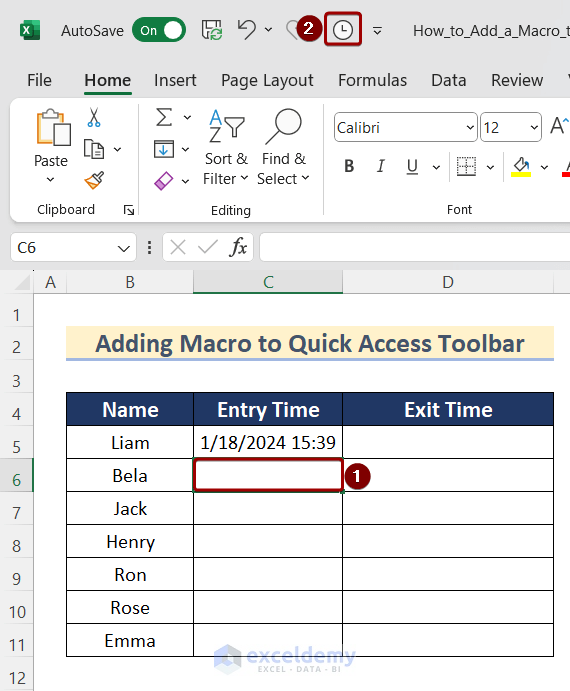
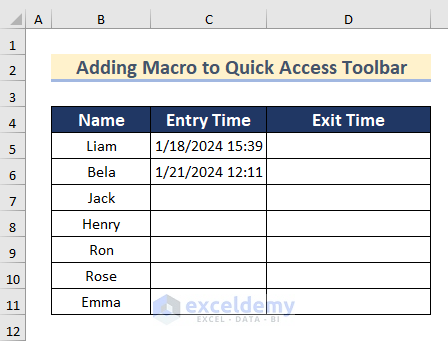
Look at the below image before and after adding the macro in the Quick Access Toolbar.
4 Steps to Add a Macro to Your Quick Access Toolbar in Excel
To add a macro to the Quick Access Toolbar in Excel, you need to follow some steps from creating a macro to adding that macro in the Quick Access Toolbar.
Here are 4 steps to add a macro to the Quick Access Toolbar in Excel:
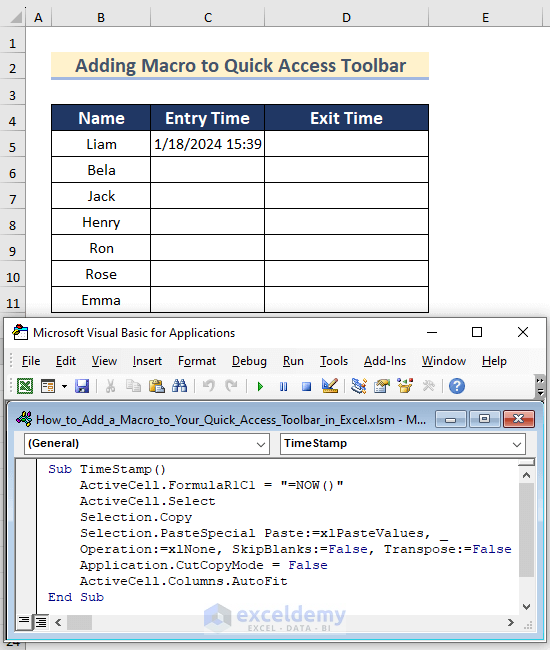
Step 1: Prepare a VBA Macro
Before adding a macro to the Quick Access Toolbar, create a macro based on your requirements. By following How to Write VBA Code in Excel article, we have created a macro named TimeStamp. This macro is used to insert the current time in a cell in the worksheet.
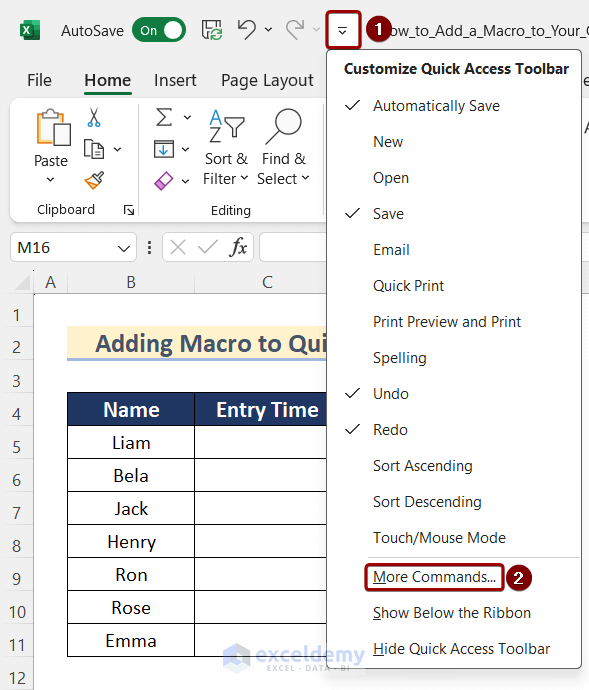
Step 2: Access Excel Options
You can access the Excel Options feature in multiple ways. The easiest way is the below one using the Customize Quick Access Toolbar. Follow the steps:
- Click on the Customize Quick Access Toolbar drop-down.
- Select More Commands from the list to appear Excel Options dialog box.
This will take you to the Quick Access Toolbar section of the Excel Options dialog box.
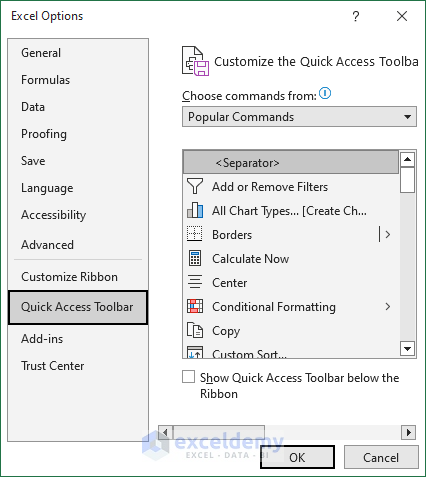
Note: If the Quick Access Toolbar is not enabled, then go to File tab > Options > Quick Access Toolbar.
Step 3: Assign the Macro to the Quick Access Toolbar
Now, we will assign the macro to the Quick Access Toolbar from the Excel Options dialog box.
- Click on the drop-down icon below the “Choose Commands from” section.
- Select Macros from the list.
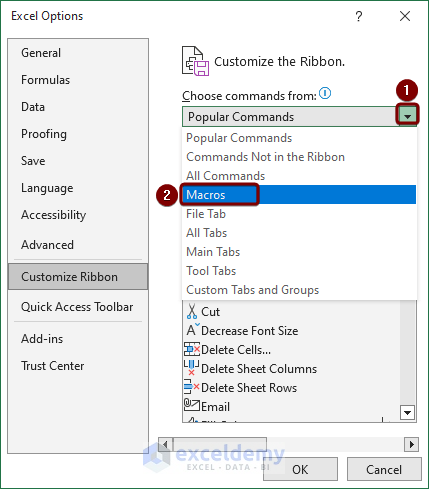 After that, select the desired macro > Add.
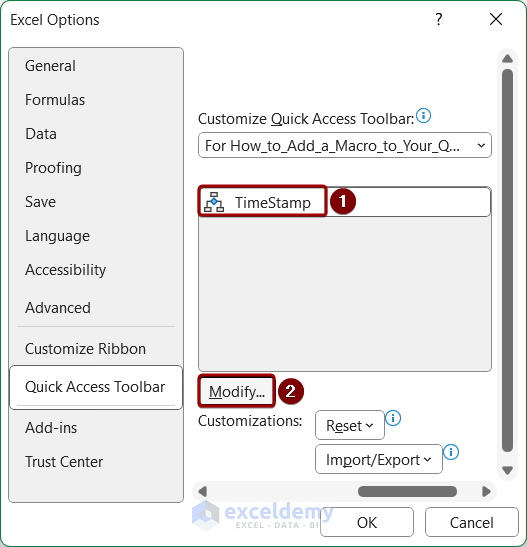
The macro will be added to the box right next to the Add button.
- Select the added macro and click on the Modify button.
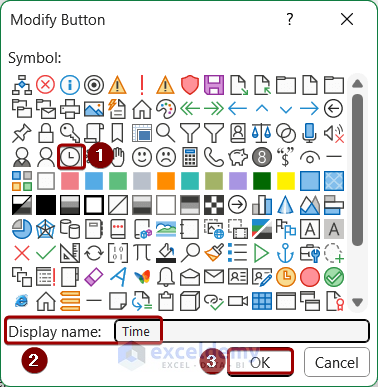
 The Modify Button window appears.
 - In the Modify Button window:
- Select the desired symbol from the Symbol section.
- Set a name from the Display Name box and press OK.
- See name and symbol of the macro have been modified. Then click on OK.
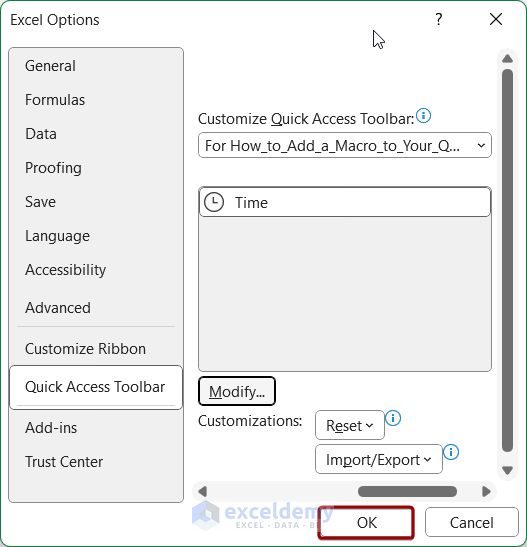
You can see the macro has been added to the Quick Access Toolbar.
Step 4: Run the Macro From the Quick Access Toolbar
Now, let’s verify if the macro is functioning correctly.
- Select a blank cell.
- Run the macro from the Quick Access Toolbar.
You can check that the macro worked well and added the time correctly.
How to Add a Macro to the Quick Access Toolbar in All Your Excel Documents?
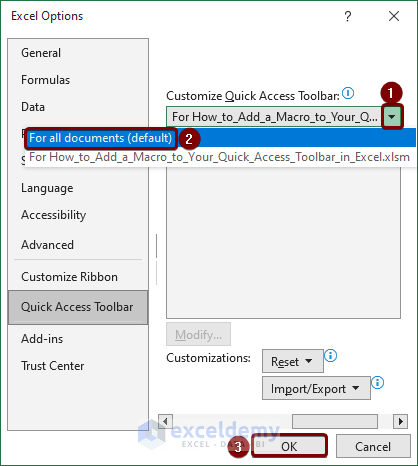
You’ve already learned the skill of adding a macro to the Quick Access Toolbar in Excel. However, this macro is specific to the Quick Access Toolbar of the current Excel only. If you wish to make this macro available across all your Excel documents, you can do so through the Excel Options dialog box. Follow the steps below for that:
- Follow steps 1, 2, and 3 to assign the macro to the Quick Access Toolbar.
- Click on the drop-down under the Customize Quick Access Toolbar.
- Select For all documents (default) and press OK.
Conclusion
Integrating macros into your Quick Access Toolbar in Excel is a simple trick for a more streamlined work experience. By following the steps mentioned in the article, you can personalize the toolbar to easily access your macros with just a single click. This not only enhances your workflow but also saves time. If you have any further questions about this article, feel free to write them in the comment box.
Frequently Asked Question
How to import a customized Quick Access Toolbar in Excel?
You can easily import a customized Quick Access Toolbar in Excel from the Excel Options window. Follow the steps below for details:
- Go to File tab > Options.
- In the Excel Options window, select the Quick Access Toolbar from the left menu.
- From the Customization section, click Import/Export drop-down > Import customization file.
- Select a file formatted as the Exported Office UI file > Open.
Now, your Quick Access Toolbar will be customized as the imported file.
How to change the order of the commands on the Quick Access Toolbar?
You can change the order of the commands on the Quick Access Toolbar from the Excel Options window.
Follow the steps to change the order of the commands in the Quick Access Toolbar:
- Go to File tab > Options > Quick Access Toolbar.
- Select the desired command under the Customize Quick Access Toolbar section.
- After that change the order of that command using the Move Up or Move Down buttons.
How to remove a command from the Quick Access Toolbar?
You can remove a command from the Quick Access Toolbar using its context menu. Follow the steps below:
- Right-click after selecting a command in the Quick Access Toolbar.
- Choose Remove from the Quick Access Toolbar in the context menu.
<< Go Back to Customize Quick Access Toolbar | Quick Access Toolbar in Excel | Excel Parts | Learn Excel
Get FREE Advanced Excel Exercises with Solutions!

wonderful i’m learning quite a lot thank you so much!!!
Thank you, Jaypogi!