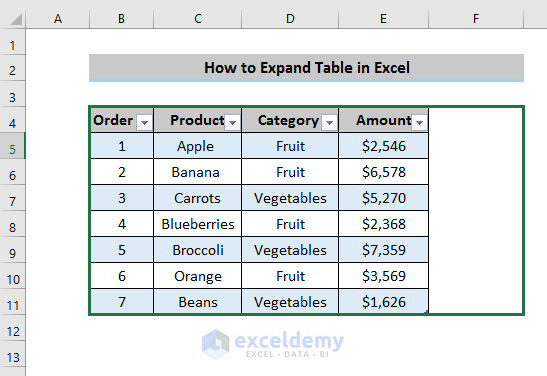
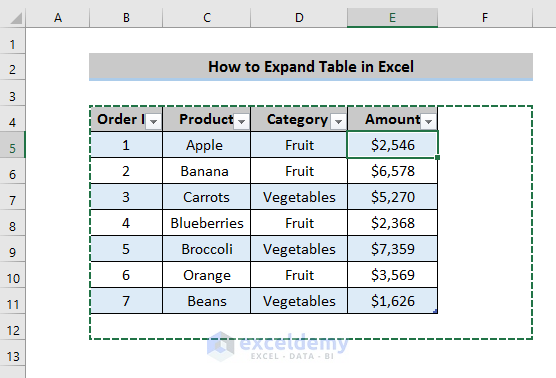
Dataset Overview
We’ll use the below dataset with order ID, product, category, and amount to demonstrate the methods.

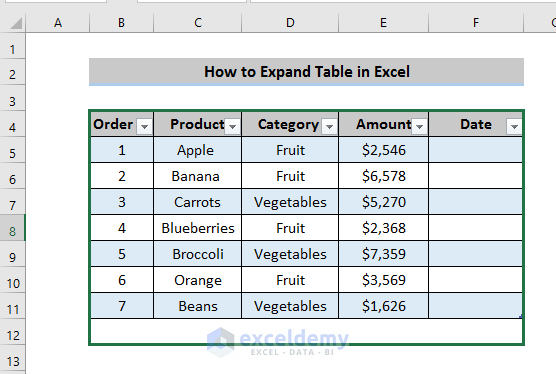
Method 1 – Extend by Typing
- Type directly to the right or at the bottom of the existing table.
- Enter the required name, as shown in cell F4.
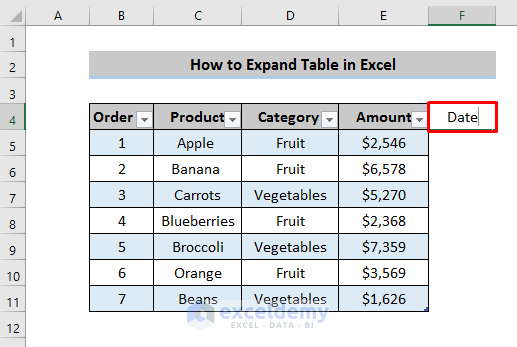
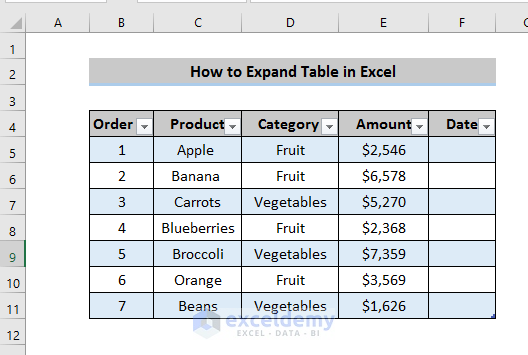
- As you type, Excel will automatically adjust the table to accommodate the new data.
- Press Enter, and the table will expand in the specified direction.
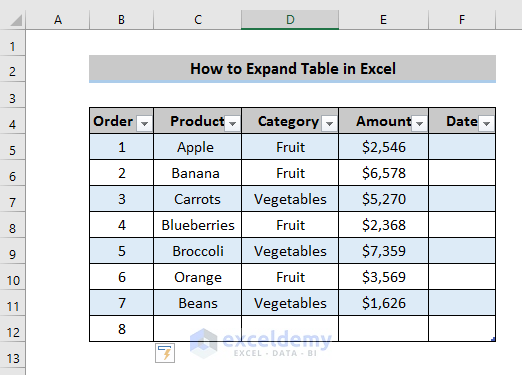
- Type from the bottom of the table where the previous one left off, just like above.
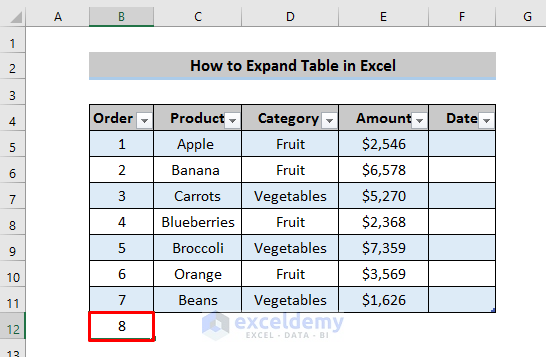
- Press Enter, the Excel table will automatically expand in that direction.

Read More: How to Rename a Table in Excel
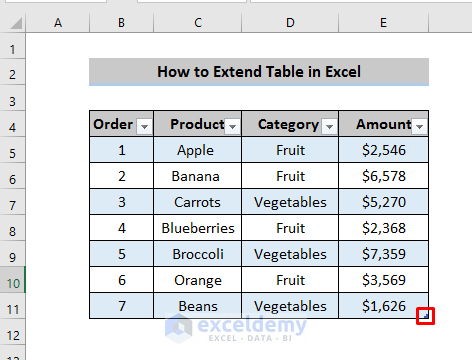
Method 2 – Drag to Expand
- Locate the small arrow at the bottom right corner of the selected table.
- Click the arrow and drag it to the right.
- The table will expand in the dragged direction.

- Extend the table at the bottom by dragging the Small Arrow in that direction.
- Dragging the Small arrow in that direction, creates an extended table at the bottom.
Read More: How to Make an Excel Table Expand Automatically
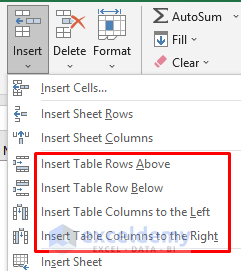
Method 3 – Use the Insert Option
- Select the cell next to where you want to extend the table.
- Go to the Home tab and find the Insert option on the ribbon.

- Choose from the following options:
- Insert Table Row Above: Adds a new row above the selected cell.
- Insert Table Row Below: Creates a new row below the selected cell.
- Insert Table Columns to the Left: Adds a column to the left of the selected cell.
- Insert Table Columns to the Right: Creates a column to the right of the selected cell.
- For example, to add a new column to the right, select Insert Table Columns to the Right.
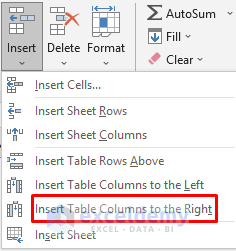
- When you click Insert Table Columns to the Right, the table will automatically extend to the right.

- To extend the table in the bottom direction, go to the Insert option in the ribbon and select the Insert Table Row Below option.
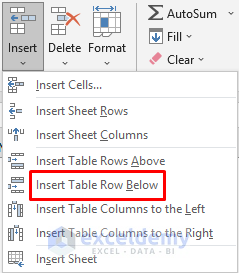
- A new row will appear at the bottom.

Read More: How to Insert or Delete Rows and Columns from Excel Table
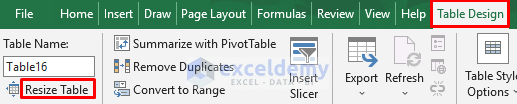
Method 4 – Using Table Design
- Select any cell within the table. This action will activate the Table Tools.
- In the Table Tools, locate the Table Design option.
- Within the Table Design menu, find the Resize Table option.
- Click on Resize Table, and a new window will appear.
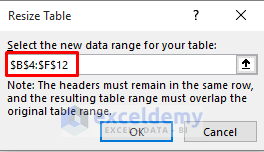
- Specify your preferred reference point by selecting the first cell of your table.
- Drag the reference point to the desired location.
- Confirm by clicking OK.
- The table will automatically extend in the chosen direction.

Read More: How to Use Sort and Filter with Excel Table
Download Practice Workbook
You can download the practice workbook from here:
Related Articles
- How to Mirror Table in Excel
- How to Remove Format As Table in Excel
- Excel Table Formatting Problems
- [Fix]: Formulas Not Copying Down in Excel Table
- How to Remove Table Functionality in Excel
- How to Remove Table in Excel
- How to Undo a Table in Excel
<< Go Back to Edit Table | Excel Table | Learn Excel
Get FREE Advanced Excel Exercises with Solutions!
